This post is sponsored by Brother. Thank you for supporting the brands that support Fall For DIY.
Ok, before we get to the reason your all here I have a small tangent to veer off into for just a moment. Bare with me while I take this detour but…
How have I lived my life up until this moment without owning a label maker!? I’m not even joking – about not owning a label maker and how on earth I’ve resisted the urge until now. I’ve always wanted one, but it seemed like one of those things you buy, use once, run out of tape and never use again. And you know, I thought I was doing alright when it took a solid 5 minutes to work out which of my unlabelled spices I needed. Or 20 minutes figuring out which box the glue was in again? I didn’t need to label things, I could just get stressed out and waste time instead.
But what if your label maker could do more than this? What if it could print on ribbon? Make clear labels? Black on white? White on black? Red on white? Green? Yellow? Blue? What if it could make patterns and change fonts? Outlines, italics, borders!!? Now you have my attention. I can label my spices, tools, materials and make personalised gift wrap. Now I don’t have to go around labelling everything in my house twice over to get my money’s worth. I can make anything from cup cake toppers and decorations to table settings and planner stickers. Now I’m interested!

I am of course talking about the Brother P-touch Craft label printer.
I’ve been testing it out and making some DIY beauty products for gifts this year. I thought they’d be more of an add on gift, but the packaging really gives these a more luxurious quality. Using the P-touch Craft I’ve created three different finishing touches for three different beauty products. I’ve tested all of these products myself but please do test them before using as your skin might react differently to mine. If you’re giving them as a gift ensure you add a note and tell the recipient to test them on a small area of skin before using them too. Ok, that’s the fine print done. Let’s get to the making!
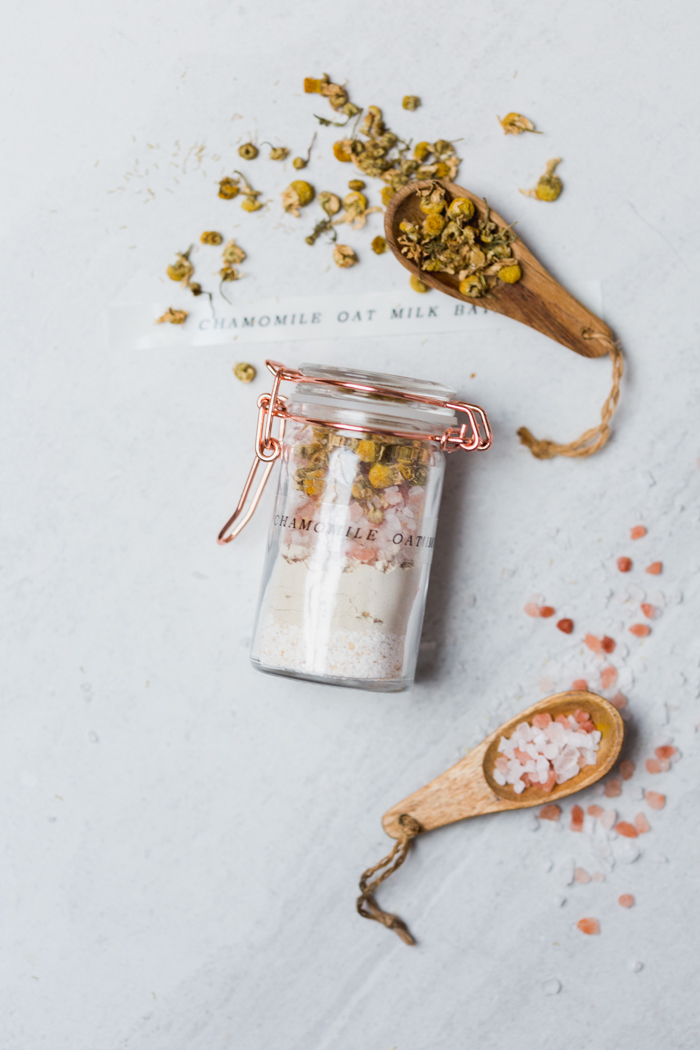
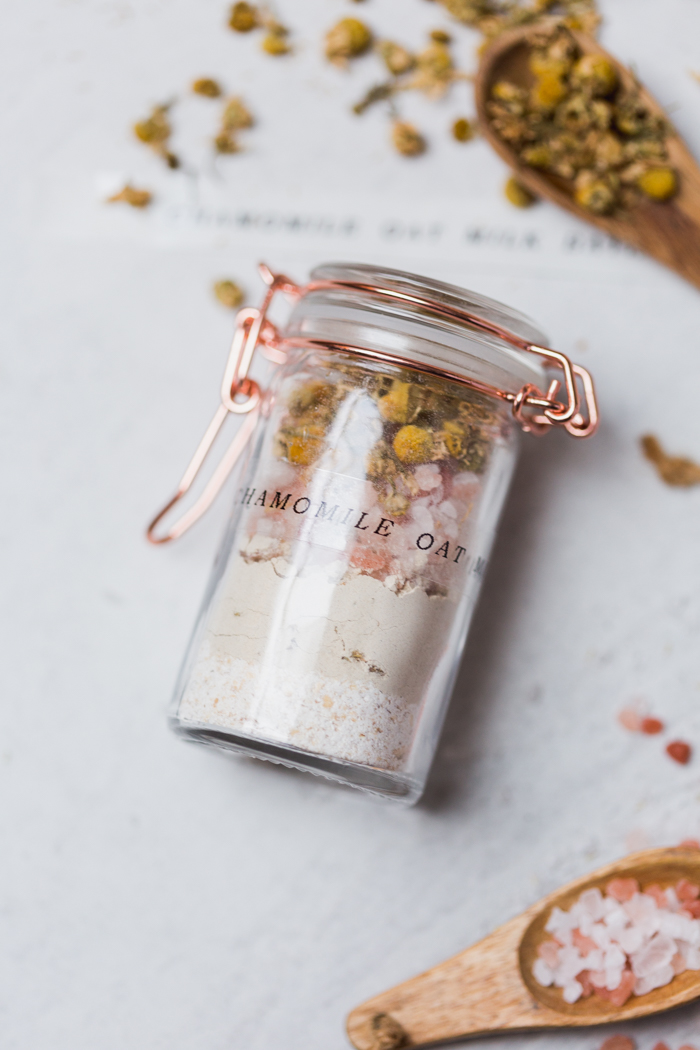
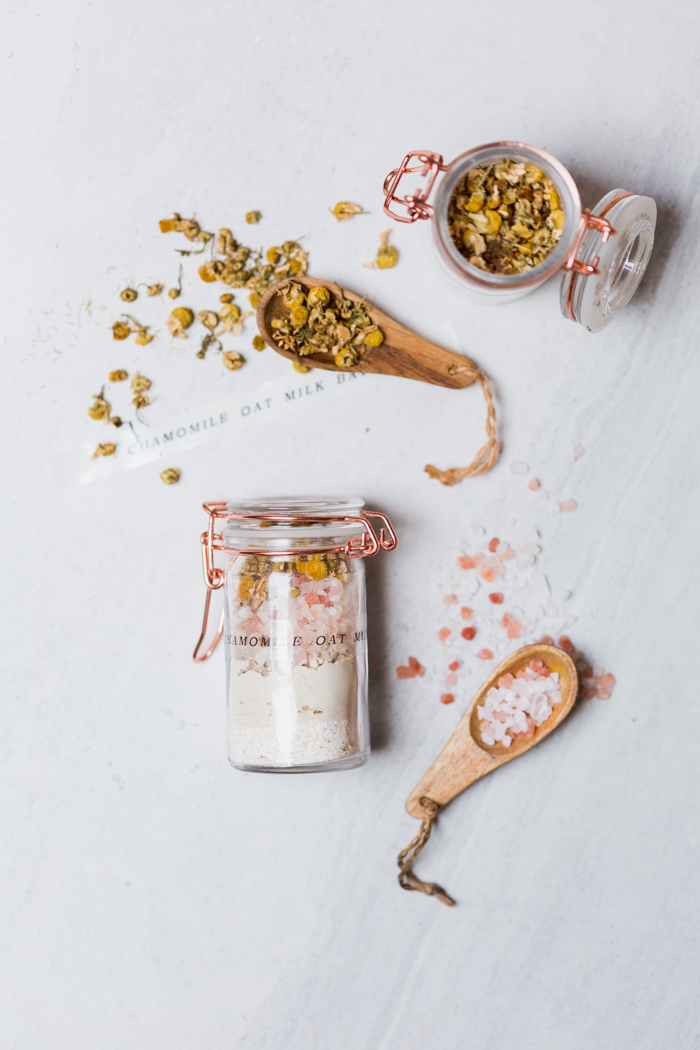
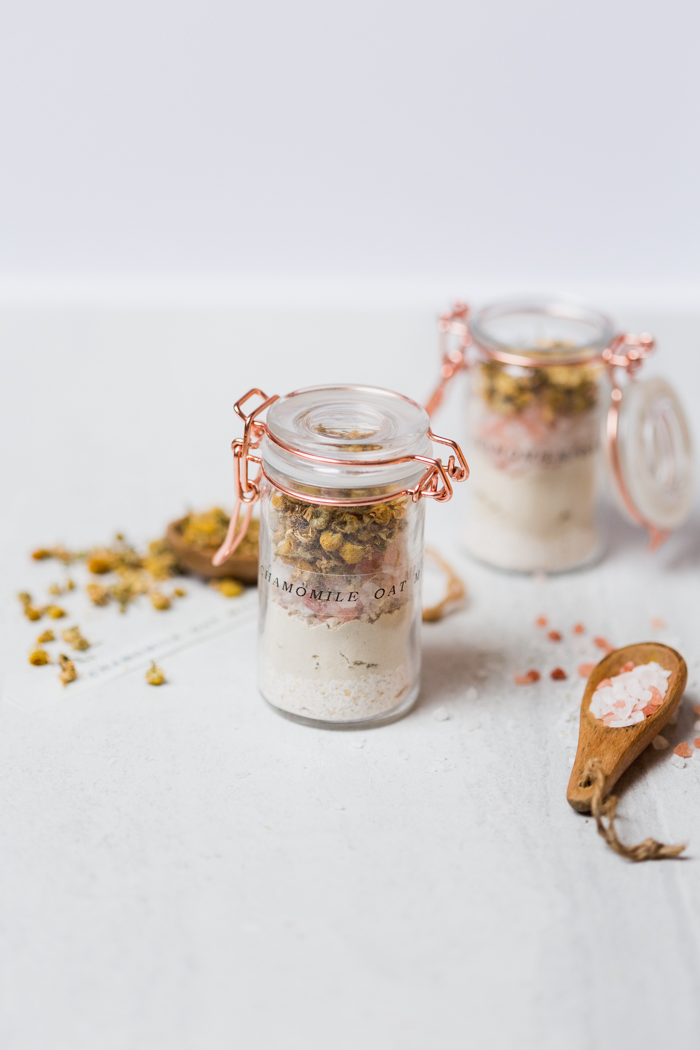
DIY Chamomile Oat Milk Bath
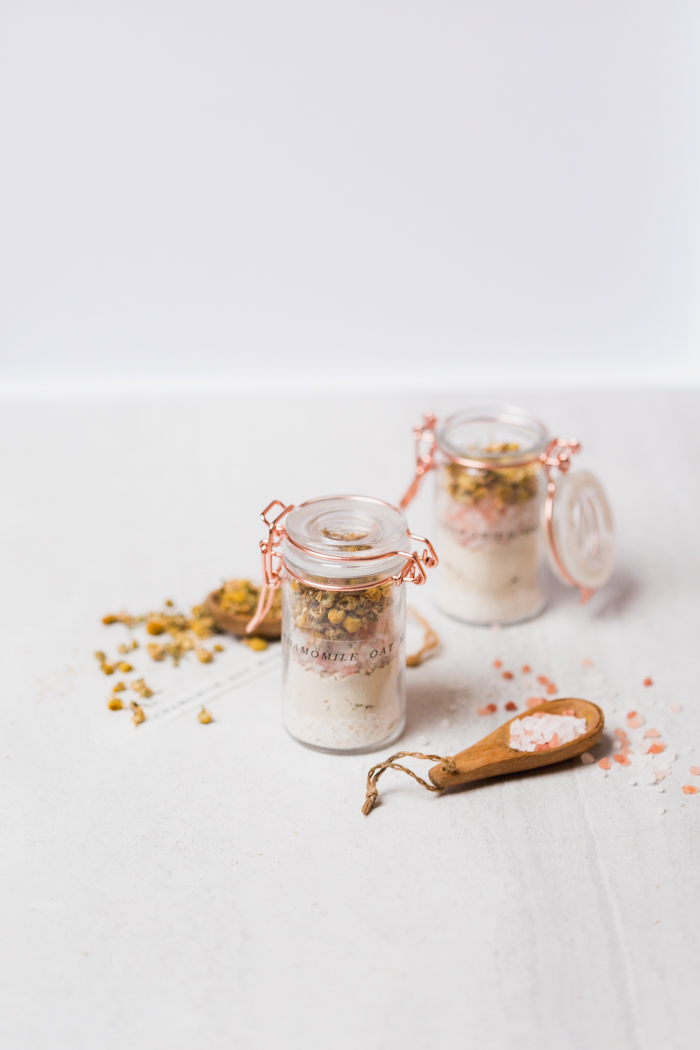
This is a great vegan alternative to powdered milk baths. Oats are wonderfully moisturising and if you’ve ever made oat milk you’ll understand how well they can work as a milk bath product. I’ve added clay for its toxin drawing properties, bath salts to improve skin tone and texture, and chamomile as an anti-inflammatory. Basically, it’s a little jar of wonder for a really relaxing bath! Here’s the recipe:
Using a small jar fill one quarter with blended oats, one quarter clay, one quarter natural Himalayan pink salt. Add 5 drops of sandalwood to the salt layer then fill the remainder of the jar with dried chamomile flowers. You can buy these as a loose leaf tea.
I’ve used black on clear laminated labels to give a very minimal look to the packaging. I love how this sits over the pink hues of the salt!
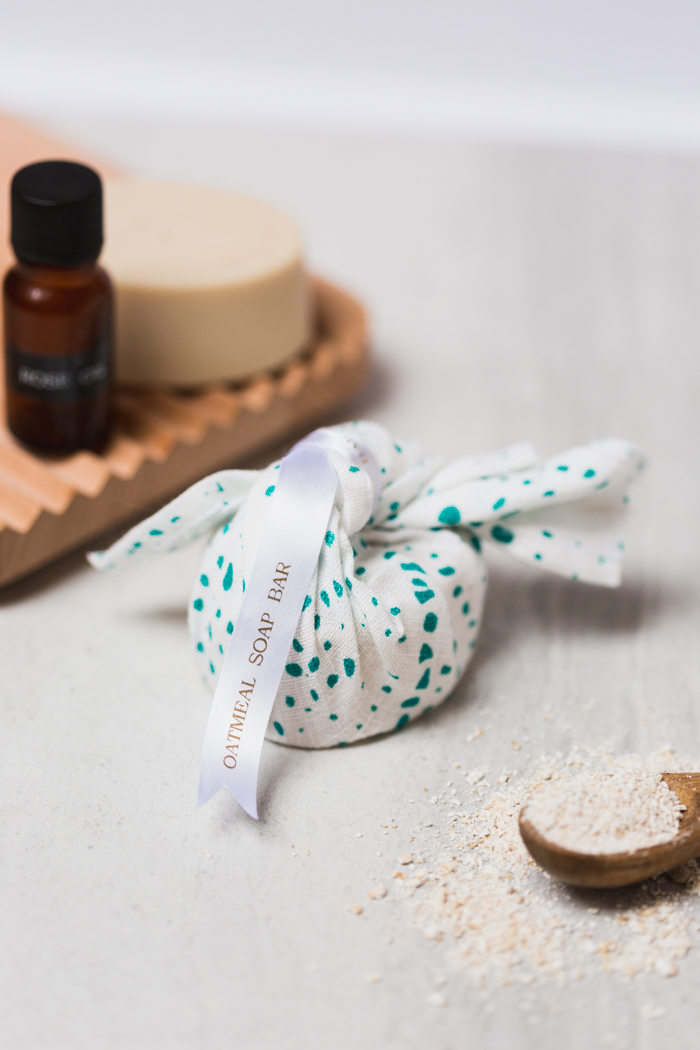
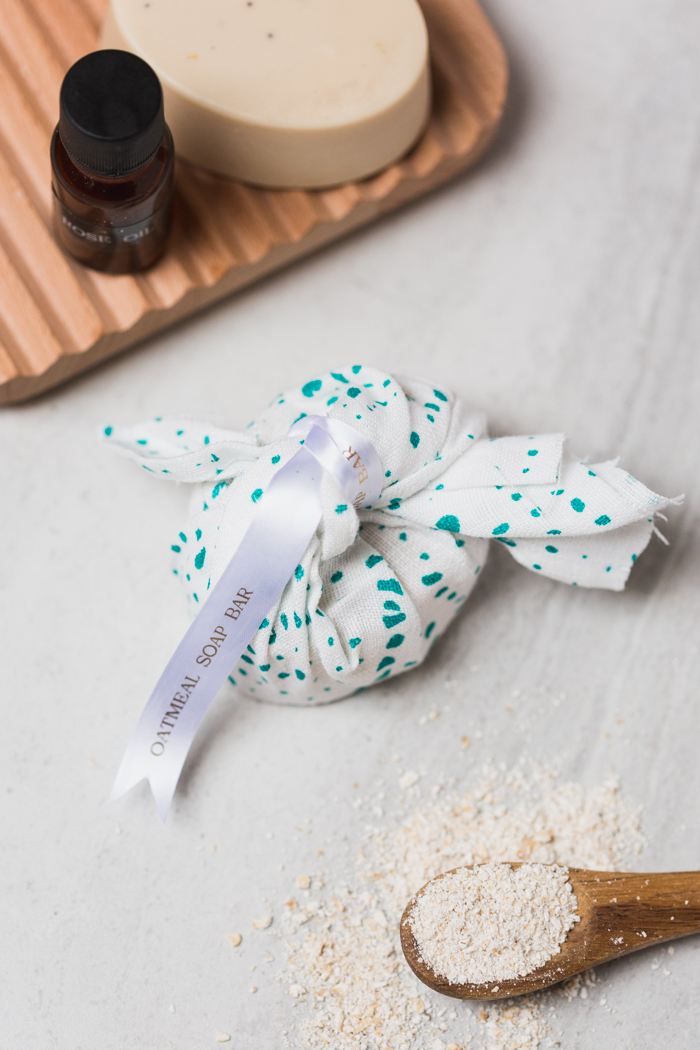
Oatmeal Bar Soap
I love that oatmeal used in a soap can act as both an exfoliator and a moisturising element. It can relieve skin irritation and level the ph balance. It’s basically the beauty wonder product you didn’t know you had sat in your cupboard all your life!
Here’s the recipe:
Heat melt and pour soap base in a pyrex dish over a pan of simmering water. Add roughly 5 drops of rose essential oil for each soap you estimate you will make. When the soap is liquid add a tablespoon of blended oats for each soap. Pour into a silicone mould and leave to set.
I’ve used a small piece of fabric to wrap the soap, then added a printed ribbon to the knot. To finish snip the end to make a v shape.

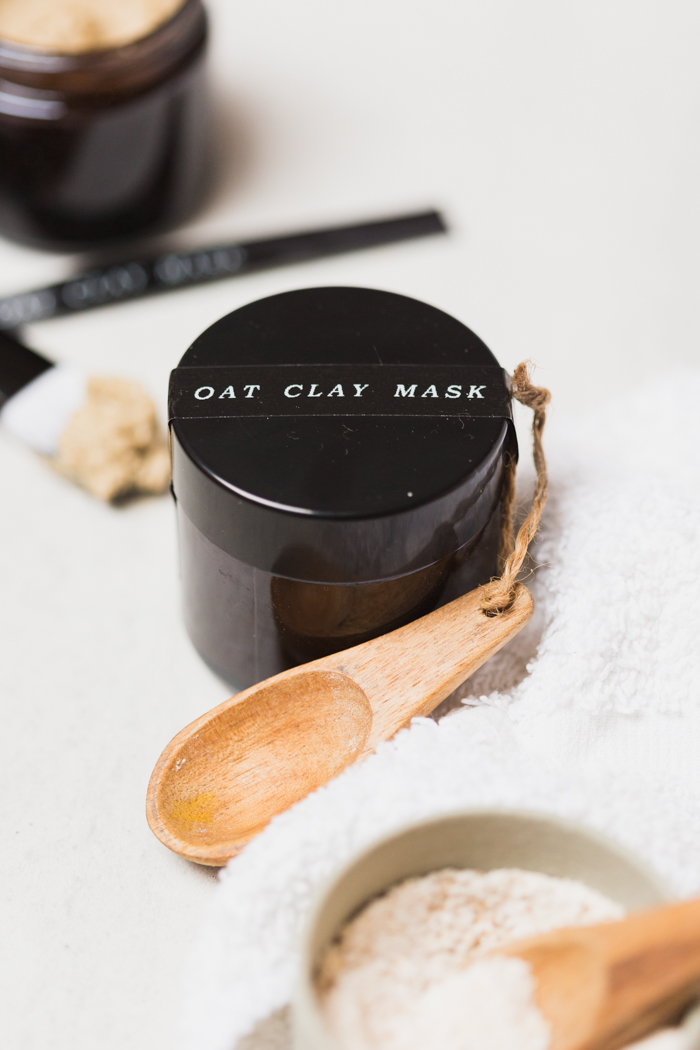
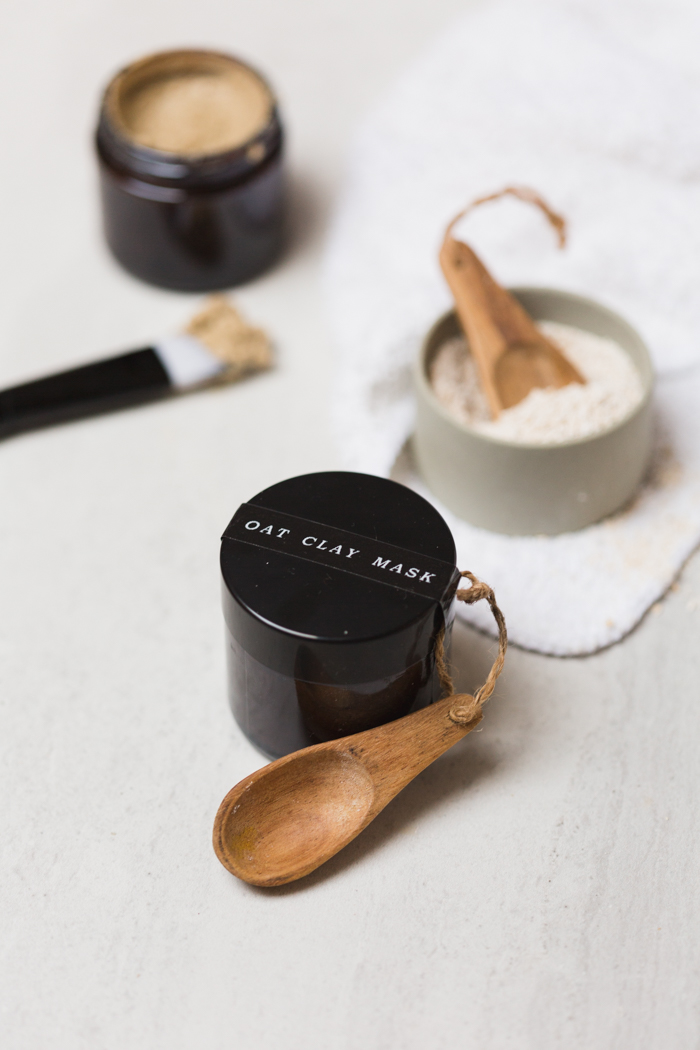
Oat Clay Mask
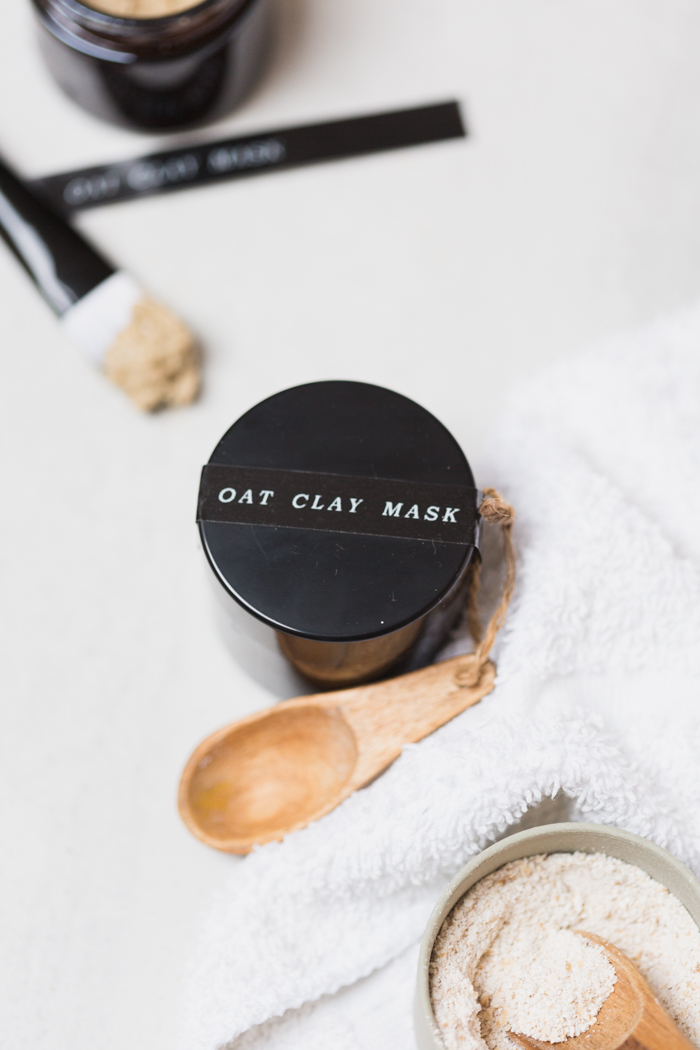
I love this mask! I have very dry skin on my face that becomes inflamed easily. I’ve been using this mask to detoxify my skin without leaving it dry. Once again, make sure anyone using this mask has tested it on a small area of skin first.
Here’s the recipe:
2 tbsp Bentonite clay
1 tbsp Blended oats
10 drops Almond oil
Mix the ingredients together with a wooden utensil and add to the jar. When you want to use the mask add 5 tbsp of water and mix well. You can either do this right before giving the gift or instruct the recipient to do it themselves. The mask should last about a week in the fridge.
I wanted to use these dark glass jars for the mask, so I created a black label with contrasting white text to sit over the top of the lid and down onto the jar. Set the length of your label at around 130mm to achieve this look.

As you can see I am very happy with my P-touch Craft! It’s going to take my Christmas wrapping to the next level and I’m already dreaming about more ways of using it. Especially on those spice jars…
Thank you again to Brother for working with me on this dream project!


These are all awesome ideas! I can’t wait to try some of these!
Paige
http://thehappyflammily.com
Let’s get to the making!
Simple, beautiful and easy to make gifts. I really like these gifts.
Thank you for sharing! Not only is chamomile a good anti-inflammatory, CBD improve skin-I advise you to read this article carefully, it will help you instill new healthy habits for your skin
Hello. I looked at your work and I liked everything very much. In fact, you create very cute and useful things that can bring a great mood. Also thank you for sharing the recipes for these wonderful remedies with us. They look super cute and helpful. It is very convenient that they are signed and you can understand what can be used and for what purpose. I am interested in the label printer you are using. I really liked that it is very compact, which allows you to carry it and take it with you to different rooms of the house. I also wanted to ask what the color of the text or the background depends on when printing?
delta 8 gummies
With such an active rhythm of life, our skin gets dirty very quickly. Do not forget about the most important stages of its purification. Choose for yourself only clean, high-quality cleaning products. The final step should always be a toner for the face to restore balance. I advise you to find more clean facial toners here
I think every girl will be happy with such a beauty gift. On my birthday, I was presented with beautiful cosmetics from this matte lipstick manufacturer. This is the best makeup I’ve ever had
It’s valuable, thanks for sharing. We put a lot of effort into looking fresh. The state of your health directly affects how you look. Don’t forget that you can always find help here cliniccleo.com to improve your beauty in a natural way
Aside from loosened up muscles, your temper will likewise improve, hence furnishing you with an unwavering discernment. Visit female to male spa near me
You have been looking for an amazing place to get your massage service, but have you checked out our site yet? Visit full body to body massage centres in Bangalore
Skin well being requires sustenance sometimes. Standard spa treatment prompts the shining and sound skin. Visit female to male spa near me 24 hours
Hi, guys! I’d like to find out more about the hot game, so could you please help me with this right now? Thanks ahead of time!!
Valget mellom original og generisk Viagra avhenger hovedsakelig av prisen og personlige preferanser.
https://apotheekzonderrecept.com/ Hoewel Viagra Generiek over het algemeen veilig is, kunnen er bijwerkingen optreden bij het gebruik van het middel. Het is belangrijk om op de hoogte te zijn van de mogelijke bijwerkingen en bij twijfel direct contact op te nemen met een arts.
Qu’est-ce que le Viagra Original ?
pharmacie en ligne belgique
Le Viagra Original est un médicament utilisé pour traiter la dysfonction érectile chez les hommes. Il est produit par la société pharmaceutique Pfizer
CBD products may be helpful for managing symptoms of inflammatory bowel disease, although more research is needed to fully understand its potential benefits for this condition.