
The holidays are almost here and I am starting to get that festive feeling. In fact as soon as I feel the first chill of winter I’m all about Christmas. I have to reign myself in when it comes to Christmas decorating. I would start mid November if I had my way. One of my favourite traditions is the advent calendar because it’s not only acceptable, but mandatory you start your advent calendar on December 1st.
For me it’s the perfect way to count down the days and celebrate the festive period for its entirety. Building the suspense each day until there’s only one sleep left… and yes, I still get those Christmas eve butterflies as a fully fledged adult! This is our first Christmas with Ollen and I’ve already cried twice with excitement. By the time we get to December I’m going to be a mess. The thing is, I know he won’t have a clue what’s going on, but I’m still going to make it the most magical Christmas ever.


Right now Ollen gets really excited by photos of us and him. He’s just learning to recognise himself and it’s so cute to watch him waving at his reflection or try to reach out to snapshots we’ve taken.
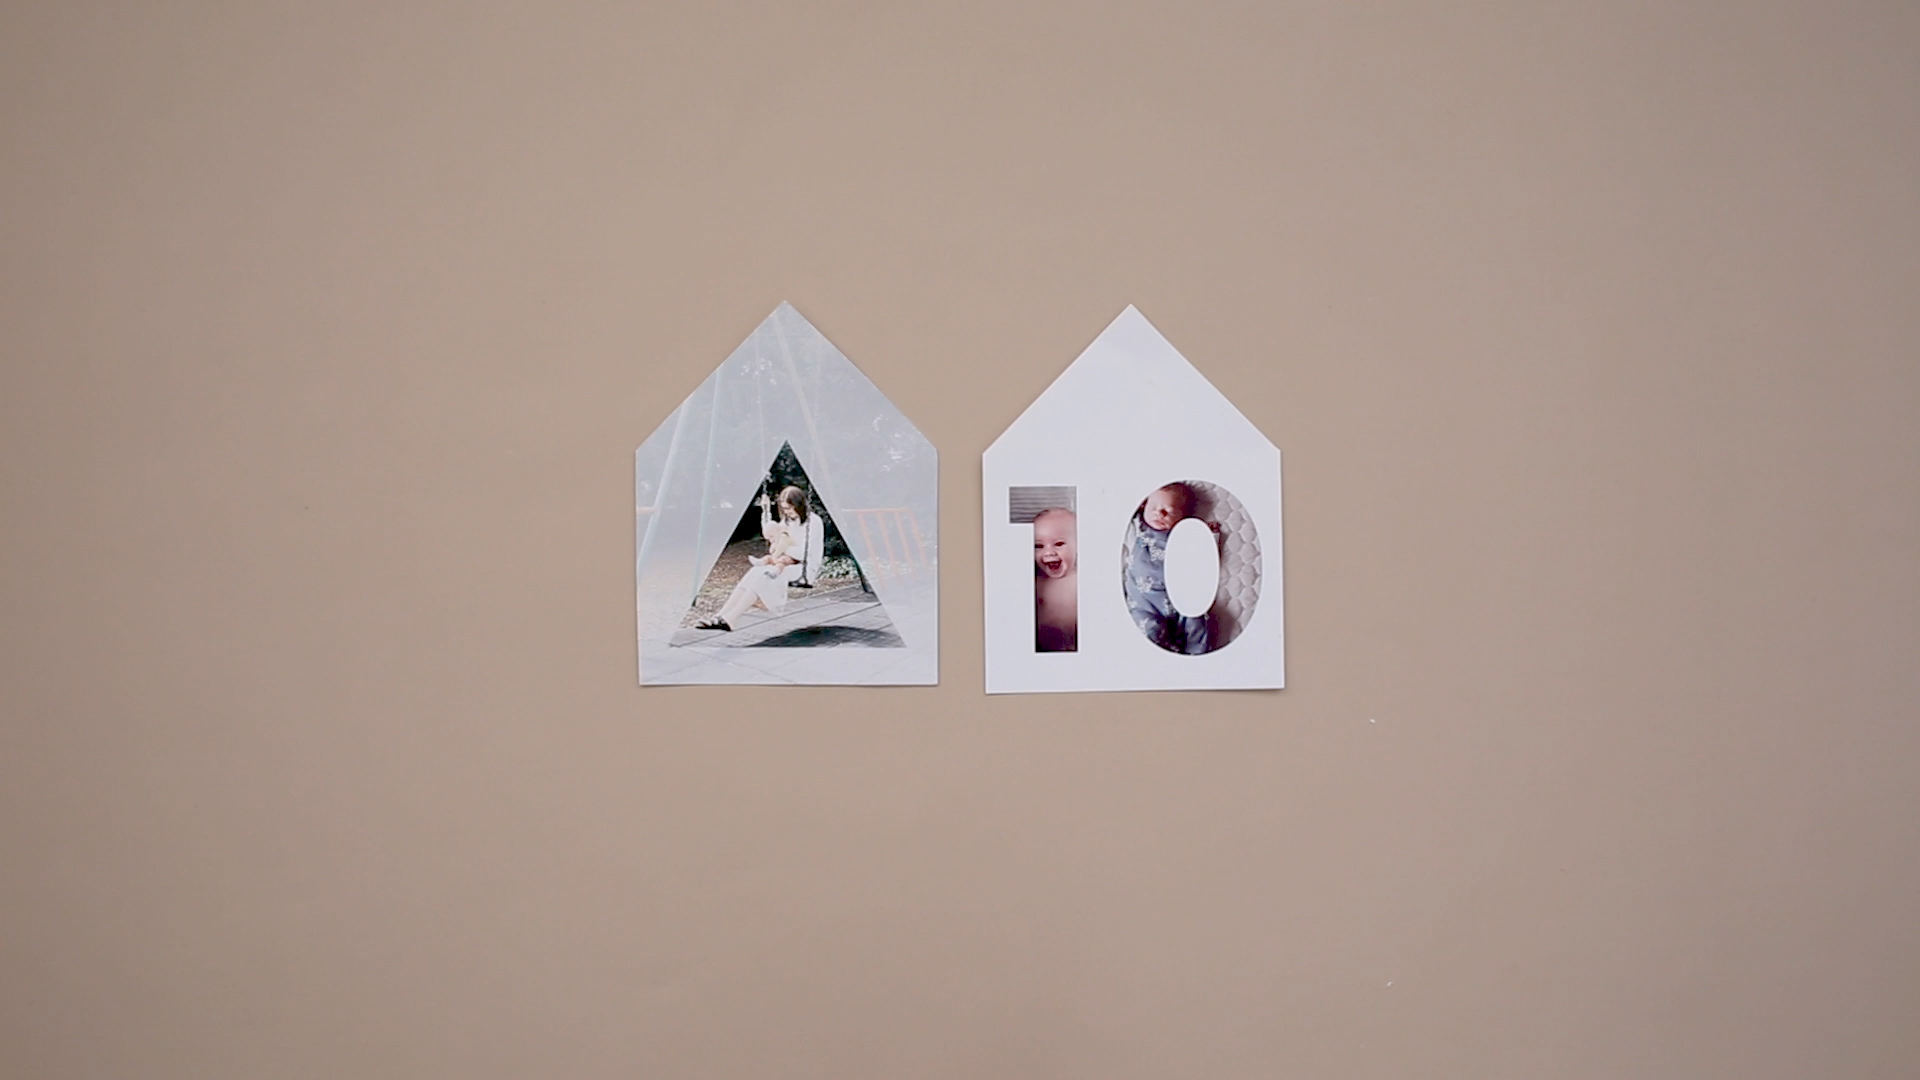
As well as being a fun activity for Ollen it’s such a wonderful way for us to look back on our first year together. To create my ornaments I used Adobe Photoshop Elements. On one side of each ornament, I used the Multi-Photo Text Guided Edit to add images as numbers for each day. On the flip side of each ornament, I used the Shape Overlay Guided Edit. Each picture is a memory we’ve snapped on my phone, so they’re not professional or staged photos. In real life, your photos are most likely messy, have off centre cropping or even include people you don’t know! The Shape Overlay Guided Edit lets you pinpoint one part of your photo and frame it, meaning you’ll focus more on the memories you love and forget that random photo bomber in the corner.
I’ve put together a video tutorial below which shows you exactly what to do to make your own memories advent calendar. Keep scrolling for the tutorial.
Materials:
- A4 Photo Paper
- Printer
- Guillotine/craft knife and ruler/scissors
- Masking tape
- Cotton cord
- Glue stick
- 6mm wood dowel
- 12mm wood half round
- Detail saw
- Wood glue
1. To create your photo Advent Calendar, open Adobe Photoshop Elements. If you don’t already have Photoshop Elements you can download a free trial here. To get started with the Advent Calendar Numbers, open a blank file (click File > New > Blank File) then select the Guided tab at the top of the screen. Go to Fun Edits and choose Multi-Photo Text. Follow the instructions on the right hand side, typing your advent numbers onto the page. Resize these to 200 then click on each number to add photos. Do this with numbers 1-24.

2. Next create the flip side of the Advent Calendar ornaments. To do this, open one of your favourite photos, then select the Shape Overlay Guided Edit from the Fun Edits Tab.
3. Follow the instructions on the right hand side to create your overlay. You can choose from a number of shapes and effects to get your pictures perfect. When you’re finished click Save As and save in a new folder. Do this with 24 photos for your calendar.
4. In the top right hand corner click Create and scroll down to photo prints. Print both sides of your ornaments images out onto A4 photo paper.
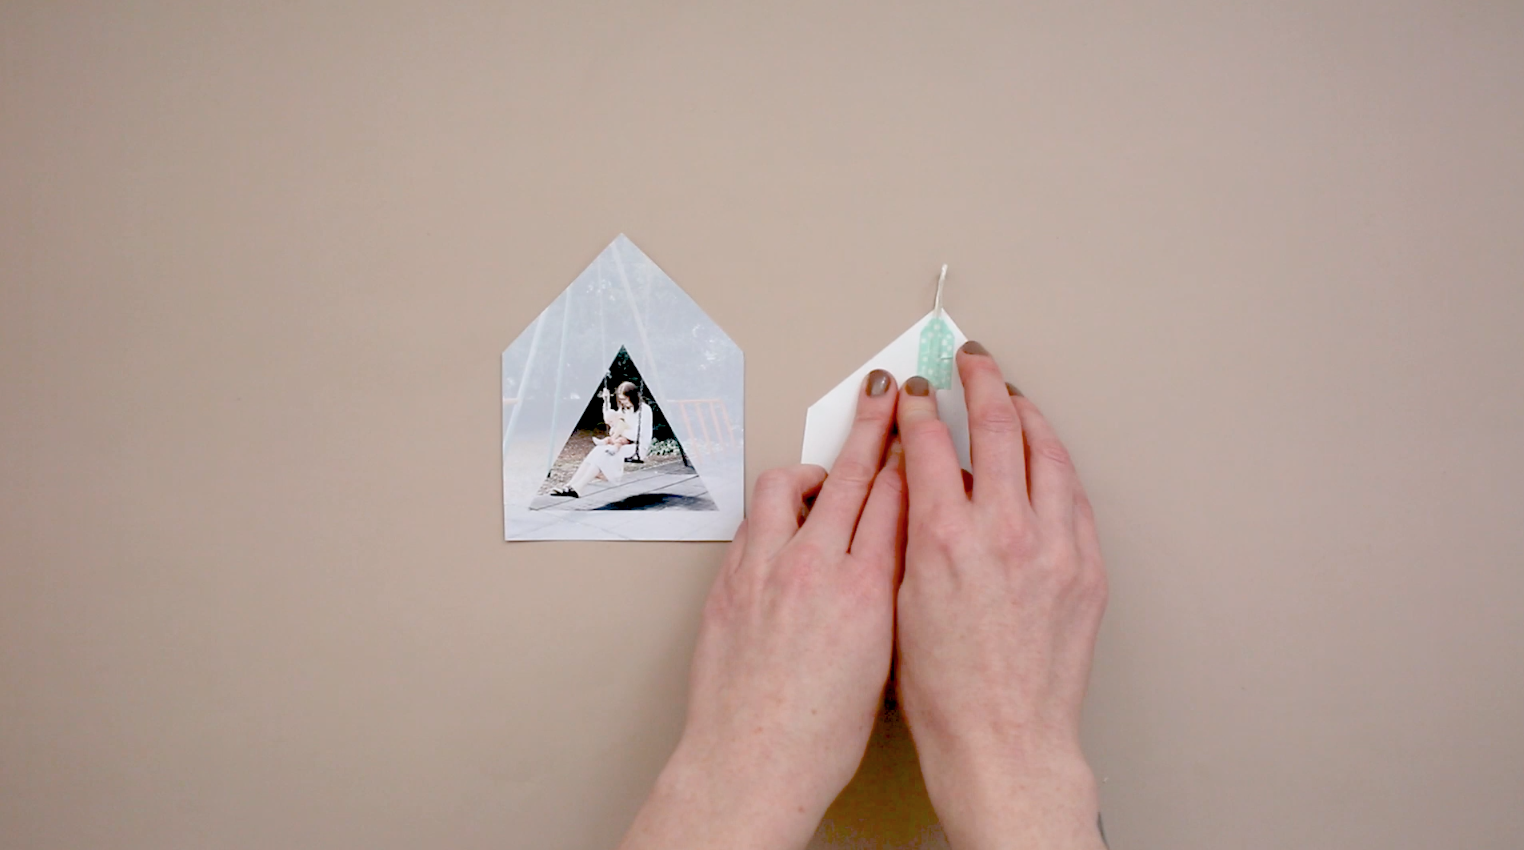
5. Draw and cut out the ornament shape (tip: fold a piece of paper in half draw half the shape at the fold to get a symmetrical shape). Use this as templates. Try to keep the shape as centred as possible.

6. Cut the ornaments out and sort into pairs. Fold a piece of cord in half and tape it onto the back of one shape. Glue the pair together back-to-back.

7. To make the tree cut your 6mm dowel into lengths starting at about three inches and adding a few inches more to each new length. Sand a flat surface in the centre and use wood glue to adhere them to a piece of half round wood trim.


I used Blu Tac to attach this to the wall and arranged the paper ornaments in place. Now you’re ready to start turning them over — but not until December 1st.

This would make a lovely surprise for someone celebrating an anniversary or birthday around Christmas as well. You can try Adobe Photoshop Elements for free right here!
This post had been sponsored by Adobe. Thank you for supporting the brands that support Fall For DIY!


What a beautiful idea, and it looks amazing!
https://www.makeandmess.com/
Oh Fran, I absolutely love this project! It’s so beautiful! Your Christmas ideas are always so creative. So happy you get to celebrate with Ollen this year! Xo
Great post!! Thank you very much for sharing.
Cutest advent calendar ideas ever! Thank you for sharing! I will definitely try it.
Oooh! Nice!
It looks grate! I will try to make it at home.
Thanks!!
What a brilliant idea. Love how the advent calendar looks up against the wall and it’s not too Christmassy so it can stay up the whole year long.
Hello there, You have done a fantastic job. I will definitely digg it and personally suggest to my friends.
I am confident they’ll be benefited from this website.
Regards for all your efforts that you have put in this.
Very interesting info.
I am glad to be one of the visitants on this outstanding web site (:
, thanks for putting up.
Our centre has all the best equipment and highly trained staff, which makes it a complete solution to your body spa and massage needs. Visit our spa today if you’re looking for the best and most ideal spa in Bangalore.Visit body to body spa near me
They must be emotionally and physically strong, and able to be unaffected by what they see, whether in the past or in the future.
We’re truly amazed at your decoration skills. This looks great!
Web3 technologies are poised to reshape digital marketing https://bitmedia.io/blog/email-marketing-crypto in profound ways, and this article explores some of the key trends and implications. From decentralized platforms to NFTs and DAOs, there are many new tools and channels emerging that have the potential to transform the way we think about advertising and engagement. BitMedia’s expertise in the crypto space makes them well-positioned to help brands navigate this new landscape and stay ahead of the curve. This article provides valuable insights for anyone looking to stay on top of the latest trends in digital marketing.