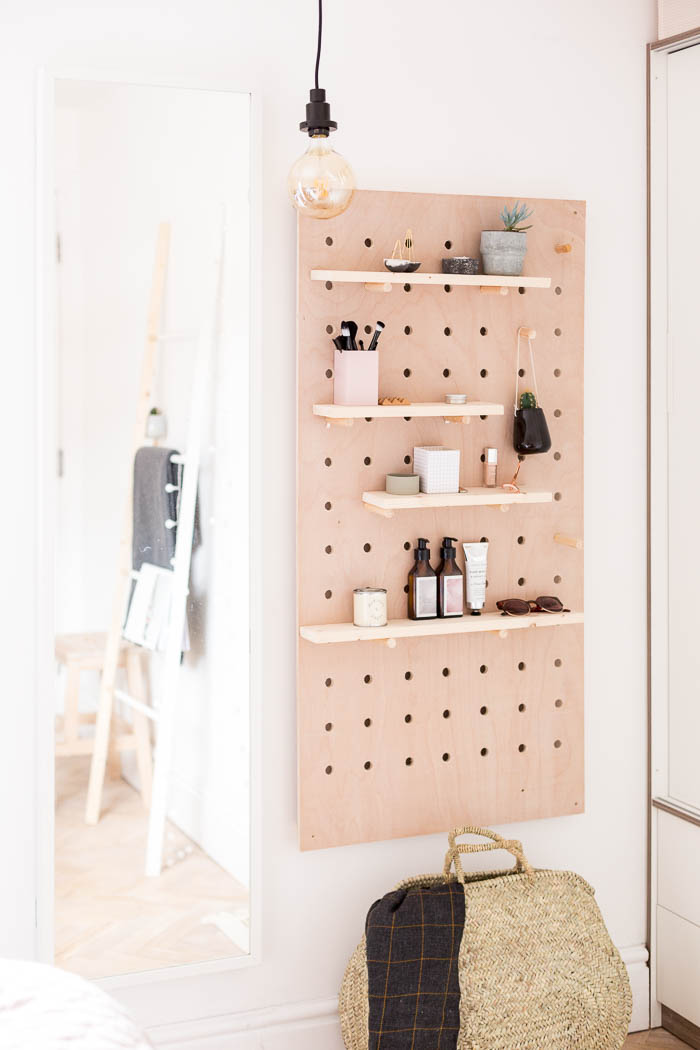
I’m pretty sure I haven’t invented the idea of a standing vanity area, but I’ve never seen one before. So I thought it was worth sharing with you guys not only how I put this together (and make it a valuable space for both storage and doing my hair and makeup), but also sharing why I created this space instead of something a little more traditional.
There are many reasons I wanted to create a standing vanity area in our bedroom. Firstly we have very little space. Even a small desk would have meant climbing over the bed to get to one side of it. That’s easily reason enough for me but read on, because there’s more.
Moving onto the also the issue of my eyesight. If you’re a glasses wearer you’ll know how difficult it is to achieve the perfect eyeliner flick from a distance when you can’t even see your own eyelashes. In fact, the last dressing table I had went unused for years for this reason alone. I used my full-length mirror to get up close instead of leaning awkwardly over a desk in a half squat position. Great for the thighs, not so much for the eyes.
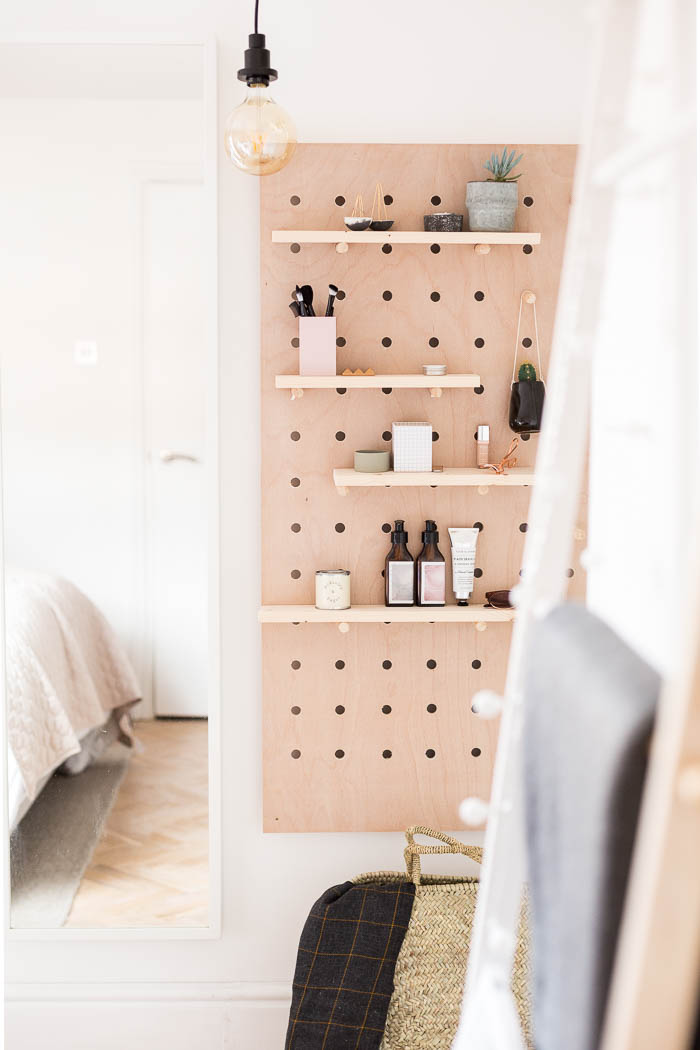
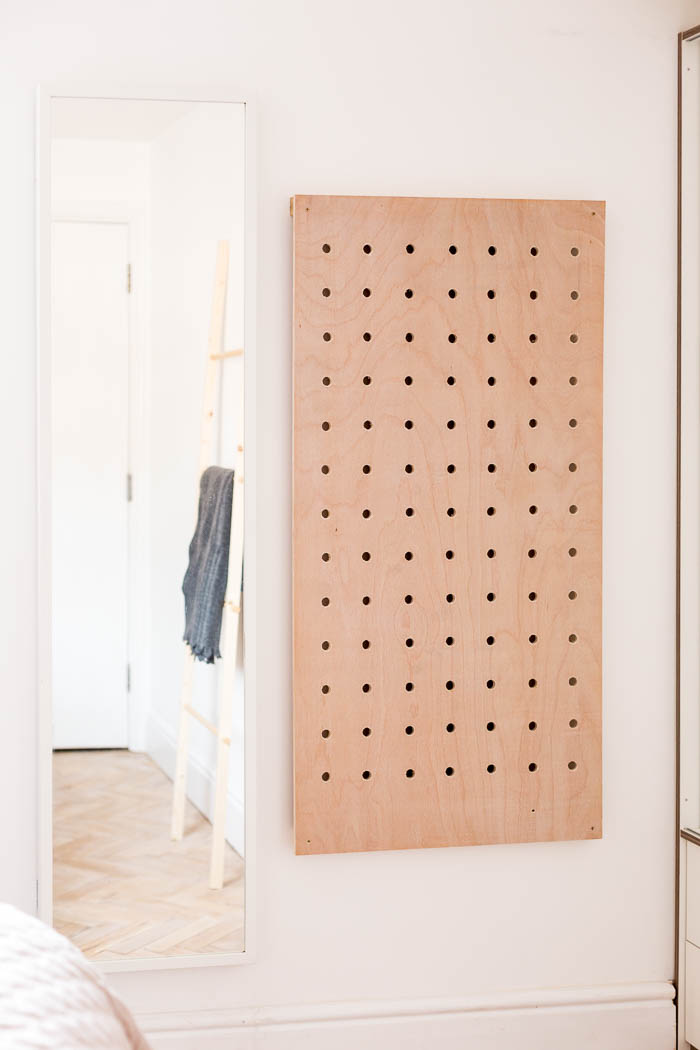
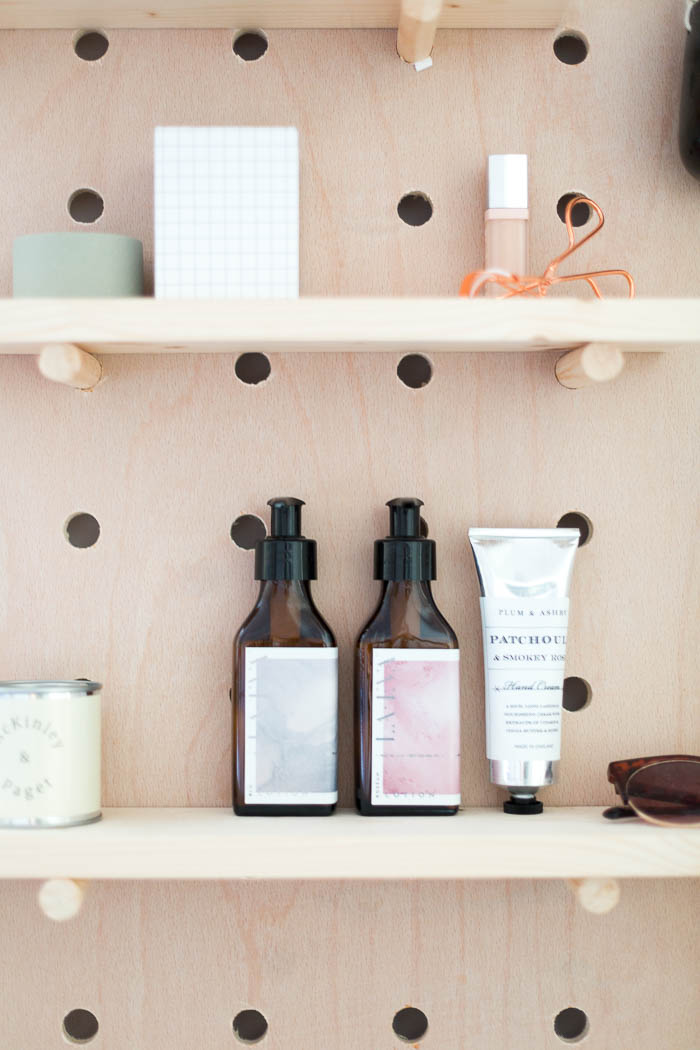
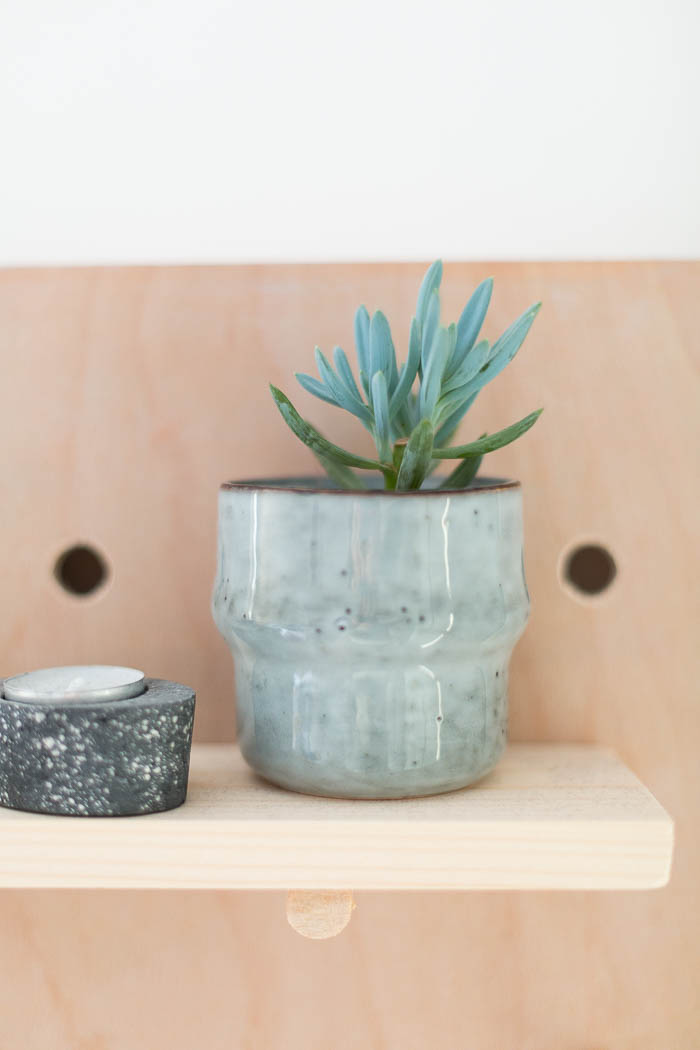
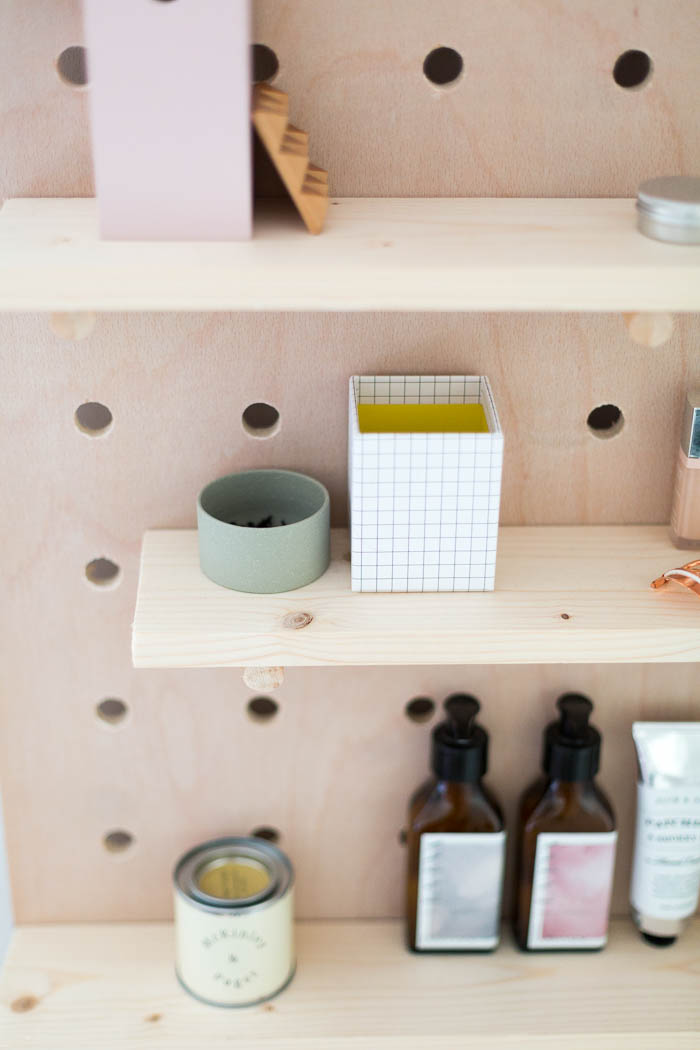
I had the idea of a standing area for this room for a long time. I was initially going to use wall shelving but couldn’t resist making a pegboard and sharing the tutorial with you!
Materials
- 12mm plywood measured to fit your space
- 15mm dowel
- 15mm drill bit
- 2cm x 4cm strip wood (at least twice the length of your plywood)
- Narrow pine shelving/strip wood
- Rawl plugs and screws
- Wood screws
Instructions
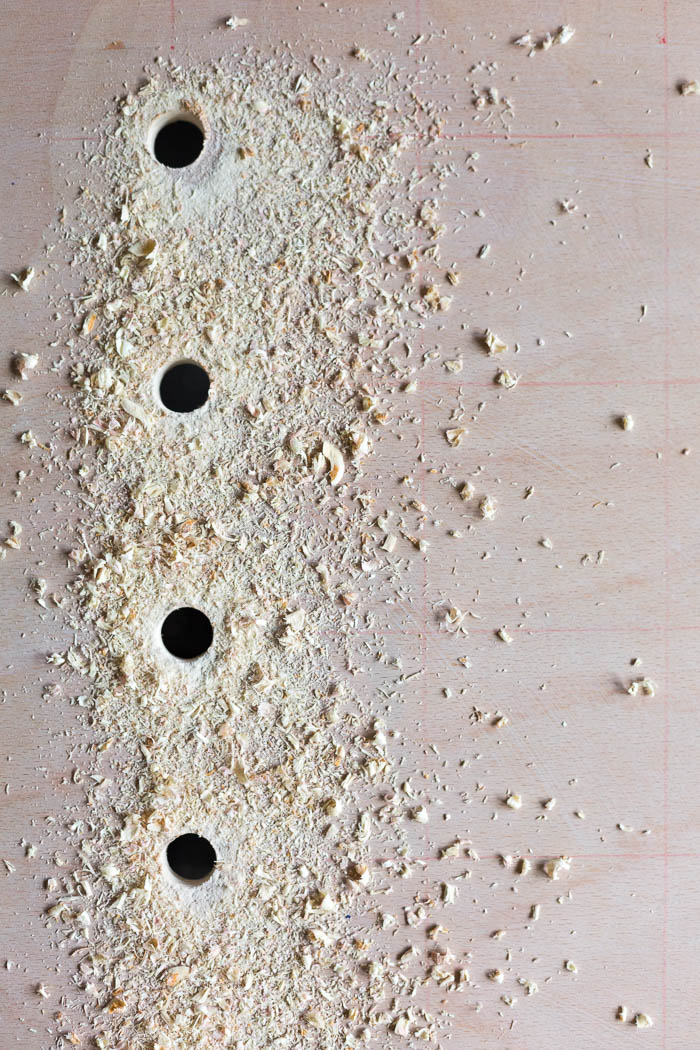
1. Measure the large piece of wood and divide that by the number of holes you want. Do this horizontally and vertically. Draw the grid onto the wood using your measurements as the distance between the lines.
2. Drill holes into each point where the lines meet. Place a scrap piece of wood under the area you are drilling to stop the back splintering. Once you’ve made all the holes sand down the edges.

3. Measure and cut 2 pieces of the strip wood the length of the pegboard and using strong rawl plugs and screws attach these to the wall where the top and the bottom of the pegboard will be.
4. Attach the pegboard to these pieces of wood using a screw in each corner.

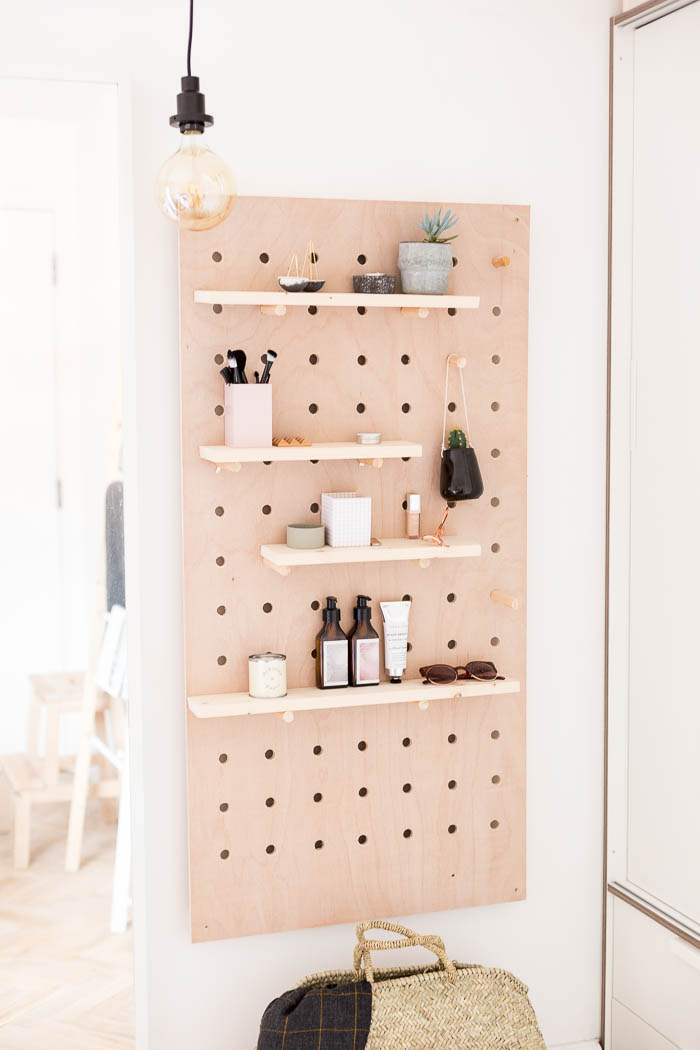
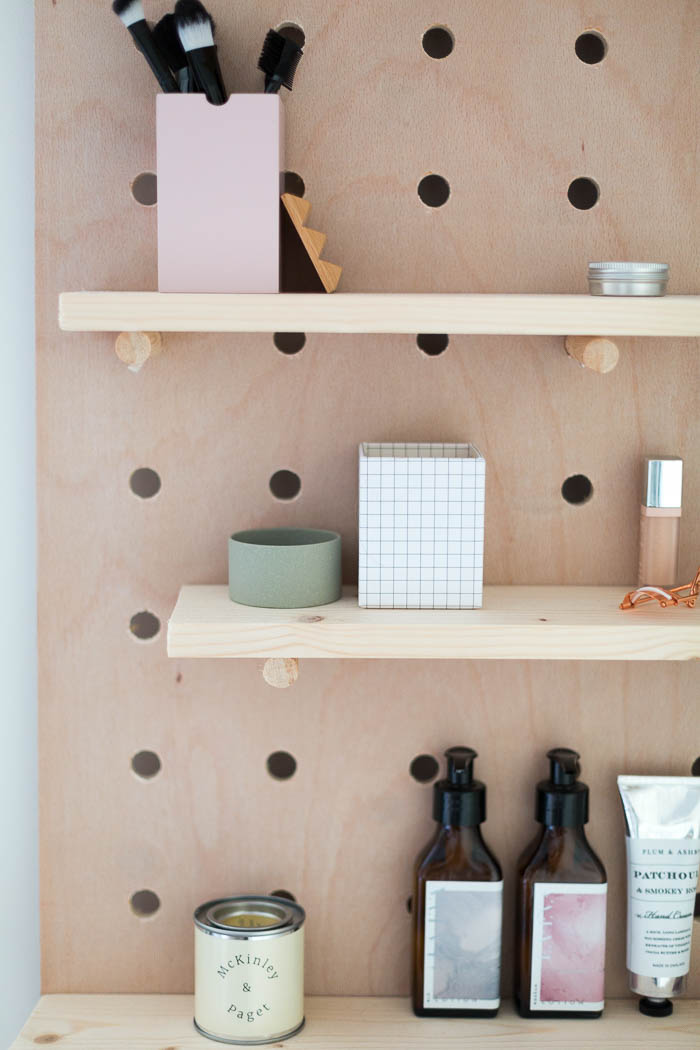
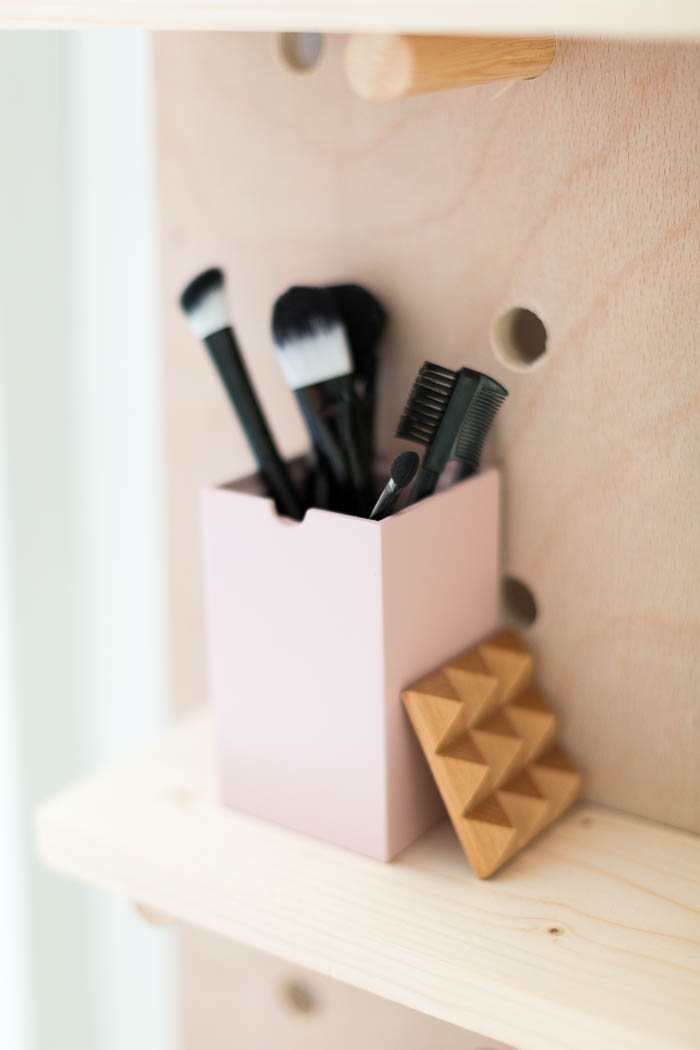
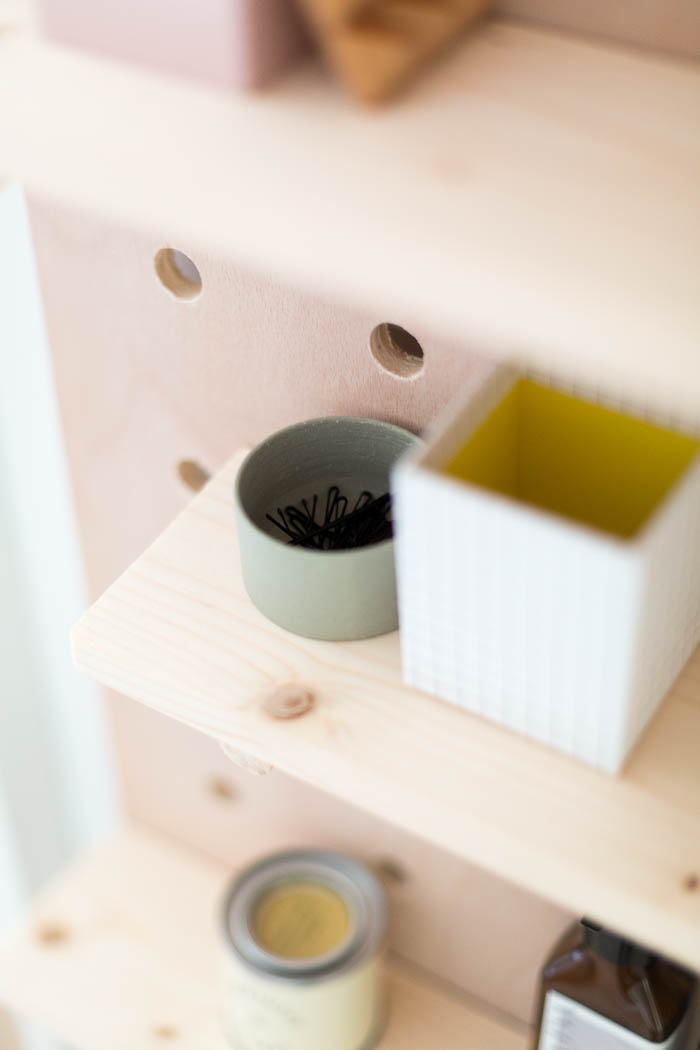
5. Measure the distance from the wall, through the holes in the pegboard and add on the width of the shelf. Cut up your dowel into pieces this size to hold the shelving in place. Any off cuts can be used as smaller pegs to hang things off.
6. Push your pegs into the holes and place sections of the narrow shelving onto them. Once you have everything in place you can use brackets to keep the shelves in place.
Read on for my other storage solutions…

For the mirror storage you’ll need a boxy mirror with space behind the glass to create your storage area. I got this one from IKEA a few years ago, but unfortunately, they don’t sell them anymore. Once you’ve sourced the right mirror use hinges to attach it to the wall on one side. Use adhesive hooks and tabs to create a storage area for jewellery and nail varnish hidden away in the back.

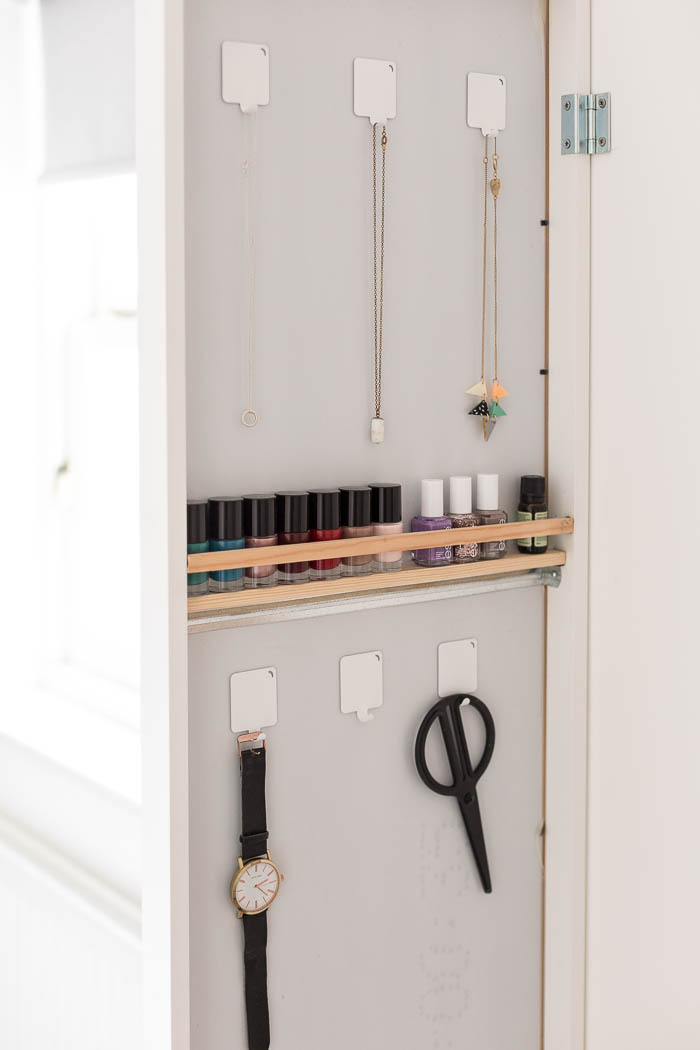
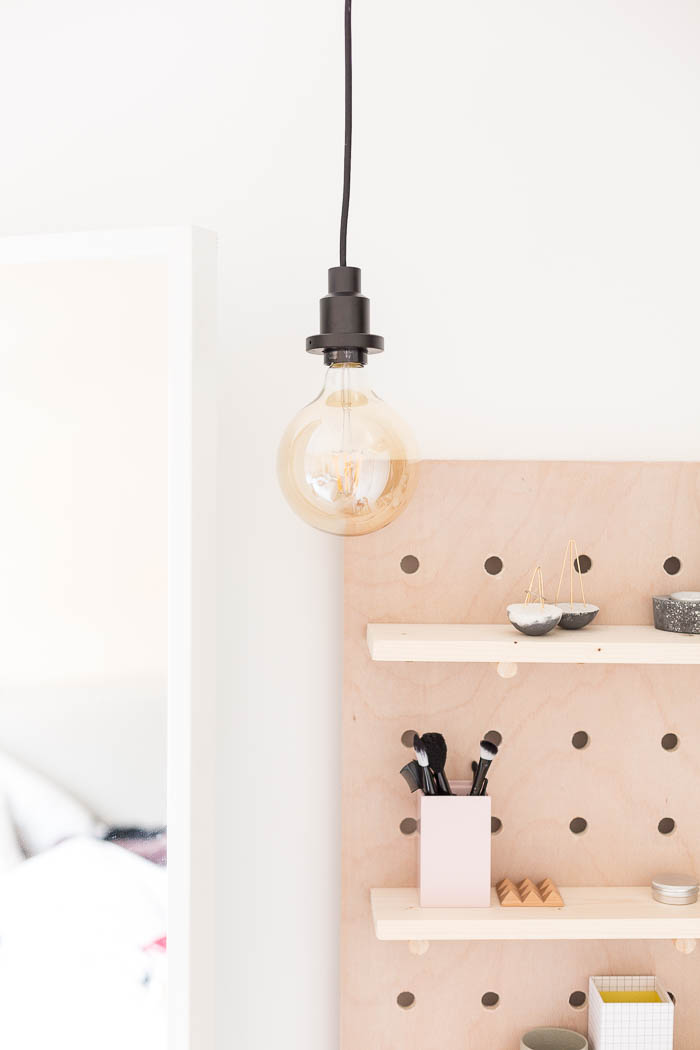
To create some additional storage I’ve added a large basket from The People Shop. I keep my hair dryer/straighteners and larger product bottles in here for easy access. Then to finish the area I’ve added a pendant light so I can see exactly what I’m doing no matter what time of day or night it is.
One of the reasons this area works so well for me is because I thought about the items I needed to store/easily access and built my storage around it. You might need to tweak the ideas for your own needs/space but this is hopefully showing you how you can have as much storage and accessibility with much less space than a vanity table.
I’d love to hear if you have a traditional vanity table or have you tried out something different too? Let me know in the comments!


In awe!!!! Love the minimalist vibe and how pretty all the objects displayed look
Thank you Ursula. I’ve definitely made an effort to make it look pretty x
This is absolutely cool, I would love to have something like this in my bedroom!
https://www.makeandmess.com/
Thank you so much Michelle! xx
So lovely! 100% agree about the glasses issue… In college I had a mirror next to my bookshelf and used that as my vanity to get close enough haha. Will have to try this soon!
HA! So you know! :D
“6. … Once you have everything in place you can use brackets to keep the shelves in place.”
Great idea, but what does this mean? Can you please explain it a little bit? I need shelves, that do not move.
Thank you.
Hey Jane, so if you use something like these saddle clips: https://www.homebase.co.uk/saddle-clip-copper-22mm-10-pack_p574146 to go over over the dowel and into the shelf underneath it will hold it in place! Hope that helps x
Wow this is so amazingly beautiful and such a versatile way to store lovely things! I get bored with my shelves so easily, so it would be amazing to be able to keep switching them around. Can’t wait to give this a go when I get a spare day – thanks so much for sharing!
Holly from The Art of Being Holly xo
Very nice blog. I like this post.
Check out Diamond Jewelry Online.
This is also a great idea to use in my shop for displaying products. Thank you for sharing. Really appreciated!
What size is your pegboard?
Am I missing something?? Ive looked this over a few times and I dont see the ‘hidden mirror storage’ where? how? what do i do?
I get the buy the wood, drill the holes, attach to wall. Where is the mirror?
Tutorial for a stumble guys Standing Vanity with Pegboard and Hidden Mirror Storage. Maximize the space in your tiny bedroom. techniques and tips for organization.
Your article was outstanding, and I eagerly forward reading more of your writing.
I have a hard time describing my thoughts on content, but I really felt I should here. Your article is really great. I like the way you wrote this information.
Good article, helped a lot thanks
Yasir Electronics
Dc Inverter Ac in Pakistan
Samsung Ac Price in Pakistan
Fryer Price in Pakistan
Samsung Refrigerator
Samsung Washing Machine
Samsung Microwave Oven
Hitachi Refrigerator Price in Pakistan
Water Dispenser Price in Pakistan
Crown Furniture
Wooden Furniture
Bridal Furniture
New Bed
Furniture Showroom
Home Furniture Shop
Modern Bedroom Furniture
Sofa Store
Wing Chair Lahore
Wardrobe Design
Center Tables
Furniture 4U
Gaming Chair Price in Pakistan
Office Chair Price in Pakistan
Computer Table Price in Pakistan
Sofa Set Price in Pakistan
Office Table Price in Pakistan
Wardrobe Price in Pakistan
Recliner Price in Pakistan
Outdoor Furniture Price in Pakistan
Dining Table Price in Pakistan
Center Table Price in Pakistan
Bedroom Set Price in Pakistan
Yamas Office Furniture
Office Chairs
Office Table
Study Table
Office Chairs in Lahore
Office Chairs in Islamabad
Office Furniture in Islamabad
Office Furniture in Lahore
Hafi Pest Control Services
Fumigation Services in Karachi
Termite Treatment Services in Karachi
Water Tank Cleaning Services in Karachi
Rodent Control Services in Karachi
Mosquito Control Services
Dengue Spray Service in Karachi
Ahsan Electronics
Dawlance Refrigerators Price in Pakistan
Dawlance ac price in Pakistan
Dawlance Automatic Washing Machine
Dawlance Washing Machine Price in Pakistan
Dawlance Microwave Oven Price in Pakistan
Dawlance Deep Freezer Price in Pakistan 2023
Dawlance 1 ton ac Price in Pakistan
Dawlance inverter ac Price in Pakistan
Karachi Fire Corporation
Fire Hydrant System
Road Safety Equipment
Fire Fighting Equipment
Fire Suppression System Supplier in Karachi
Fire Alarm System in Pakistan
Road Sign Board
Fire Fighting Training
Fire Extinguisher Price in Karachi
Fire Safety Equipment
Fire Fighting Companies in Pakistan
Fire Doors in Karachi
Water Tank Cleaning
Water Tank Cleaning Services in Karachi
Pakistan Fumigation Services
Fumigation Service in Karachi
Water Tank Cleaning Services in Karachi
Disinfection Services in Lahore
Termite Control in Lahore
Water Proofing in Karachi
Pest Control Services in Karachi
Termite Proofing in Karachi
Pest Control Services in Lahore
Roof heat proofing karachi
Disinfection Services in Karachi
Rodent Control Services
Furniture 4 US
Home Furniture Karachi
Bedroom Set
Bedroom Chairs Set
Center Table
Dining Table
Sofa Set
This is so amazing, great minds think alike I just wrote a similar post on this topic! You should check it out.
gacor slot has a high chance of winning, only here you can get online slot wins with opportunities that use external servers, more hilarious and sadistic, multiply down from zeus lightning ada 777
good to read it
Thanks for the article. Thank you for the help and your work.
Online slot gambling sites offer lots of bonuses
Great article, thank you,dont forget read my blogger sites. I if you want to find the best beautiful girls Asian in Bali Indonesia ? Click here » Nagabola 希望能在这篇文章中得到收获.
Link alternatif terbaru NAGABOLA buruan daftar dan rasakan sensasi JP nya
natural essential oils
Retrouvez notre sélection de stylos publicitaires Tunisie
Watch Online Video Episode Shiv Shakti , Colors Tv New Drama Serial Shiv Shakti Latest All Episodes Online , Shiv Shakti Full Episode Online, Watch Shiv Shakti online today episode.
Shiv Shakti
Watch Online Shiv Shakti latest Desi Serial Drama Today Full Episode at Colors Tv Online, Voot,Shiv Shakti Full Episode dailymotion video download.
Shiv Shakti