Before Ollen was born I had a hundred ideas for making all the baby things. I wanted to make his bedroom decorations, toys, clothes and especially costumes and fun photo backdrops. But since he got here, Ollen has had different thoughts all together. Turns out it’s not easy to hold a glue gun and a baby at the same time. Why are so many creative tools objects of danger? So I haven’t actually got around to making anything for the last couple of months.
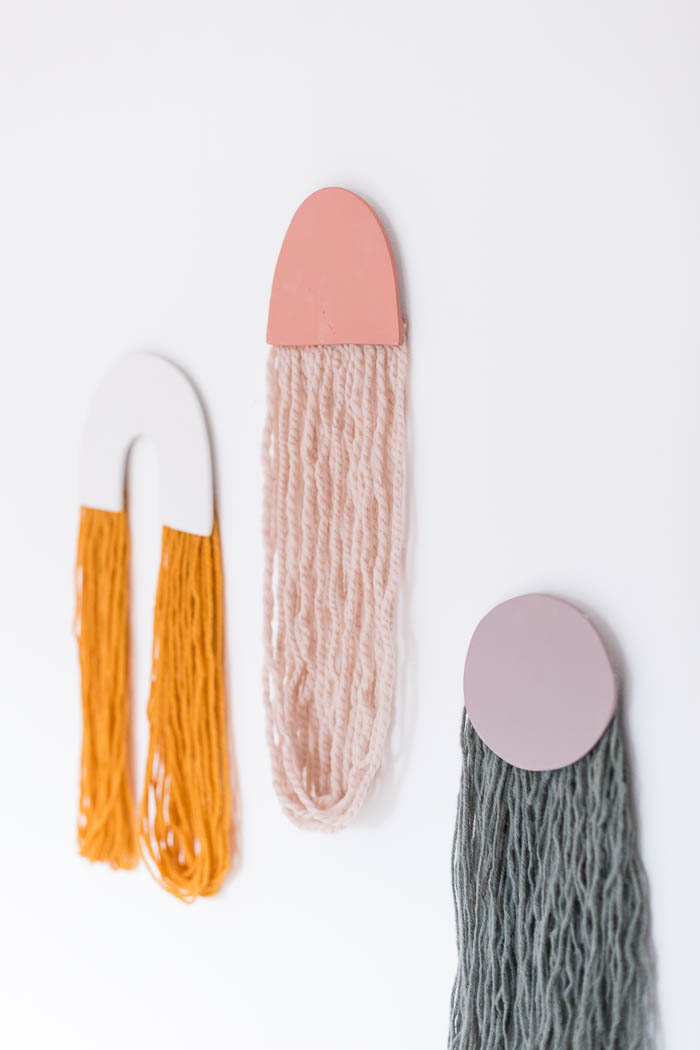
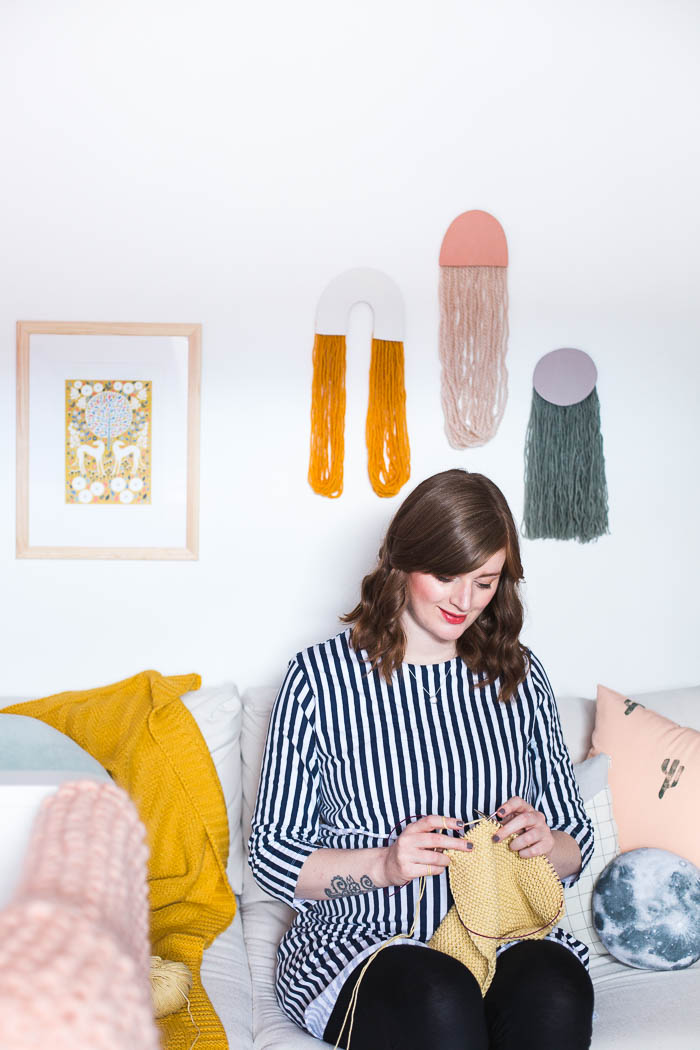
But luckily before he was born I was in full on nesting mode and managed to out some of my plans into action. The photo below was taken the day before I went into labour! I didn’t even know what I was knitting here, I just felt like I had to do something useful while I still had the time. I also made these DIY yarn art wall hangings with one of my favourite materials. Read on to find out more.
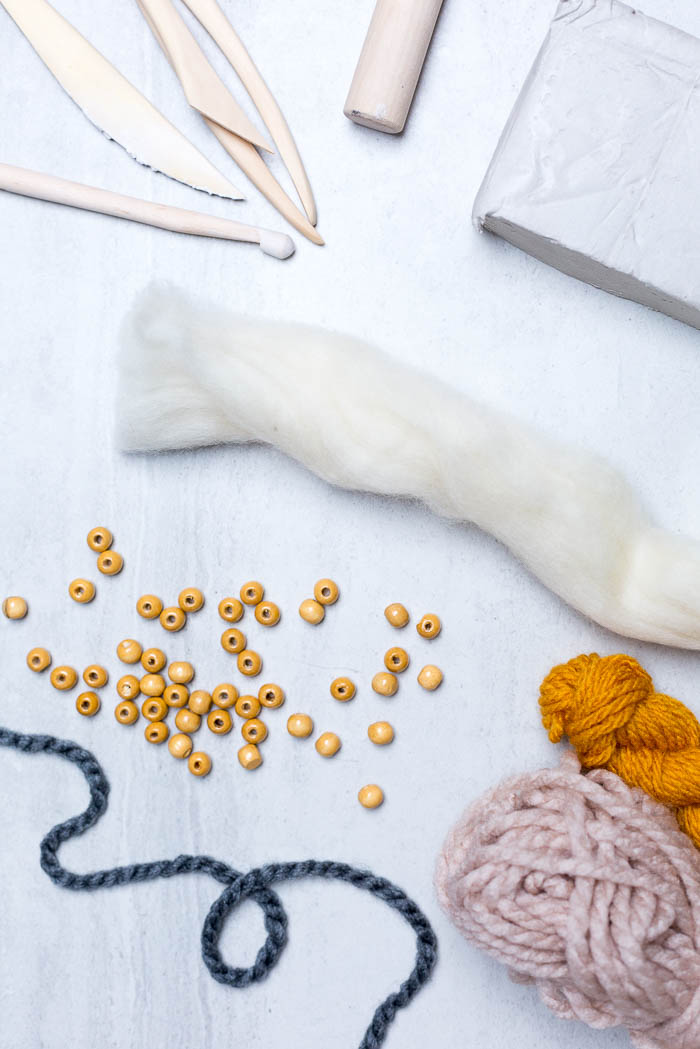
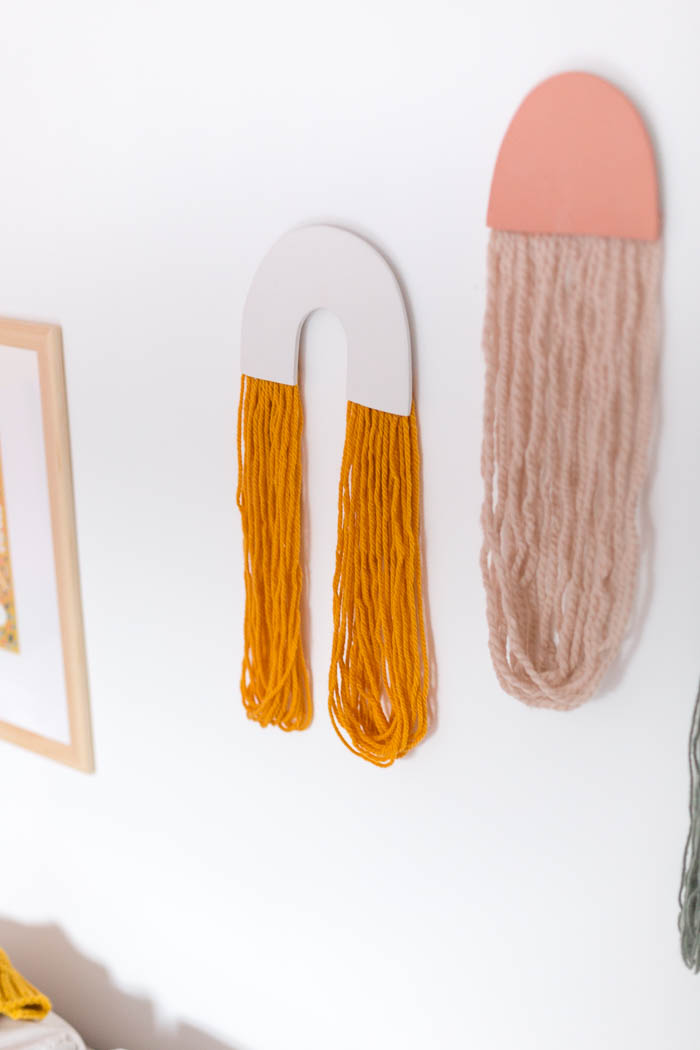
Materials
Air Dry Clay | Yarn | Glue Gun | Ring Pull
1. Roll out the clay, resting the roller on two thin pieces of wood either side of the clay to create an even surface. Cut the clay into a fun shape like a rainbow or squiggle.
2. Leave the clay to dry for 24 hours (or until it has lightened all over) and sand down the surface until it’s smooth.
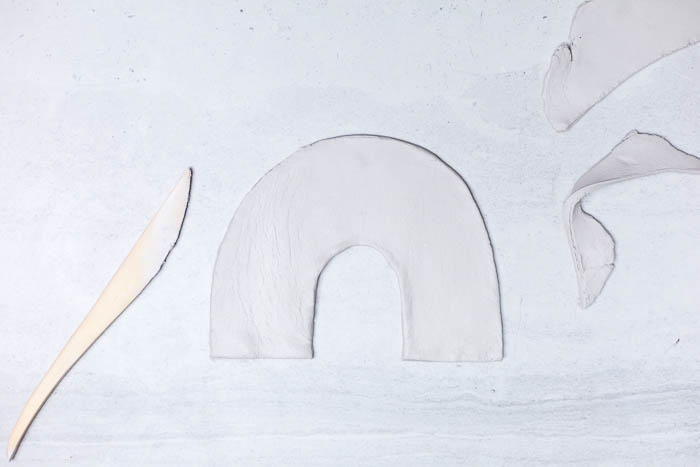
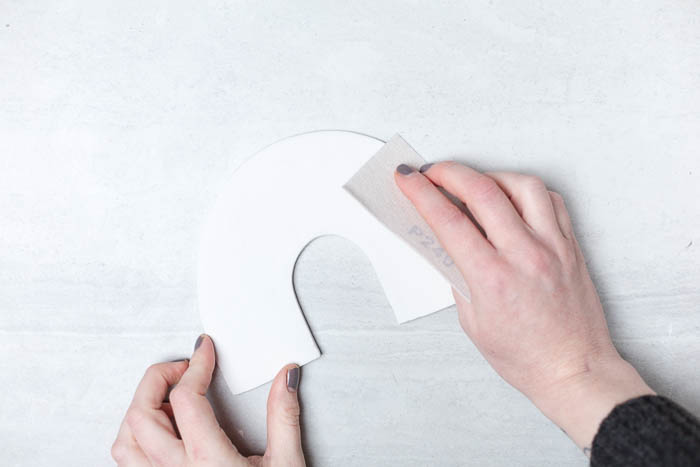
3. Turn the clay over so the back is facing up (you can choose the front and back depending on the quality of the surface.
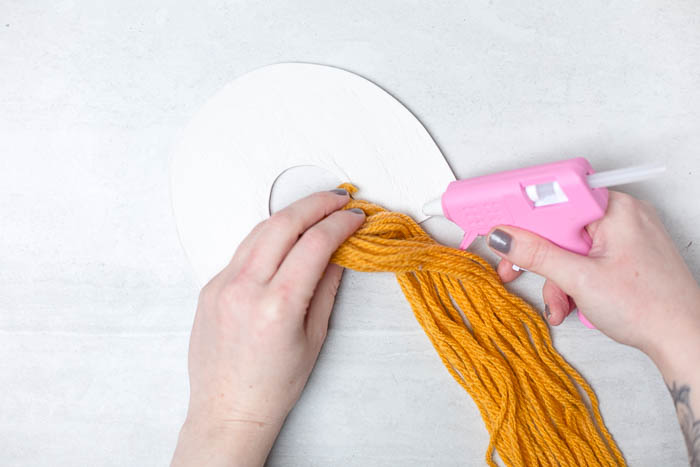
4. Wrap your yarn around your hand and bent elbow several times to create loops. Use the hot glue to fix the yarn to the clay at one end. Use as much glue as you need to make it secure. Trim the excess from above the glue line.
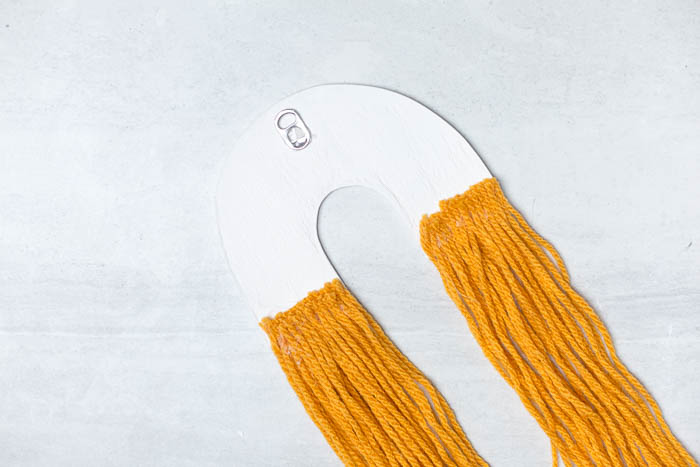
5. Using hot glue, adhere the smaller end of the ring pull to the back of the clay to create a hook.
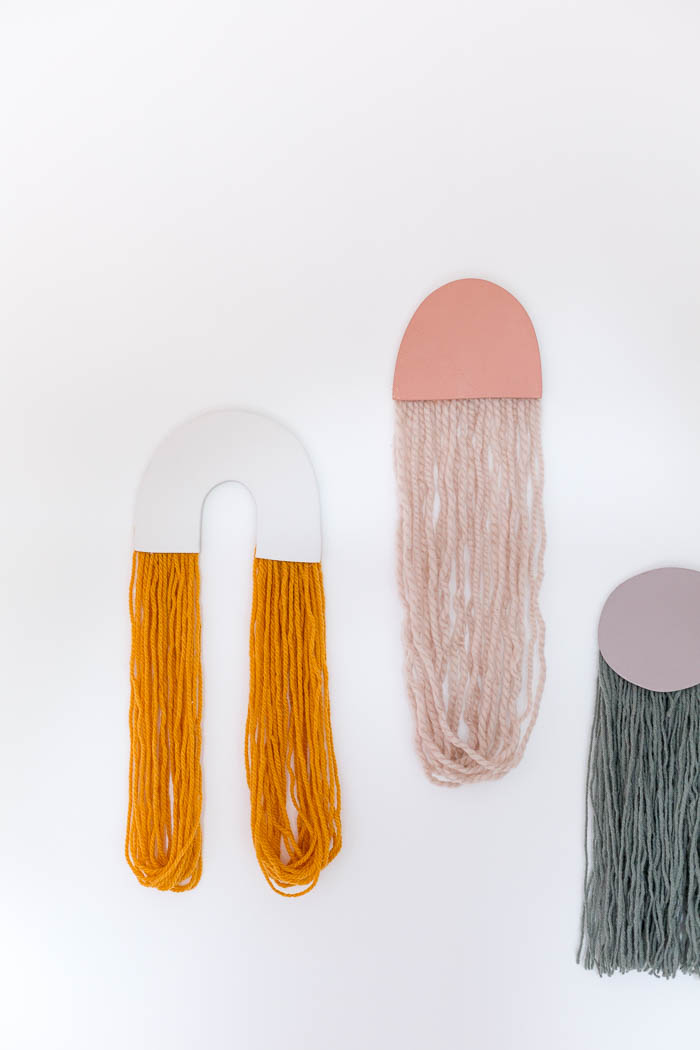
If you want to you can paint the clay with emulsion or acrylic (or any other multipurpose) paint. I’ve use tester pots that I love the colour of which saves me mixing up my own paint colours.


They’re so cute, I love the idea!
https://www.makeandmess.com/
Thank you Michelle :D
Hi Fran. These are lovely. Thanks for sharing how you made them. I’ve included your post in our latest Top 10 in Craft inspiration. https://craftylikegranny.com/hand-made-craft-rocks/ Cheers Jodie :)
Thank you Jodie! So happy you like these :D
This art looks beautiful and is good for house wall hangings. This art is really valuable. I know the site has created a ryzen 5 3400g compatible motherboards on yarn they have much other DIY yarn art for wall hangings.
This option looks incredibly stylish. sometimes, in order to freshen up the renovation in your room, it is not at all necessary to repaint the walls. Sometimes just a little creativity is enough. Here https://soposters.com/ you will definitely find a poster that will suit you.