This is a sponsored post written by me on behalf of Blue Nile UK. All opinions are 100% mine.
Being able to make my own jewellery has always come in useful. It makes a great gift in a pinch and it’s saved me from turning up with yet another bottle of wine countless times. Like these twisted wire rings or the beaded rings I’ve used in this post. But there are times when whipping up an easy necklace or simple ring just won’t cut it. A special occasion deserves more than something I’ve rescued out of my box of jewellery findings.
For those times when you need a gift to be memorable I love to choose something I know they will treasure. My own go to is a birthstone item. That little touch of personality makes the gift so much more thoughtful. Just make sure you have their birthday month right first! Once you’ve got the right date head over to Blue Nile, who have a range of beautiful birthstone pieces to suit every budget and helpful gift guides to make choosing the perfect piece of jewellery quick and easy!

Read up on expert guides over at Blue Nile to make sure you’re making the right purchase. There’s even a diamond education to get you up to speed on the cut and quality. Get free shipping with your order and a 30 day return period so you can shop knowing you’ll pick out the perfect gift. Be it for a graduation, birthday, anniversary or the biggest surprise of their life!
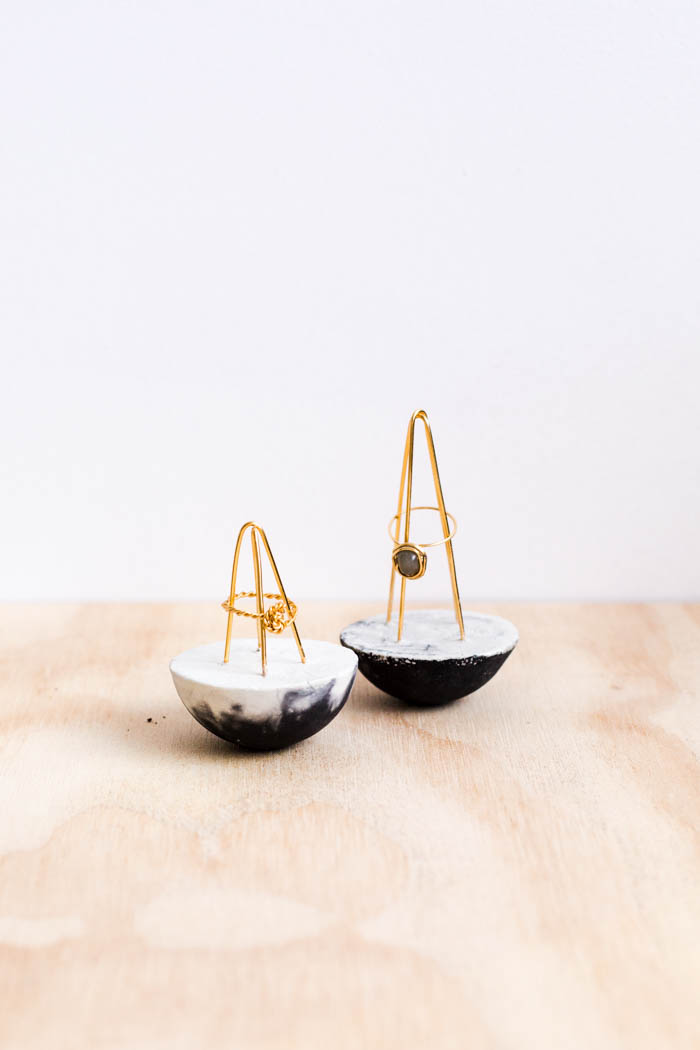
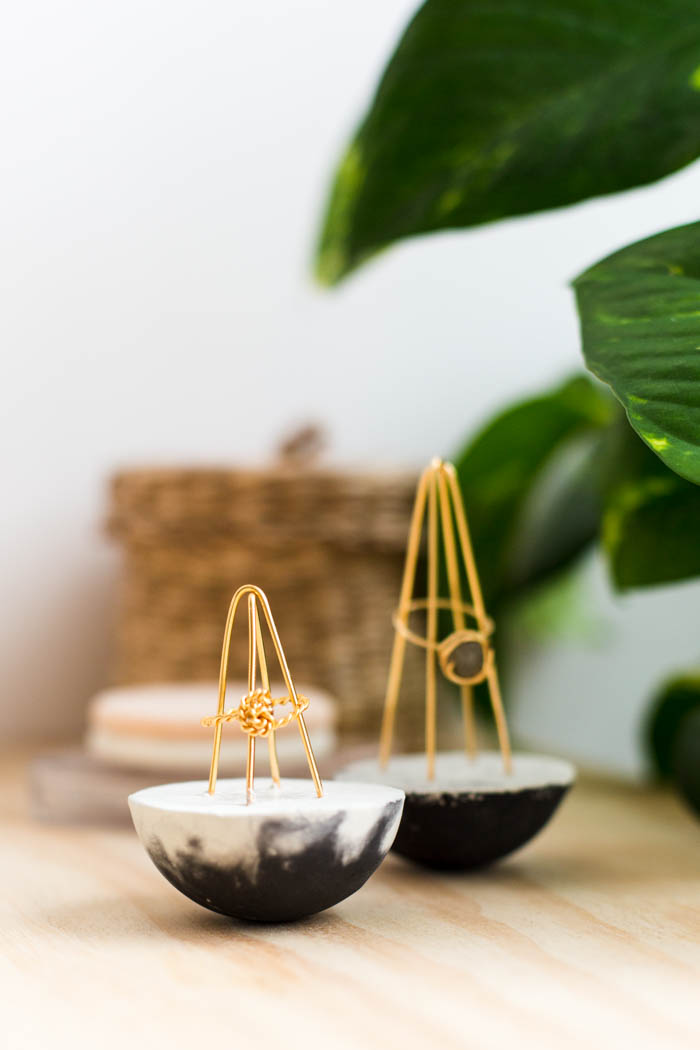
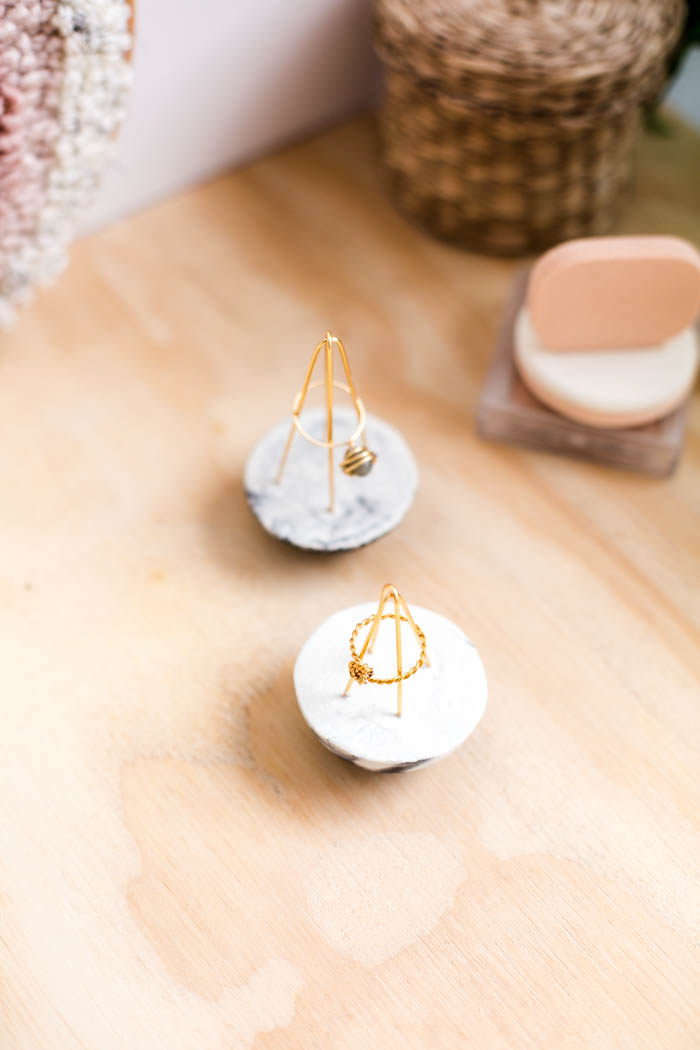
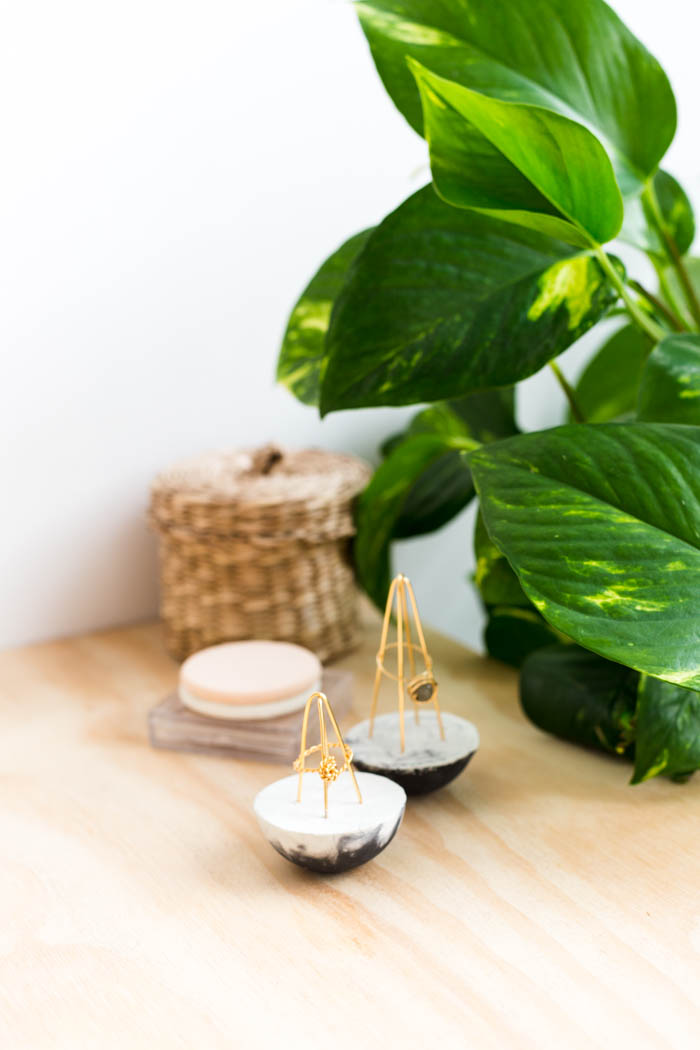
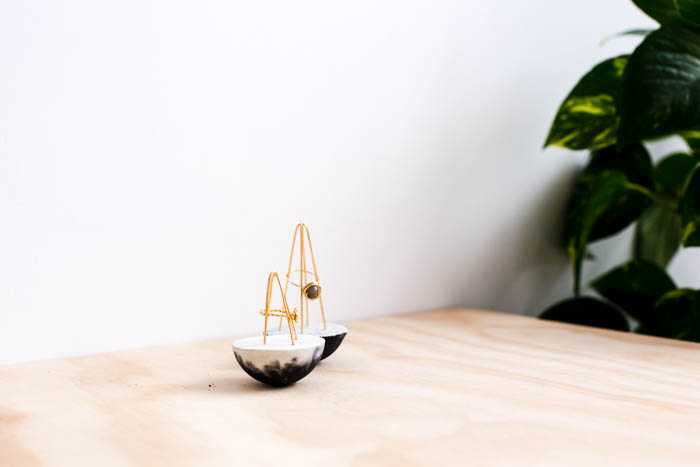
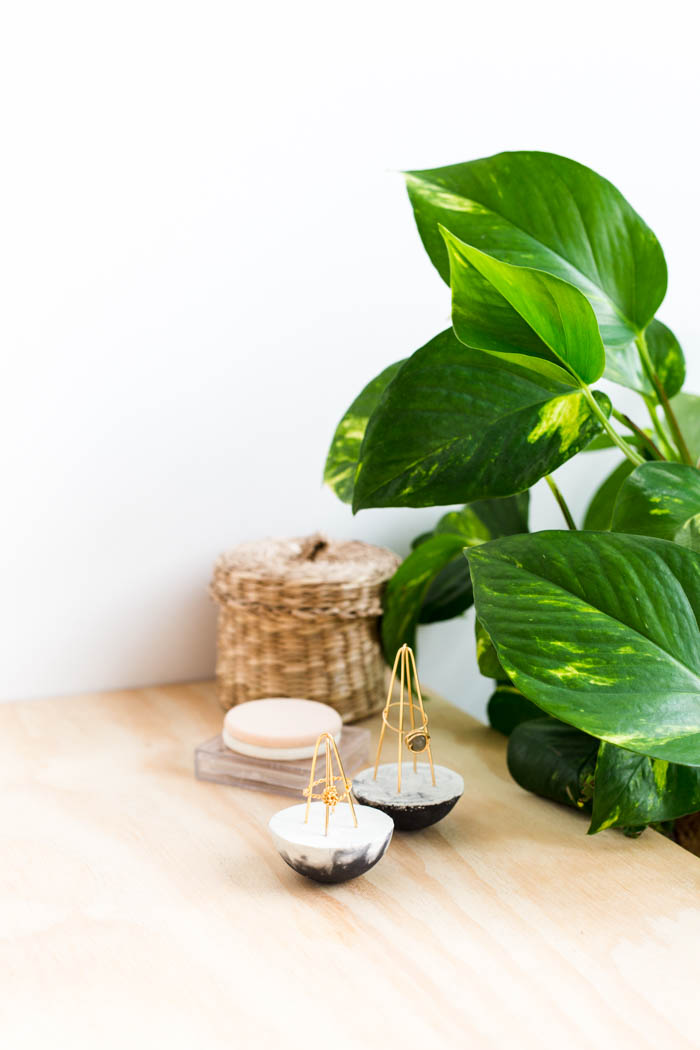
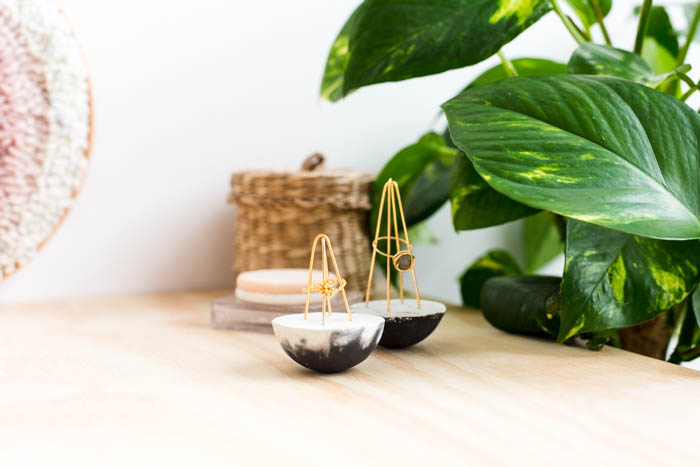
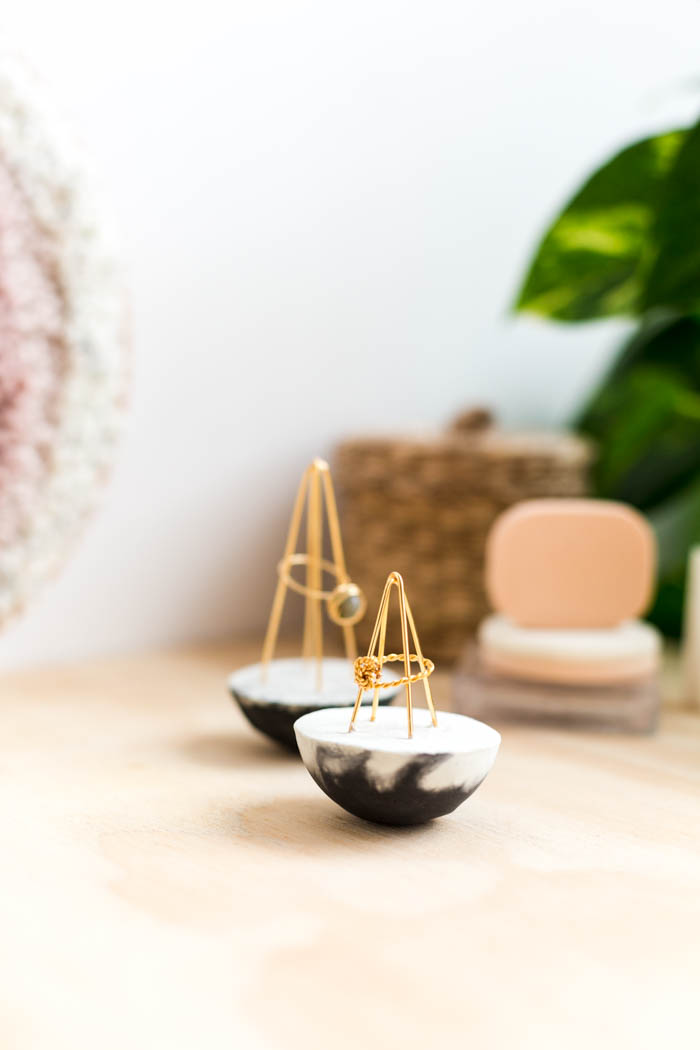
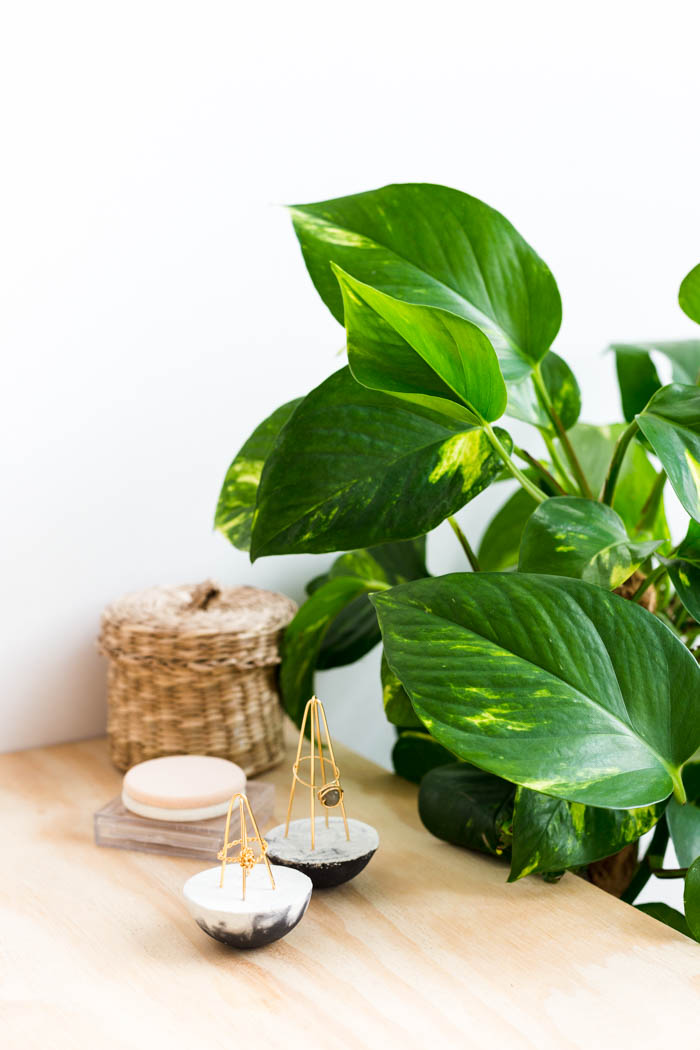
Now if you’re lucky enough to be on the receiving end of this arrangement (start hinting now for Christmas) these ring holders are a great way to display rings that are extra special and make sure they’re always in easy reach.
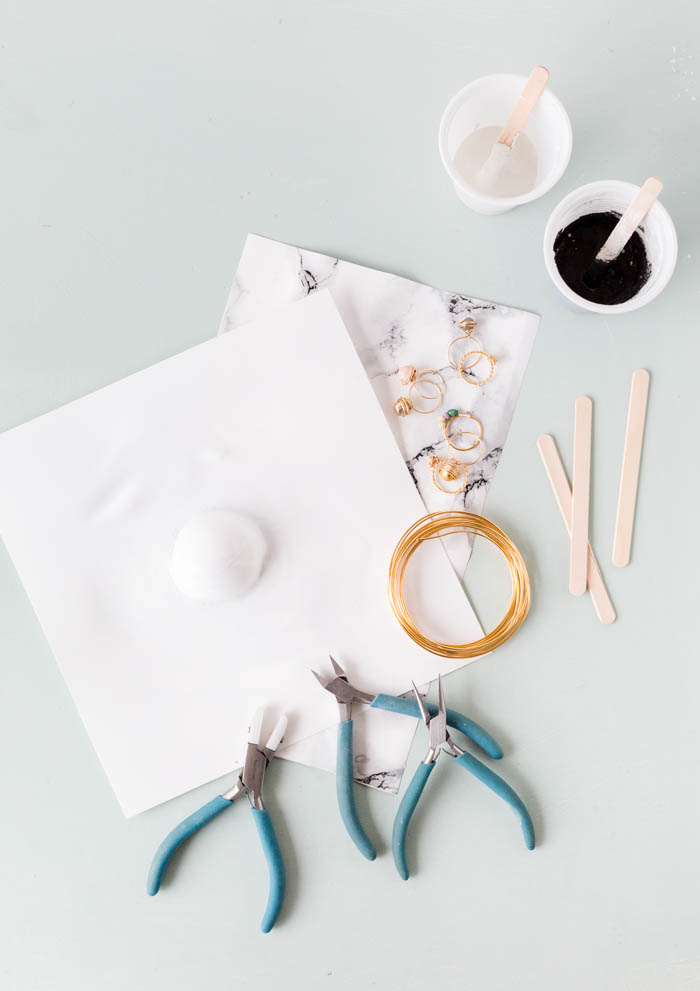
Materials:
Half Sphere Silicone Mould | Vaseline | White Concrete | Mortar Dye | 1.5mm Copper Wire | Plastic Cups | Mixers | Jewellery Pliers
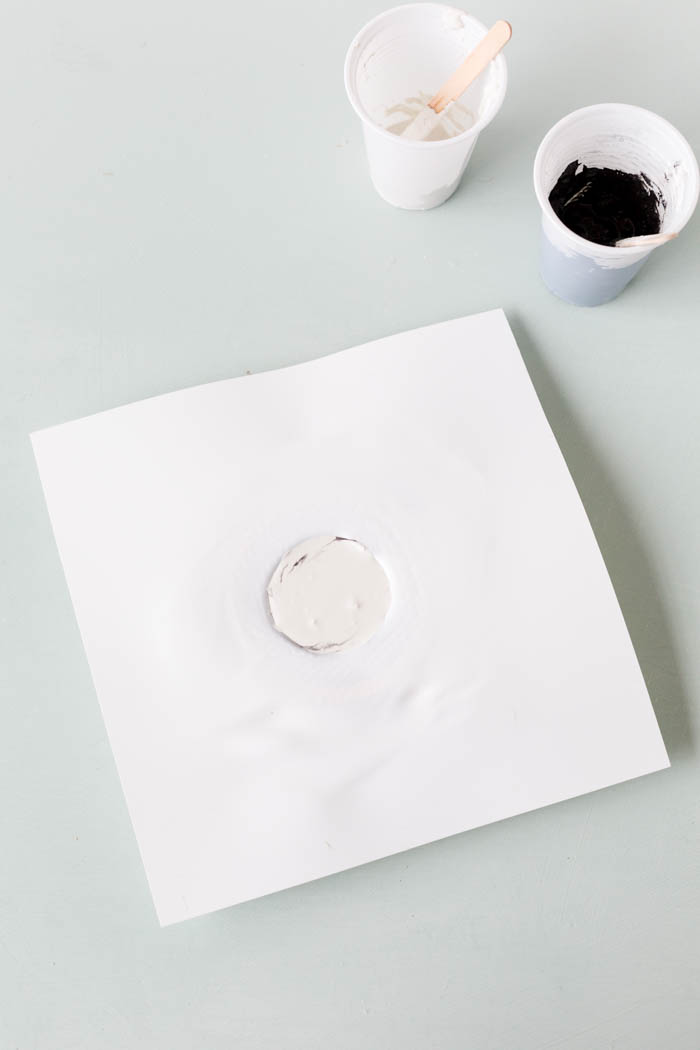
- Coat the inside of the mould with Vaseline. I like to use this as it will make removing the concrete easier yet doesn’t stain or colour it. Mix up a little white concrete in two plastic cups adding the mortar dye to one a little at a time until you have the desired colour.
- Pour the black concrete into the mould up to the halfway point the fill up with the white. Push a mixer or stick through both layers around the edge of the mould to slightly mix up the two colours and create a marbled effect. Tap the mould gently on a flat surface to work out any air bubbles.
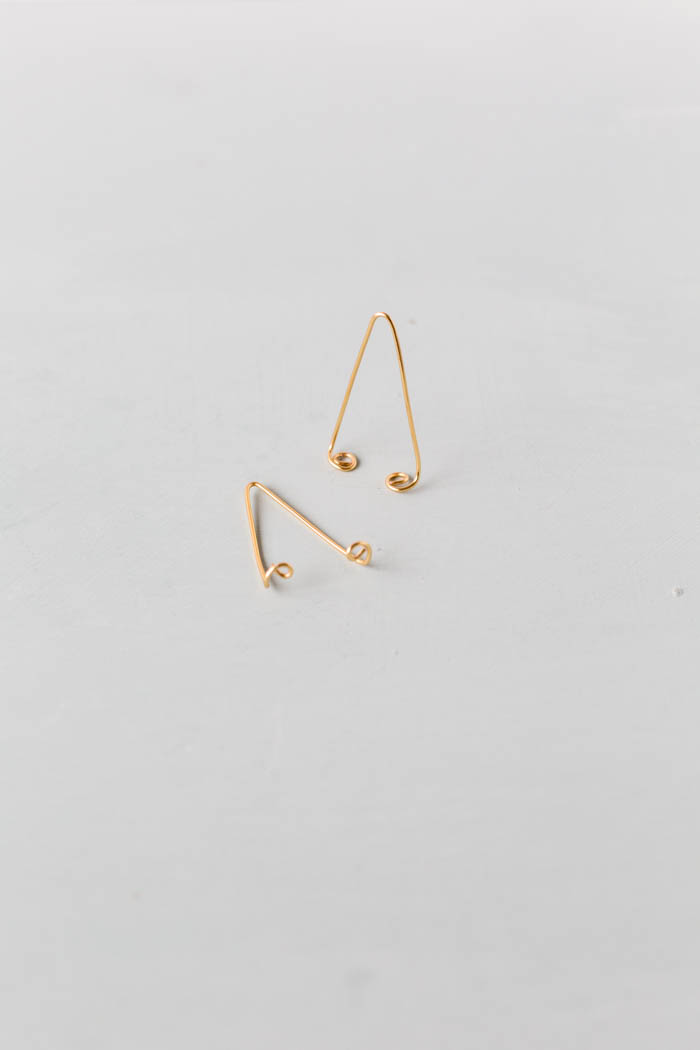
- Cut off two lengths of wire between 4 and 6 inches depending on the size you want the point to be. Straighten them using silicone covered pliers or wrap an old pair of pliers in masking tape. Warm the wire and run them down the length working out any kinks.
- Bend the wire at the halfway point to create the peak of a triangle. You can test the angle with a ring to make sure it will sit around halfway. At both ends curl the wire up roughly to the same point and bend at a right angle to the rest of the wire. Repeat this step to make two similar sized peaks.
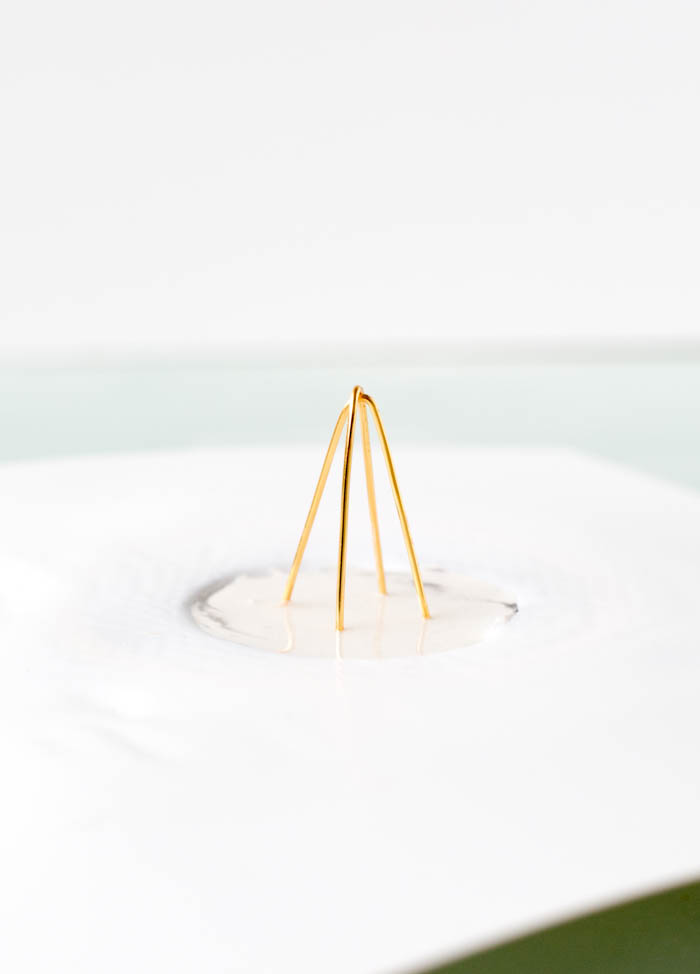
- Press the ends of the wire into the concrete so the peaks meet and the wires are equal distance from each other. Ensure the concrete is covering the wire swirls and is even and level at the top of the mould. Leave these for 24 – 48 hours to set.
- Remove the concrete from the mould and with a fine sandpaper neaten the edges and top of the semicircle. Rinse off any excess concrete dust and dry.


They look so cool, like little pieces of art!
https://www.makeandmess.com/
Oh that’s such a compliment! Thank you :D
This is adorable! So creative!
SO the thanks to be http://mahjongdimensions.me play online game.
hi,
i like this holder, you made very unique and so pretty items,
ᛕeepp on working, great job!
Very good and creative ideas. I really like this idea. I will apply it.
Thanks for post!
The teacher assigned us this homework the day before yesterday: write an essay about business in our area. I immediately went to the Internet to read business articles and watch different videos, but I was unsuccessful. It’s fortunate that I came across this medicalschoolstatements.com. I tried several other essay bases, but this one was my favorite, and the instructor had no questions.
Love your tips, keep it up :)
Hardly had you tried to fix this, you pretty much gave up instantly without any work and attitude.
Izspa is best place known for female to male body massage and body to body massage,Thai massage service in Bangalore.Our motto is giving 100% satisfaction to our customers.We are known for safe and secure service provider among all.
Visit massage center near to me
nice blog Visit massage center near to me
Skin well being requires sustenance sometimes. Standard spa treatment prompts the shining and sound skin. That is most likely the motivation behind why body spa is so well known among ladies.Visit body spa near me
Great article, thanks for sharing with us! also visit our website to know more about credit card and to make right financial decision
pagelines
Concrete is a composite material consisting of coarse aggregate bonded together with a fluid cement (cement paste) that hardens over time. Most concretes used are lime-based concretes such as Portland cement concrete or concretes made with an aggregate of other hydraulic cement, and with concrete you have Basement Waterproofing repairing.
The cost of transporting a car from New York can vary depending on several factors. These factors include the distance of the transportation, the type of transportation service chosen, the vehicle’s size and weight, the transport company, and any additional services or requirements https://www.youtube.com/watch?v=MVW7Ui-MzgA
Arborists can assist in selecting suitable tree species for specific environments and handle the delicate process of transplanting mature trees without causing significant stress. https://treeservicesspringfieldil.com/