I’ve got to admit I’ve never had a traditional dinner party before. It seems like that’s some sort of omission of guilt. I’m not a real blogger. I don’t know how to style a table! I’ve had friends over for dinner of course, but it’s always buffet style, grab what you want off my mismatched plates, find a seat and dig in. Who wants a Bloody Mary? I don’t know whether it’s my 30’s kicking in but I want to give my guests a little more. A beautiful table and fancy cutlery perhaps, a luscious centre piece and many, many bottles of great wine. Just a little change of pace from our usual free for all attitude to dining. But I realise this is a big undertaking. There’s a reason we have party planners – to make sure all the aspects of a perfect dining experience are figured out and ready more than two hours before the event. Basic organisation… something I’m not really known for. So I’m thinking baby steps. I’ll work up to the perfect party. Collect together the ingredients before setting the date and give myself the best (or at least some) chance at getting it right.
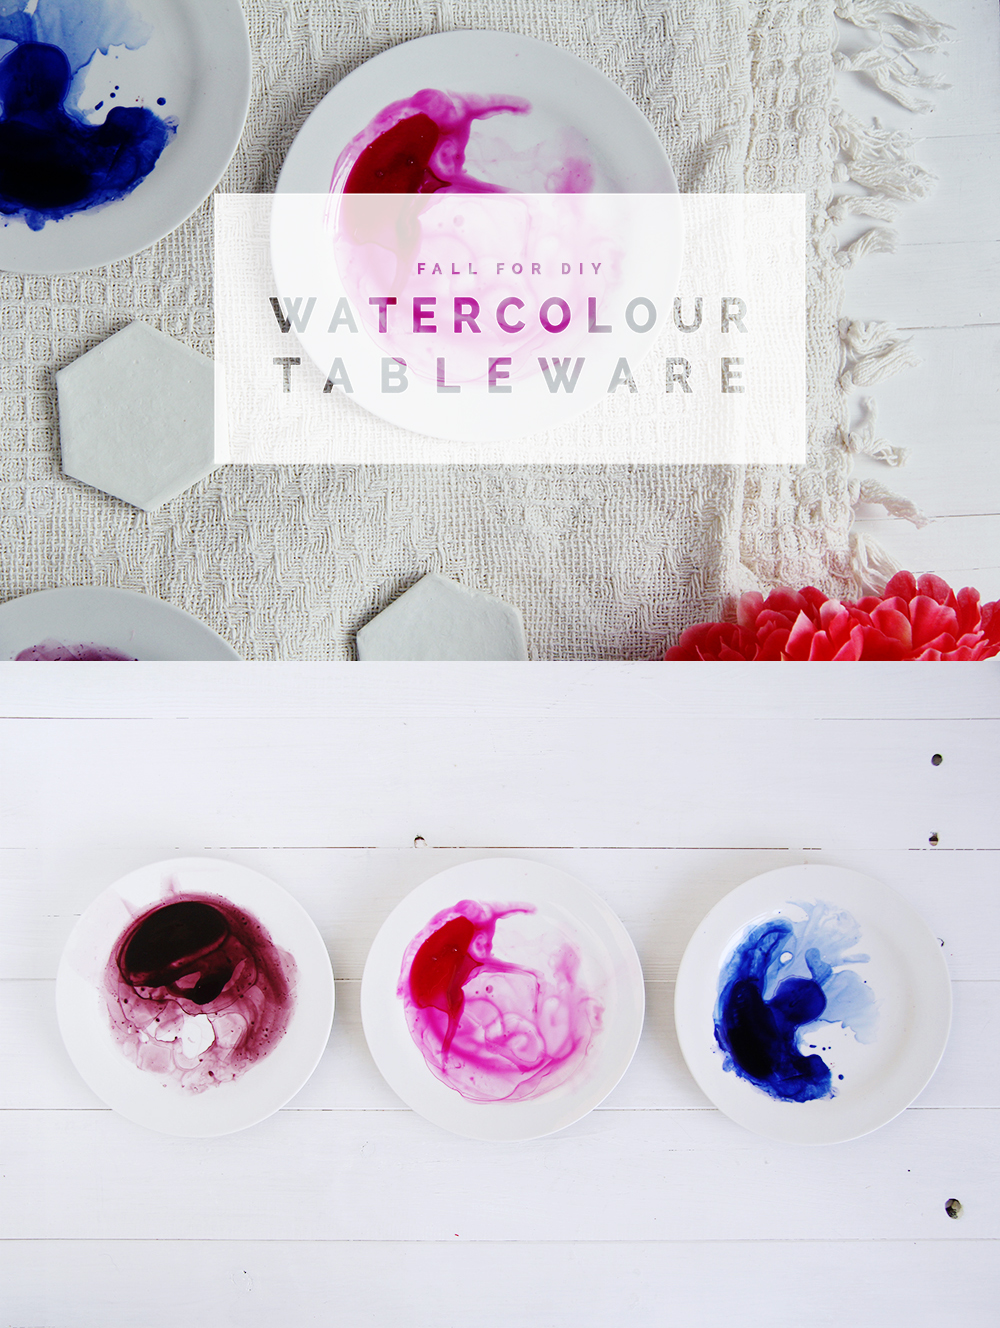
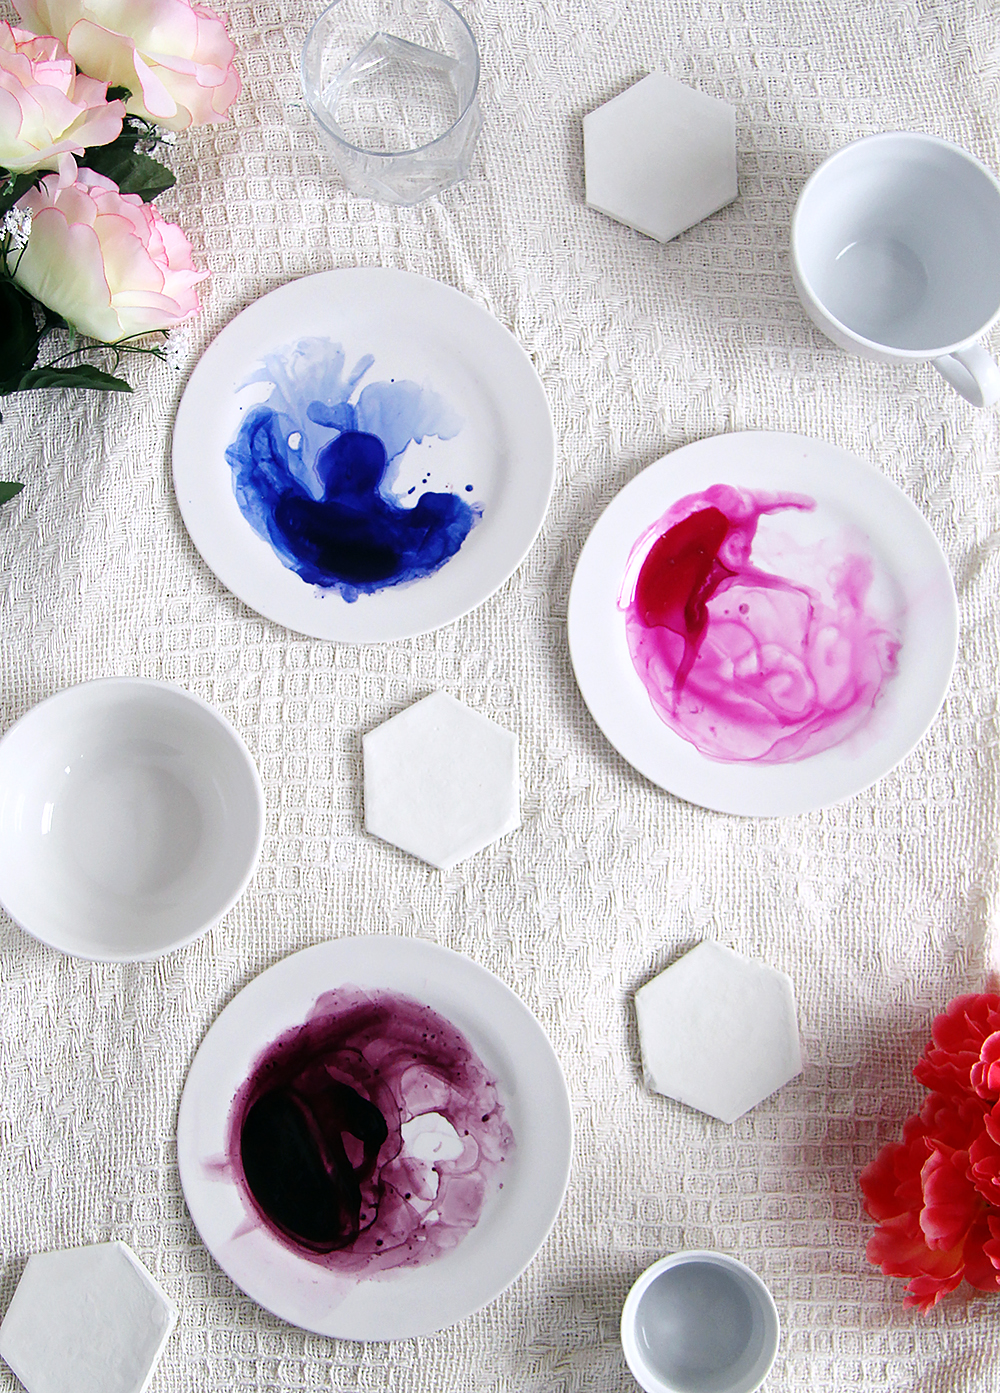
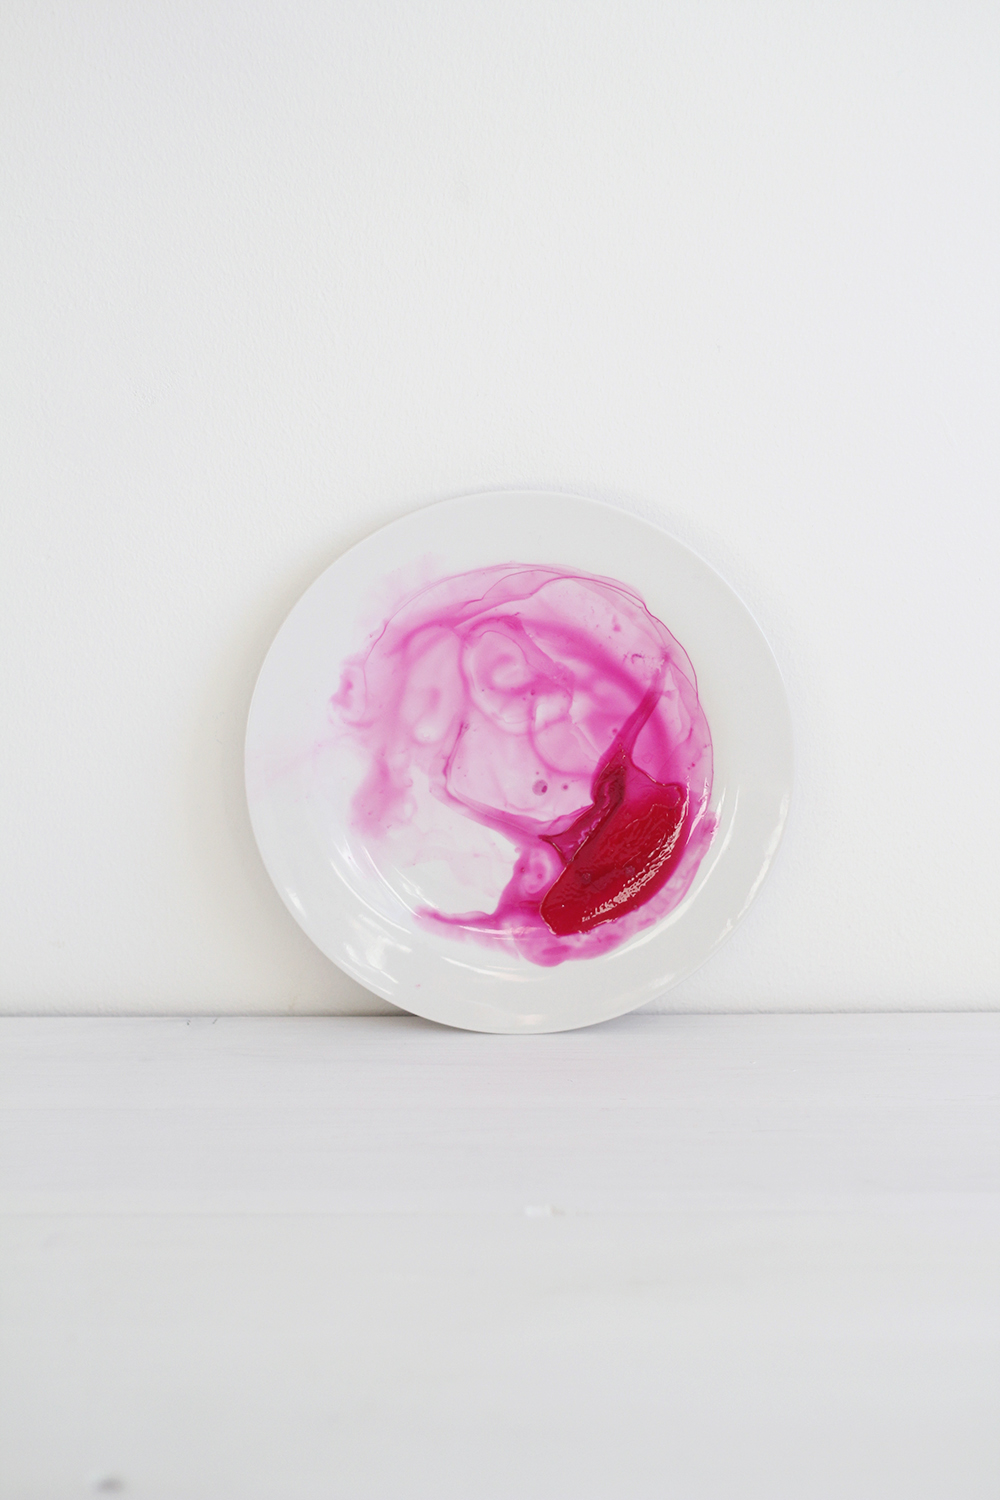
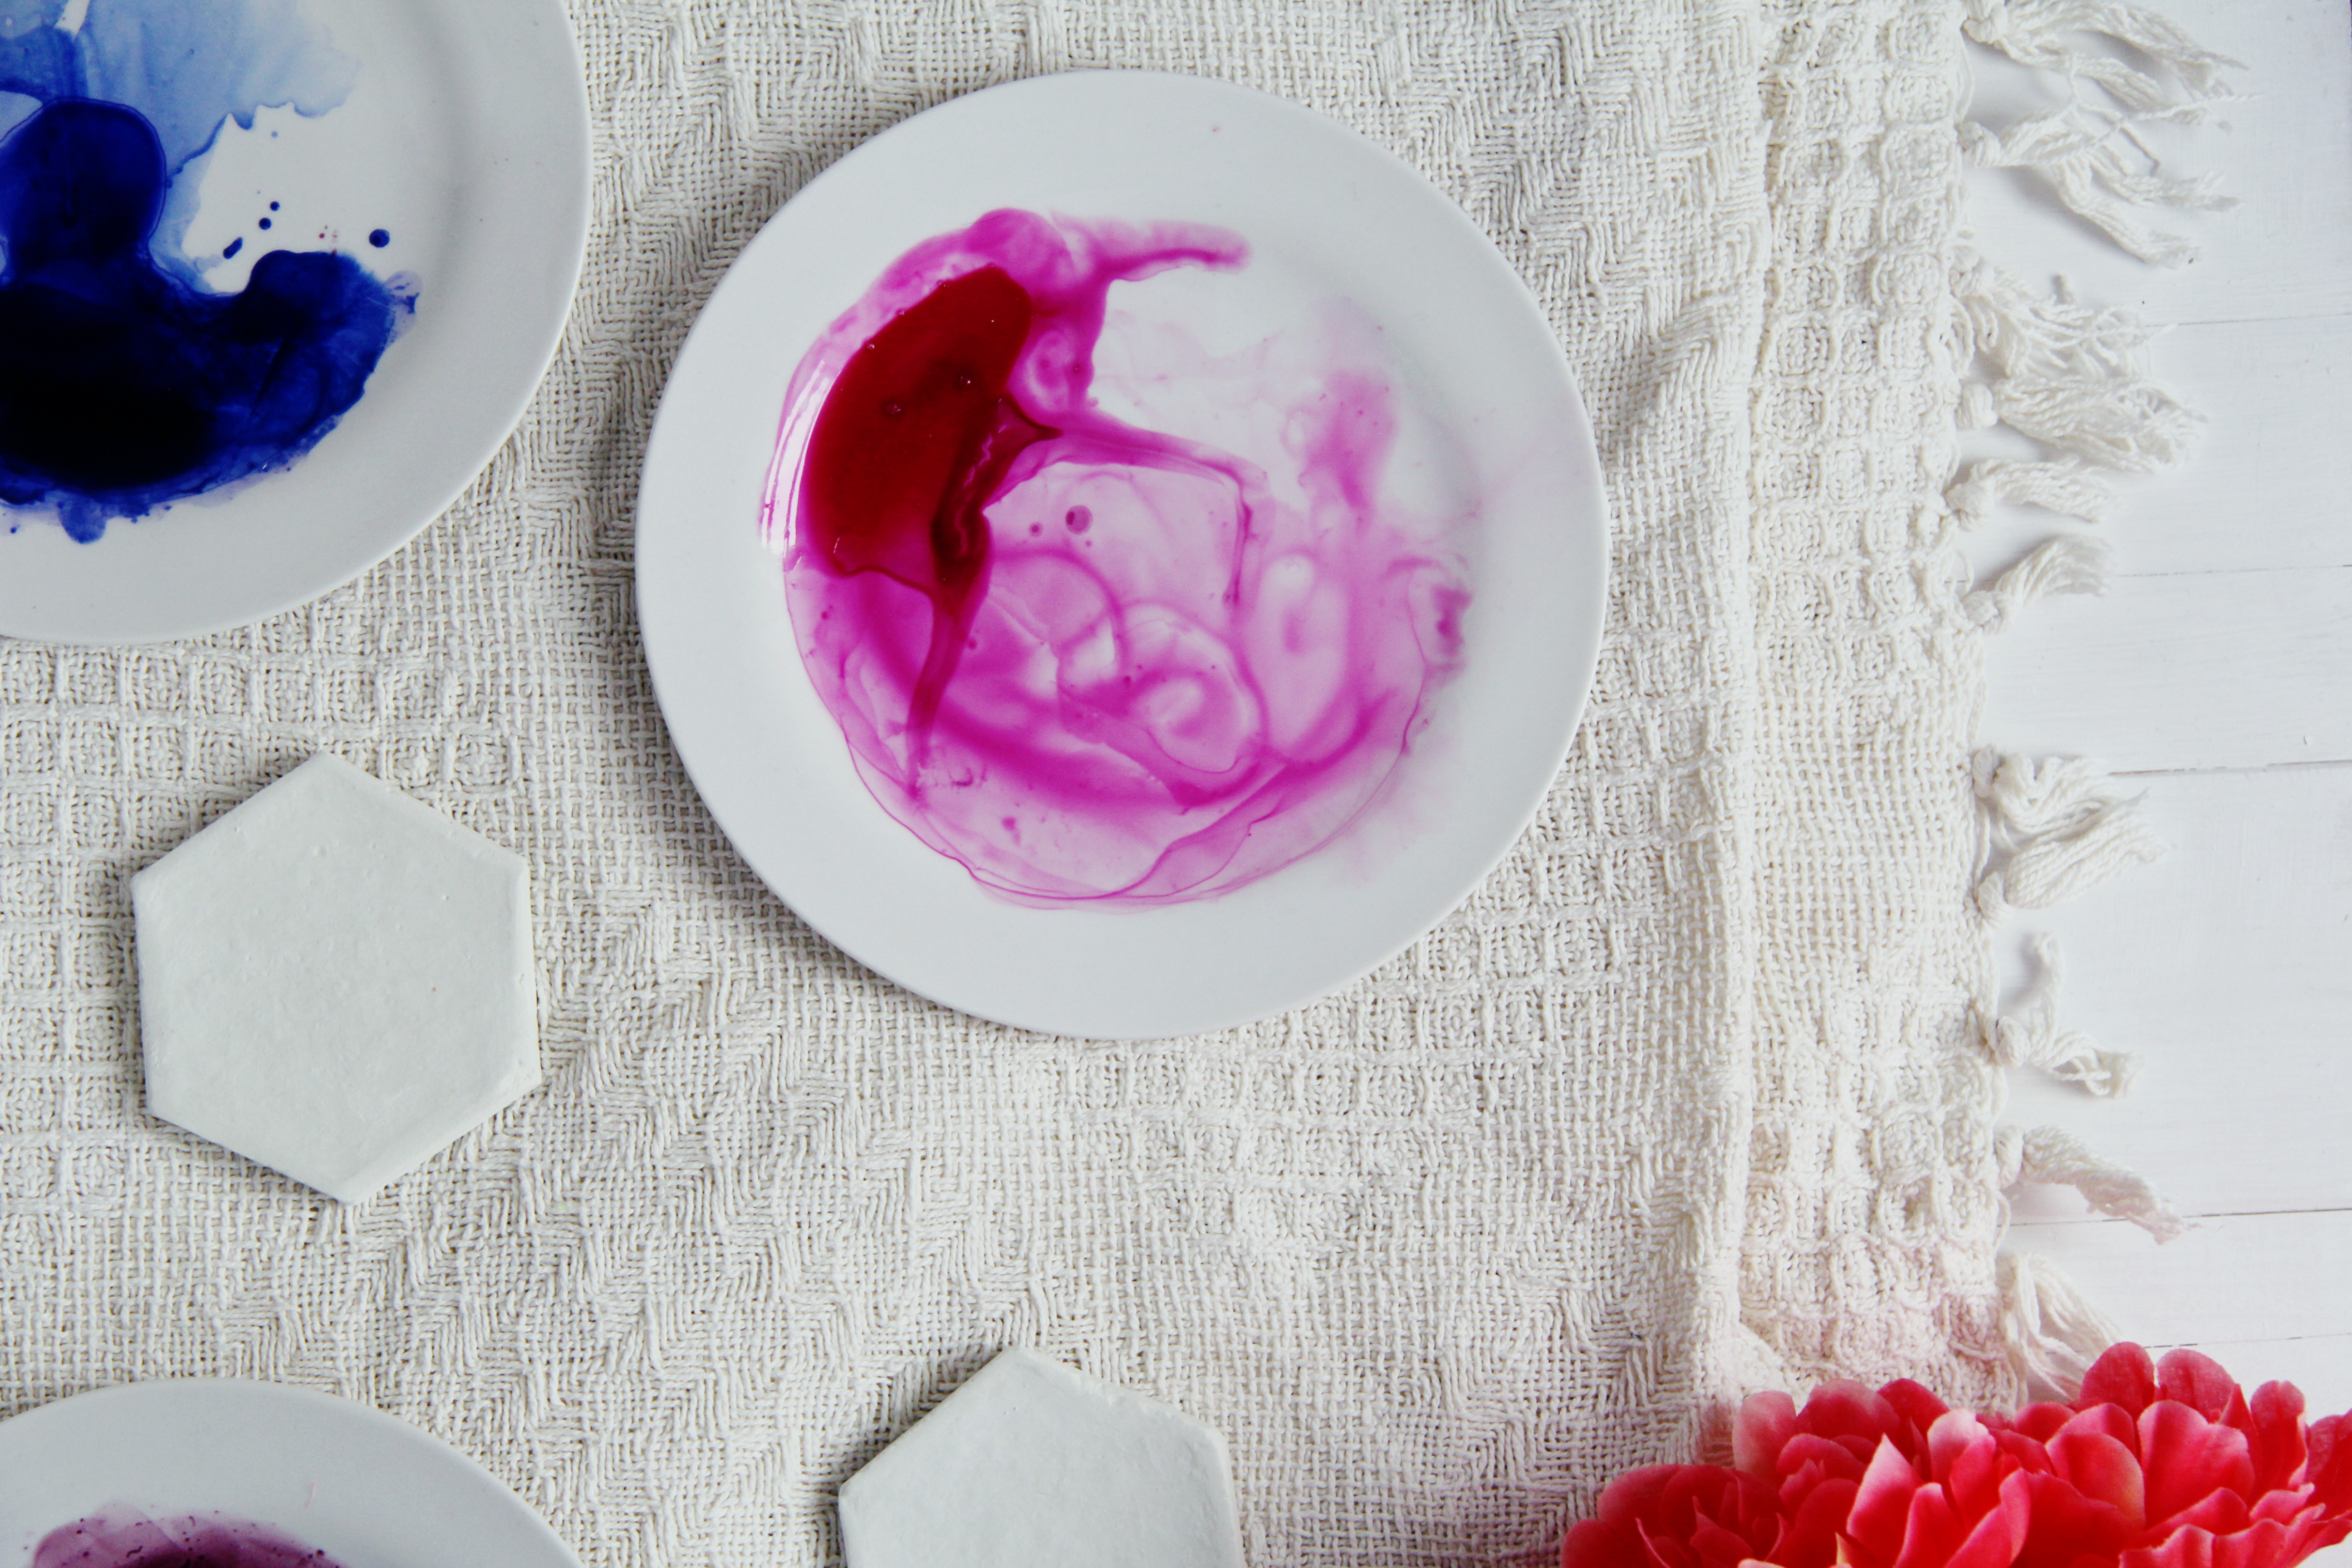
First on my list are these dreamy DIY side plates decorated with a splash of watercolour. Doesn’t the colour look like silk swirling underwater or is that just me? You can make these for the perfect injection of vibrance to your everyday table or for a special occasion. Here’s how:

Materials:
- Plates
- Porcelain paint
- Paint brush
- Water
Instructions:
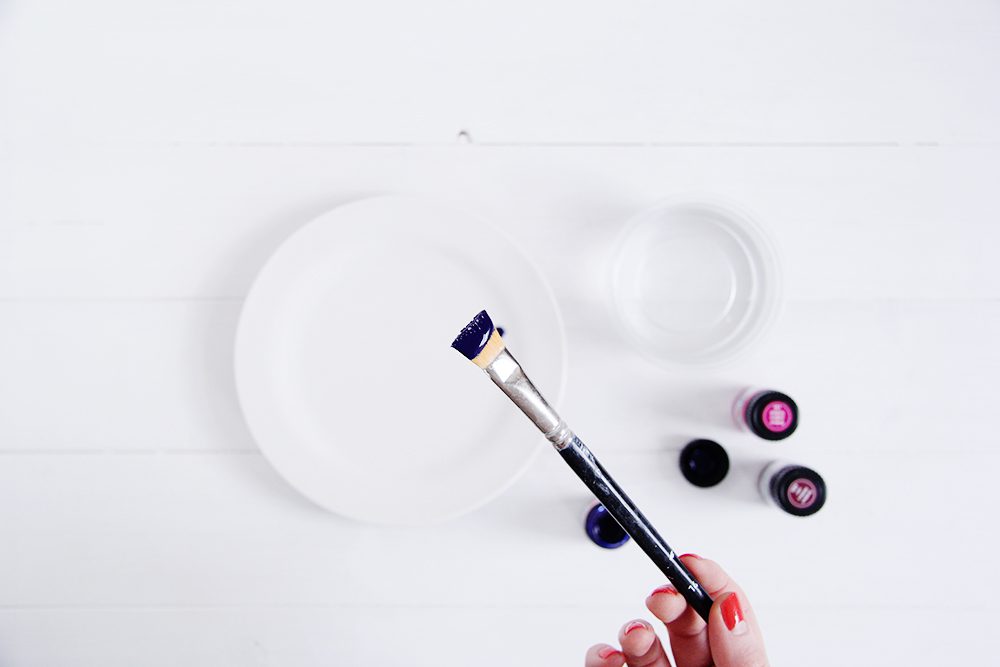
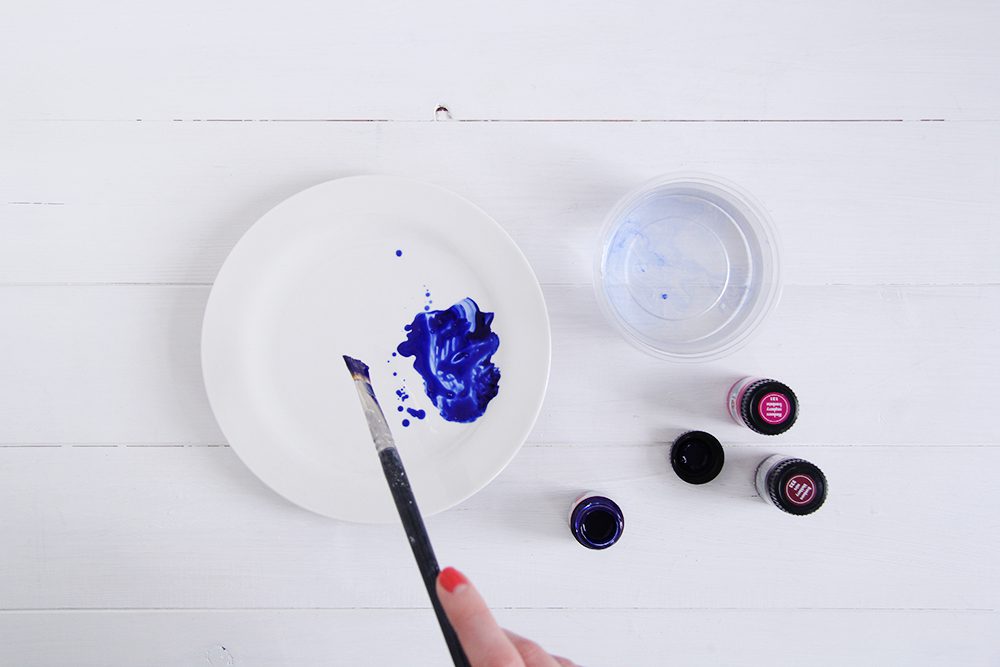
1. Dip your paint brush into the paint. Don’t be scared of it, get a good amount on your brush.
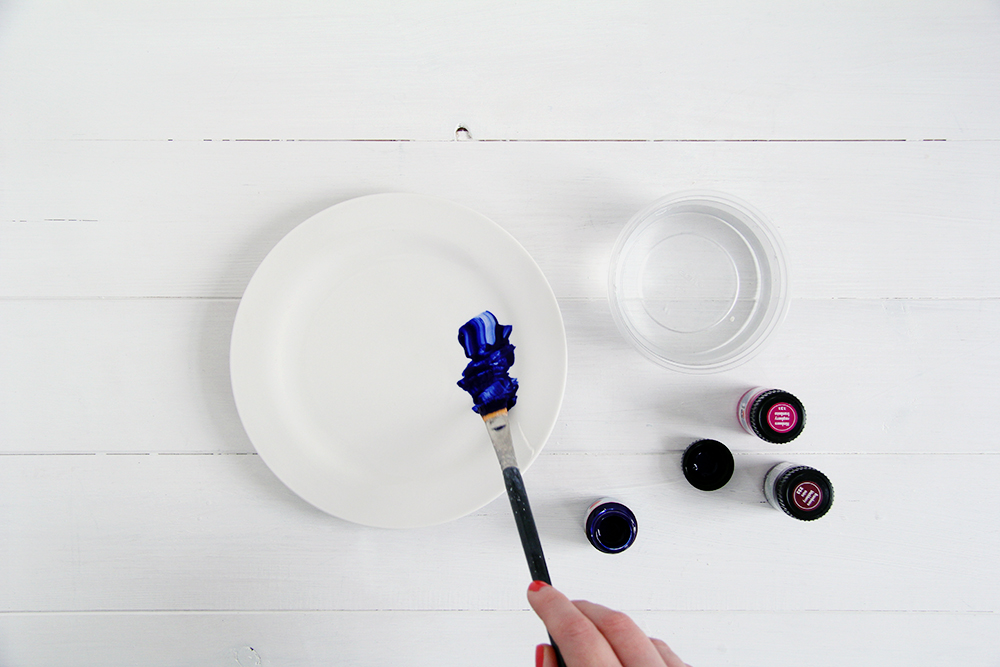
2. Start to dab it onto one quarter of the plate. You’re just getting the paint in the right place for now so don’t worry about how it looks yet.
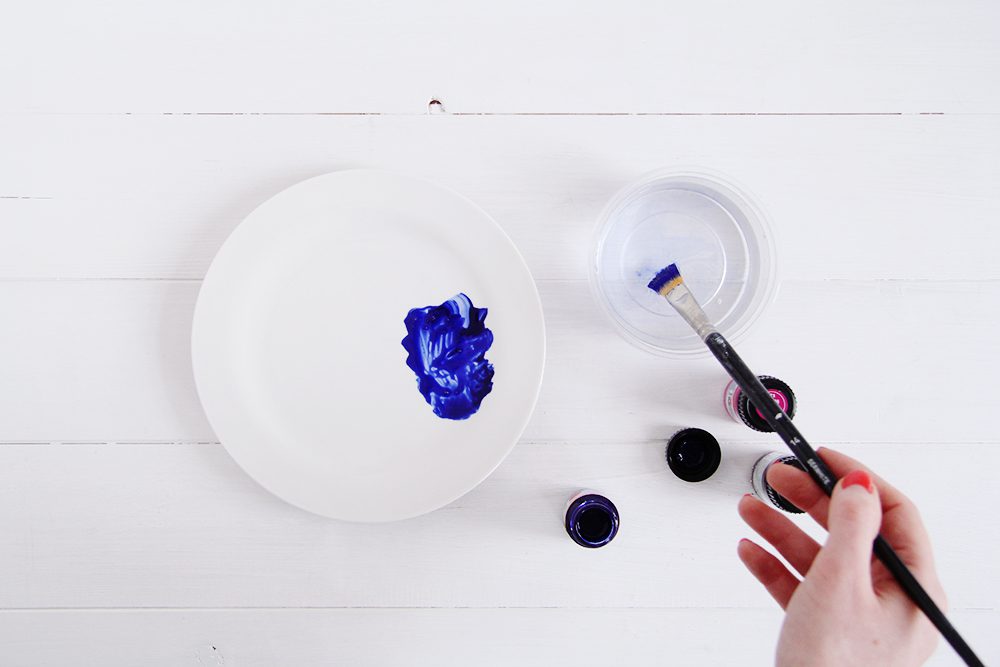
3. Once you have a good amount of paint on the plate dip your brush into the water and start to drip it onto the edge of the paint towards the empty space.
4. Keep adding more water until the paint starts to thin at the edge and begins to run into the rest of the plate.
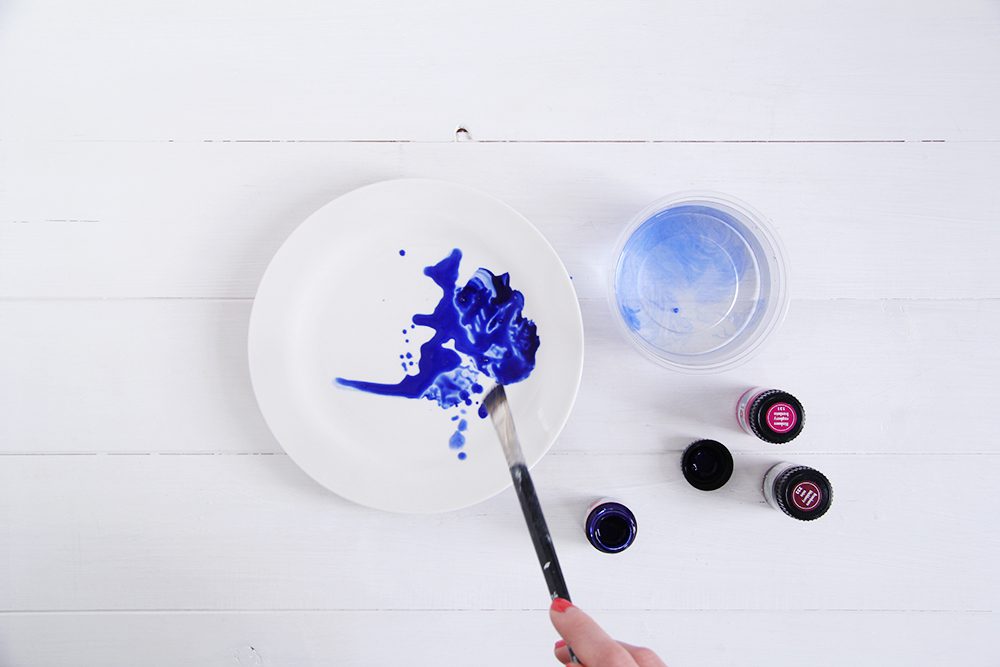
5. Tilt the plate so that the paint runs around it in an organic pattern.
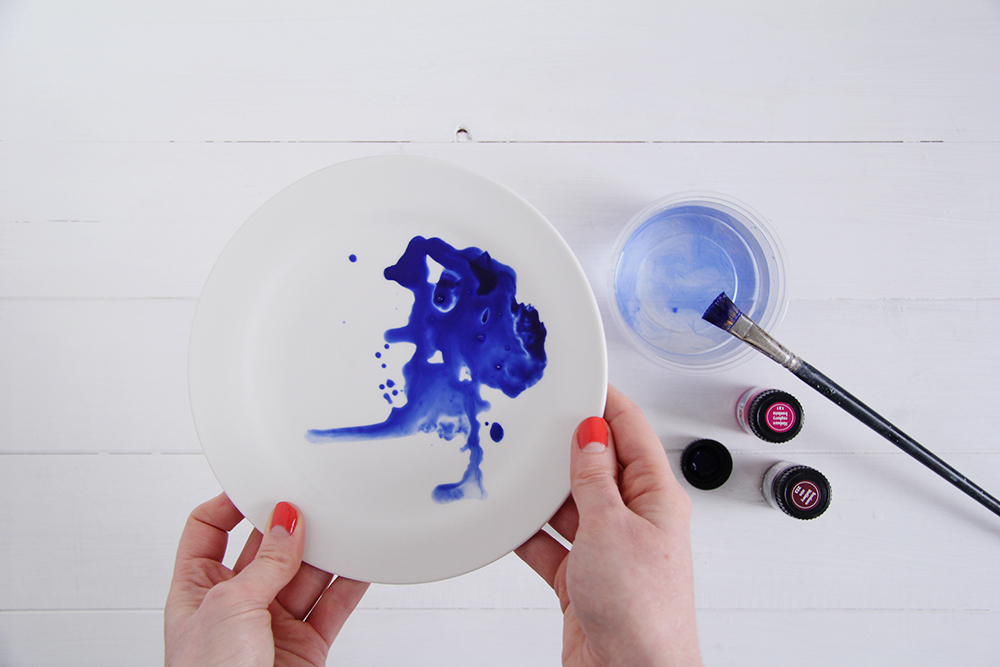
6. Add more water and tilt the plate again. Make sure to let the paint run back to the original section of the plate so that there is a heavy build up at one point. Keep the plate propped up so that the paint naturally runs back to this point.
7. Leave the paint to dry for 10 minutes and then tilt it around again. Repeat this step until you’re happy with the design. Tilt the paint so that it runs back to the darkest point and leave to dry overnight.
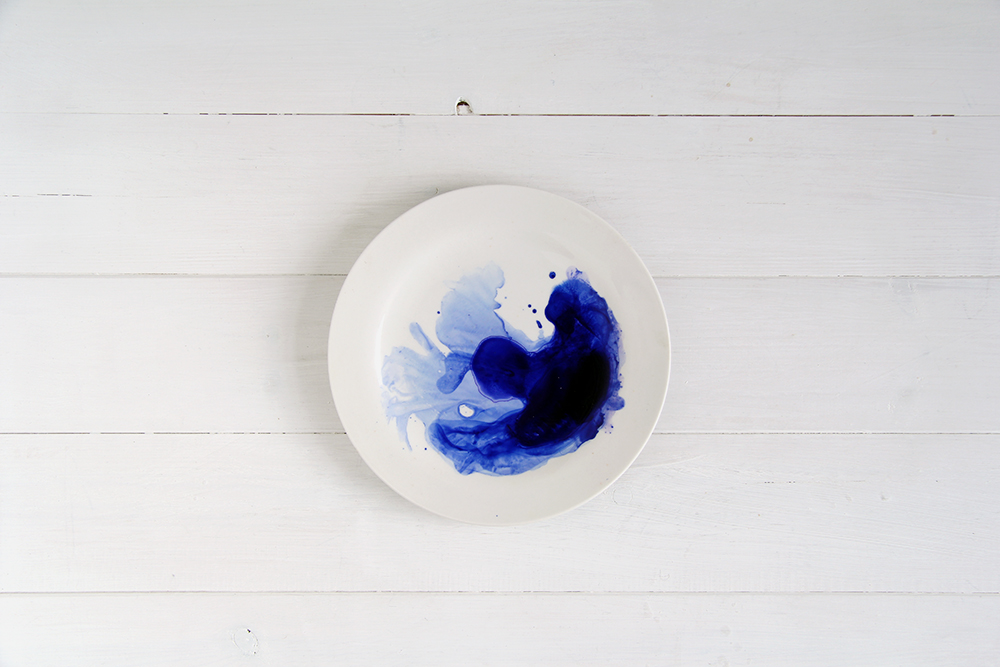
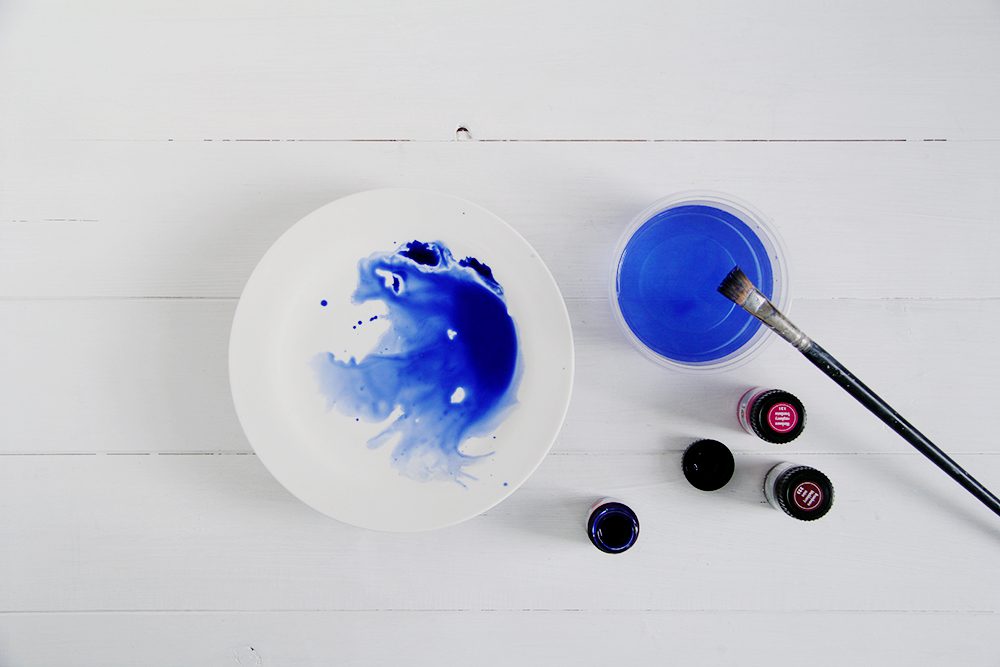
8. Once dried I baked the plate on a low heat for 45 minutes. Usually when you’re using these paints you wouldn’t need to take this step but because we used a lot of water I wanted to make sure no one ended up with a blue bread roll…
Give your plates a quick wash and you’re ready to lay the table!


Oh my gosh, I love this so much!! I can’t believe how easy this is to do! I think it would be great for me to put my jewelry on or even do it with a flat dish for my perfumes! Ah, can’t wait to try this!!
What an awesome tutorial! Definitely keeping this in my back pocket :)
Neha // http://nehasharmaphoto.com/blog
OMG! I did not even think of using it as a ring dish. Totally stealing your idea and doing that now :)
I love love love this idea, but I can see it completely messing with my mind. Are you SURE it’s not going to come off??
Ahhhhh
Beanie
hahaha! You know, I’m still not completely used to it myself. Service with a confusing mind game :$ Make sure you’ve got good quality porcelain paint and you’ll be fine :)
Love the idea, It’s going to be fun to play with this idea and make some fun design like dripping or splatter.
What a great idea! So cute!
Those are the ugliest things I’ve ever seen. Why would you want to eat off of that? It looks like a 5 year old got into a jar of paint.
This is potentially one of the most unessecarily unkind comments I’ve read in a long time. If you don’t find them pleasing don’t make them. It’s a simple solution. I don’t even read this blog, I came across the idea on Pinterest. I couldn’t not say something though! Please try to learn some manners, or at the very least Tact!!
I agree with you. There was no need for such a rude comment.
You wrote exactly what I was thinking!!! I will never understand some people and their need to hurt others!!??!!
PLEASE! If you can’t say anything nice, don’t say anything at all! We all know that beauty is in the eye of the beholder.
I agree, at first glance, I thought, someone forgot to clean up their Easter egg dye.
Totally unnecessary comment! Rude too. My Mom always told me “if you can’t say something nice then say nothing”.
Oh my goodness – these are so amazingly beautiful. I need to make them now!
These are beautiful! Did you end up with a chunk of paint on your finished plate or was it relatively smooth?
thougth it ‘s April fools. who would spoil her paltes that way. toooooo ugly.
usualy i love your diy…
I realize that this is a year later, but your comment really bothered me. If this isn’t your stye it’s fine, but put a little sunshine in your day and keep the negative comments to yourself.
Yeah… What she said
This is great! Just one (maybe stupid) question… Were did you bake them? Traditional or special oven? I just have my traditional (kitchen) oven LOL!
These are so rad! What a cool idea. I never realised that customising plates etc was so easy!
So stunning! And I love the colours you’ve chosen. I can absolutely visualise a gorgeous table setting with these.
SUPER stylish make Fran! I love a good dinner party x
I’ve used glass paints for years for wine glasses, plates, etc. Usually the paint instructions say “not for use with food.” I have painted, successfully, the BACKSIDE of clear glass plates. These can be used for food. Even though they can be run through the dishwasher, I recommend hand washing, and do not let the painted plates soak. I always bake them in the oven for added durability. Put them on a cookie sheet into a COLD oven and heat with the oven. Once cure time is up, turn off oven & let items cool with the oven. Baking instructions will be on the paint bottles. This is great fun, and you can be SO creative!! I’ve painted some really cool small glass salad plates & used them for cocktail plates. But, remember, that painting the BACKSIDE of glass plates will be REVERSED from the topside!! Have fun…….
Just thought of this……….another option would be to paint white plates and use as chargers, and use clear glass plates (Ikea) on top as dinner plates.
Thanks so much for your suggestions Rita! Loving the idea of using a glass plate over the top instead. I bet you can make some amazing designs using glass crockery and glass paints. Might have to try it out!! :)
At what temperature do you bake these? This sounds like a fun project.
Are You inspired by this?: http://www.antywieszak.pl/diy-podstawka-na-bizuterie/
I think these are awesome! I think if you’re concerned about the durability/safety of the paint you could always try the same effect at a paint your own pottery studio? I’ve never tried either but maybe an option? These look way better than my boyfriend’s ugly rooster plates hehe :P
I tried following your tutorial for this today. Only frustration and disappointment ensued. I don’t know how you “tilted” yours to get the pattern you did. When I tried with water, per your instructions, the paint always resettled into the “dark spot” but instead of having whole areas that were covered, I ended up with the paint consolidating to a line and running back to the original space, leaving me with a spiderweb effect. I also tried using the porcelain paint dilution stuff, but only got rivulets that looked like a rainy window pane with one dark spot with a very obvious border.
These look beautiful! I love the colours too.
Quick question – did you just use normal plates? Or specific ones that you can paint on?
Awesome idea! Love the colors. This painted ceramic dinnerware is very beautiful. But the combination of ceramic – match pewter dinnerware is elegant. Dinnerwares made from ceramic are the best option for special occasions.
I followed your tutorial exactly and these turned out horrible! I was so sad. Spider vein-y, bubbles, just a mess. Any tips?
Hey Zoe!
I’m so sad to hear that. I was thinking about this and I think I might have a couple of solutions. Perhaps you could dilute the paint a little less to help it stick to the plate as you wash it over. You could also help to spread the paint with a wet paint brush to make sure it goes everywhere you want it to. Hope it works better next time!
Fran
This is so beautiful project! It could work as refreshing of old porcelain plates too! I have some old plain white plates that will really look gorgeous with the watercolor effect. And also this would be a good recycling project for my daughters. Thank you for the inspiration!
This is beautiful!!
Love this!
Art in motion<3
http://www.theonlymeem.blogspot.co.uk
Thank you for sharing this lovely idea.
Do you know if the porcelain paint is actually scratch free?
This is gorgeous, but is the colour safe to eat in the plates? Thanks
Hey Ari!
The Maribu paints I link to in the materials are food safe. I don’t think any other porcelain paints are though. One reader suggested making them into trinket dishes instead if you are worried about food safety.
x
Oh great thanks for the info :-)
Amazing design and really new pattern too. I was looking for same pattern and i found the same at Houseofthings in the design of Nishita Dinnerware
What’s up mates, its fantastic article concerning educationand fully
defined, keep it up all the time.
Hello,
Love, love these plates. But sadly only in theory. i have gone thru almost an entire set of porcelain paint 8 diffrent colors and full jars. I have tried more paint, less paint more water, less water, thinner no thinner, swirl slowly swirl faster. Dripping water at edge of paint to dripping in water in middle of paint to make a thicker stream run. And nothing has worked. It just looks awful and makes a mess. whats even sadder is that apparently kids and this is a begginer project cause its labeled as that. So i feel even more like a total failure. i have searched the web, YouTube, to see if i can find a video of someone anyone doing this technique and so far nothing. a million videos on how to do it with nail polish but you can’t use the plates. Please help me.