• Home
  • Blog
  • About
  • Collaborate
    • Media Kit
  • We Make
    • Bloglovin
    • Facebook
    • Instagram
    • Pinterest
    • Twitter
    • YouTube

Fall For DIY

  • DIY
  • Interiors
    • Planters
    • Paper
    • embroidery
    • Drinks
  • Blogging
    • Photography
    • Instagram
  • fashion
    • Jewellery
    • Accessories
  • Inspiration
    • Round Up
    • 50 DIYs
  • Office
    • Free Printables
    • Organize
  • Party
    • Christmas
    • Halloween

Our favourite things in your inbox every month!

DIY Minimal Statement Resin Bracelet

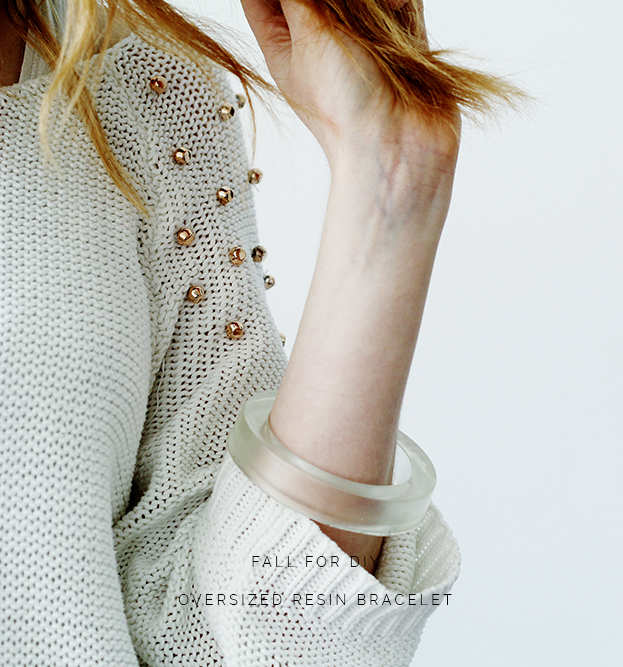
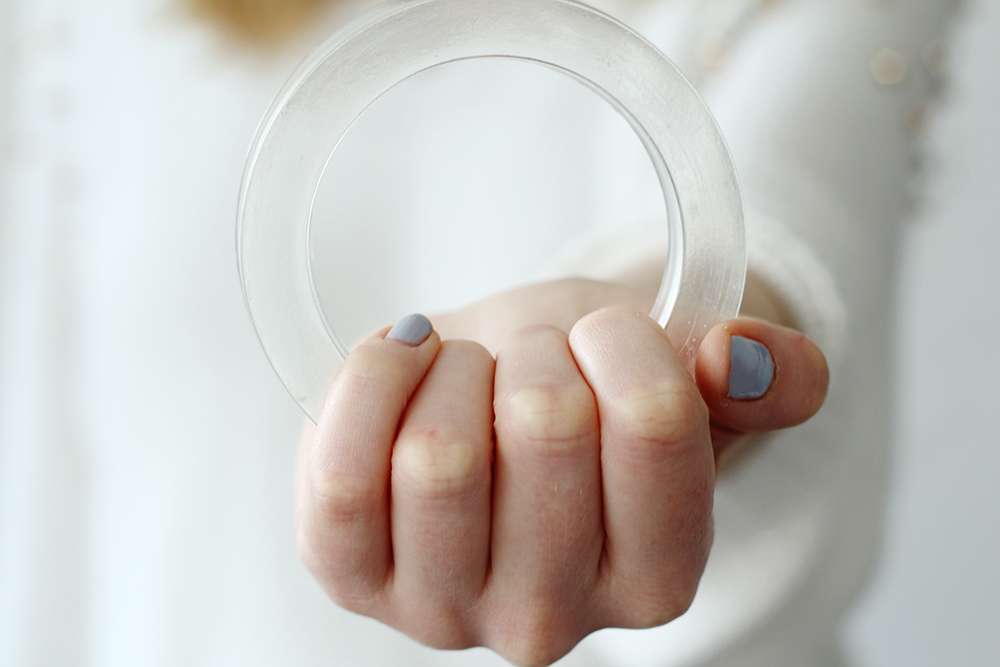
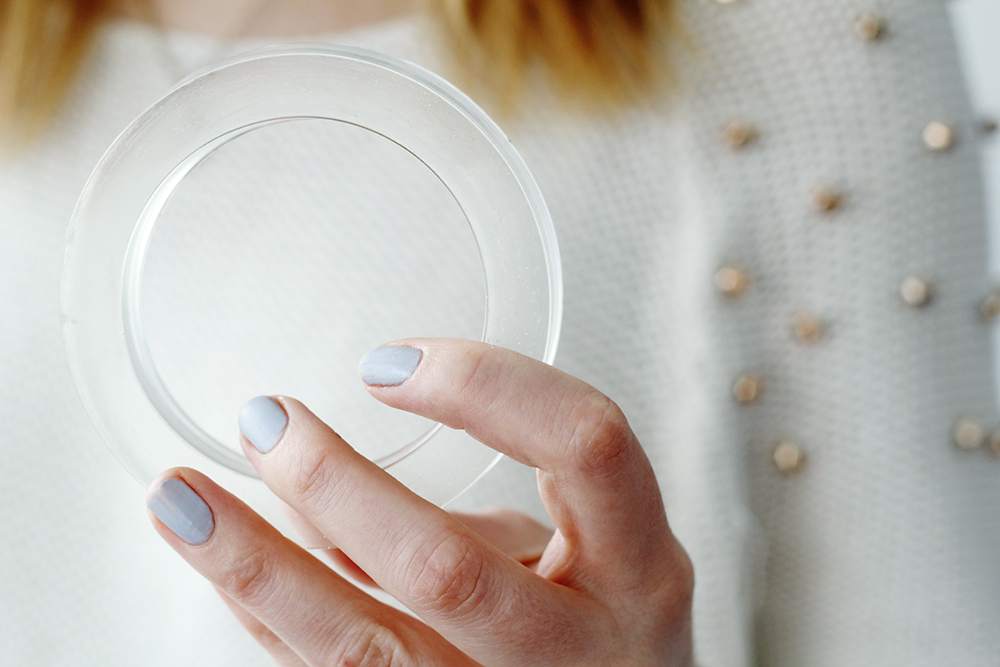
Minimal statement jewellery is big news this year with oversized pearls, nudes and transparent materials being used in contrast with the glitz and glam of precious stones and sparkly details. This clean and bold bracelet oozes understated charm and is a perfect addition to springs minimal trends.
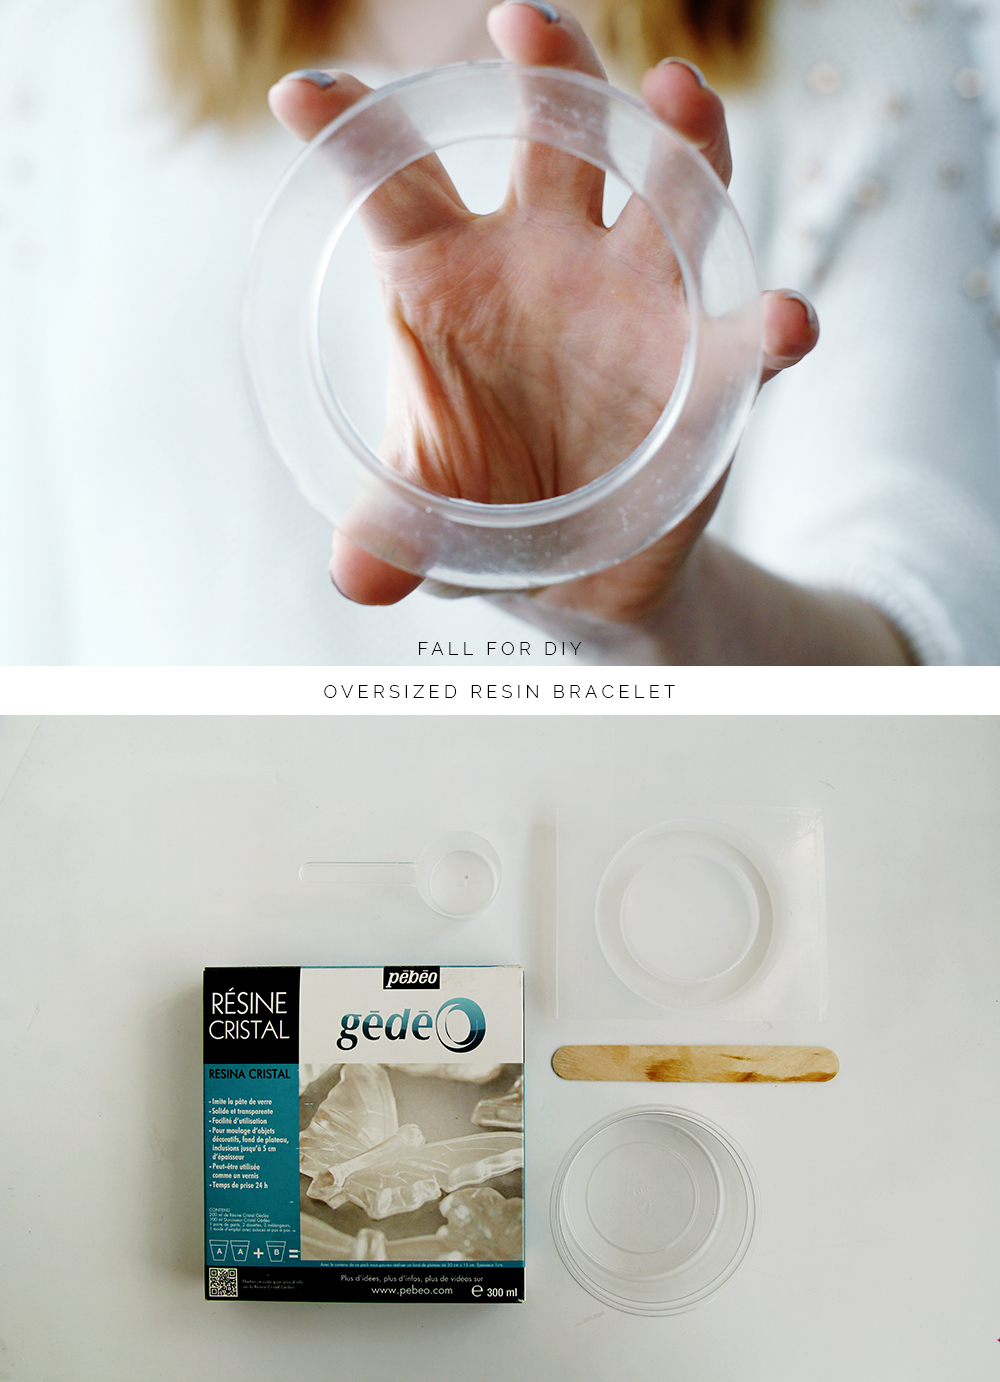
Materials:

Resin

Container for mixing

Bracelet Mould

Instructions:

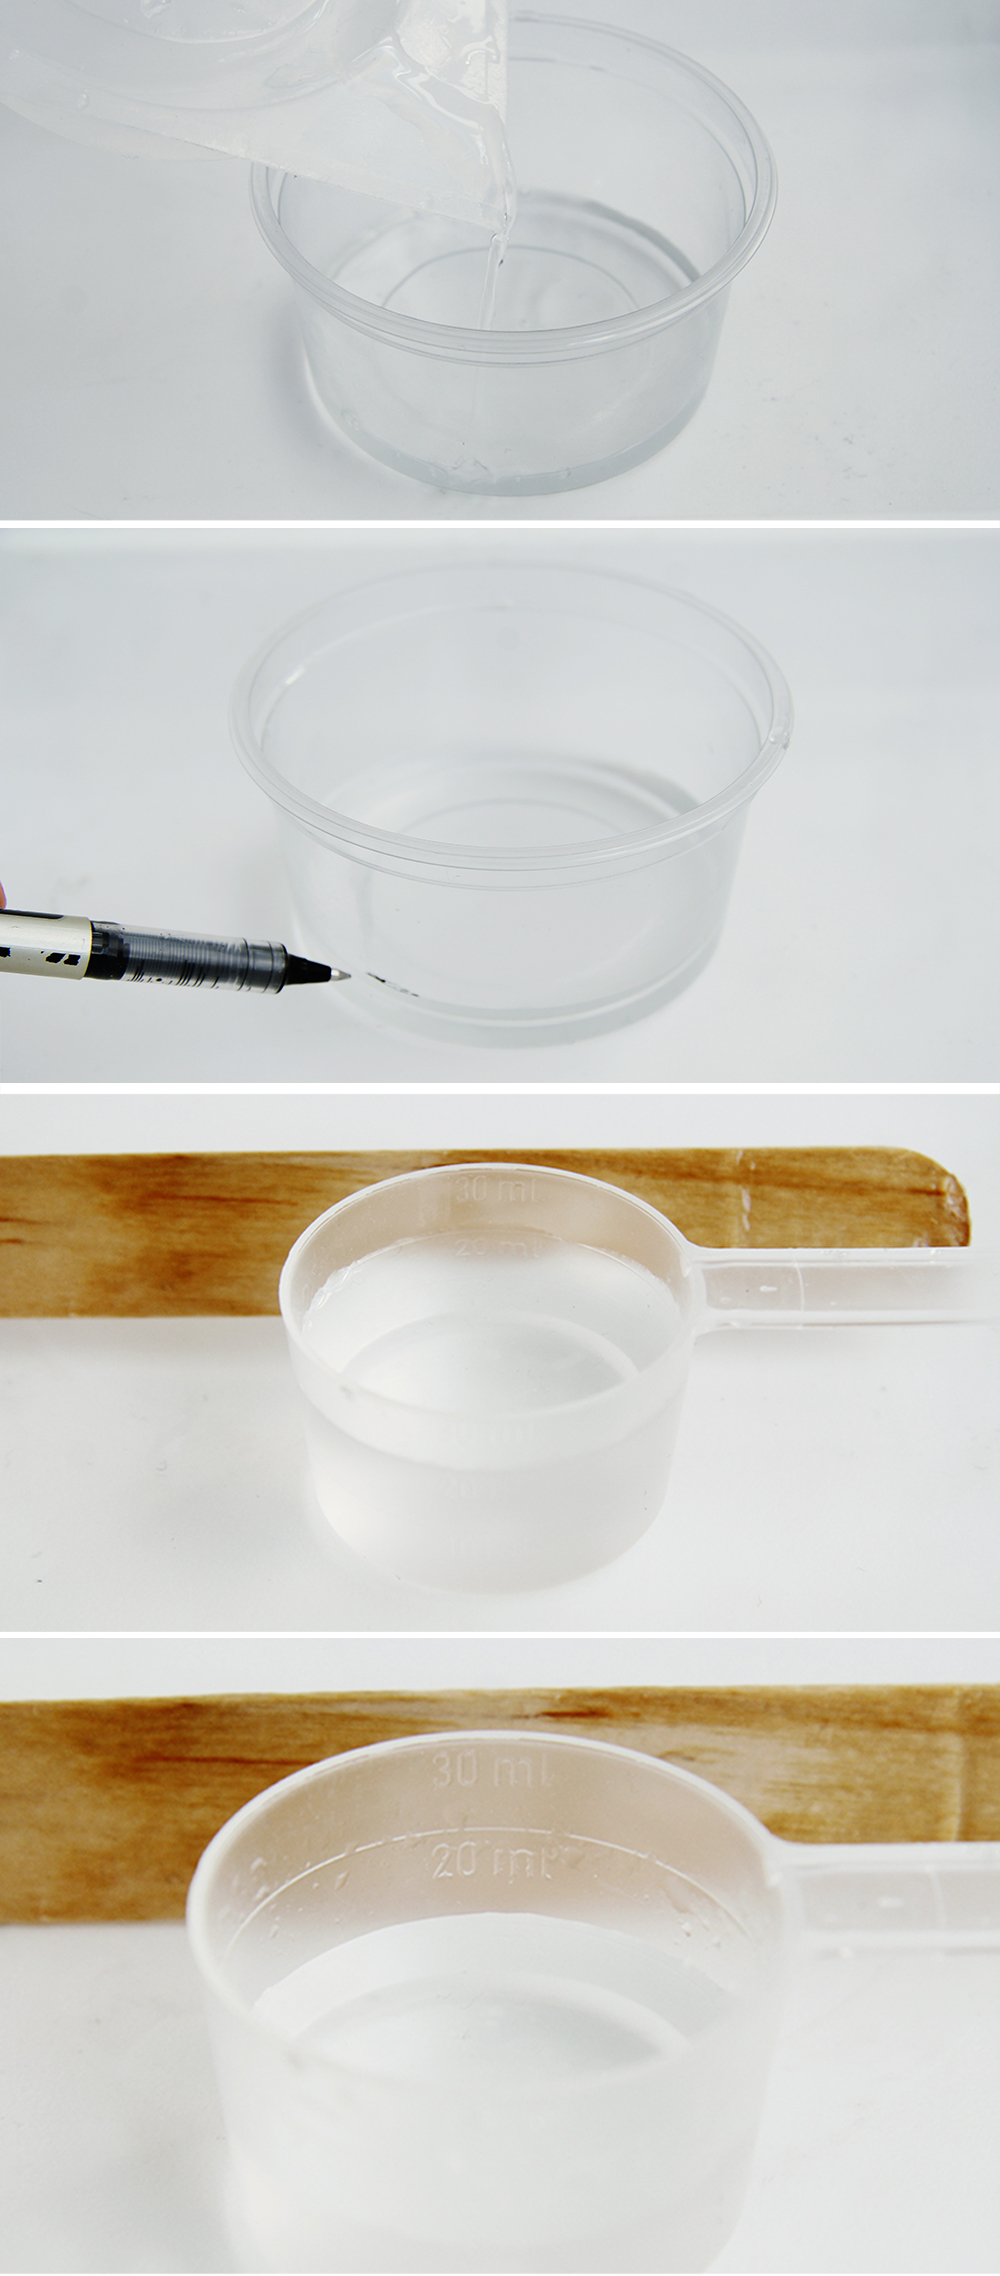
1. Firstly measure how much resin you need by filling your mould with water and pouring it into your mixing container. Then mark a line at the water height. You will need to make at least this much resin.

2. Mix your resin and catalyst together following the instructions. I needed 2 parts resin to 1 part hardener. Easy enough!

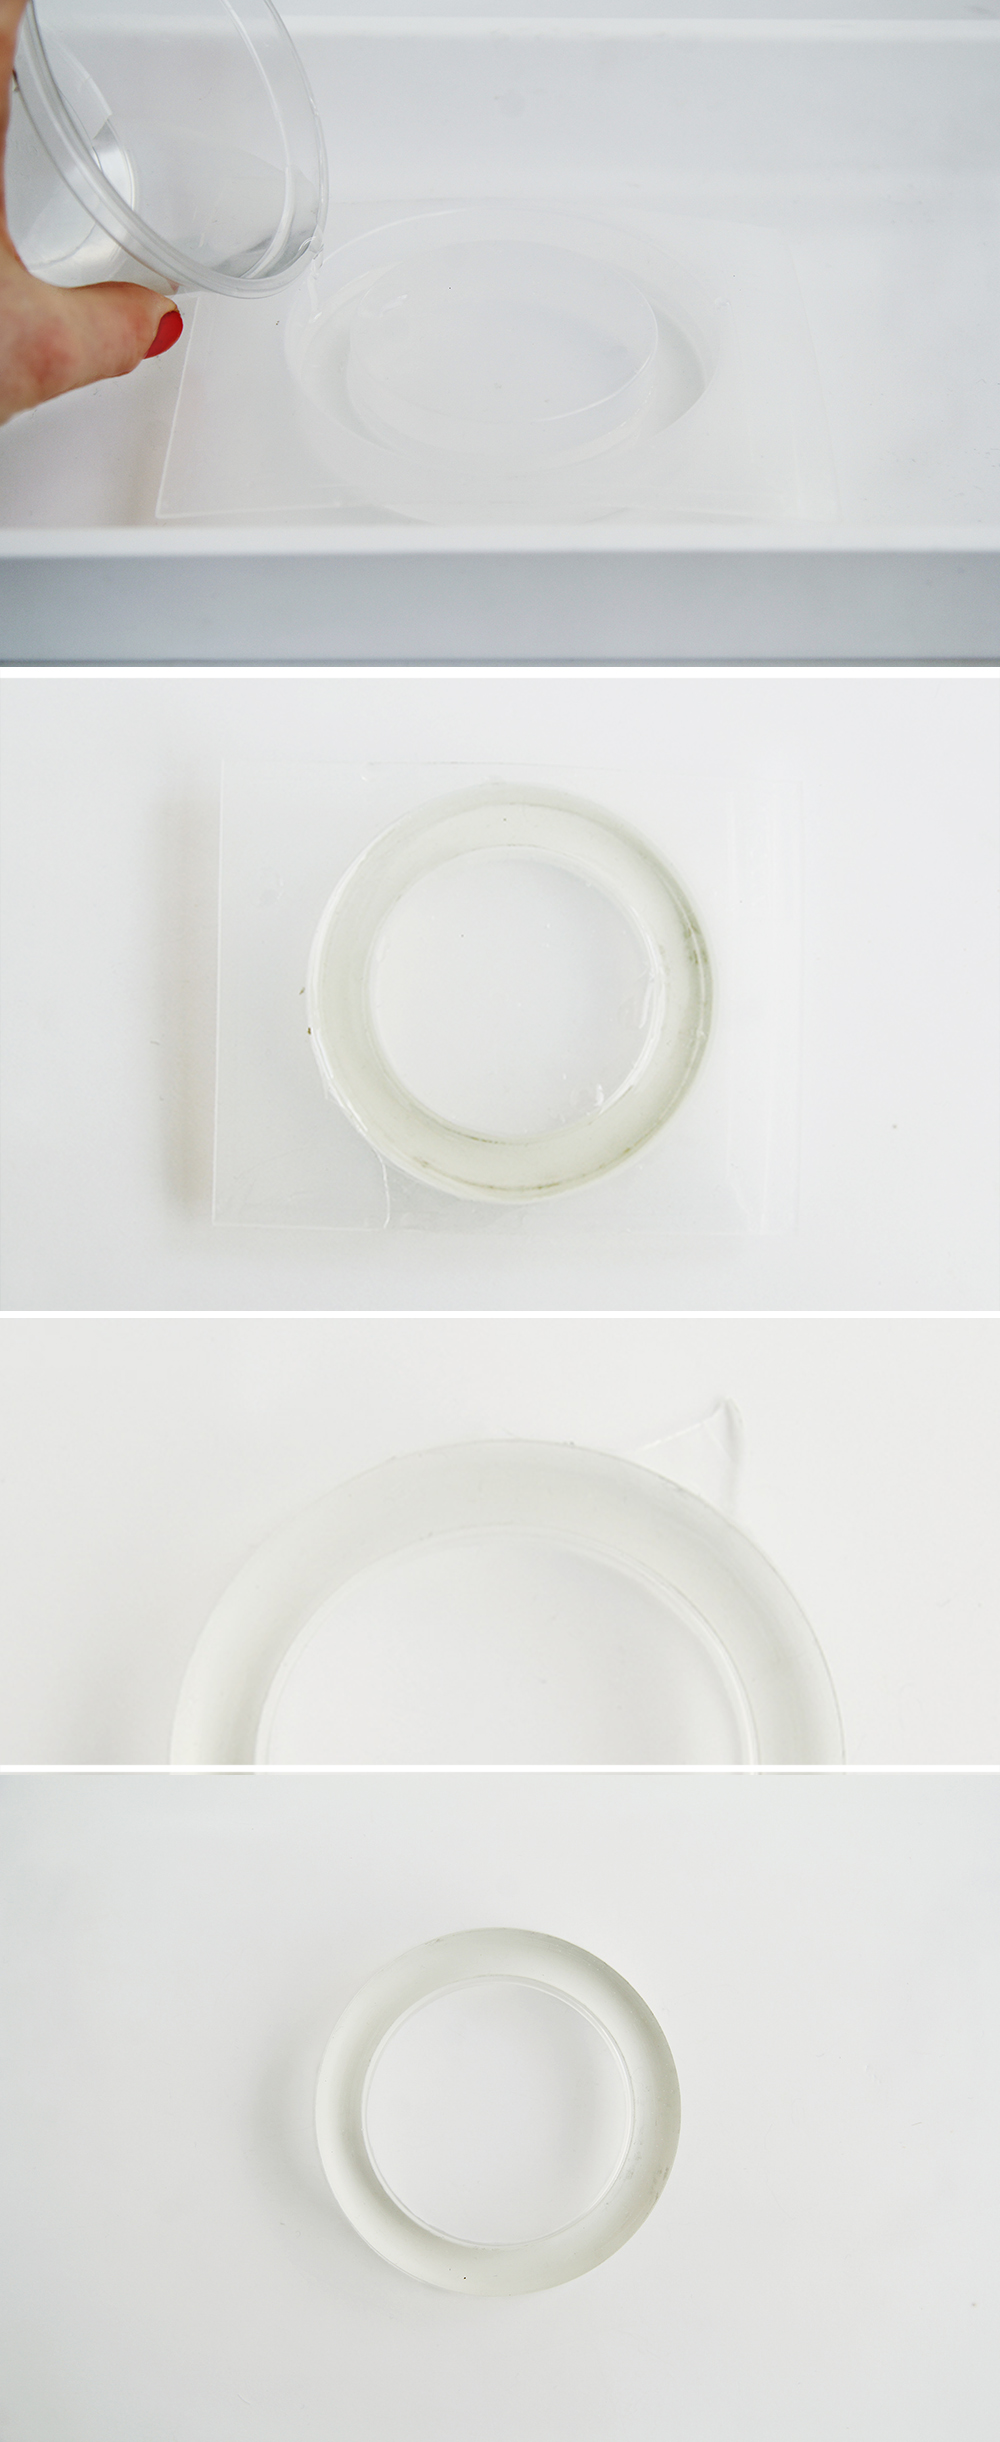
3. Mix thoroughly for at least a minute and pour into the mould.

4. Leave for 48 hours to harden fully. Try to resist touching the resin during this time to check it’s status. You’ll get those finger prints everywhere!

5. Remove the resin from the mould and cut off any excess with a sharp craft knife. Make sure there are no sharp bits sticking out.

6. That’s it!

IMG_6574 IMG_6575

Related

DIY// Jewellery

« DIY Raw Semi Precious Stone & Silver Pendant Necklace
How to Make a DIY Silicone Mould »

Comments

  1. Amanda @ A Hammer & Heels says

    April 24, 2014 at 6:53 pm

    Genius idea! I’ve been looking to make a transparent cuff bracelet and wasn’t sure on the best material. I’m definitely trying this :) So glad I found your blog– every DIY is amazing!

    hammerandheels.blogspot.com

    • fran says

      April 26, 2014 at 5:12 pm

      Thank you so much! I’m so glad you like it. Resin is amazing to work with, but it gets a bit messy and sticky so be prepared! ;)

  2. Tan of Squirrelly Minds says

    April 25, 2014 at 4:16 pm

    Girl, you make the COOLEST things!

    • fran says

      April 26, 2014 at 5:08 pm

      Thank you! You’re ace.

  3. Amy @ Homey Oh My! says

    April 26, 2014 at 8:18 pm

    This is stunning! Amazing how simple it is to make yet it’s SO gorgeous!

    • fran says

      April 28, 2014 at 7:06 am

      You’re too lovely! Thank you Amy x

  4. Beth says

    April 29, 2014 at 2:52 am

    Wow! This is really cool! I’d love to have this bracelet.

  5. Samantha says

    May 2, 2014 at 6:01 pm

    Love it!. Love the simplicity. Love that you did not gop it up with glitter or other rot. Very Michael Kors.

    • fran says

      May 7, 2014 at 2:55 pm

      Thanks Samantha!

      I had someone say almost exactly the opposite (in a not so complimentary manner) so it’s really nice to hear such a lovely compliment. Thank you x

  6. Carlos Saraiva says

    July 14, 2014 at 12:25 pm

    Thank you very much for the tutorial, i will try to do a diamond shaped gem, for a lamp…

    • fran says

      July 15, 2014 at 2:13 pm

      Interesting! Send me a picture of the finished product :)

  7. Ana says

    July 23, 2014 at 1:10 am

    Awesome! Love this! Where did you get the mold?

    • fran says

      July 27, 2014 at 5:56 pm

      Hey Ana,

      There’s a link to the mold in the post (it is on the materials list) Sorry it’s not more obvious! xx

  8. karen millen dresses says

    March 20, 2019 at 11:26 am

    Great post here. Lots of information, I look forward to reading more from you.
    karen millen dresses http://www.ferriagamo.com

  9. DRAGON says

    June 3, 2020 at 12:34 am

    Data processing is her professiongrouplivelihoodoccupationalcoursecareerpositionprofessionalcareersjobtaskareacommunity.

  10. totoforce says

    December 5, 2022 at 6:54 am

    This blog is very beneficial to us. Thank you for writing about it. In this article, some examples help me apply to my daily life. 메이저토토

  11. majornoriter says

    December 5, 2022 at 6:55 am

    Everyone is to blame for sharing particularly amazing posts. It was really worth it. Continue to share more material. 메이저토토사이트

Trackbacks

  1. How to Make a DIY Silicone Mould | Fall For DIY says:
    September 19, 2017 at 11:33 am

    […] 5. Press your object into the silicone to create the mould. You’ll want something with smooth edges that the silicone will peal off easily. This resin bracelet was perfect. […]

Search

About

Preorder My New Book Easter

FESTIVE

Follow

Featured

shop earrings

Partners

Terms & Conditions
Private Policy Statement

DIY

DIY Easy Festive Stars

DIY Easy Christmas Star Decorations made using Card (with templates!)

Easily Add Machine Embroidered patches to Anything and Everything with Skitch

DIY Air Dry Clay Wavy Painted Bowl

Testing the LokLik Cutting Machine to Upcycle Old Clothes

How to Hack Your Bedroom for a Good Night’s Sleep

Folded Paper Christmas Decorations

7 Paper Christmas Decorations You Can Make Today

A Very Merry Christmas – Festive Trends 2023

DIY Bobbin Picture Memory Frame

Why I Replaced my Laminate Flooring with Vinyl (spoiler – because it’s AMAZING!)

A Green Garden Refresh with Durapost Vento Fences

More Posts from this Category

Copyright © 2025 ·Brand New Child Savory · Genesis Framework by StudioPress · WordPress · Log in