I know I’m late to this party, but how good is E-6000 glue?! I first heard about this glue many years ago when a customer to the bead shop was telling me about how she made a sparkly microphone with rhinestones and a tube of E-6000 and I’ve been meaning to pick some up ever since. Well, I finally took the plunge and ordered a tube online. I don’t know if it was the fumes (please open a window when you’re using it) or the sheer power of this glue that made me giddy, but what I did know was I needed a project to use it on.
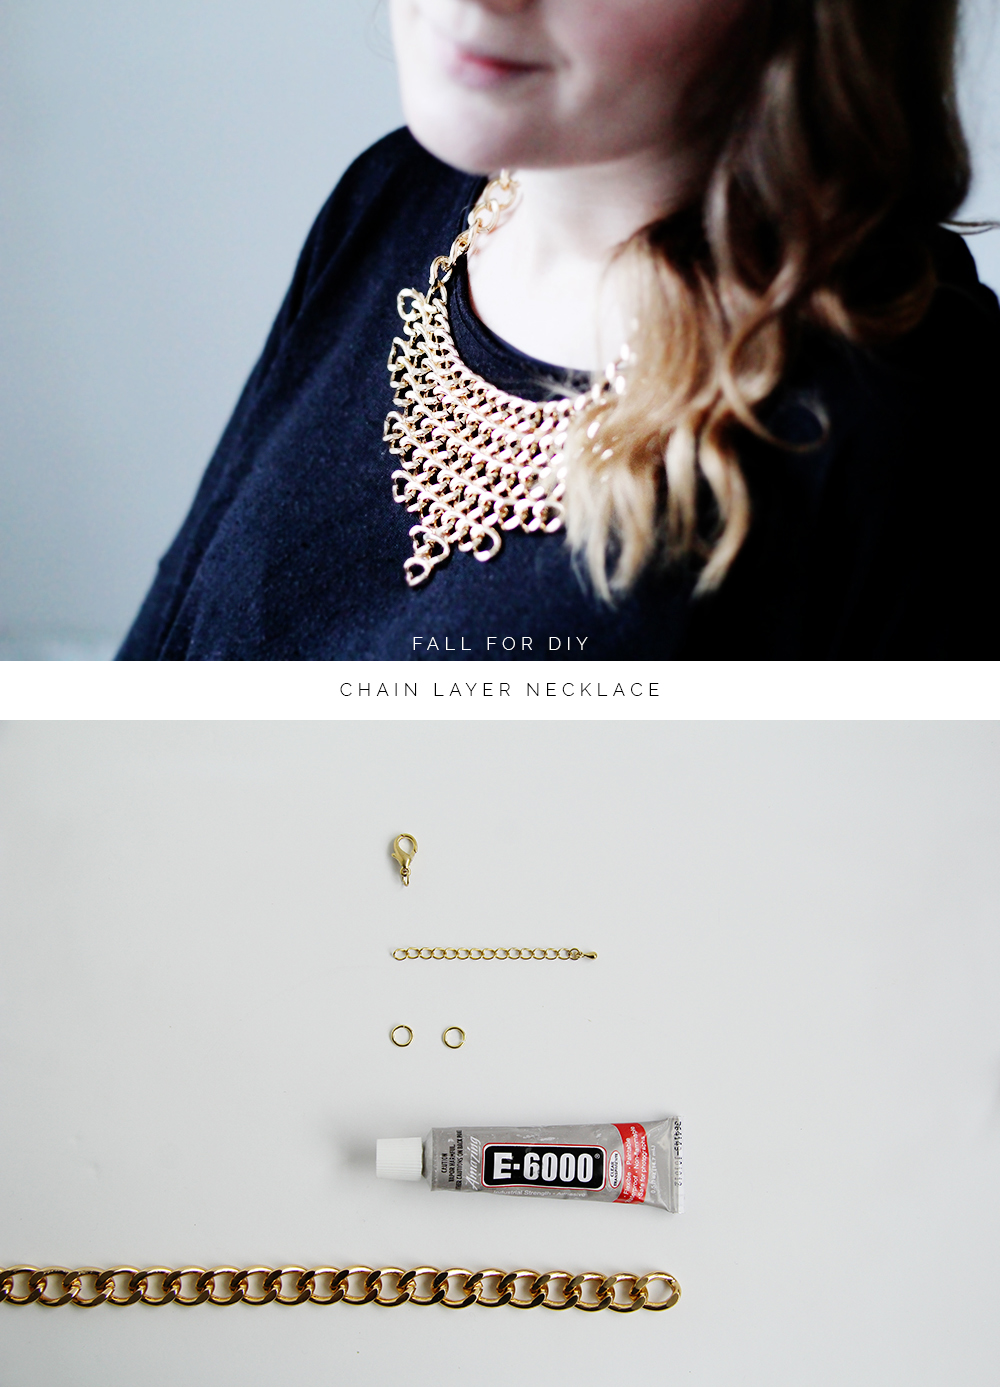
Materials:
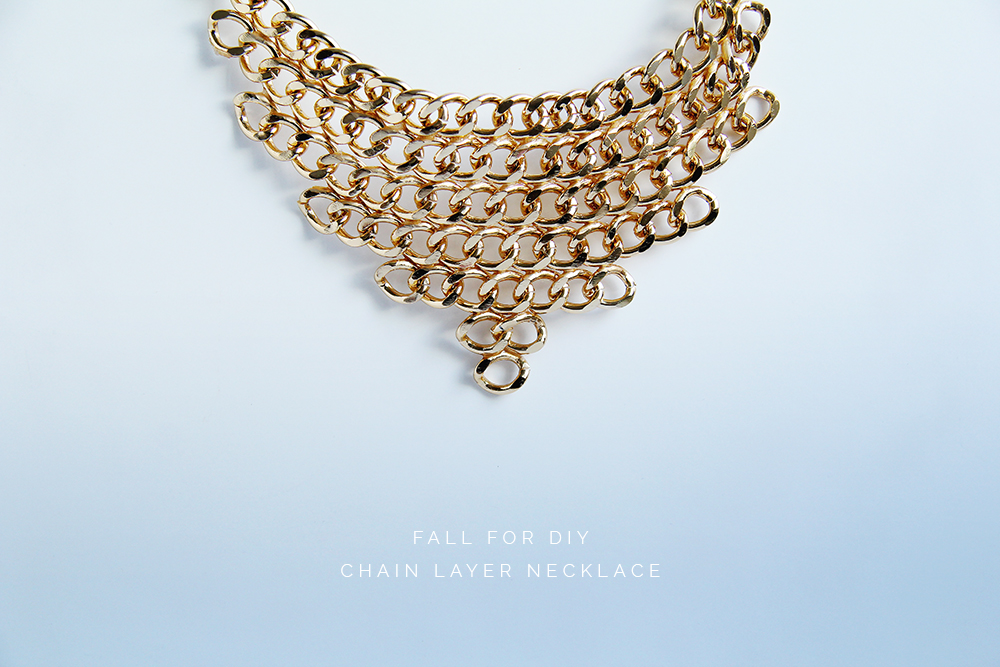
1m Chain
Extension Chain or make your own
Instructions:
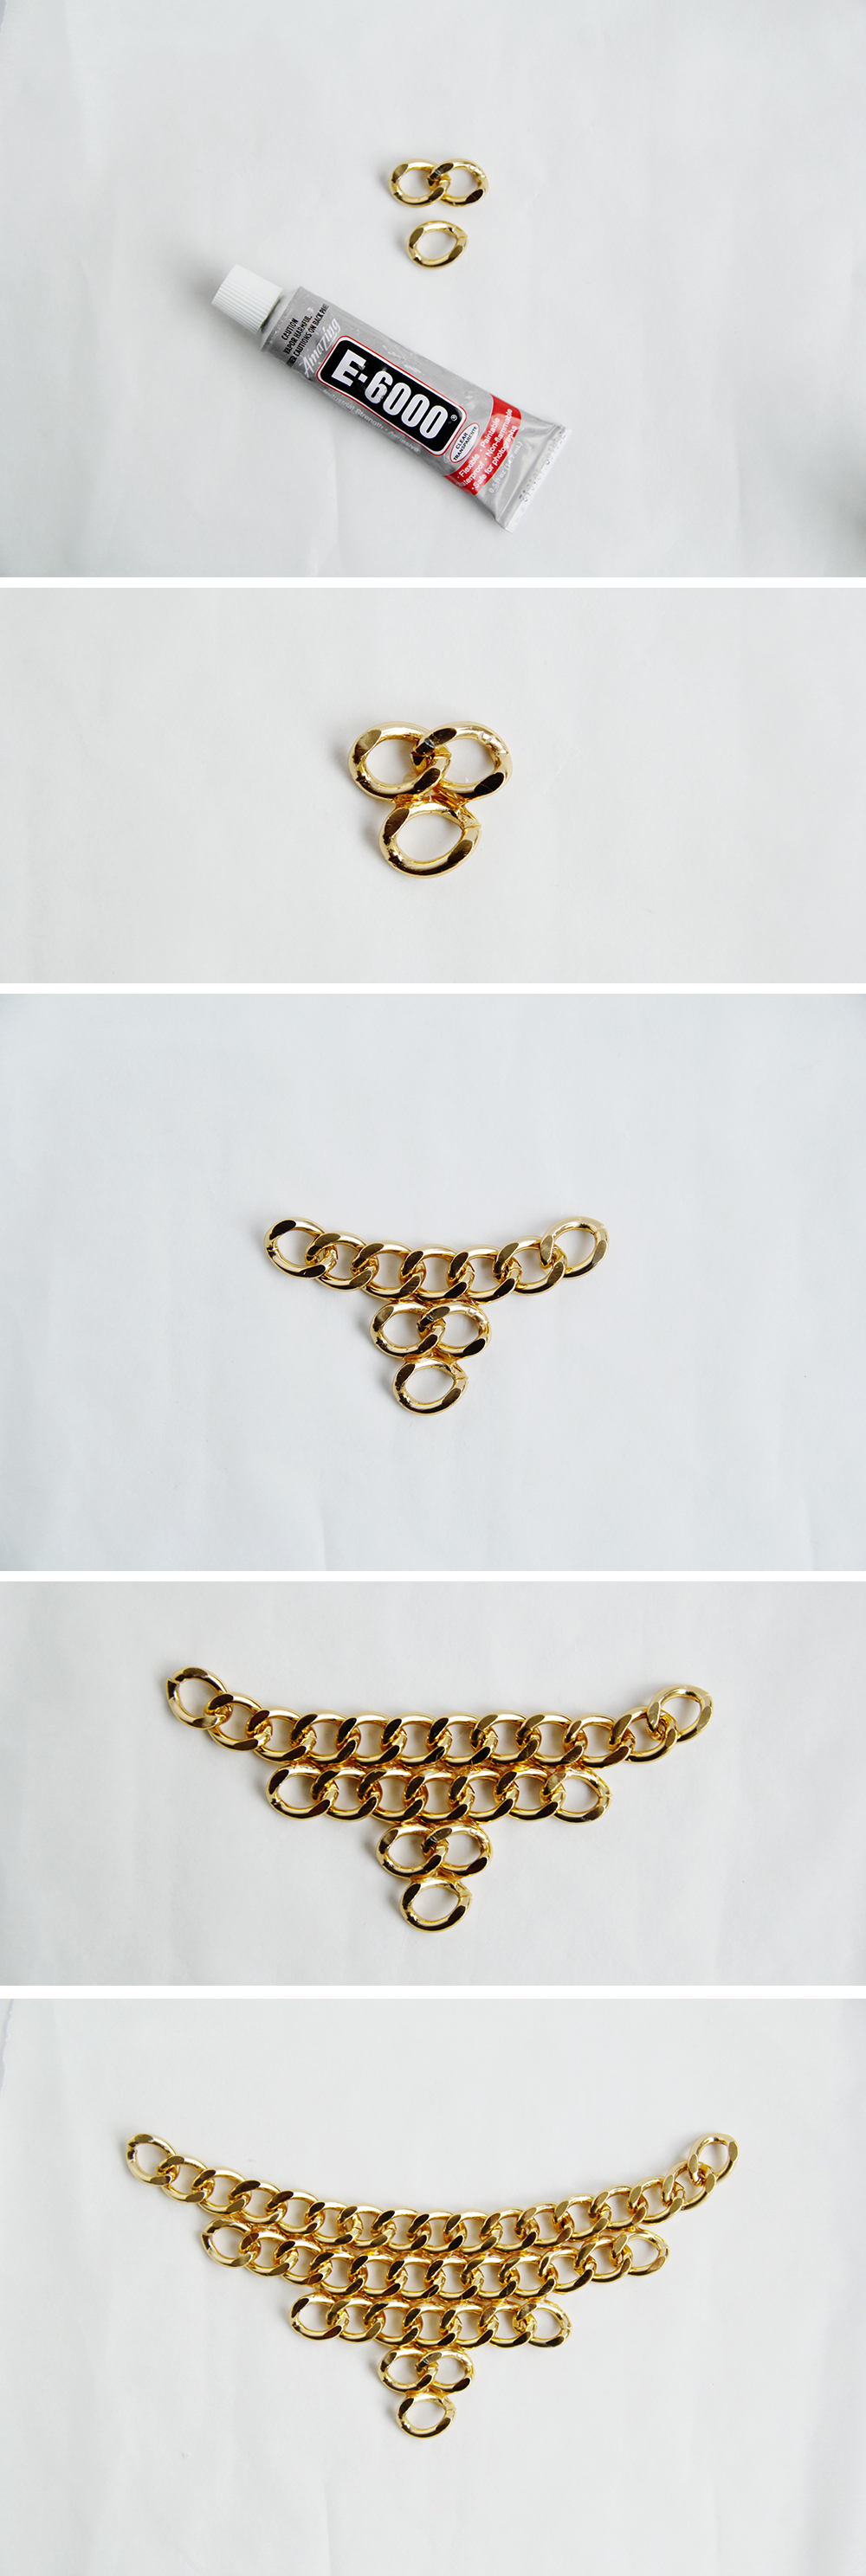
1. Start from the bottom of the necklace. Open one chain link, remove and close again. Do this the same way you would open and close a jump ring. You’ll need two sets of pliers and to ensure you don’t scratch the chain cover the pliers in masking tape (or use nylon covers)
2. Remove another piece of chain that is two links long.
3. Lay them on a sheet of grease proof baking paper. Spread glue along the top of the single chain link and press against the middle of the two chain links.
4. Whilst this is drying remove a length of chain seven links long. Glue the tops of the two link chain and press against the middle of the seven link chain.
5. Continue to repeat these steps with chain lengths 12 links, 17 links and 20 links long.
6. You should now have just the right amount of chain left for the necklace section. Measure this around your neck and add / remove links as is necessary.
7. Find the middle of the chain and position this ready to glue at the middle of your chain layers. An easy way to do this is to line up the middle with the very first link link of chain we worked with.
8. Run your glue along the top of the last layer of chain and glue the final piece on.
9 Attach extension chain and a clasp using jump rings
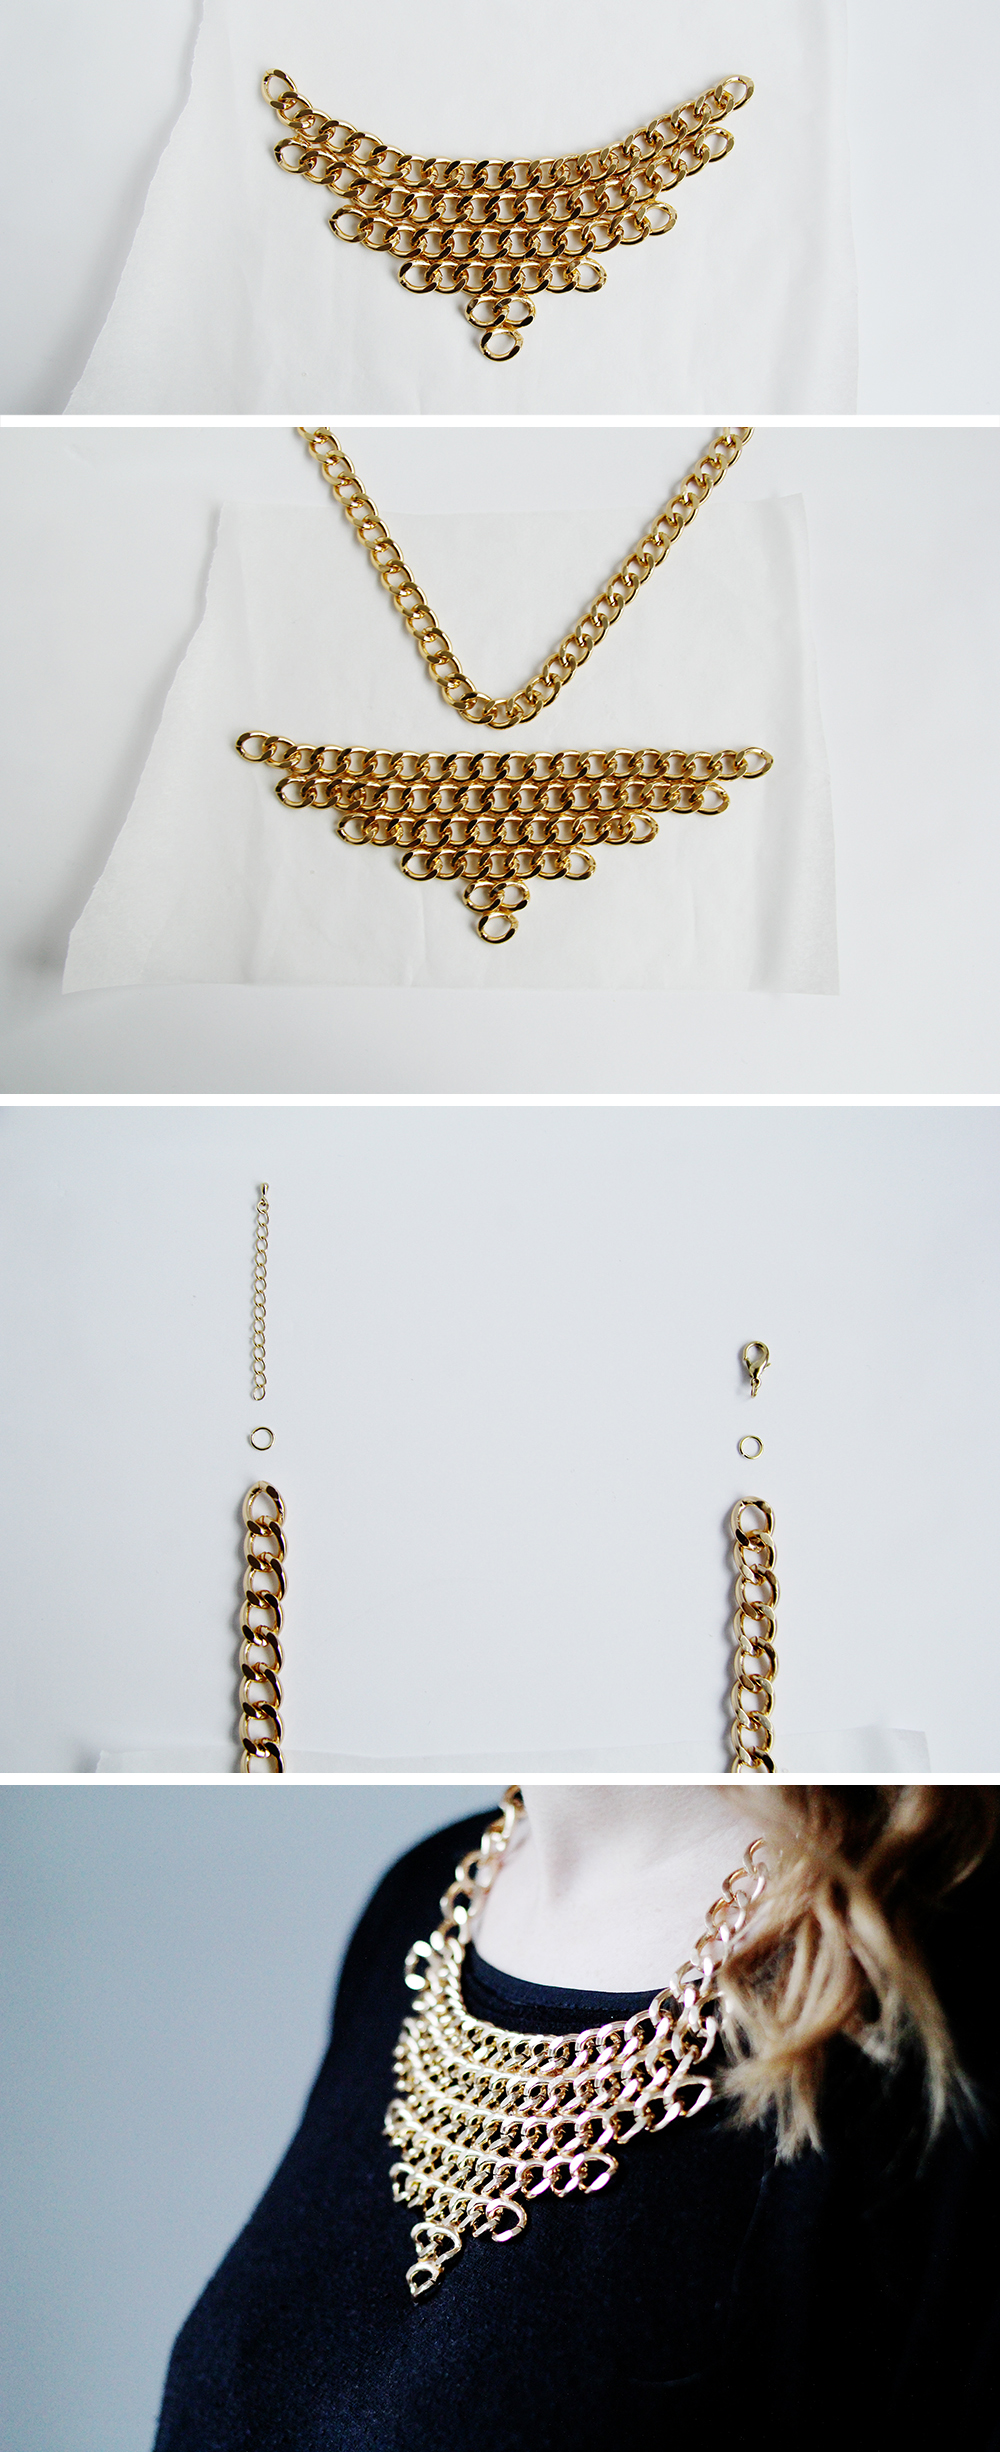
TIP: Try to make sure you don’t glue the links together. It should move freely which will stop it coming apart too easily!


I love that glue. I discovered it a few years ago when I couldn’t get anything to stick my art to ring bases. I found E6000 and the rest is history. It’s like the Neosporin on the craft world, it fixes everything.
This is so smart and pretty! E6000 glue is my life, I don’t know what I would do without it.
Love it! I never used this glue…I will have to give a try!
So cute! Love the necklace. Still haven’t tried E6000. I’ve got to get on that.
Hi Francesca,
I just tried my hands on this necklace and it was awesome. Pls do check it out http://koltureshoq.wordpress.com/2014/05/16/diy-layered-chain-necklace/
Thanks for sharing and the inspiration
Whooo! Looks fantastic
Awesome necklace! Wondering how you are finding E6000 though? It’s the best glue I’ve used to date but it still doesn’t stick well for some materials I find :(