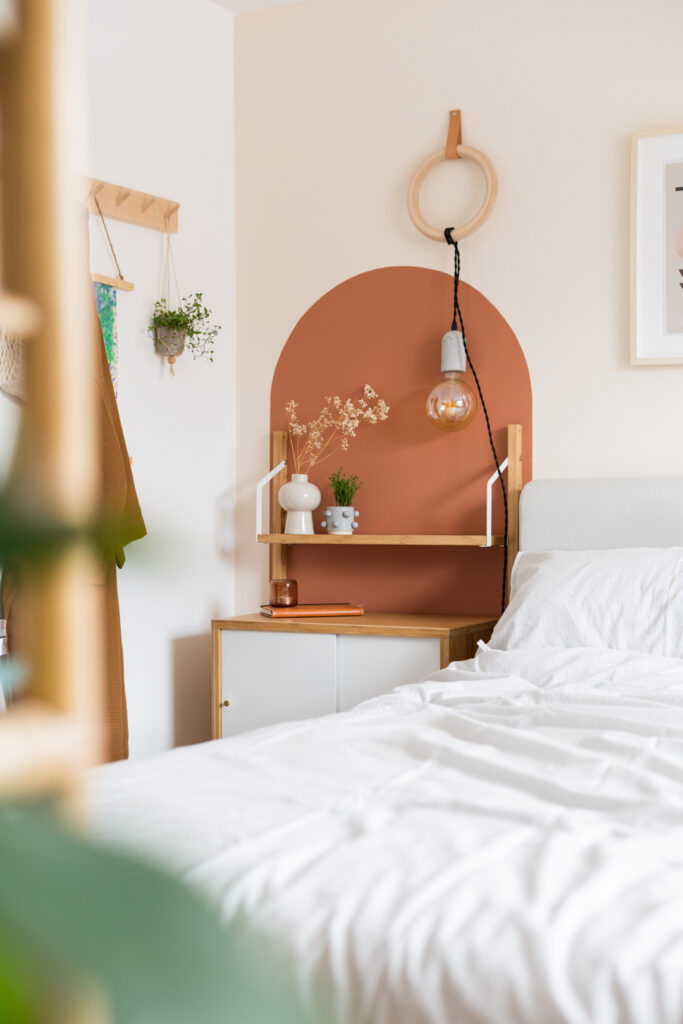
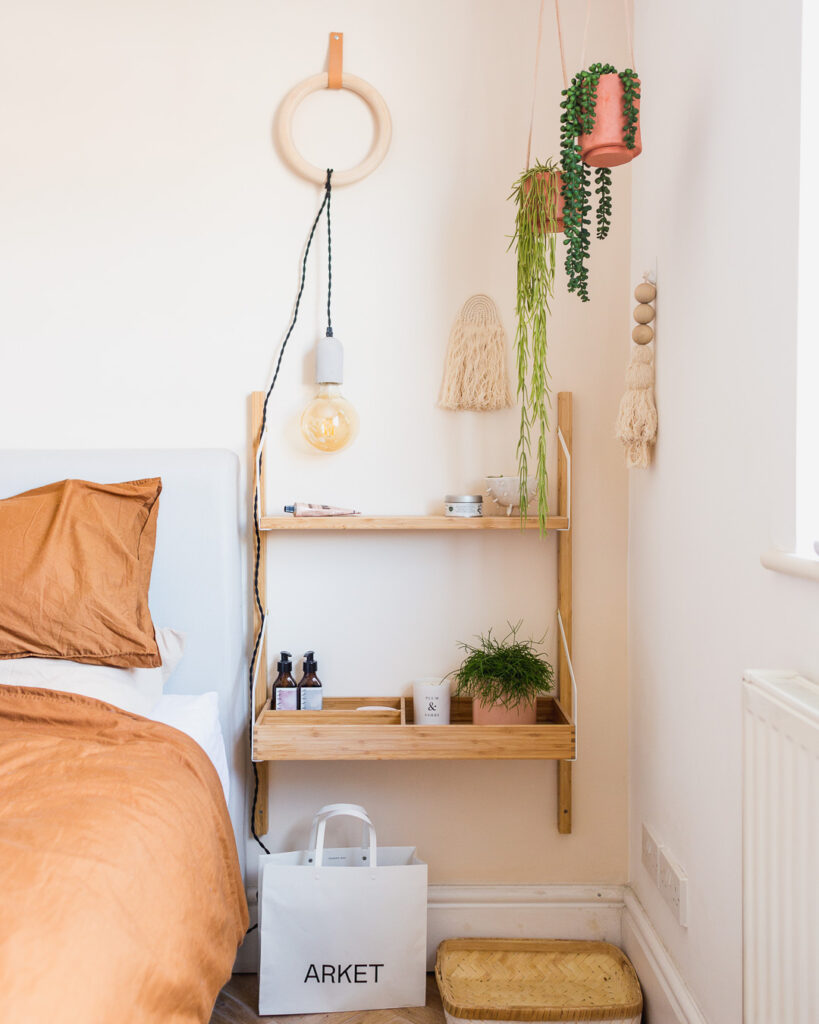
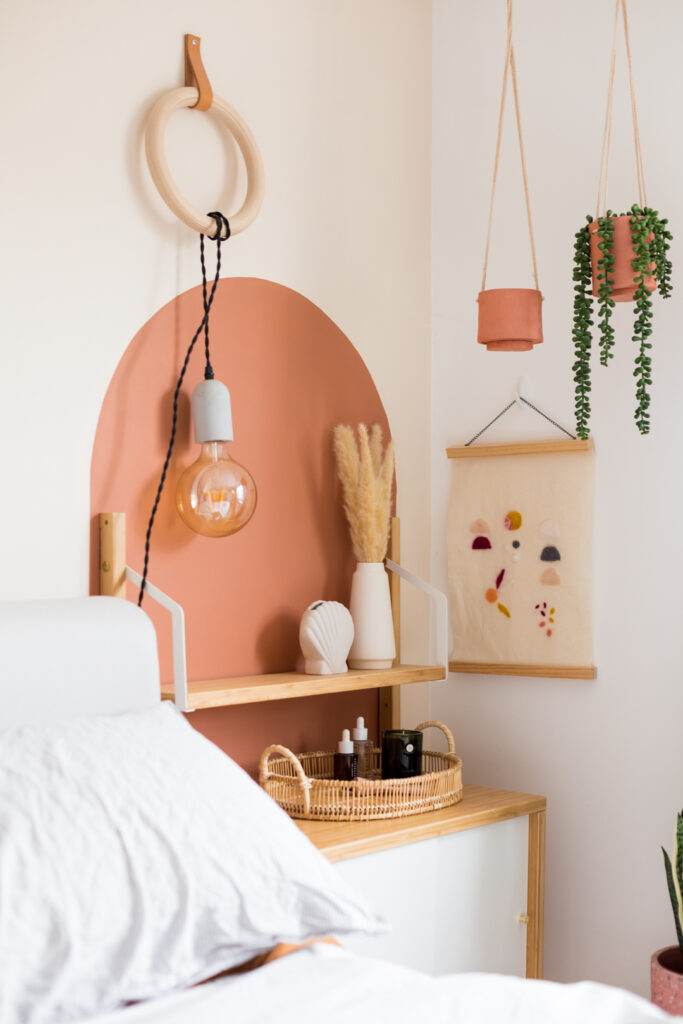
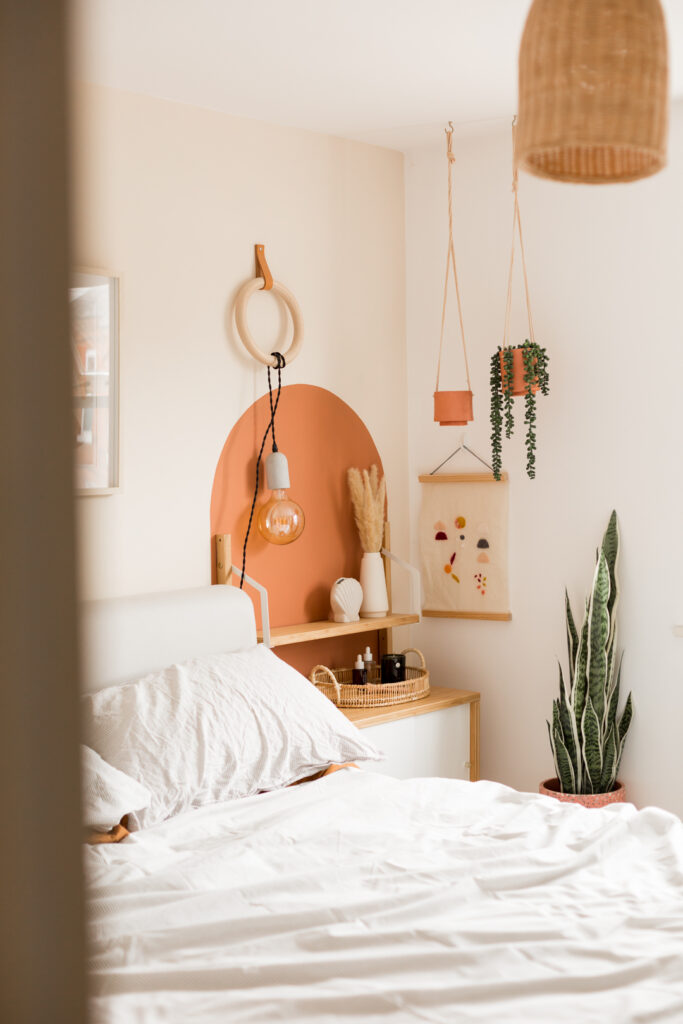
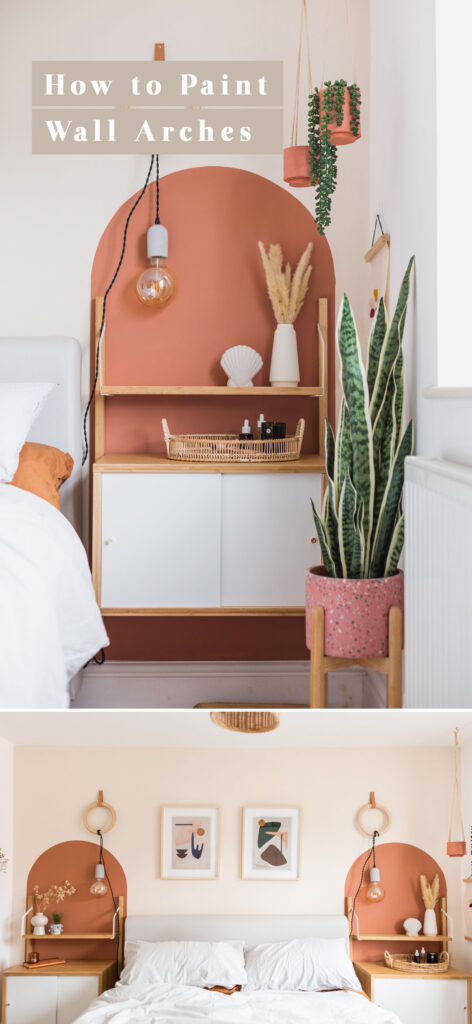
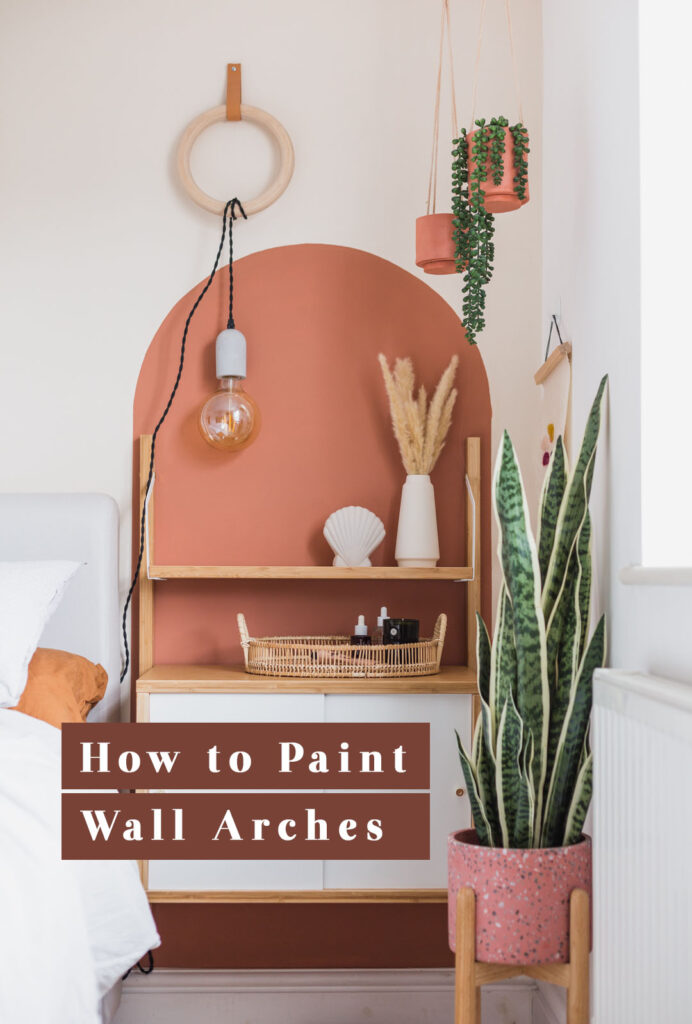
Ok, so these DIY painted wall arches might be my favourite home decor DIY to date! It’s definitely up there in my top five without a doubt. I’ve been seeing more of these cute arches all over Pinterest and Instagram recently and it gave me an idea to create a quick refresh to my bedroom. I had planned to paint the whole wall behind my bed, but this was so much quicker and as I was changing up my IKEA SVALNÄS system anyway, it seemed like the perfect opportunity to go big!
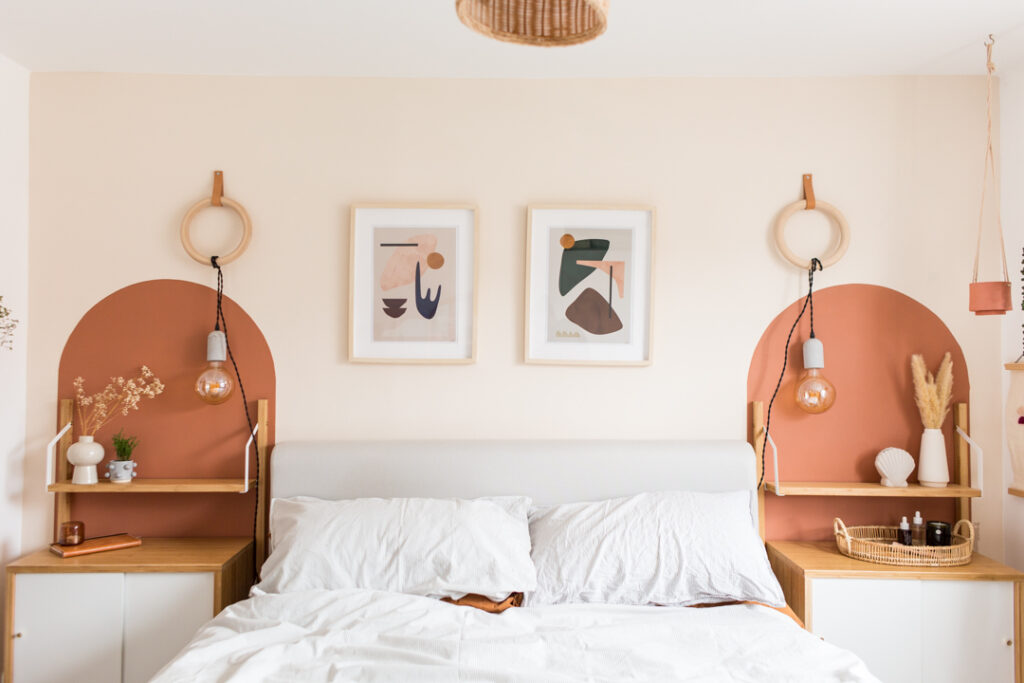
Even though I was pretty happy with what was here before I’ll show you the before and after below. This colour has made such a huge impact on the room and going bold has really paid off. In fact it’s made me question why I’ve been so afraid of using stronger colours in the rest of my house! Expect to see all the painting timelapses over on Instagram from now on!

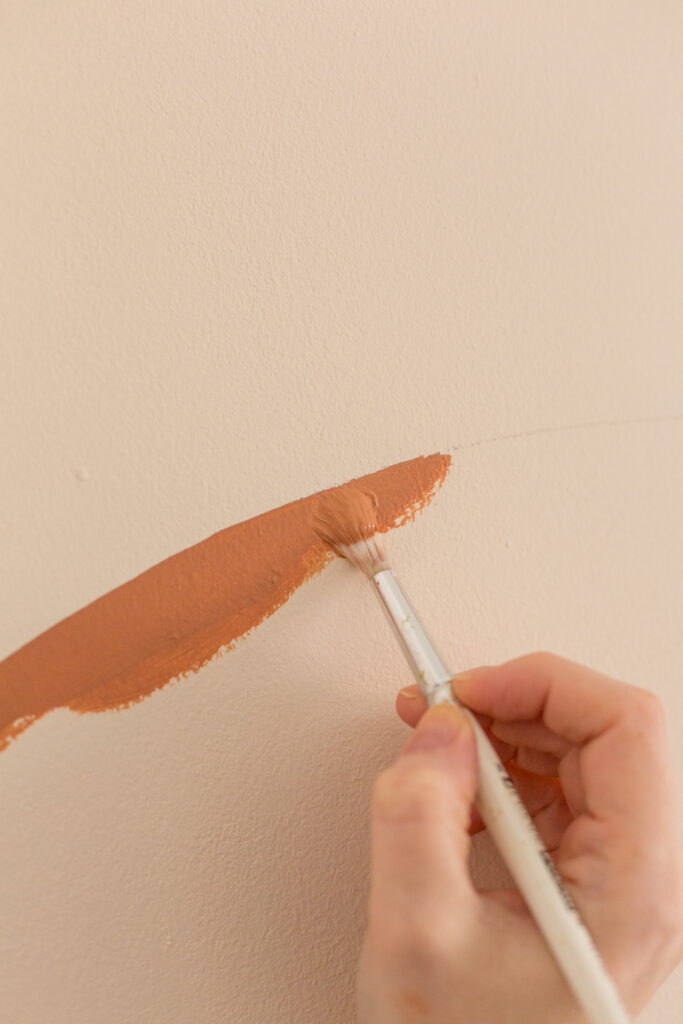
The technique to create these arches is easy and quick, but does require a steady hand. After drawing the design (I’ll show you that step below) I used an artist paint brush to paint in the curve then painters tape (not just regular masking tape) to section off the straight edges. I have a few more tips for stopping bleeding and getting your lines straight below!
You’ll need:
+ Paint (I used Crown/Elle Decoration Cushion Craze)
+ Masking tape
+ Pencil
+ String
+ Painters tape
+ Artist paint brush
+ Roller and tray
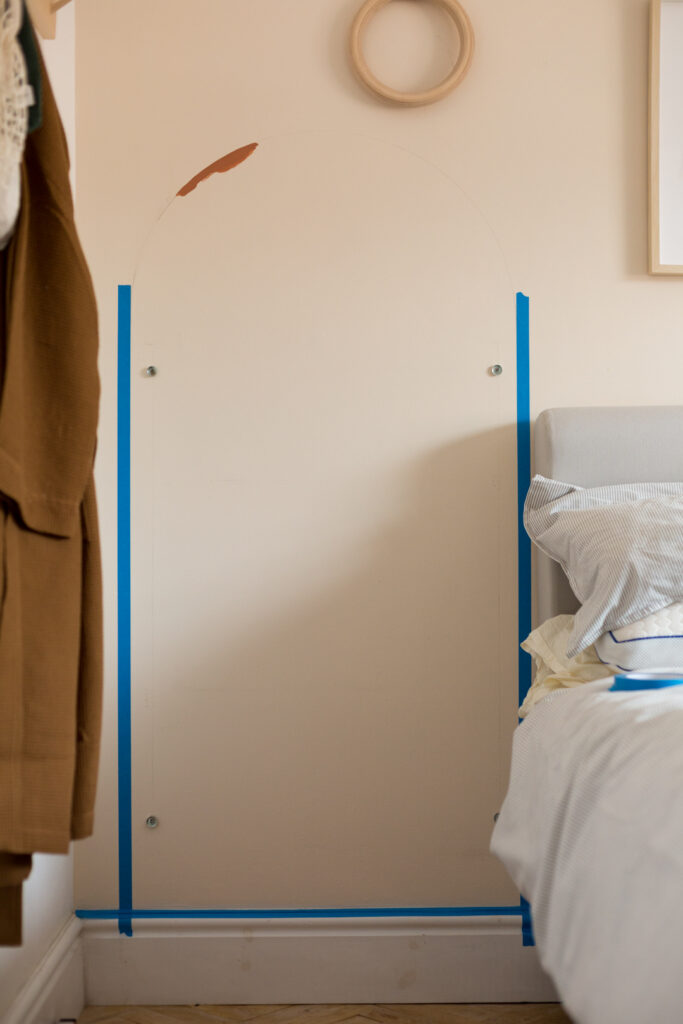
- Make a rough mark on the wall where you’d like your arch to start and finish. Measure the distance between these marks and divide by two.
- Tie one end of a piece of string around a pencil. Measure from the pencil your measurement from step one. Add on 1 cm and cut the string.
- Find the centre point of your arch between your initial marks and hold the last 1 cm of string between your thumb and the wall at this point. If your have one to hand a thumb tac makes the next step easier. Hold the string against the wall using the thumb tac at the 1 cm point.
- Place the tip of the pencil on the wall at the first of your previous marks then slowly move the pencil up and over the centre point keeping the string tight at all times until you reach the other side.
TIP – Keep the pencil line light so you can easily rub it out if you need to. - Once you’re happy with the arch, run two pieces of painters tape down from the ends of the arch to the floor. A really easy way to make sure these are straight is to hold the string with the pencil attached at the edge of the arch. Tape the opposite end to the pencil at the starting point and use the hanging cord as a guide to create a straight line with your painters tape.
- Starting with the arch paint the edge of the template. When you’re trying to paint a neat line don’t start at the line. Start painting just under the line, then press the paint brush down into the wall to create a large flat surface. Move this slowly towards and along the line for maximum control.
- Once you’ve painted along the arch use the same brush to paint over the masking taped edges. To minimise bleeding, paint from the tape to the wall.
- After painting the edge fill in the inside using the roller. I needed three coats of this paint to get a solid finish.
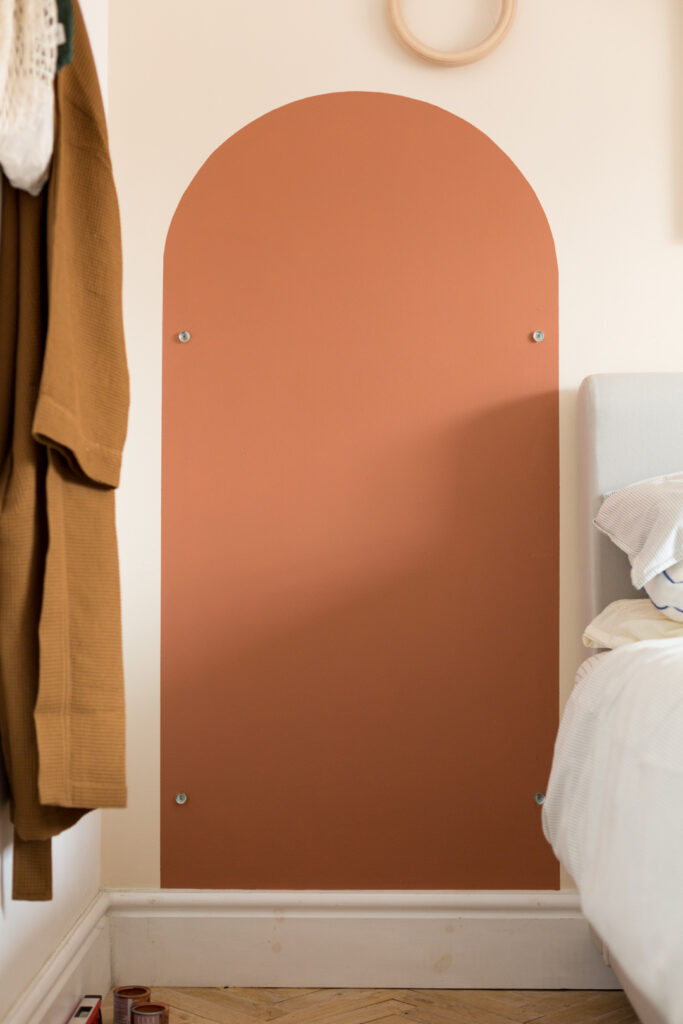
Once you’ve finished the last coat peel back the tape and stand back and admire your beautiful new arch while you watch the paint dry. Honestly that’s pretty much what I did, it’s so pretty!


If you want to see more easy decor DIYs come and follow me on Instagram!


I absolutely love this! I have two side tables that are a little lower than the top of the matress. I have a couple of tall lamps to make up the difference but it’s always looked unbalanced. Painting an arch is the solution I’ve been looking for. Brilliant!
Indeed a beautiful project! DC Drywall Contractors says it’s simple yet warm and elegant.
Don’t let your partner control you and don’t set out to control your partner. Setting boundaries means respecting each MyOchsner other and finding compromises to make the relationship work well.
Thank you for the guidance, I have done it successfully. Thanks again so much for this helpful sharing. wuxiaworld
How creative! I love your layout! Simple but warm elegance
Her minimalistic approach is awesome!
George | gutter contractor
Amazing colour of arch!
who invented homework
Fantastic! I’ll have to finish my popcorn ceiling removal first before recreating this makeover!
I love this! Beautiful! Do you have a DIY for that cabinet shelf unit too? Or where is that from?
Thank you for this nice DIY Idea.
This is absolutely beautiful!
Greetings from https://www.drywallaugusta
Hi! What color are your walls!? Love the color scheme.
Thanks a lot for helping me. I was desperately looking for the right solution to it.
Thanks a lot for such immense help with the information i was looking for
What an amazing article.
This is gorgeous! I’m painting my room soon and would love to do an arch like this, near my desk.
What light bulbs are these? I love the golden looking bulb.
Argh I’m sorry but I think this is the most ridiculous trend in the last 5 years. It’s just so random – it’s as if you’re trying to fool someone there’s an architectural arch there. Just….no!
Several factors hint that the person might be a https://thegirlcanwrite.net/ good future spouse. The person is honest and sincere and is being real and open. Responsibility is also a great trait. Responsible people are great at marriage. Reliable and trustworthy – never let you down, or at least have really good excuses (because things happen to everyone). Humble, nice, and makes you happy and loved.
Lots of good ideas, about DIY painted walls thanks so much for sharing.
Extraordinary post! I didn’t knowral of these assets and I will go look at them now!
Great Article about Full Forms – Hindi Full Forms
Your website is very helpful. Many thanks for sharing!
I love the outcome. Greensboro Drywall Contractors inspired by this project! Cheers
very interesting and great article!
learn about filmmaking >
What is preproduction
Amazing colour, Interesting.
IZSPA, is the heaven in form of spa we are best body massage service provider in Bangalore.We offer our customers massages like Female to Male,Body to Body Massage, Visit b2b spa near me
One of the oldest healing practices is massage. Massage was used to treat many ailments by ancient peoples such as the Ancient Greeks and Egyptians, Chinese, and Chinese.Visit body massage in Bangalore
massage is a great way to relieve muscle pain, soreness, and tension. It doesn’t matter whether this pain was caused by physical or mental stress, the massage will work it out for you.Visit body massage spa near me
Instead of being treated as a luxury spa treatment, the We people view their traditional Thai massage as an essential therapy to promote wellness. It is a practical way to relax the whole body that is in line with the main pillars and principles of Thai medicine.Visit massage parlour near me
Amazing Collection
This is really nice idea… Bathroom contractor
Awesome post. Looking forward for more content! http://www.concreteoakville.com
I love the designs and want to get this as a model in our future house.
I also see this lolbeans potential through those designs.
Thank you for this kind of information. Check this out Custom Drywall Designs
Fantastic details! We appreciate you providing this information for free. You are Awesome. https://www.windowcleanerscoquitlam.com
it seemed like the perfect opportunity to go big! drywall services</a
it seemed like the perfect opportunity to go big! drywall services
Amazing Collection
Awesome post. Looking forward for more content! http://www.insulationsurrey.com
Informative Blog. Thanks for sharing. https://www.personaltrainersherwoodpark.com/
Thank you for awesome information
It’s nice seeing this great information here. DNR Drywall Burnaby, BC
Thanks for the inspiration. My room in Cleveland looks like this, all thanks to you!
Thanks a lot for sharing this articles! I really love painted wall arches but I’ve always had troubles painting them, sometimes the colors would mach or the lines turned out crooked so in the end I decided to call for my favorite interior painting company in gainesville fl so they could do these arches for me, and they turned out even better than I imagined!
As a minimalist kind of person, the layout, color and design of this DIY Project are very promising!
For me, this is a very good site. Thank you! Kitchener Appliance Services
you gave very good information | Thanks for sharing
The arches are absolutely wonderful! We have a large arch that is usually decorated with fresh flowers at our business, planstlevents.com. It can be used for picture backdrops and looks absolutely stunning with a little color.
So much good information here Handyman Services
Interesting cool project. I’m figuring out how to install a fence. After this, I’ll check if I could also imitate this inspiration!
Hey, thanks for sharing! Local Handyman
Yey! you have a beautiful content https://www.change-of-address-form-online.com
Great info, thanks for sharing!
No doubt this is an excellent post! I got a lot of knowledge after reading this, thank you! Ceiling Drywall Repair Services
Thanks for the post and great tips..even I also think that hard work is the most important aspect of getting success. https://www.fencesmilton.com
Hey! this is a very interesting post, I liked it…
Accountants Calgary Ab
I really like the color combination! I will ask https://www.clarksvilledrywall to paint it after their repair! :)
During your visit to our website, we may collect more information without directly identifying you. The website does collect personal information such as your name, identify, gender, and geographic region. 25penny.com During your visit to our website, we may collect more information without directly identifying you. The website does collect personal information such as your name, identify, gender, and geographic region.
Cool post! Thanks for this. Drywall Services
I got a bunch of ideas from other members here. Thank you so much! Siding Installation
“Thanks for sharing this wonderful post!
Plastic Surgery Plano
‘”
I must say, this article on DIY painted wall arches is truly inspiring! It’s amazing how a simple design element like an arch can add a touch of elegance and visual interest to any room. The step-by-step instructions provided make it seem achievable for even novice DIY enthusiasts like myself. Thank you for sharing this insightful guide, and here’s to many successful wall arch transformations! masonry repair san antonio
This is so nice. Thank you for sharing. pressure washing services fayetteville
Wow, those DIY painted wall arches sound amazing! I love how they can quickly refresh a room’s decor. It’s great that you found inspiration from Pinterest and Instagram. Have fun transforming your bedroom!
Super
https://bodymassageinchennai.in
I appreciate this wonderful information on this wonderful website. I hope that there’s more to come.
chimney flashing repair cost worcester
This is so creative! Greetings from all of us here at http://www.drywallatlanta.net! :)
Nice! This is a powerful story for me. Thanks a lot for sharing with us!
junk car removal ma
Wow. This is a lovely project! I’ll share this with https://www.drywallmarietta for inspiration.
Thanks https://bodymassageinchennai.in
I appreciate the research that went into this article. The author has clearly delved into the subject matter and has provided credible sources to support their arguments, making it a reliable resource for readers. Residential Roofing Victoria, BC
“Thanks for sharing this interesting blog here
Tree Service Orlando“
Unlock lightning-fast speeds and reliable WiFi connectivity by buying WiFi from Q9Telecom in UAE and Dubai. Elevate your internet experience with our high-performance WiFi services, designed for seamless browsing and streaming. As a trusted provider, we offer accessibility and availability across the region, ensuring you stay connected wherever you go.
in home comfort tools, the a/v distribution system allows you to distribute audio and video around the entire house, as well as simultaneously viewing or listening to the same content on different spaces of your home.
With the popularity of Instagram and the increase in its statistical population, famous people are more and more looking for a blue tick next to their username.
Because the blue tick indicates the official accounts whose identity has been confirmed by Instagram.
Now, to know the cost of Instagram blue tick, you can get help from the site team.
Thanks for this post.
Cool Post
Nice Post
Hi! What color are your walls!? Love the color scheme.
“Thank you for this amazing blog!
Plastic Surgery Shreveport“
“It was very informative. Thank you for sharing.
Plastic Surgery Sacramento CA“
It was easier than I expected to paint my wall arches! :) I am planning to move to a new house where I can unleash my creativity, and I was wondering how to choose house number according to numerology to feel happy there.
Embark on a great journey of creativity with a do-it-yourself project!