
When I was pregnant I had so many plans to make Ollen everything he’d ever need in life. OK, so maybe not everything – I’m pretty new to this so I’ll leave most of it to the experts. But I did want to make the fun stuff. Cute clothes, toys, mobiles etc.. but it turns out babies like to keep you on your toes. We’re pretty much only just getting to the point where I feel I can spend a little time each week on making and being creative.
So anything that helps move this process along a little faster is worth it’s weight in gold right now. Which is why, when Cricut asked me to give their new machine a try I jumped at the chance. Saying I was excited about using the Maker was a major understatement. Instead of wasting hours on the cutting process, I can spend that time with Ollen instead, then just pick up the pieces ready for crafting once he has finally gone to sleep!
The Cricut Maker has some pretty impressive new features. One of which is the fabric cutting wheel. On previous machines the blade would cut fabric, but only light materials like cotton and only once it had been stabilised. It sometimes took a little trial and error to get things right. Now the Maker cuts through a vast array of fabrics like a dream. So far I’ve tried suede, cotton and velvet with no problems at all. Cricut boast that this magical machine also cuts through felt, denim and even leather and oh yeah, I am exited to try out every one of them!
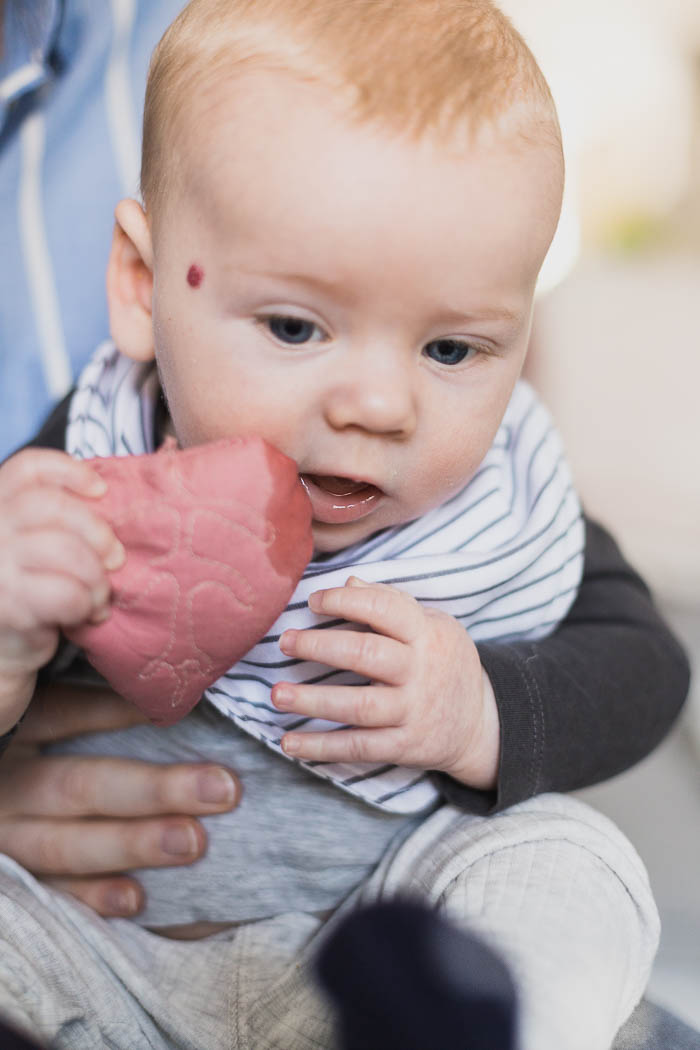
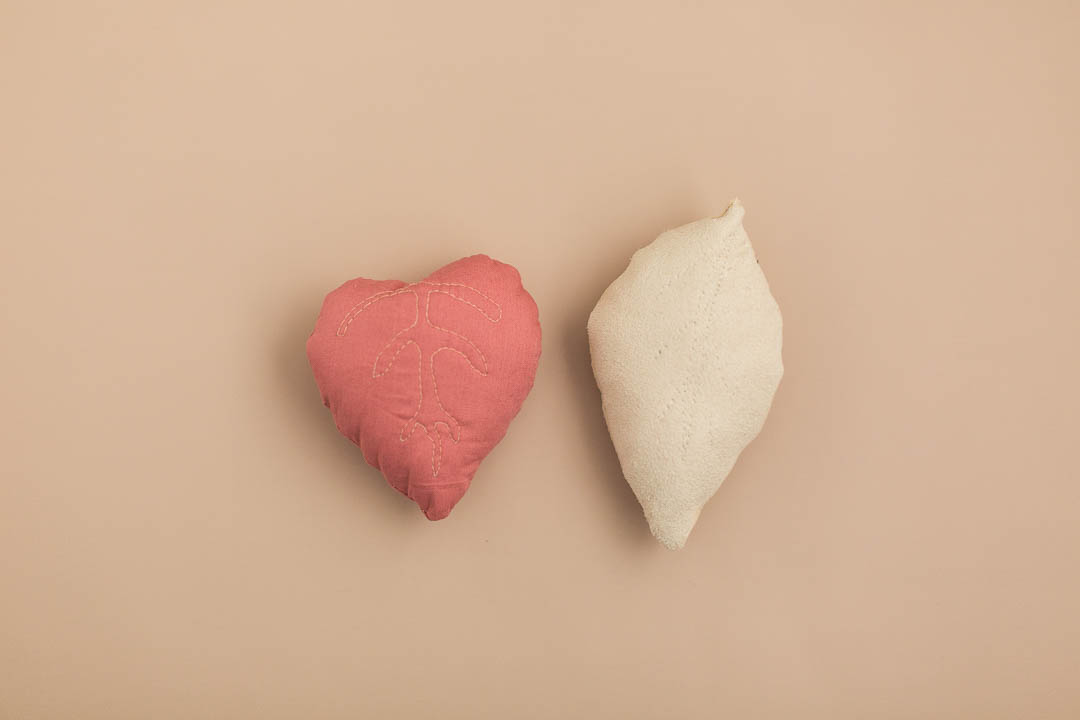
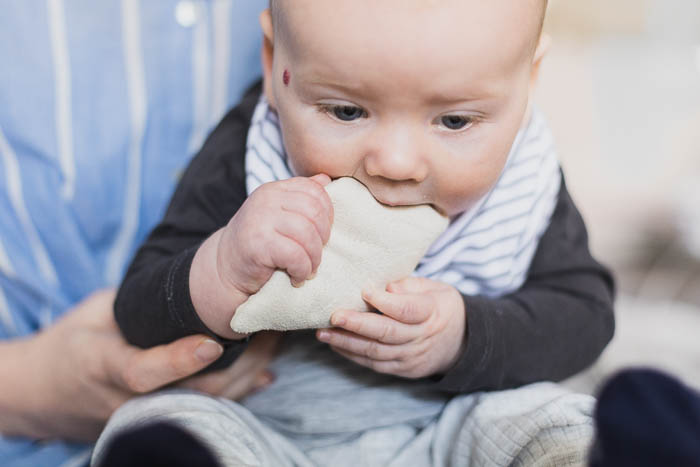
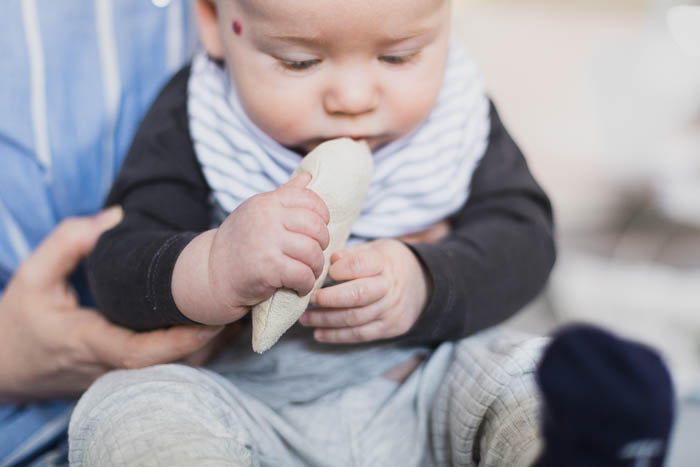
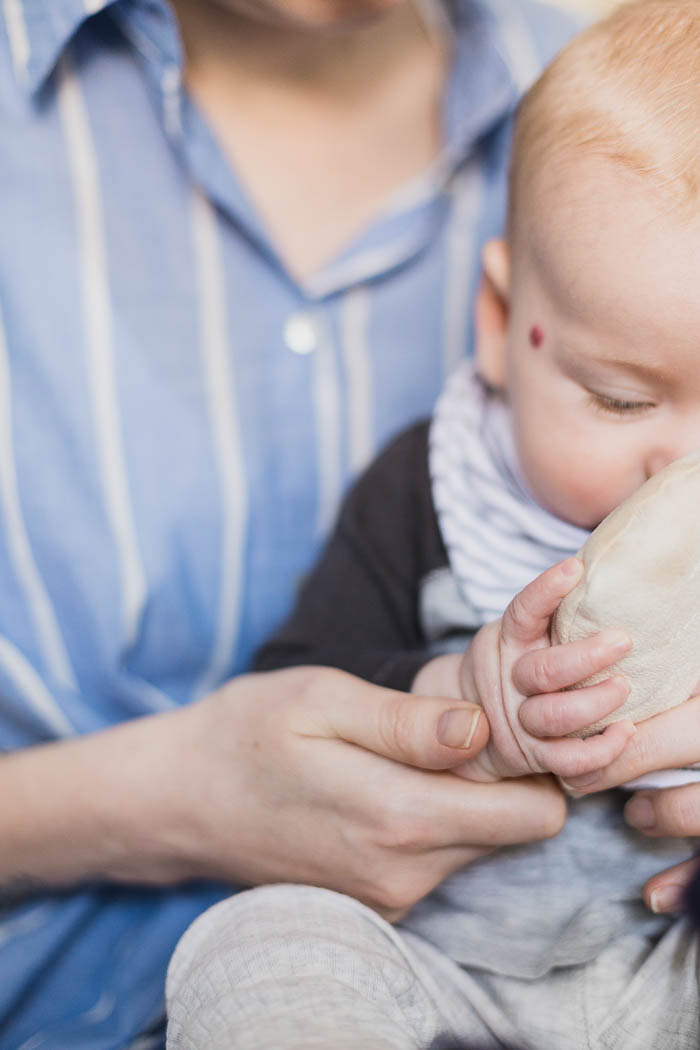
I have been feeling like I was skirting my duties as a creative mama (every one asks me if I’m making everything for him) so for my first fabric trial I thought I’d make Ollen a few soft rattles to play with. He’s just starting to realise that he can create sounds (when he’s not just putting the toys in his mouth) and it’s a joy to see him figuring out where the sound is coming from.
Most of his rattly toys are made of plastic and are a little bulky for his grip right now. He can manage with two hands, but concentrating on holding and then trying to shake them… that’s no fun. We’re not background actors in Cocktail here. I wanted to make him something easy to hold onto as well as being a little calmer than the ‘in your face’ garish colours that toys tend to be. He has enough of those. In fact, sometimes I catch him just stretching out for a cushion or blanket. Something with an interesting texture, rather than a collection of colours and patterns that feel like an assault on you senses.
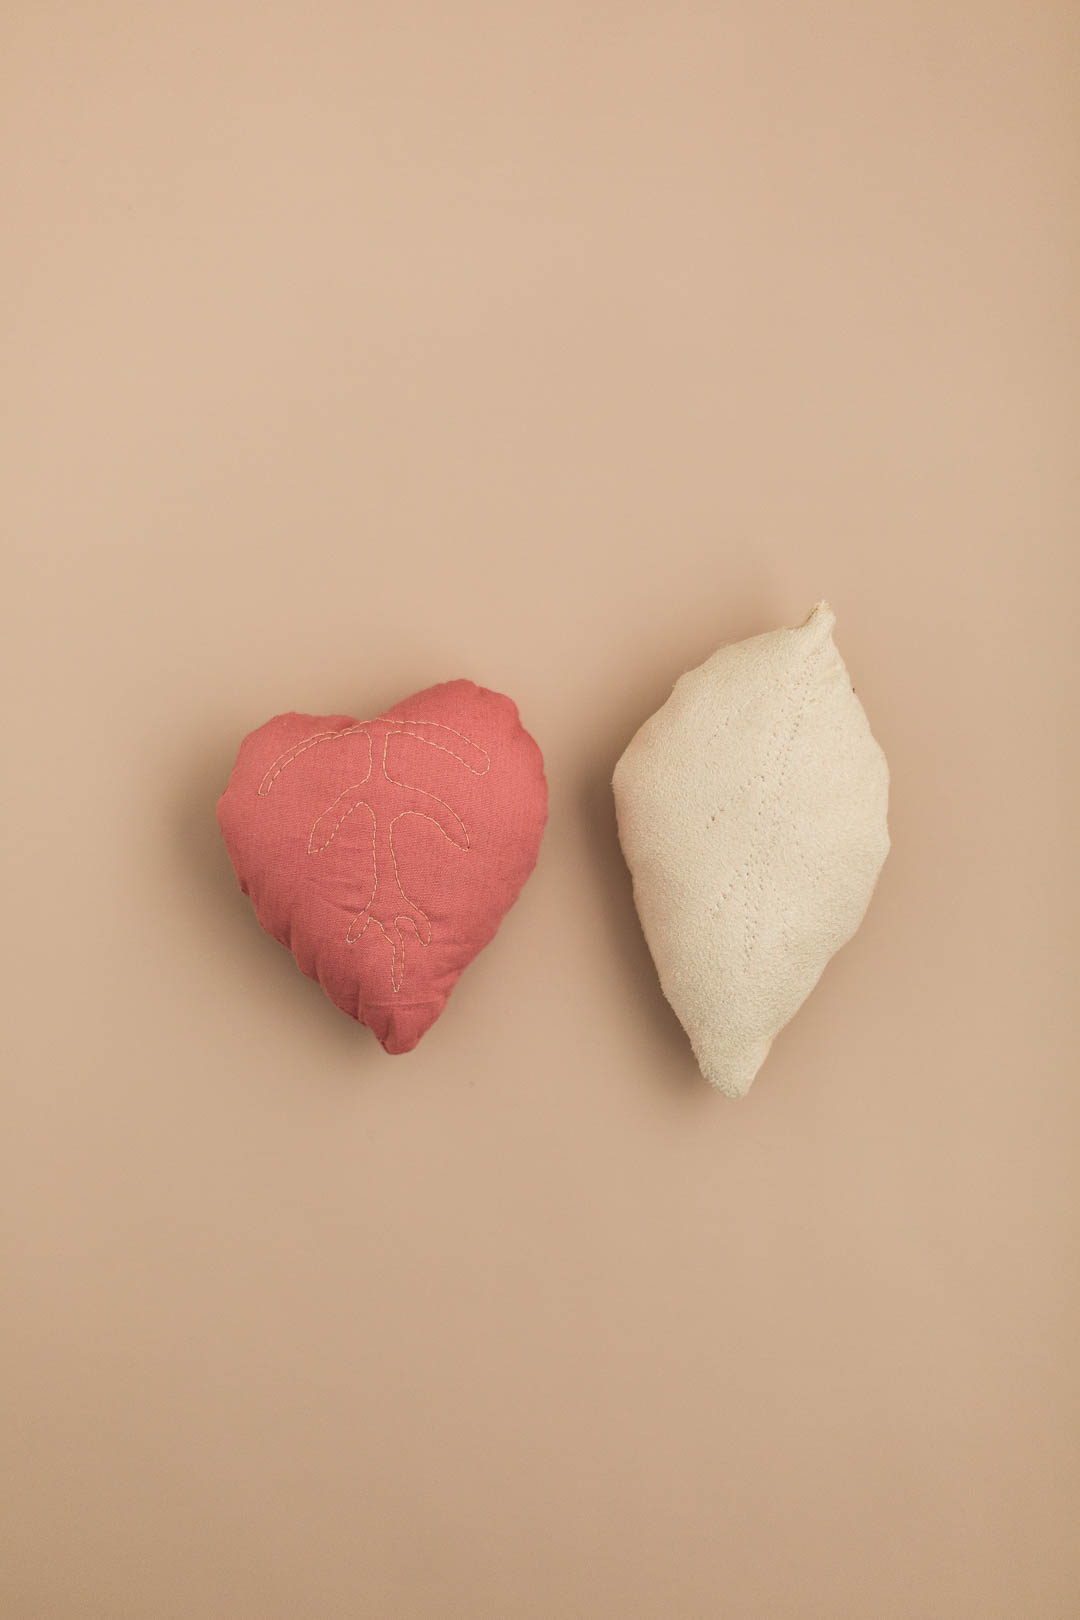
So I picked out some free leaf patterns from the Cricut Design Library and let my little Maker friend get to work.
Materials
Soft fabrics | Cricut Maker | Sewing Machine | Wadding | Stuffing | Cotton thread | Toy rattle insert
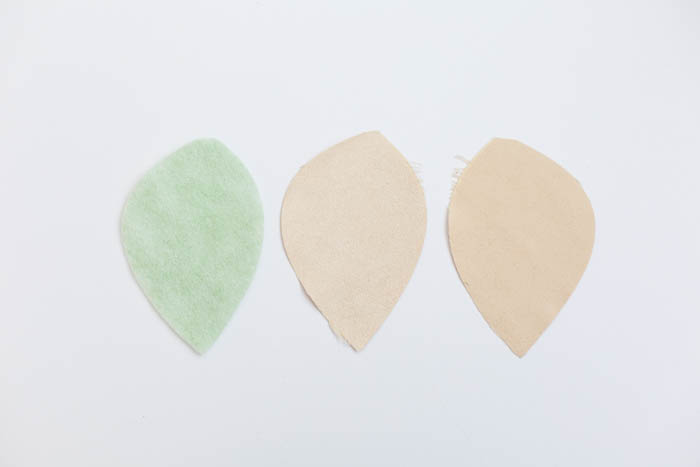

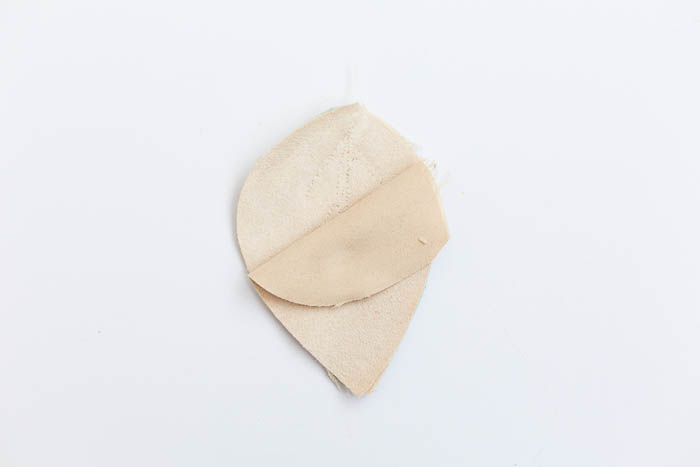
1. Use the fabric mat and cutting wheel to cut out your pieces of fabric and wadding. I am using both the back and front of my fabrics to create some variation, but if you wanted to just use one side (for example on a suede) remember to flip the leaf in the Cricut Design Centre to create the second side of fabric.
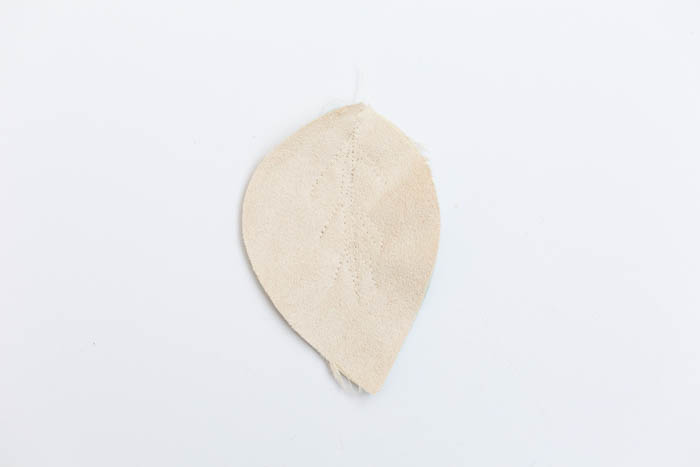
2. Layer up the front piece of your rattle with the wadding on the back. Sew some leaf details into this using the free form sewing foot on your machine.
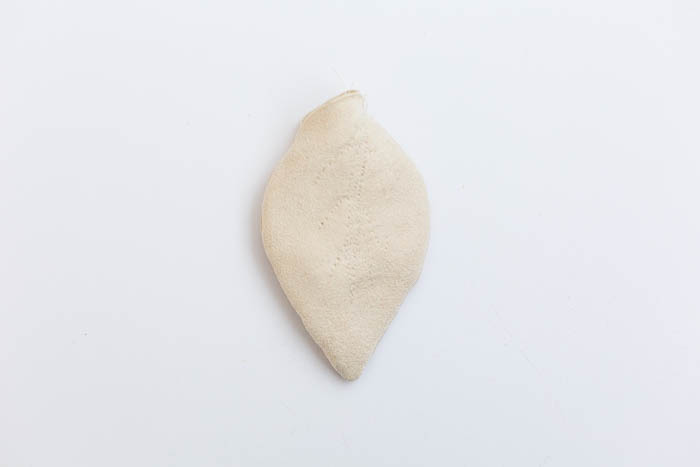
3. Take the back of the leaf and place it onto the front – right sides together. Sew around the edge leaving a small gap on a straight edge for turning and stuffing.
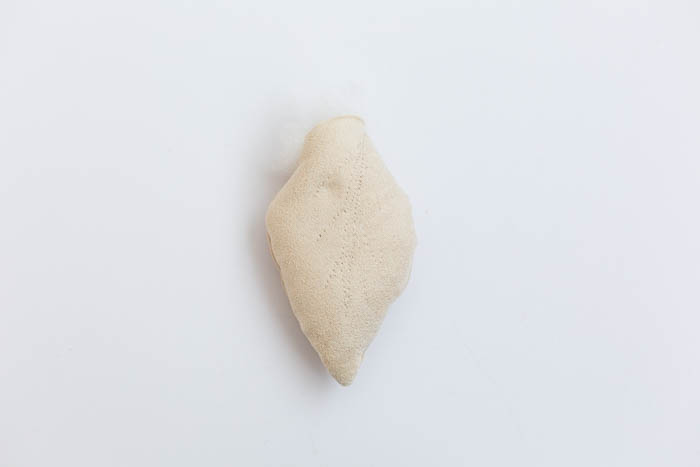
4. Turn the leaf inside out so the right sides are facing out. You can press the edges now if you like. Then fill the leaf with stuffing and the rattle insert. Sew up the gap and tie off securely. Make sure the stitching is secure all the way around the join.
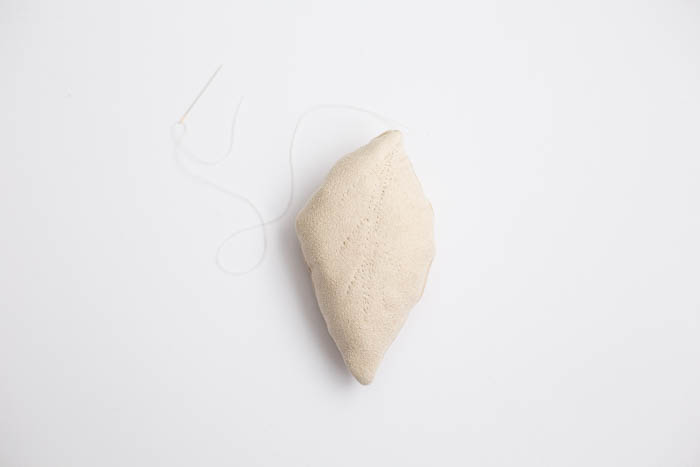
And your rattle is ready to go. These have so far spent more time in the mouth than making music! But he’s learning.
Thanks again to Cricut who sent me the Maker to share some projects with you guys! Thank you for supporting the brands that support Fall For DIY


How adorable, I love the idea!
https://www.makeandmess.com/
Our centre has all the best equipment and highly trained staff, which makes it a complete solution to your body spa and massage needs. Visit female to male spa near me