I’ve been away from the blog for most of this week because we have been packing up our We Make Collective kits ready to send out today! So even though I’m more than excited about our first kit range/ tutorials launching, I also miss this little space a bit (who am I kidding? I miss you guys A LOT!) So we’re back today – much later than usual – with a bang!
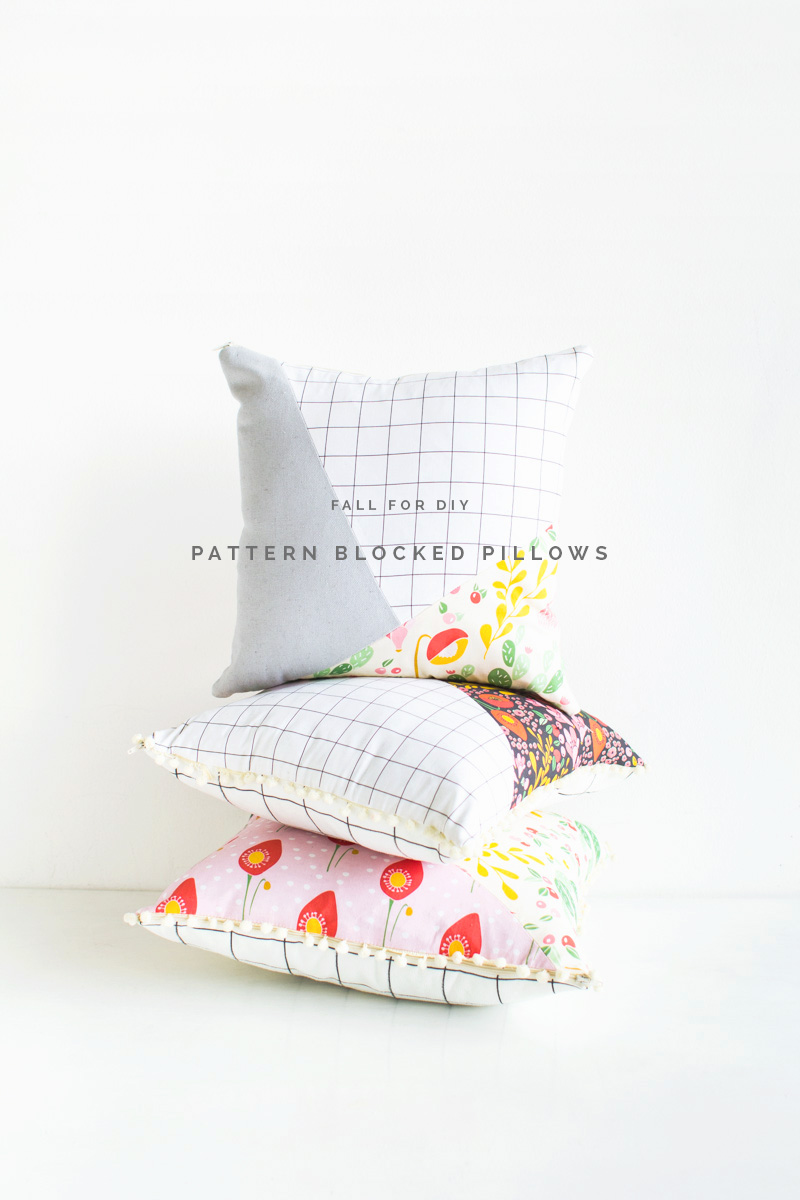
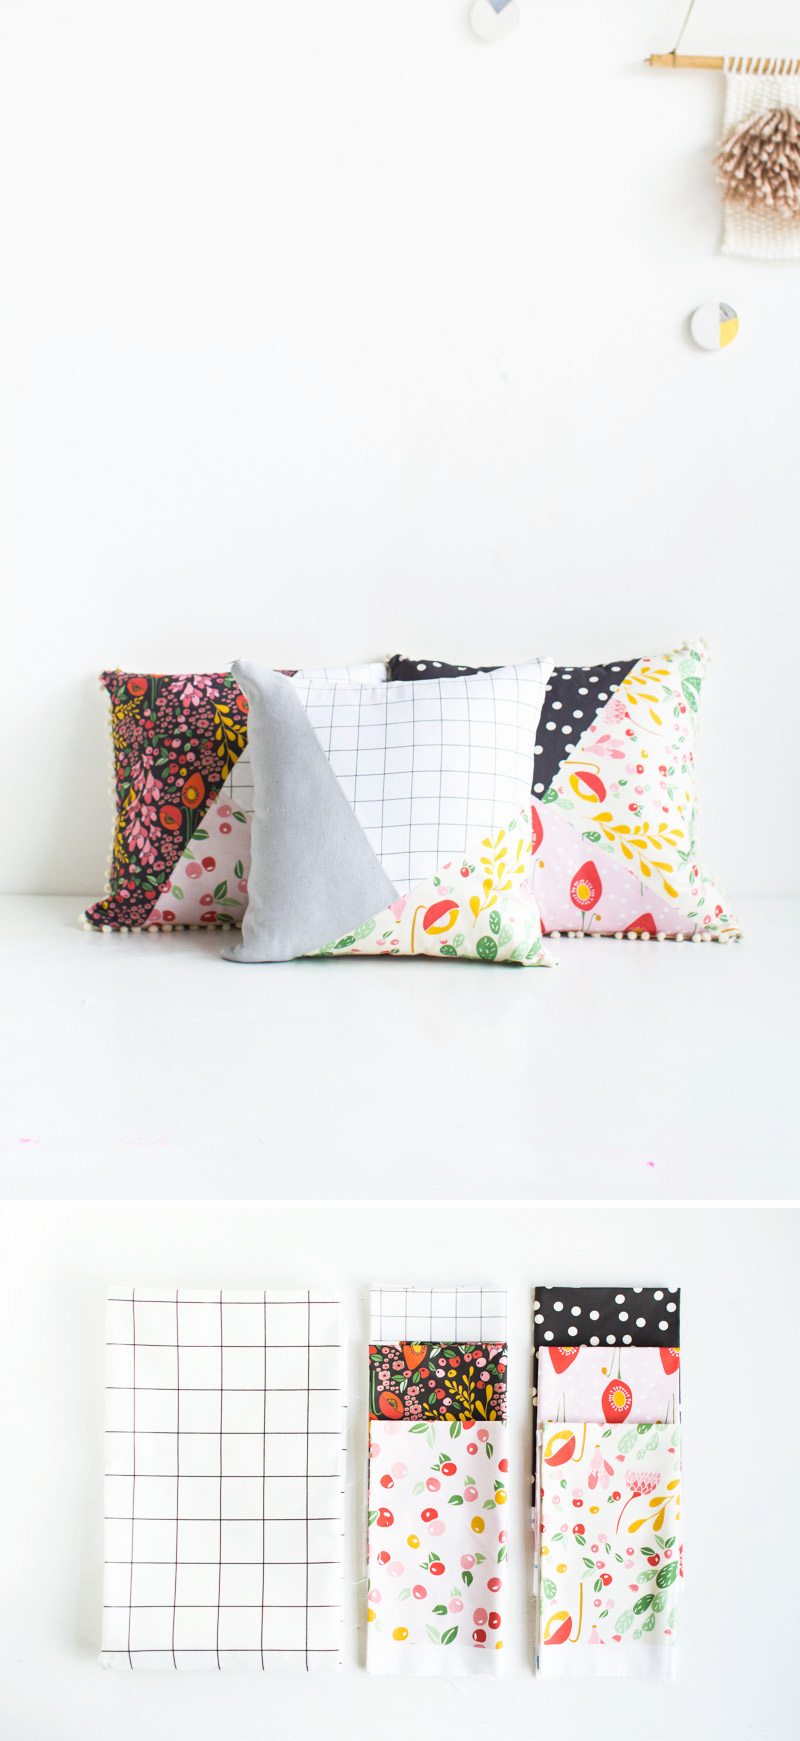
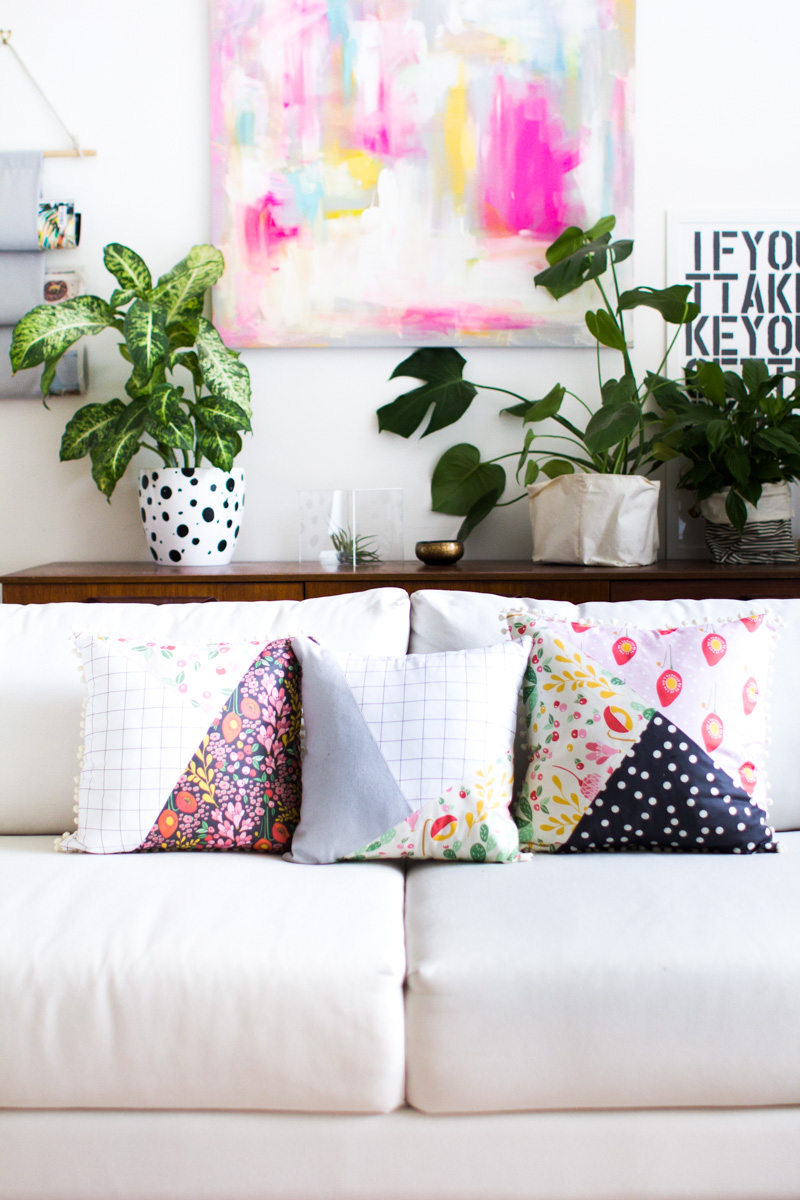
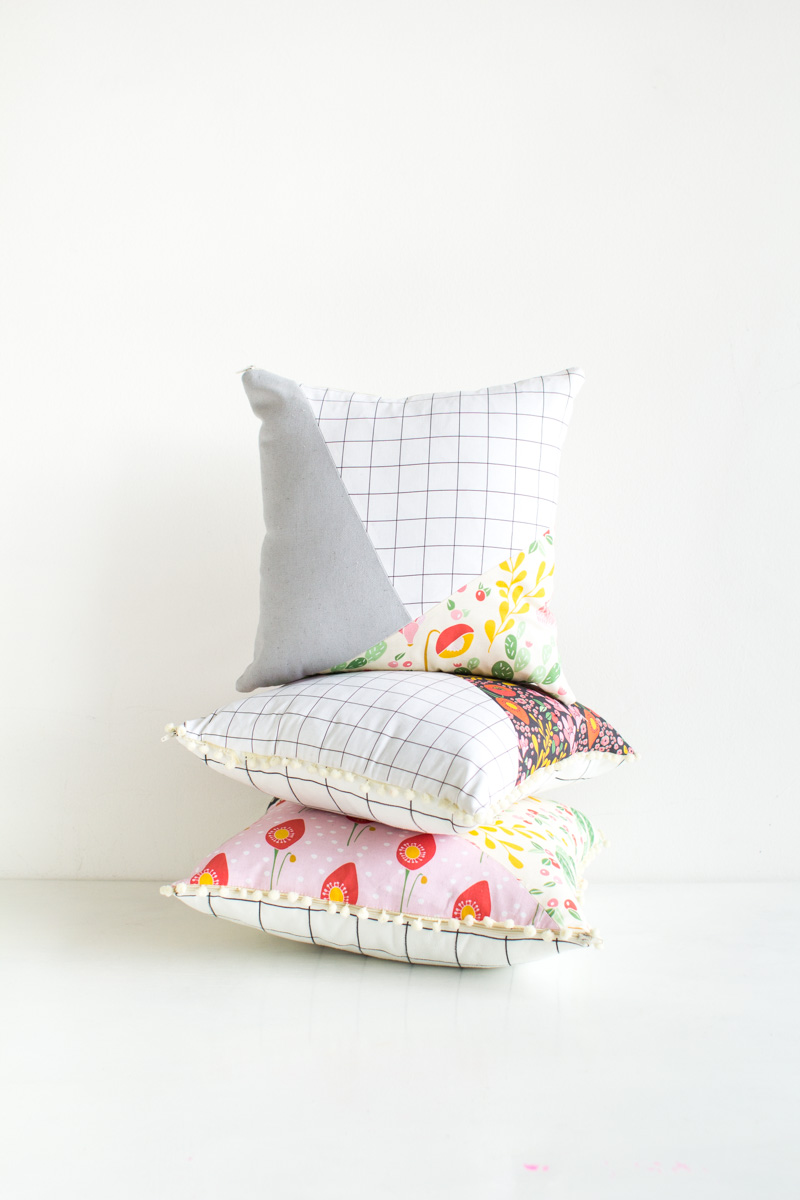
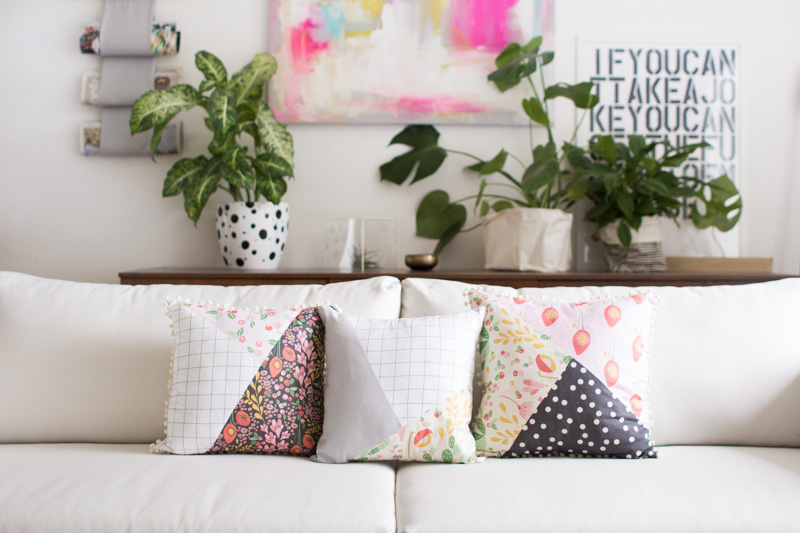
If you haven’t been able to tell from the DIY cushion obsession we have over here, I am on a personal mission to cover two sofas, my bed and perhaps the majority of my floor with hand made pillows. So when I was given the opportunity to use these absolutely gorgeously fabrics from the California Dreams range by This Little Street my mind immediately pinged to pillows! I can’t get over how well these designs work together. I’ve used fat quarters in a range of designs for the front and faux suede for the back which makes the pillows extra soft and cuddly!
Make sure you click over and check out the rest of the range because it’s jam packed full of stunning designs!
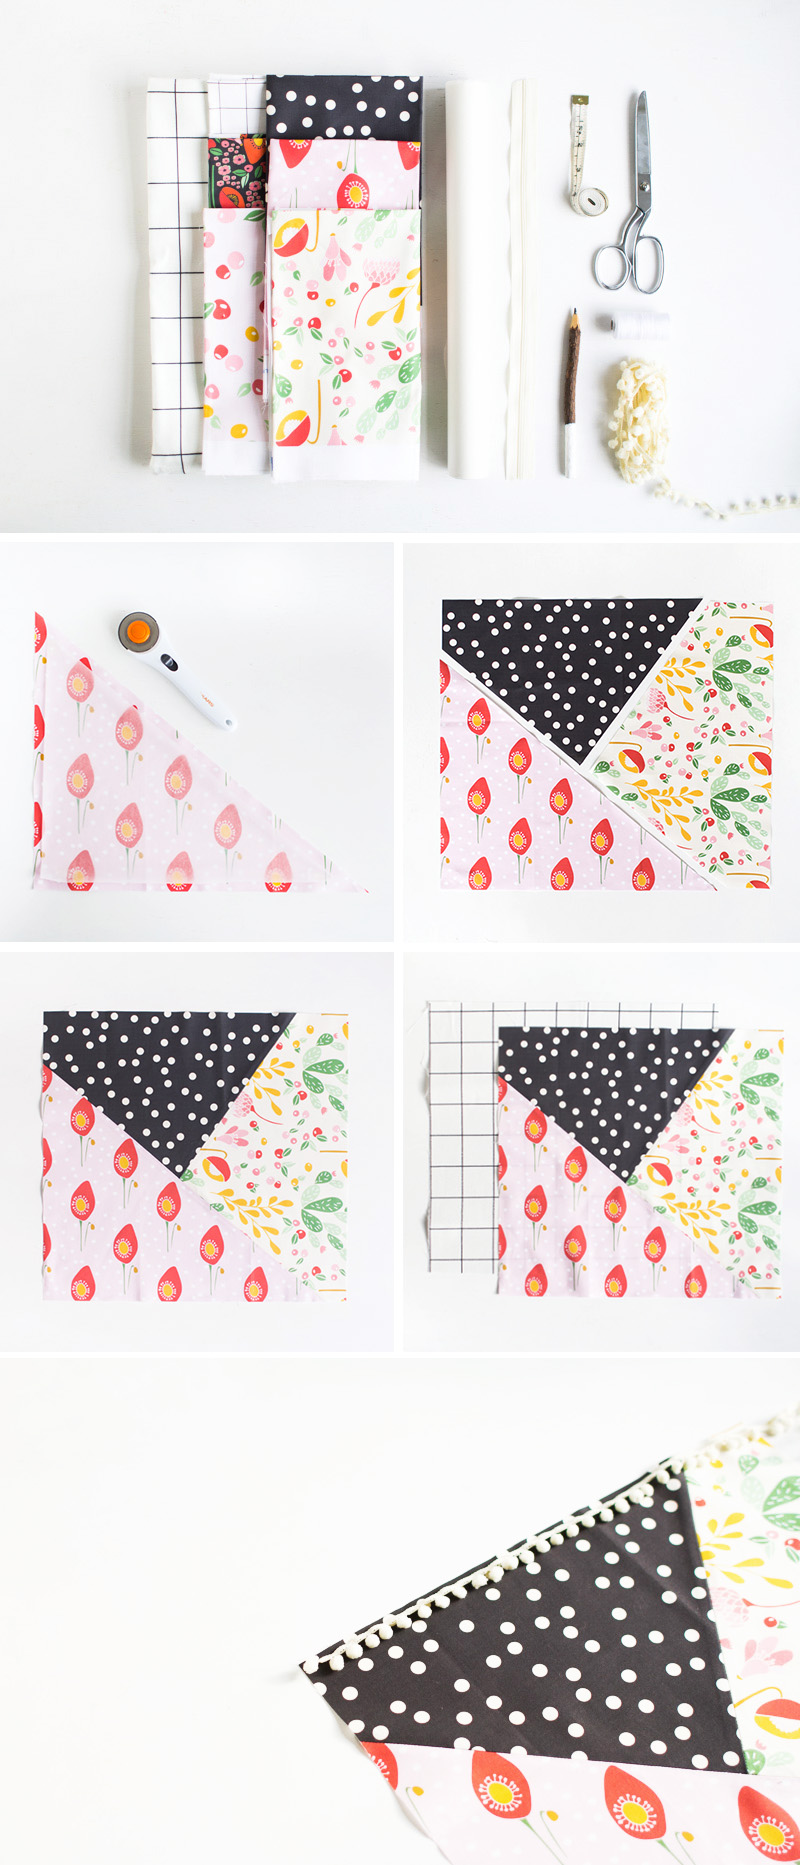
Materials
Fabric – California Dreaming Range | Pom pom trim | Zipper | Measuring tape | Tracing paper Thread | Sewing machine
1. Measure out a piece of tracing paper the same size as your pillow. Once you have sewn the hems the pillow case will be smaller than the pillow which creates this plump, full look.
2. Draw a couple of lines across the tracing paper to create the templates for your fabric. Cut along the lines. Place these on your chosen fabrics and cut out with a quarter inch margin.
3. Sew the fabric pieces back together starting with the shortest length. Once you have a square, trim the edges straight.
4. Cut out the backing fabric the same size as this square.
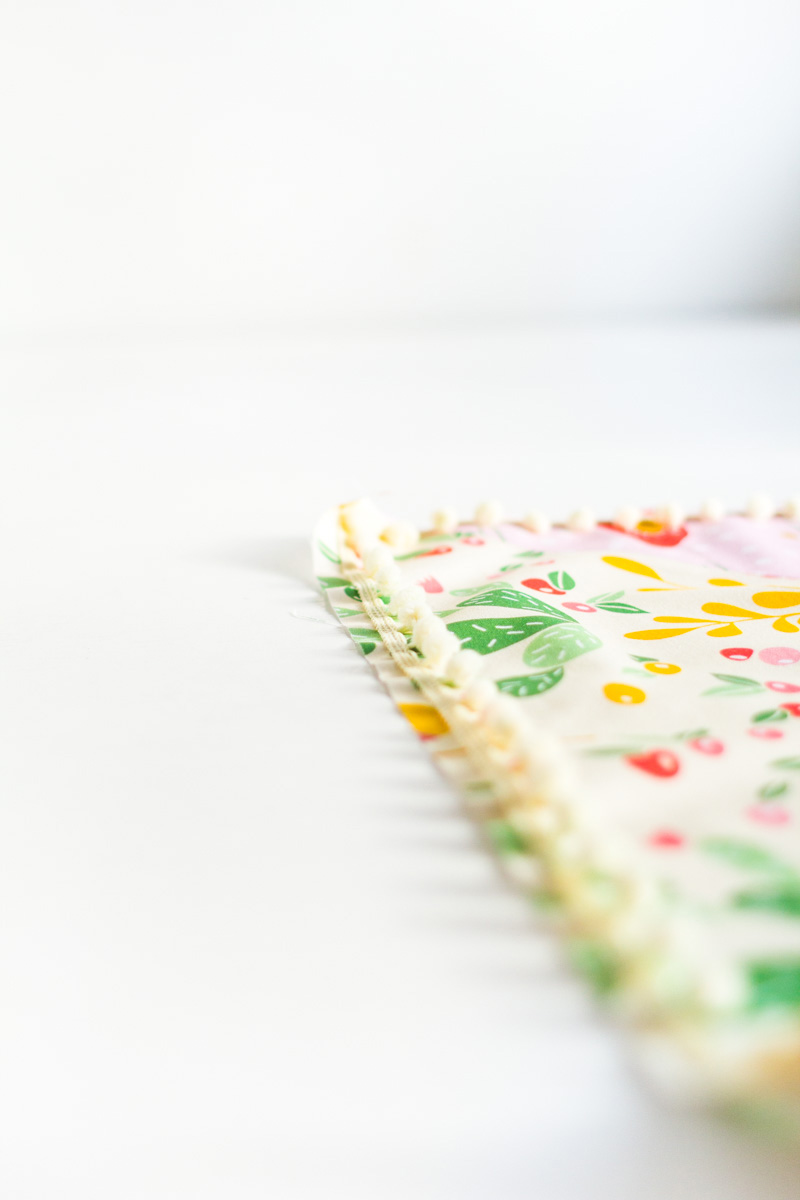
5. Sew the pom pom trim around the edge of the front piece. Remember to keep the pom pom hanging towards the inside of the pillow.
6. Place the zipper upside-down over the front fabric right sides facing. Line up the edge of the zipper with the edge of the fabric. Keep the pom poms facing in so you don’t sew over them. Sew along the edge of the fabric close to the zipper thread.
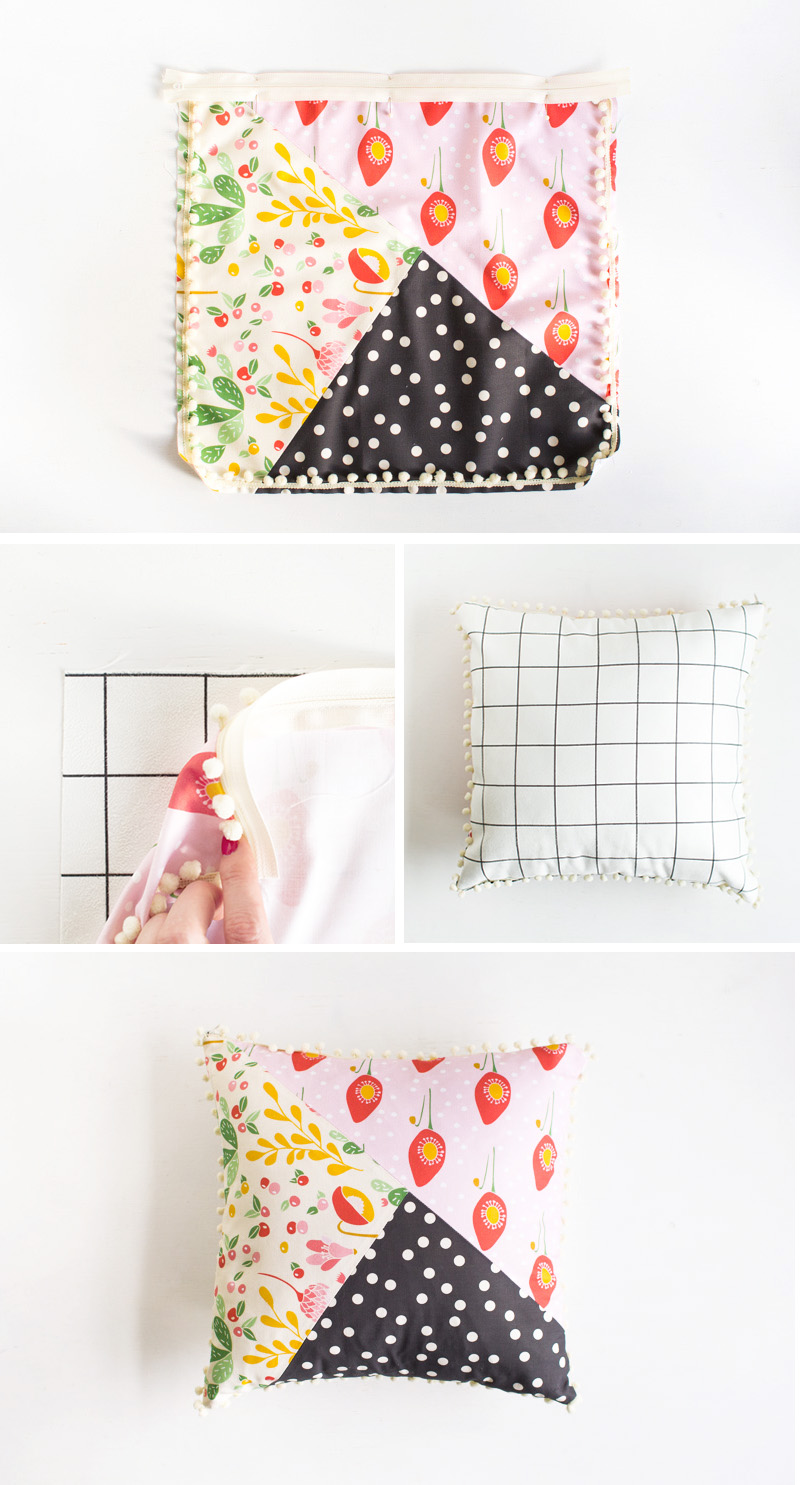
7. Place the other edge of the zipper over the back fabric, right sides facing. Sew together. Place the right sides of the fabric together and sew around the outer edge keeping the pom poms facing inwards. (Make sure the zipper is a little open so you can get into the pillow!)
Turn inside out and stuff with your cushion!
I’ve made one without the pom poms which I love because I feel like the fabric are beautiful enough to be the main focus of the cushion – but that’s totally up to you! Know you how, you can add them or not.


Fran. Honestly. I think I just want to be you. These pillows are so clever and I LOVE them. Pinning!
These are adorable! What a great idea – I love mixing patterns, but never thought to mix them together on one pillow.
g.
Fran! These are STUNNING!
Ok, so obviously Audrey’s fabrics are amazing…but the way you’ve combined them! I’ve never seen better fabric mixing. These are soooo beautiful. And they look amazing on your couch! Would love to see more of your living room! xoxo
These pillows look fantastic!!!! Great job!
Oh man these are so good, and I love the addition of the pom-pom trim! It is making me want to get a sewing machine and learn how to sew!! ;)
Love these! I’m a cushion addict, I keep buying them but have nowhere to put them! I think if I started making them as well things would just get out of hand! Maybe if I gave them away as presents though… oh the possibilities!
I’ve been making and selling this design, which I created, through online auctions. Etsy, artfire, ecrater, bonanza. I’m so glad you like my design, I’ve made them in faux fur and cotton, and other great fabrics. Just shocked to see that anyone can take other people’s designs when they want.
Hey Maureen
I can understand your frustrations when it comes to people copying ideas online (trust me, I’ve had my fair share on ideas reused). So I’m mortified by your comment. I decided to try and find your shop so I could be sure our designs aren’t too similar. I think I eventually found your shop and I (if this is the one) can say hand on heart I have never come across your shop and designs before. And I even think there are quite a few differences between our takes on this popular design. I love that you’re experimenting with different fabrics. I’ve never tried combining faux fur with cotton. It looks like quite a skill.
I hope you can understand that we might have come up with the same idea totally individually of each other and taken it in our own directions. That’s the beauty of creativity. One idea can be used in thousands of different ways and be totally unique each time.
Good luck with your creative endeavours!
I was thinking of making my own cushion covers for when I start decorating my new flat, and then I saw this pop up on pinterest! I’m taking that as a sign! Great pattern, thank you :)
What’s up to every one, it’s actually a pleasant for me to pay a visit this site, it consists of valuable
Information.