
When I was younger I remember I went through a phase of being obsessed with semi precious stones. I had these small individual display boxes, a bit like clear topped jewellery cases, with the names and properties labelled (yep, I was a rock geek). Many of these stones had come from a magazine which I think was about rocks, dinosaurs, the earth and science and I clearly recall the excitement I would feel when the day arrived to get the next issue of this magazine, but more importantly I’d look forward to the free gift!
Oh, what I wouldn’t give now to get my hands on those stones, rip them out of their neat little boxes and turn them into something beautiful and usable. One of the most important things I’ve learnt whilst writing this blog is not to hide the special and precious things away in boxes. Find a use for them, even if it wasn’t the originally intended purpose. Like that old chiché goes think outside the box, literally in this case.
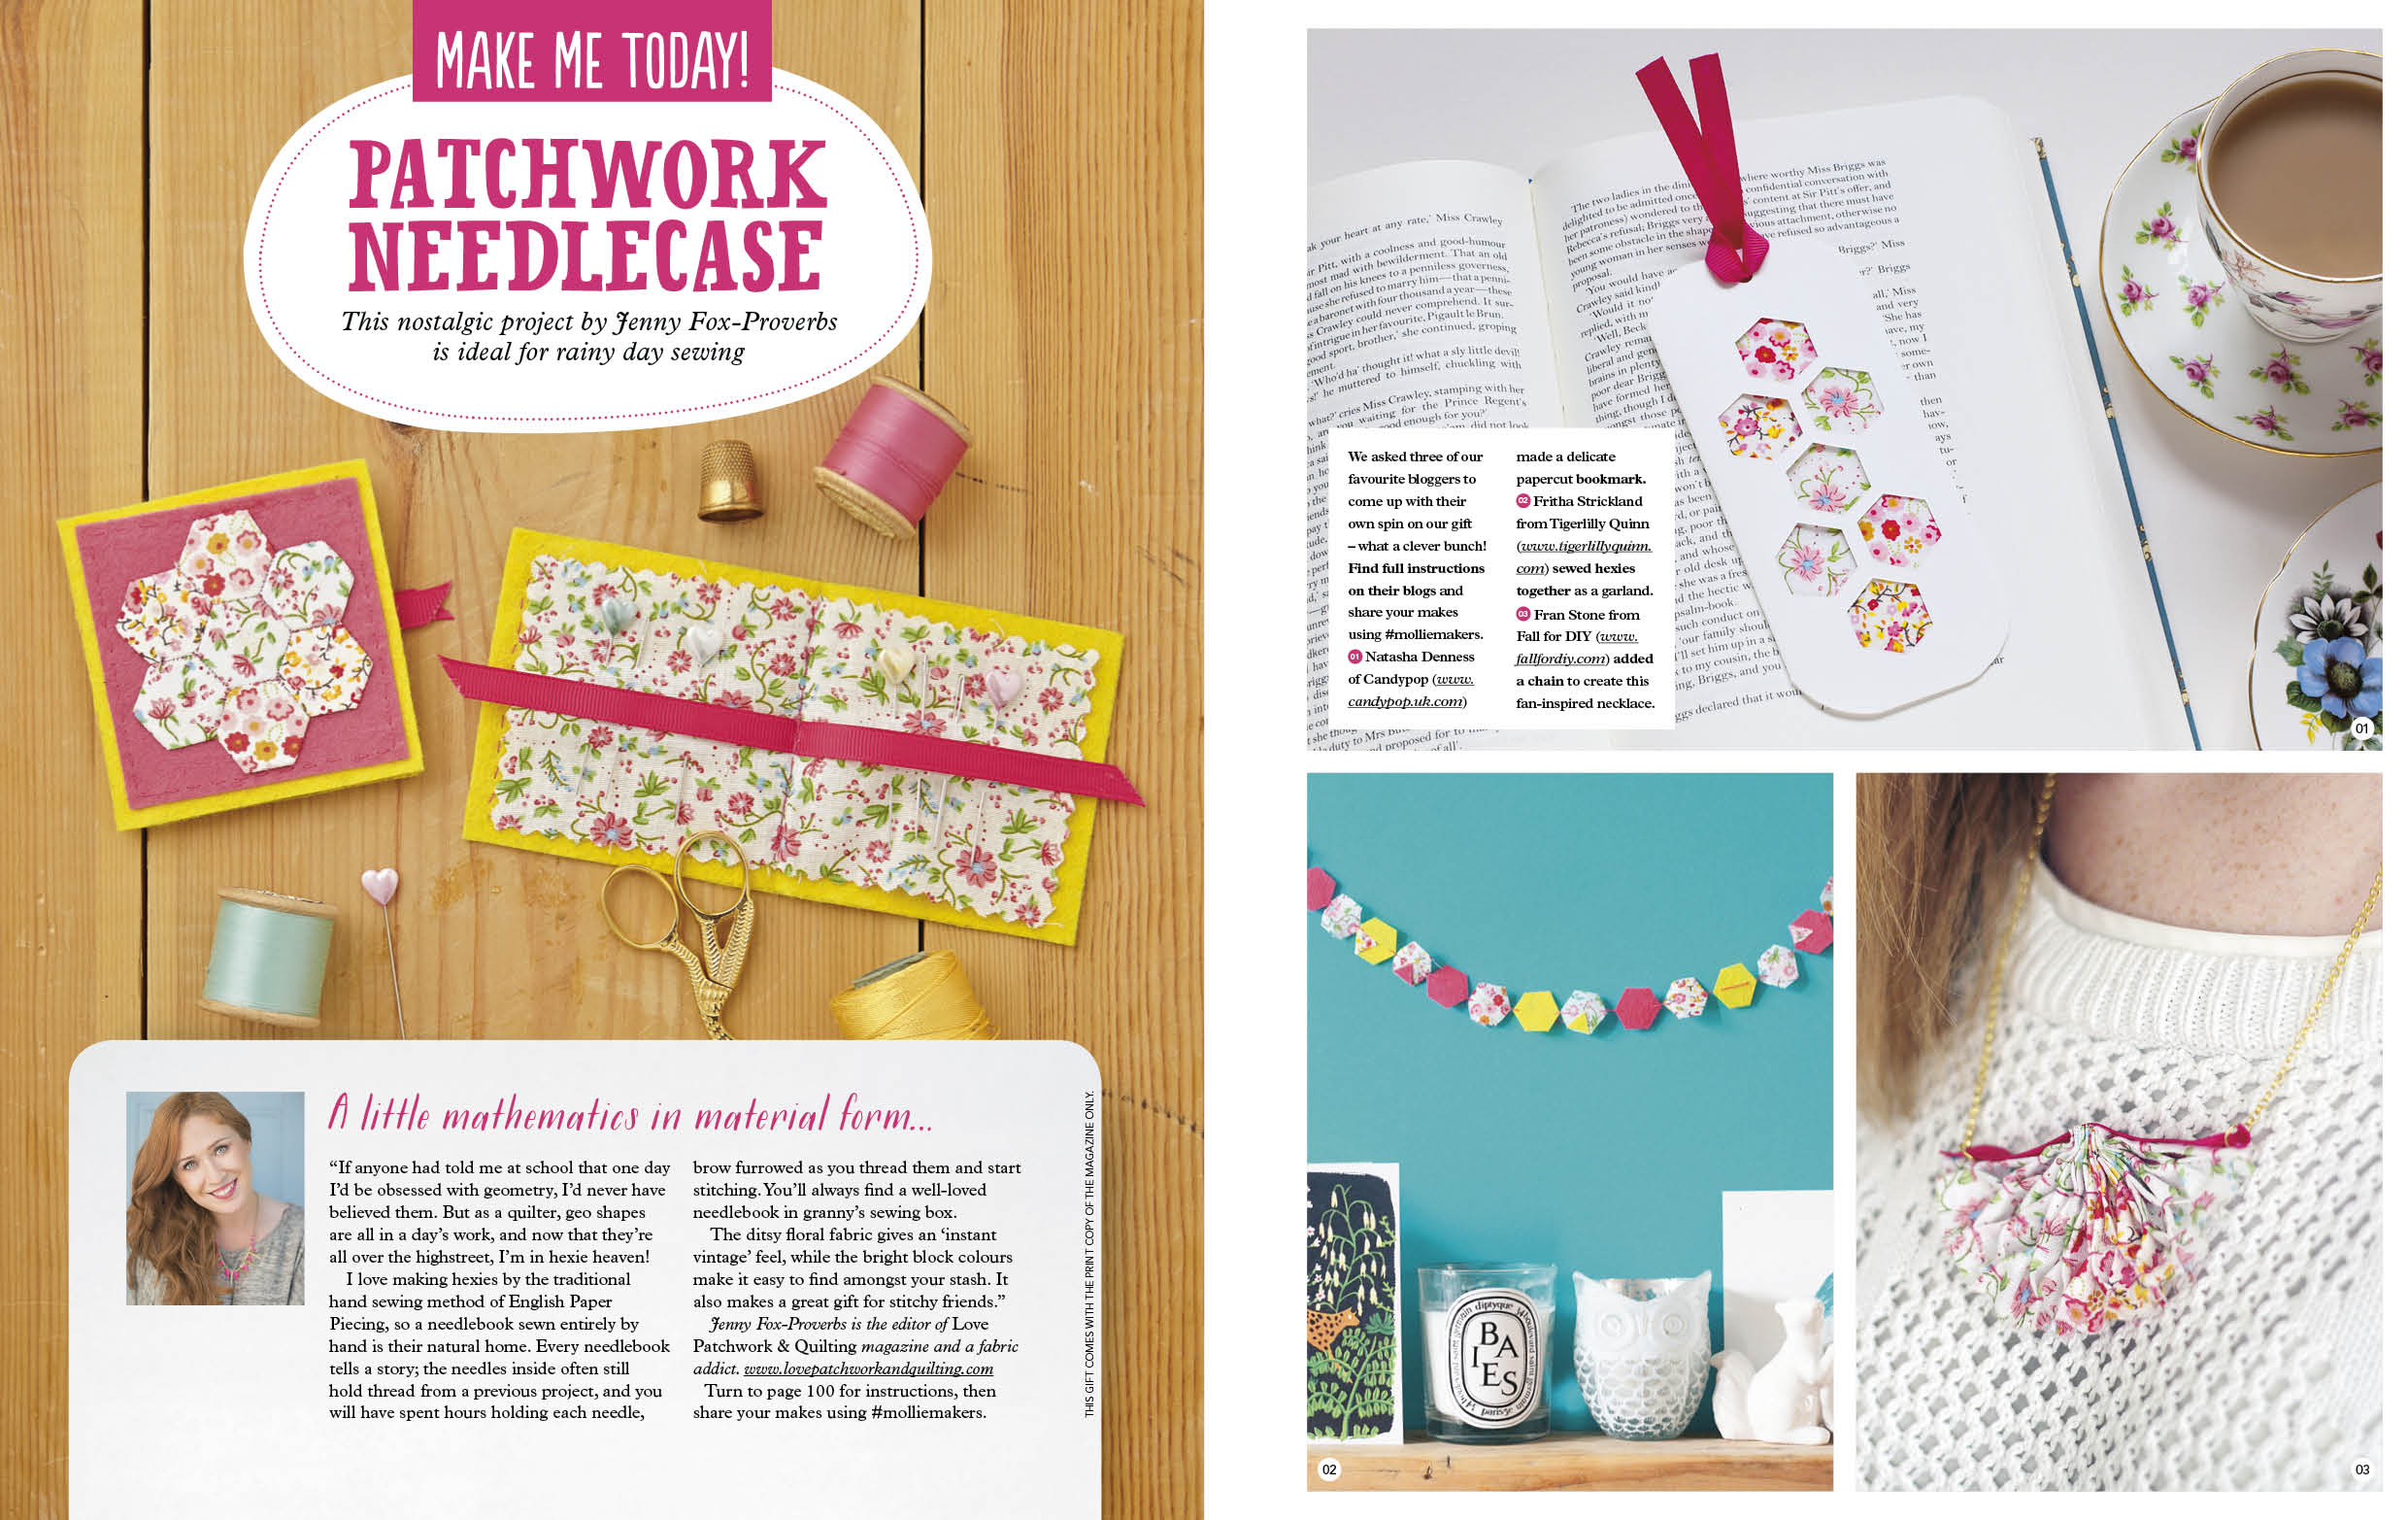
When Mollie Makes asked me to imagine up a different use for their January magazine freebie it reminded me of the covergift stones and couldn’t resist taking a kit designed for one purpose and giving it an entirely different use. Of course this needle case is gorgeous to begin with but if you want to make something different then Natasha from Candy Pop, Fritha over at Tigerlilly Quinn and myself have all put together tutorials to give you a few more options. Make sure you pop over to their blogs to see how they’ve used the materials to create such fantastic DIYs! (Seriously, I’m going to have to get two more copies so I can make both of theirs…)
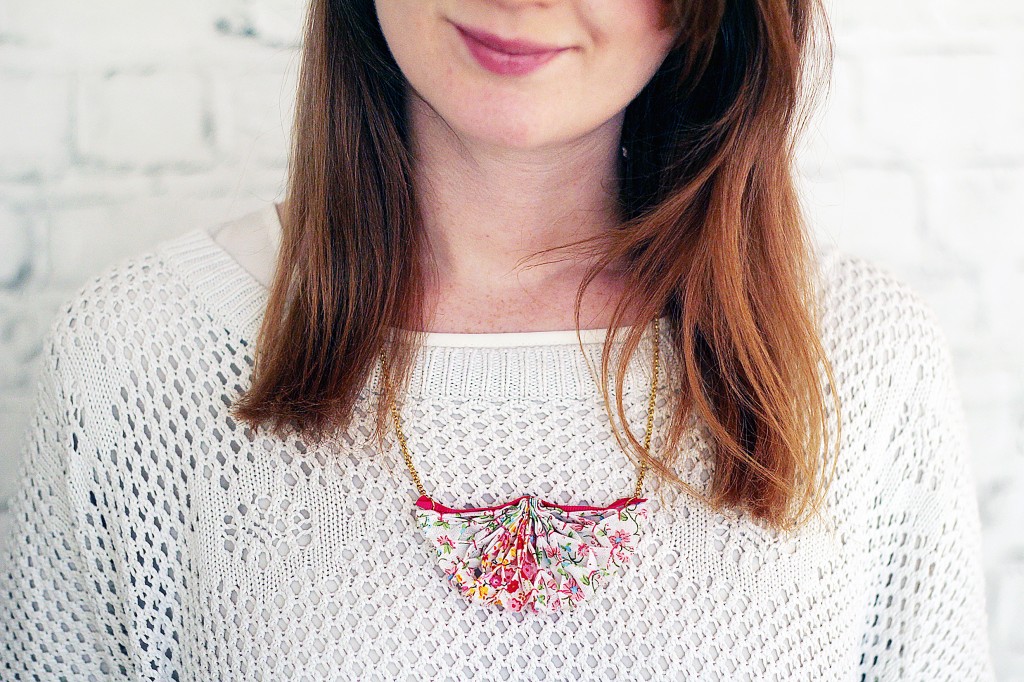
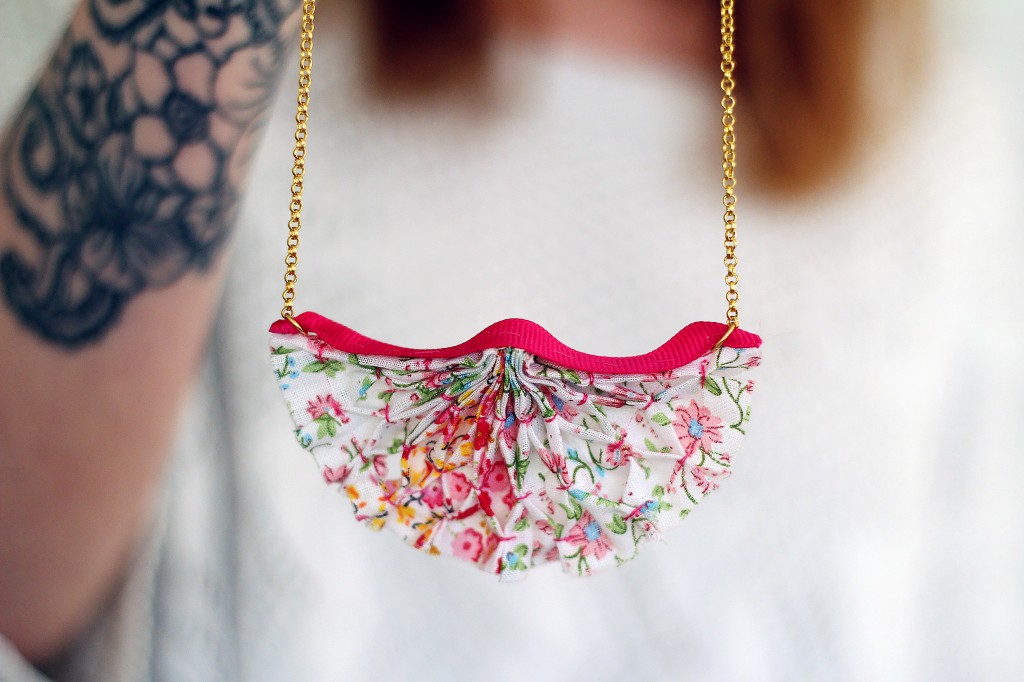
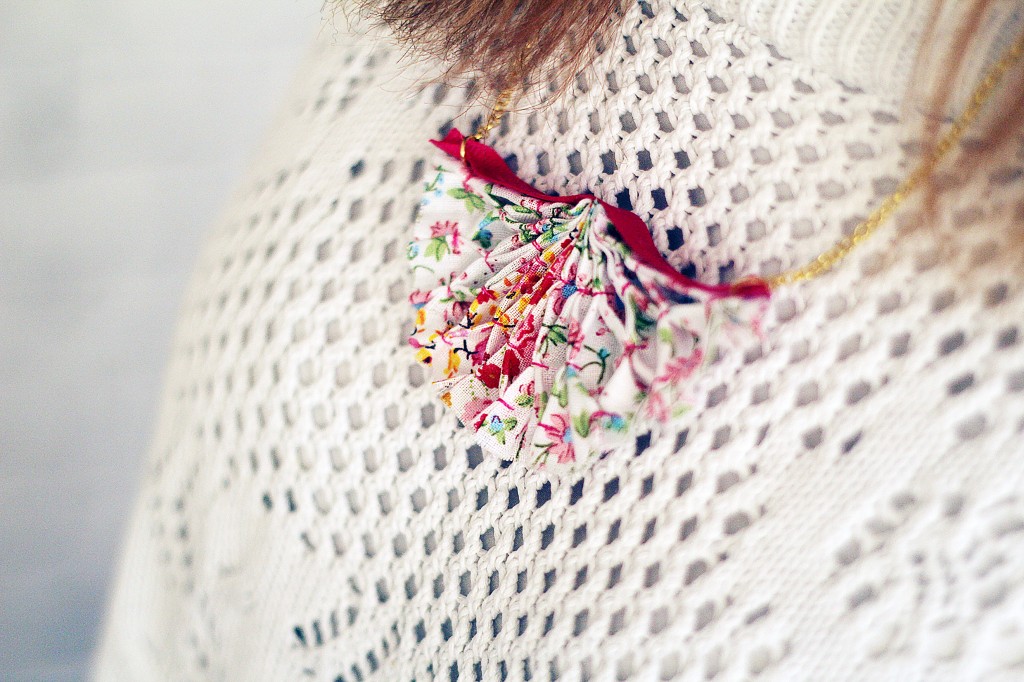
I’ve added a necklace chain and two jump rings to this kit, but everything else (including the needle and thread) comes in the kit. So if you’d like to make this necklace then you’ll just have to run out and get your January copy of Mollie Makes which goes on sale Friday 9th January BUT you guys, I have a very special treat for all you impatient (and overseas) readers! I’ll be giving away a voucher code for a free digital copy of Januarys Mollie Makes magazine to all of you guys reading this now! It’s available until the 19th so make sure you share this post with your friends and family so you can all get your copy… for FREE! I’ll share the code at the end of this post.

These are the materials you get in the kit. I’ve also used:
Instructions:
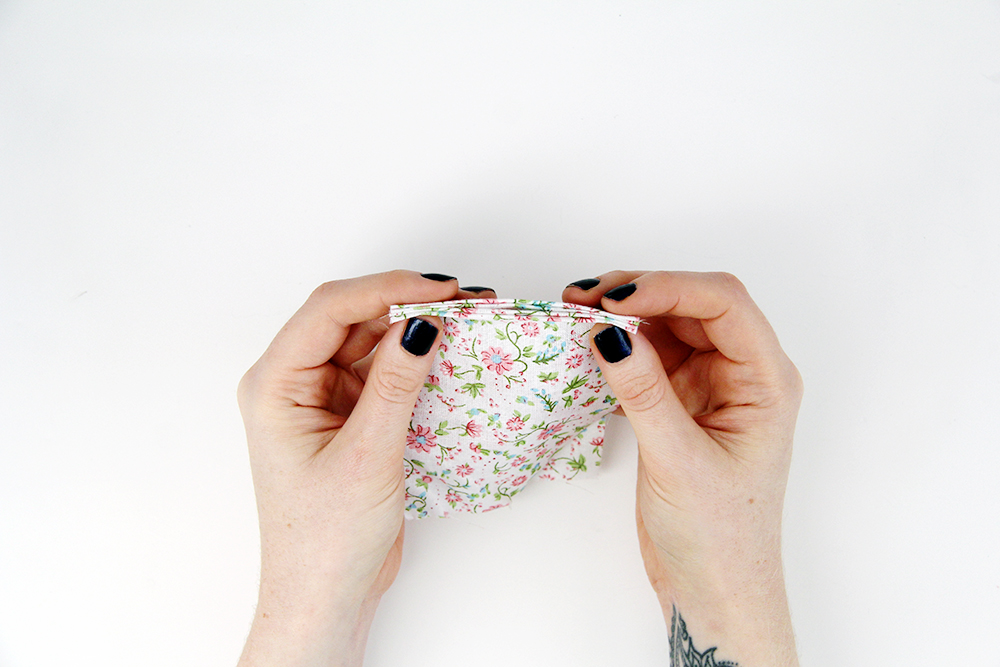
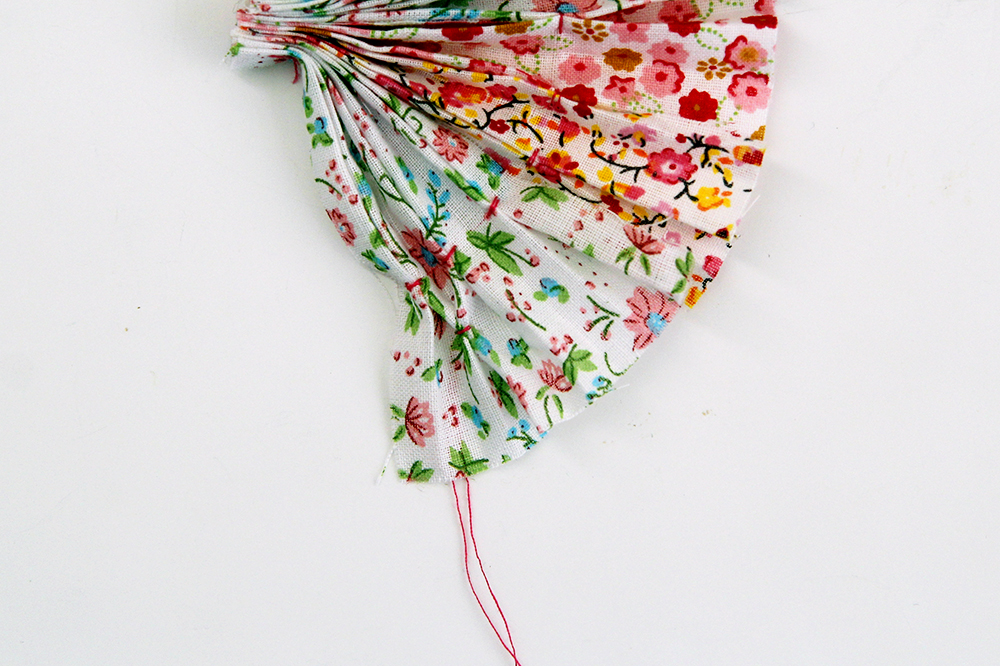
1. Concertina your fabric pieces starting at the length they all have in common (for the largest piece this is the shorter sides)
2. Once you have folded all the way through your fabric secure with a couple of stitches at one end.
3. Do this with all the fabric pieces and join together with a few stitches.
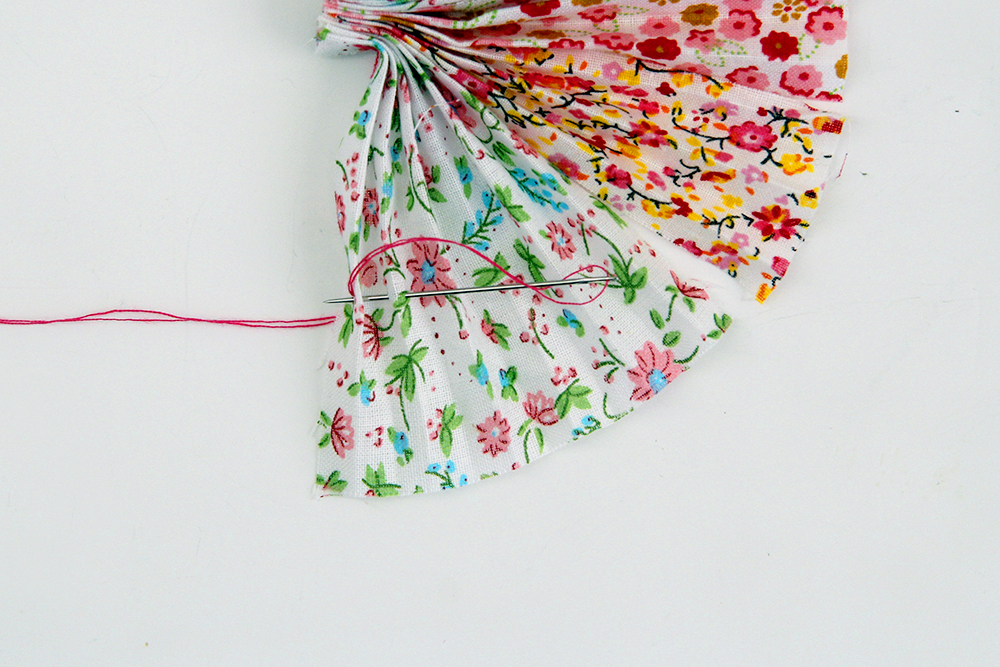
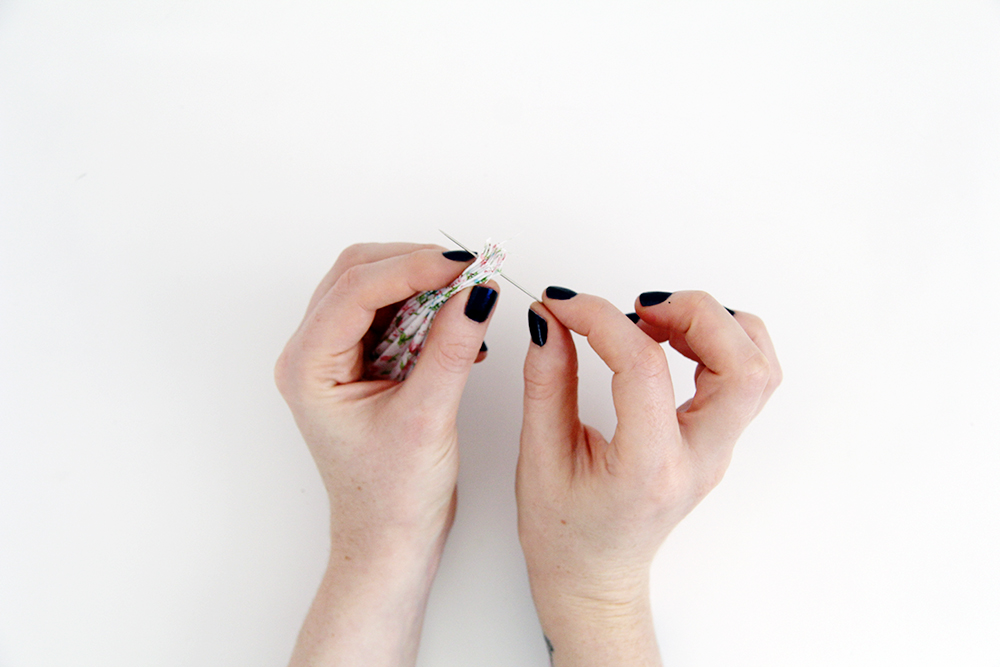
4. Now, about half way down the fan stitch two of the mountain (^) folds together. Start from the back of the piece come over the top of two ‘peaks’ and back into the back of the fabric. You might want to make a double stitch to secure the thread in place.
5. Now move onto the next few stitches and do the same thing, sewing two peaks together.
Continue this pattern until you reach the other side.
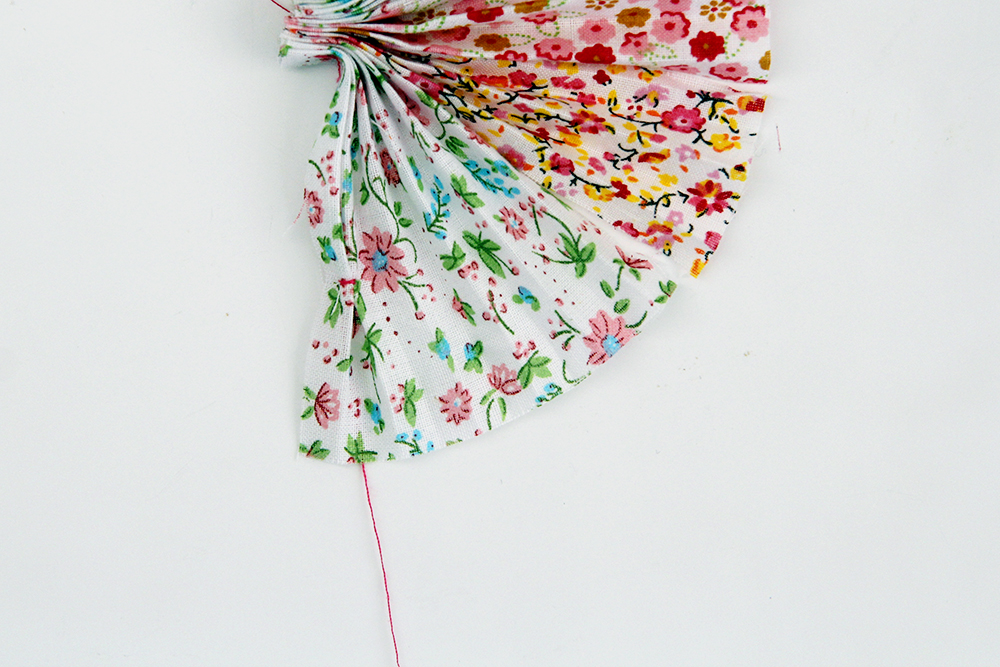
6. Starting from the beginning again miss the first peak and sew the second and third together.
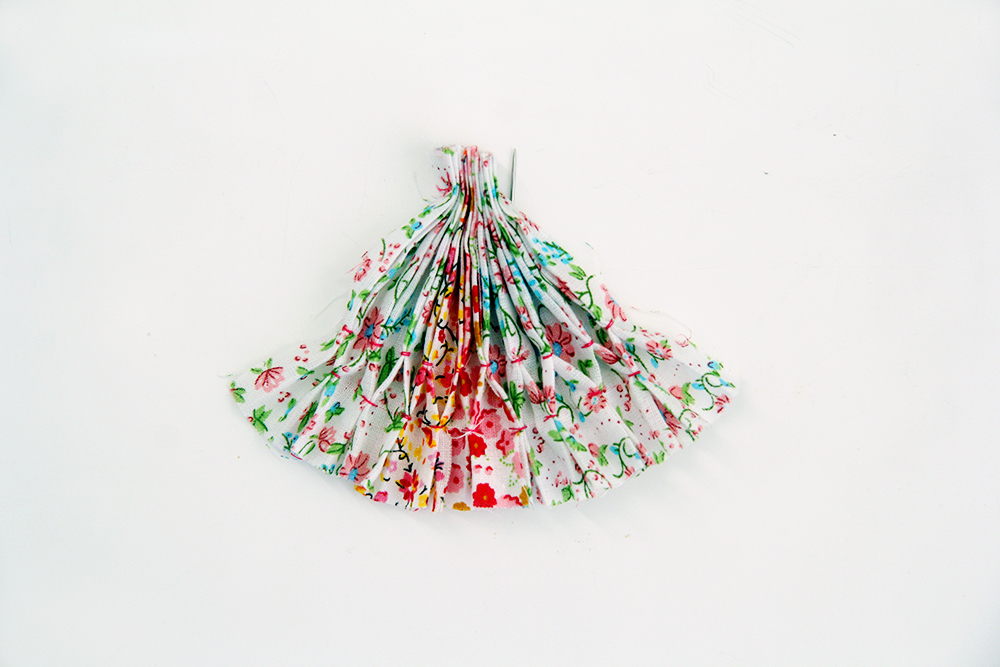
Work along the fan stitching the next two peaks together again.
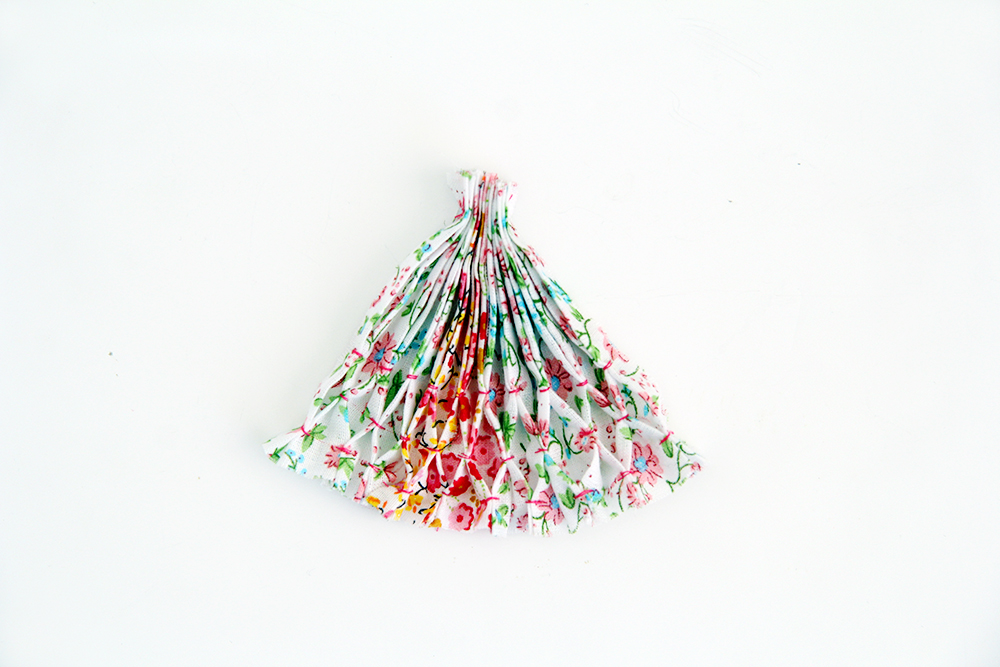
7. Make one more row of stitches following the pattern of the first row. You should now have a honeycomb effect along your fabric.
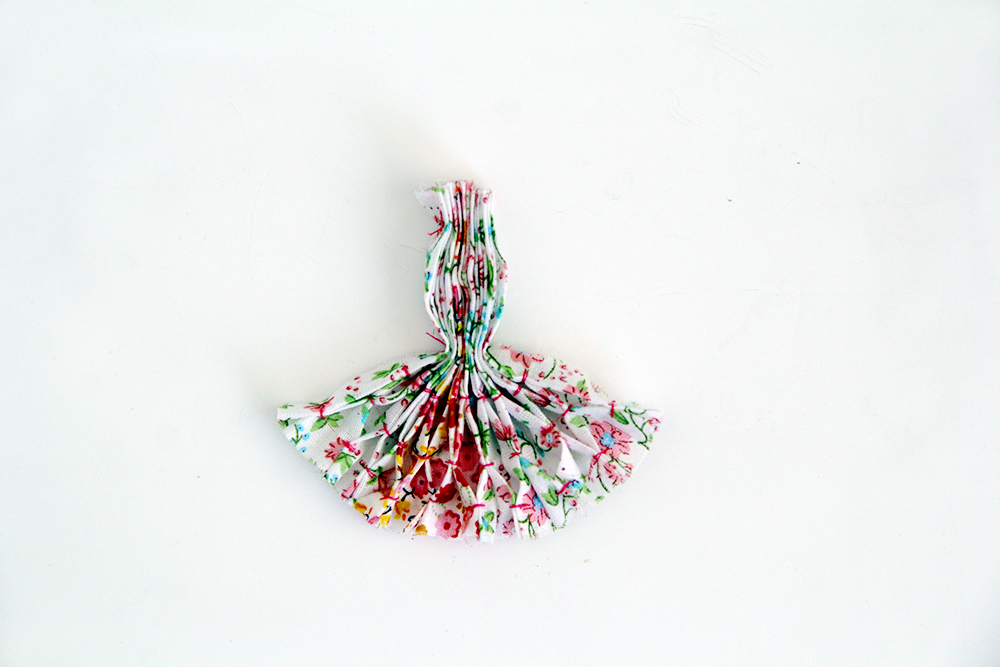
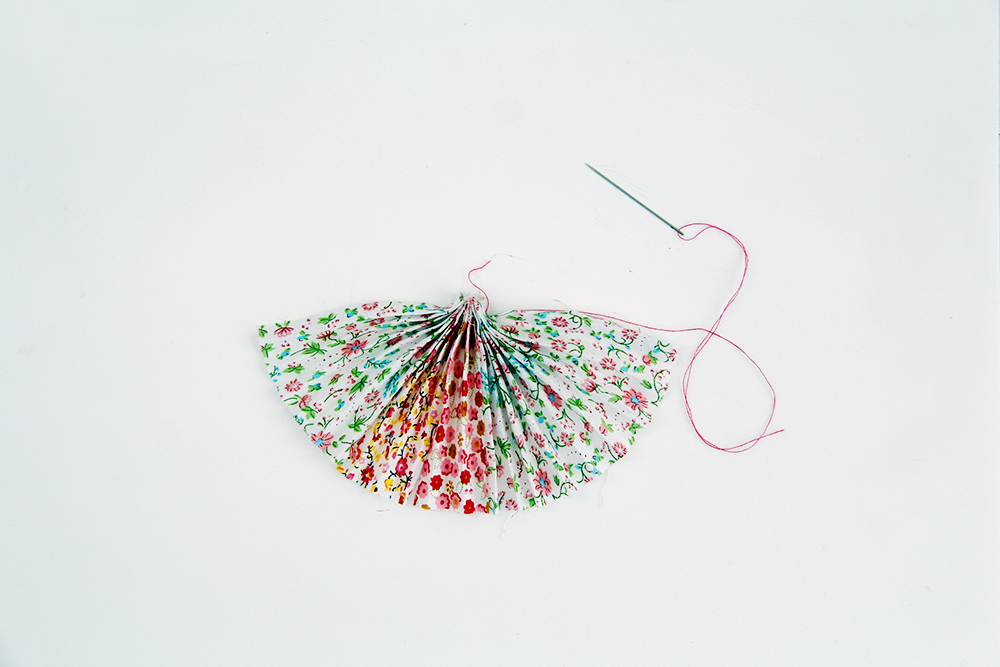
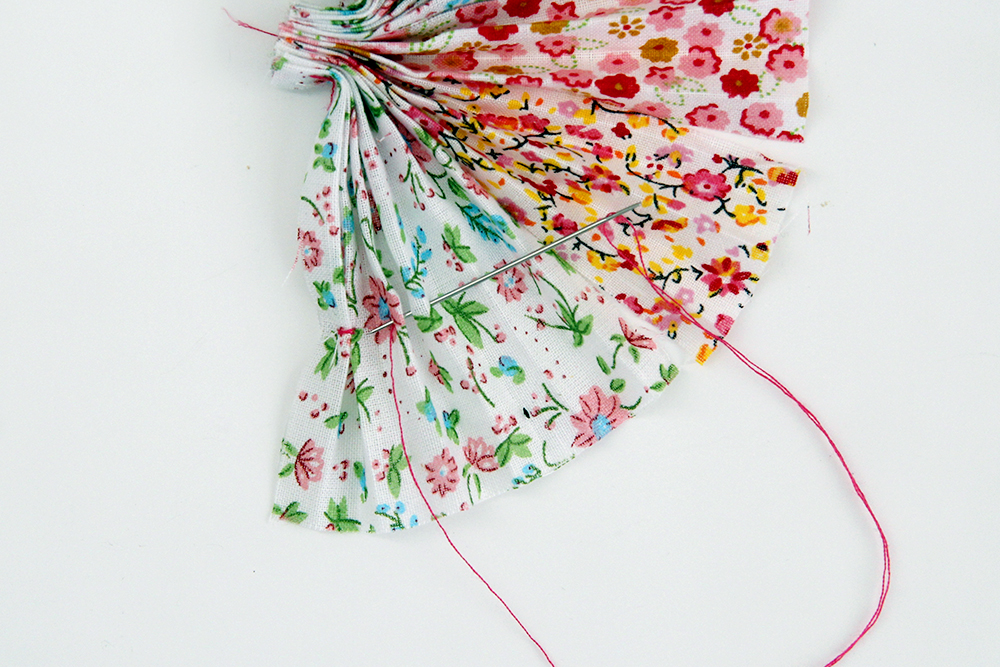
8. Squeeze the fabric together between your fingers about halfway down and make a few stitches at this point. Cut off the fabric above these stitches.
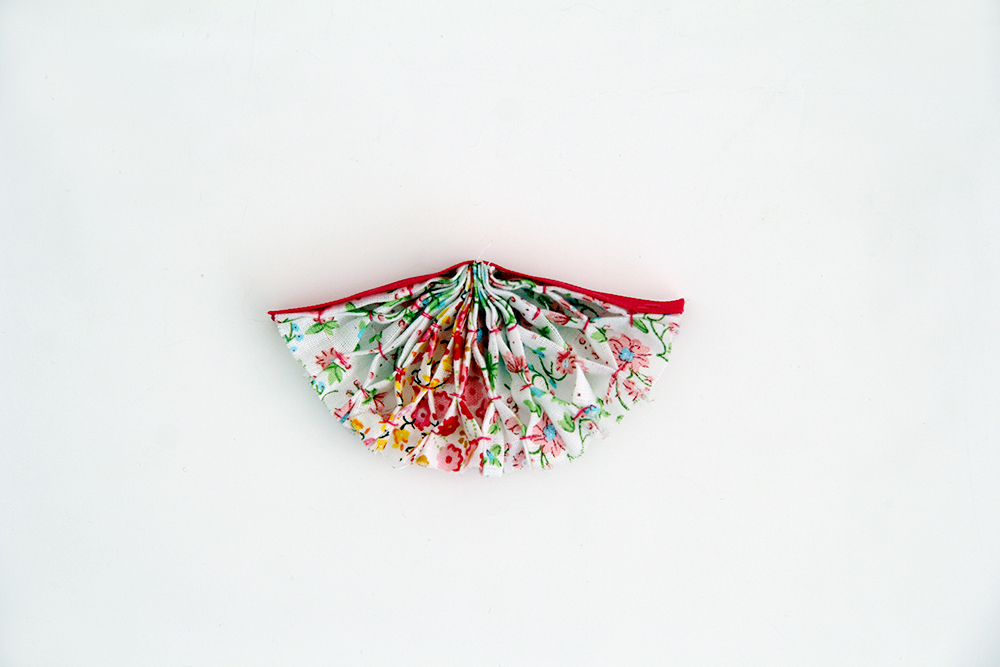
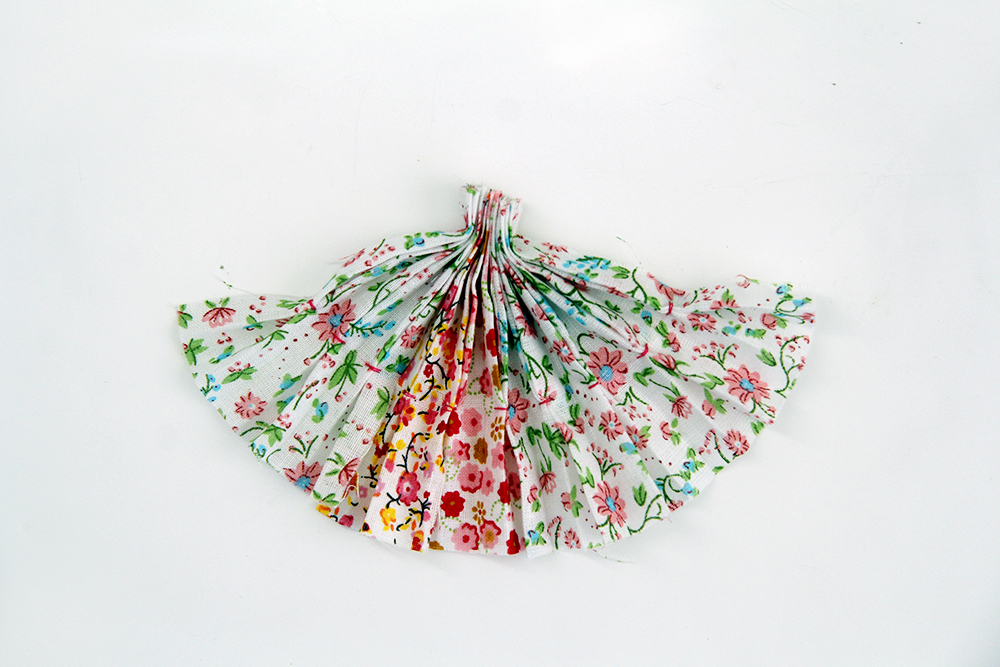
9. Sew the ribbon from the kit along the top of the fabric fan.

10. Split your necklace chain half way down using your pliers and attach to the ribbon in between stitches with the jump rings. If you’d like to learn more about beginner jewellery making you can learn all you need to know to get started on my ecourse: Beads & Baubles
Don’t worry! I didn’t forget. You can get your free digital copy of Mollie Makes by clicking here** and entering the voucher code DIY2015
**Redemption process:
Step 1 – Download the app
Step 2 – Ipad – Tap ‘voucher’, iPhone – Tap ‘help’ then ‘voucher’
Step 3 – Enter voucher code DIY2015
Don’t forget to check out my mini donut necklace post in the magazine as well! Enjoy. Follow this link for a first look at next months copy.


This is completely amazing you clever thing! I would never have thought to do anything like this, lovely to work on this project with you! x
Thank you so much Fritha! This is exactly how I felt when I saw your garland. Fantastic to work with you too! xx
This is gorgeous – I love it! Well done lady. x
Thanks lovely!
ohhh i like this!! i don’t always buy molliemakes n i have stockpile of their past freebies still to make so will defo have a go at this!! <3
Thanks Anoushka! That could be a new years resolution. Put all the gifts to good use! :)
This is so different; I do love a bit of re-purposing! Also my love of semi-precious stones started with those rock and gem magazines too (I remember one was called ‘Treasures of the Earth’). If anything I’m even more of a rock geek now because I write blog posts about them!
Haha Emma! Treasures of the Earth sounds familiar. I want to read you rock geek posts! ;)
Hello.. Fabulous to meet you via Mollie Makes! Your necklace is perfection!
Amazing to meet and work with you too! Hopefully much more in the future :)
This is incredible! I love it! So cute!
Thanks Monique!
There is a lovely lady called Eva, her blog is
http://tinctory.blogspot.co.uk/ she has been making smocked jewellery, necklaces and pendants for a long time just like this. xxx so inspiring
Hey Lynn,
Thanks for sharing that link with me. Eva’s jewellery is beautiful! I love the natural, earthy tones she uses. It makes the folds in the fabric seem so organic. Wonderful!
That looks really fresh and pretty. What a great way to use up little scraps of fabric. I am currently making quilted bags and immediately wanted to make a matching necklace.
This is such a cute design – I cant wait to give this a go. X
Hello!
I love this necklace and all crafts for donuts and your blog is amazinggg, So many great things, and the layout is awesome. I tried to apply the voucher on my iPhone and it said it was not valid :( is this freebie gift period over?? I really wanted to try out that dinosaur stuffy that I saw in the preview of the magazine too!! Aghhhh I hope its not overrrr!
Thanks!
R
Wow! Congrats on being very very creative! The colors are great!