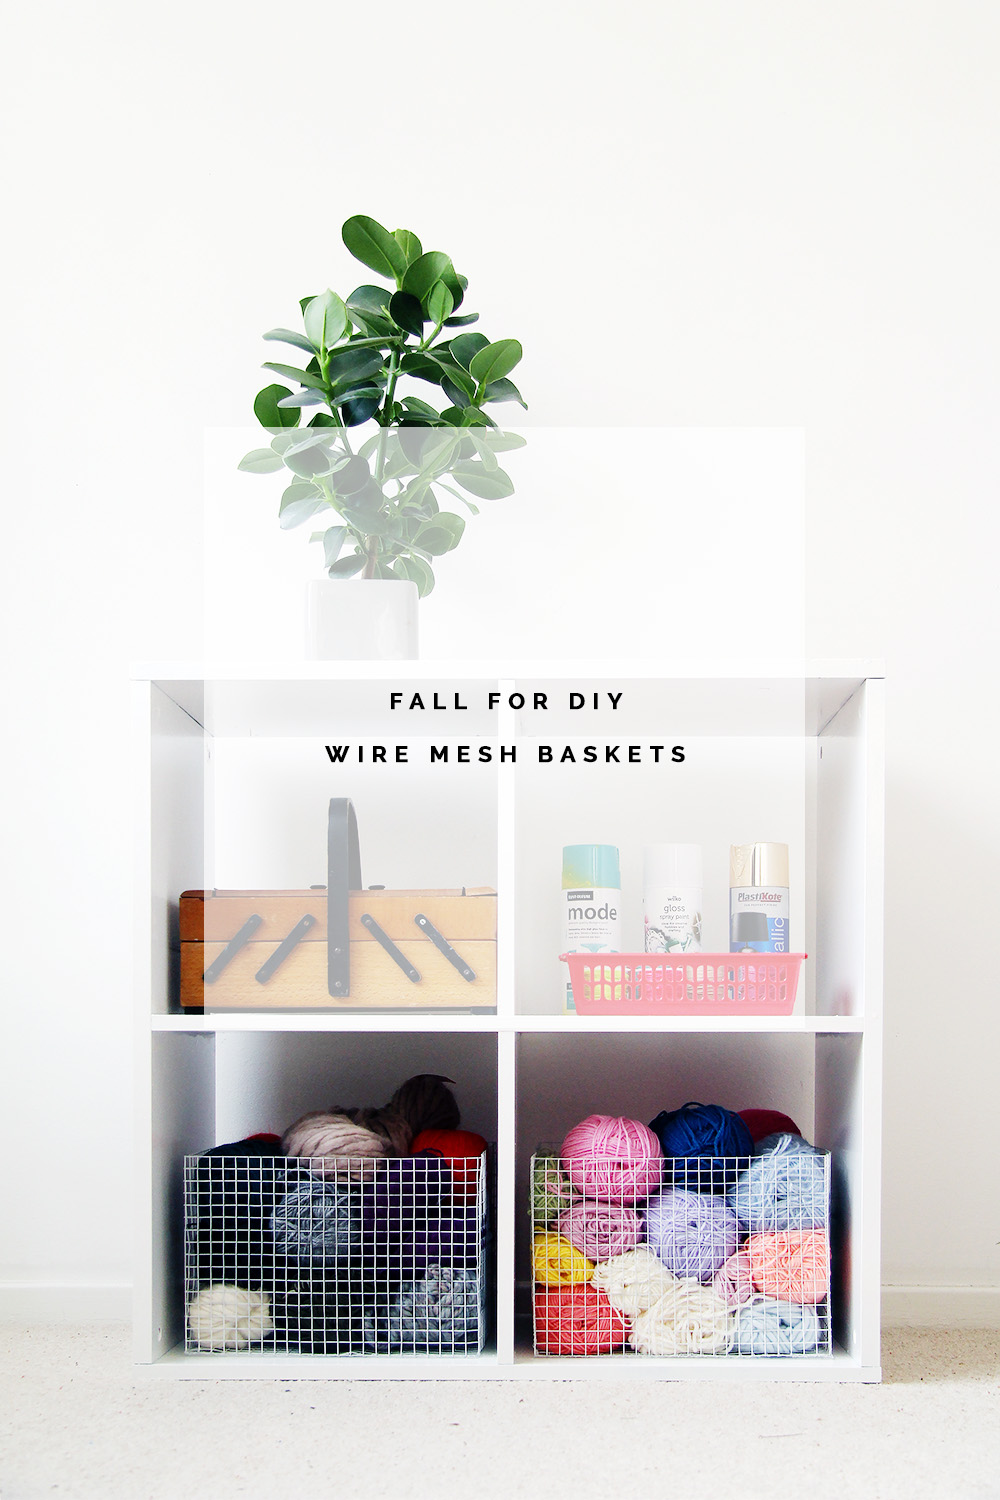
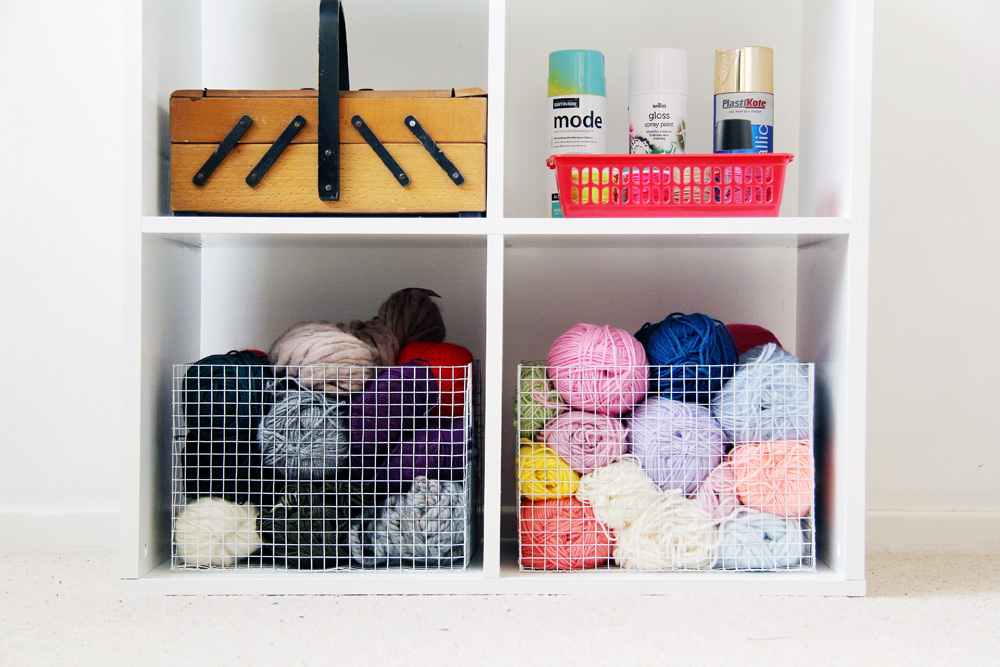
Storage people! How it is I never seem to have the right kind. When I need big boxes I can only find tiny ones, when I need things hidden all I have are clear containers and visa versa. My storage solutions need some serious consideration if I’m ever going to have an organised studio. So I figured I’d kill two birds with one stone. Make some crates to store my ever growing yarn collection and document the process so you lot can do the same! Win win!
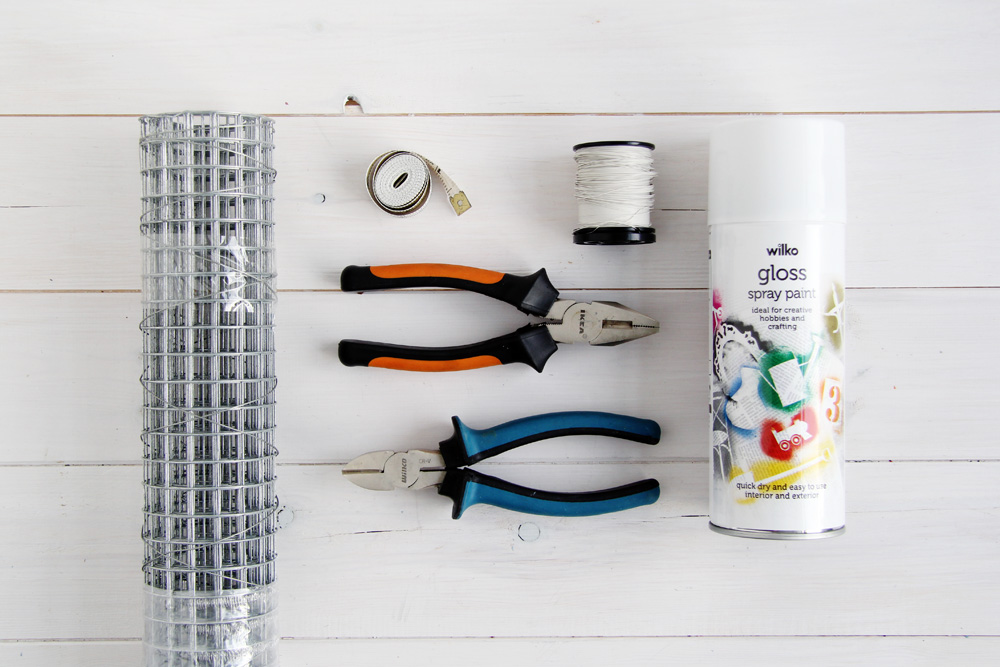
Materials:
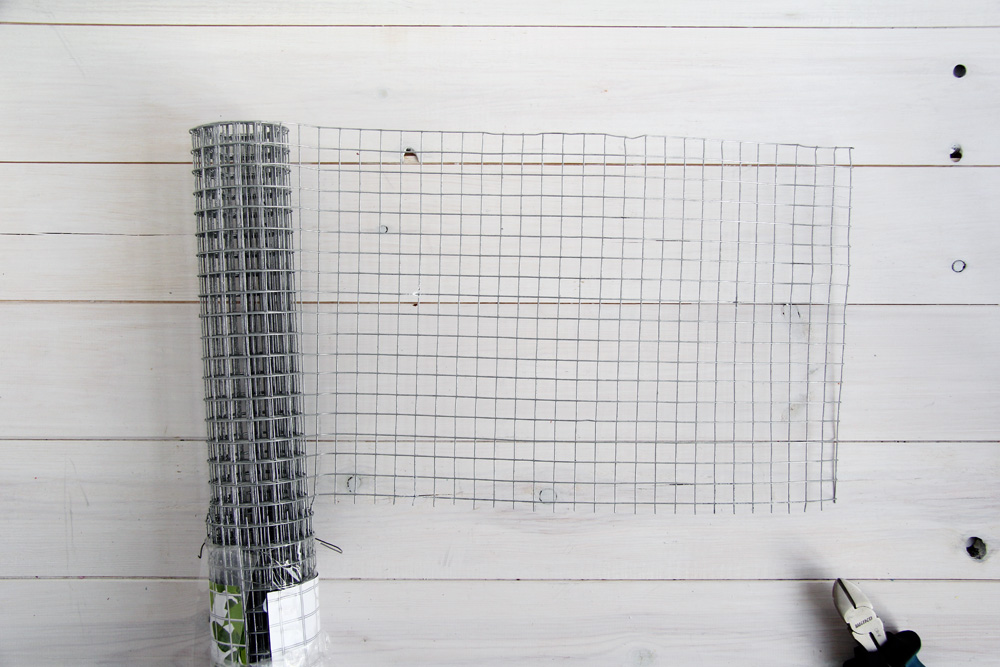
- Galvanised Wire Mesh
- 0.5mm wire
- Wire Cutters/Jewellery Wire Cutters (for a closer cut)
- Flat Pliers (If you’re using regular cutters)
- White Spray Paint
- Tape Measure
Instructions:
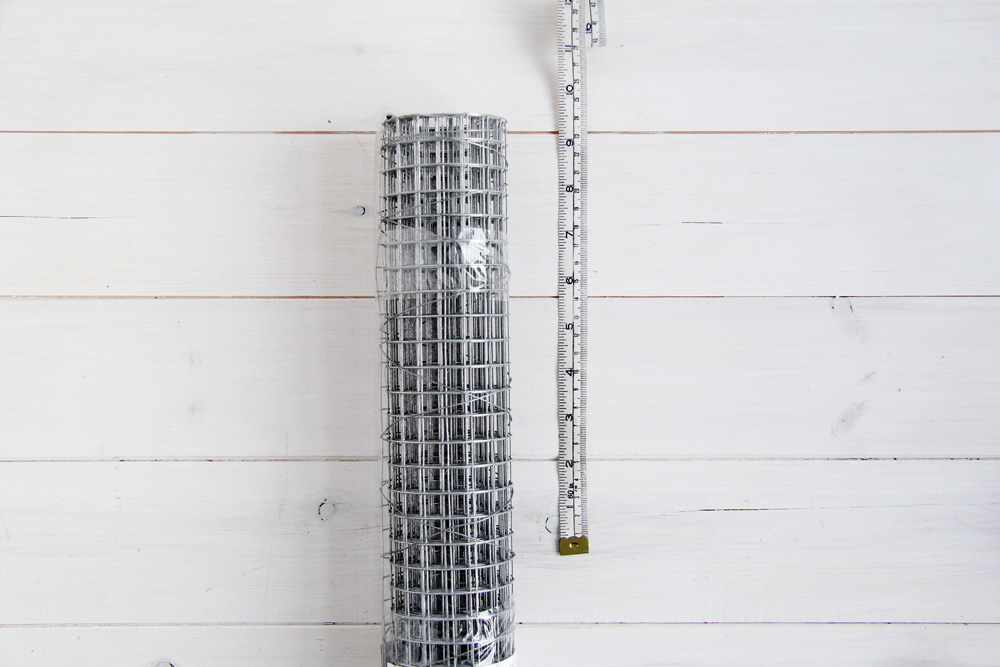
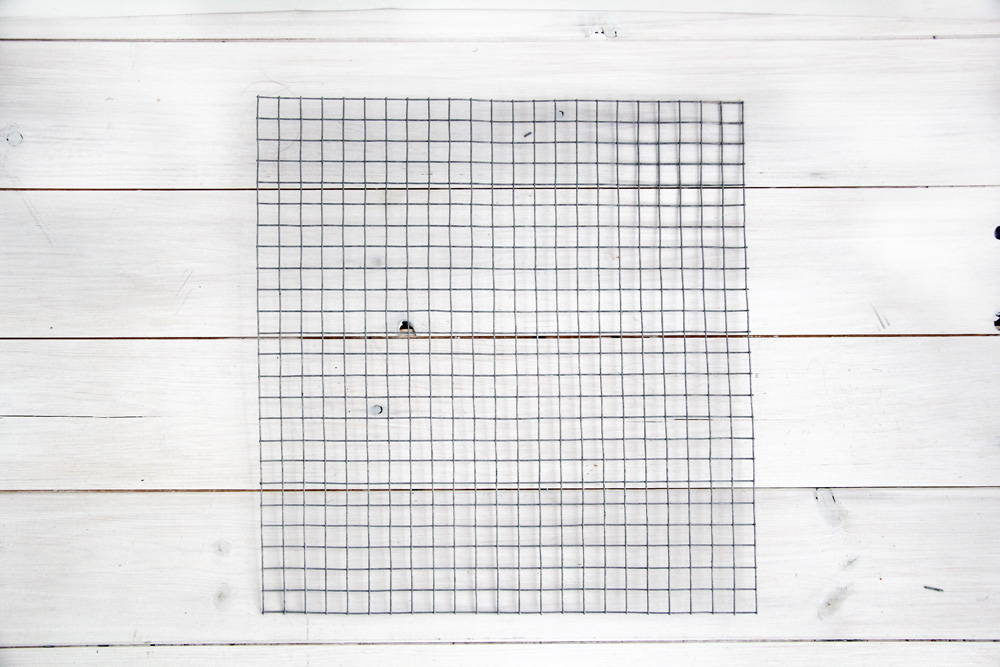
1. Measure the height of your basket down the roll of the mesh and the width of all the sides put together to for the length.
2. Start to cut along the length of wire mesh to the length you measured earlier.
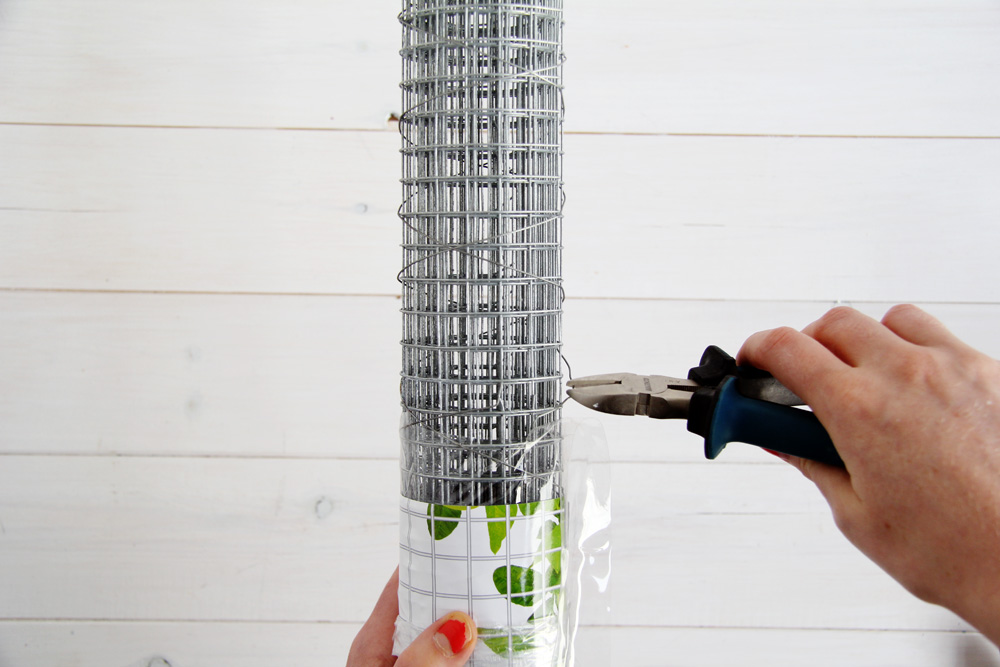
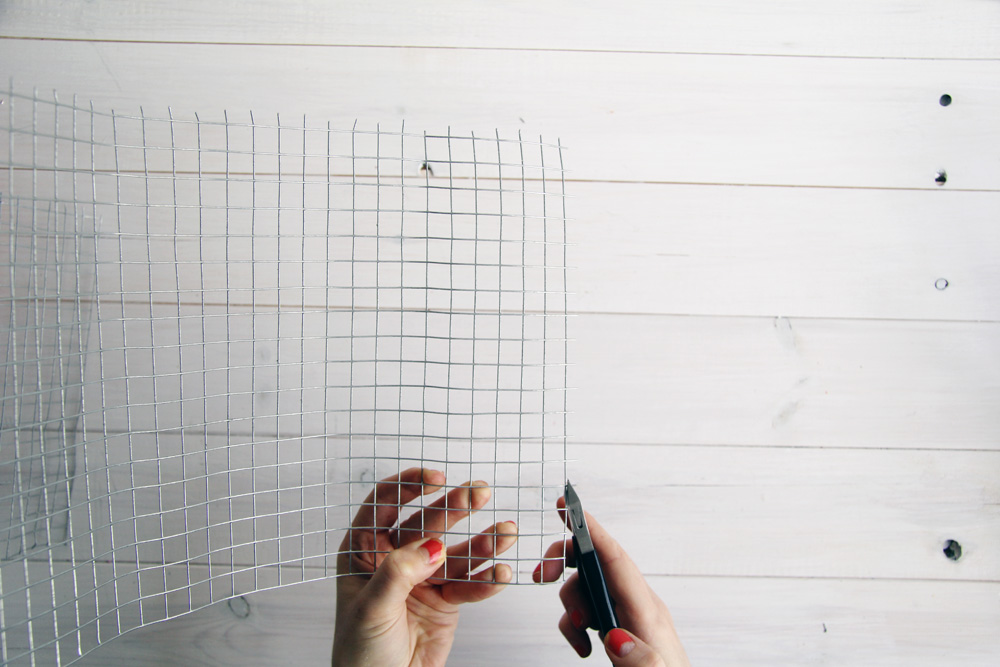
3. Cut along and the whole length then either snip the wire ends off using jewellery pliers or bend them back onto themselves with flat nose pliers. Either way you’re probably going to want to run a file over the ends. They get sharp!
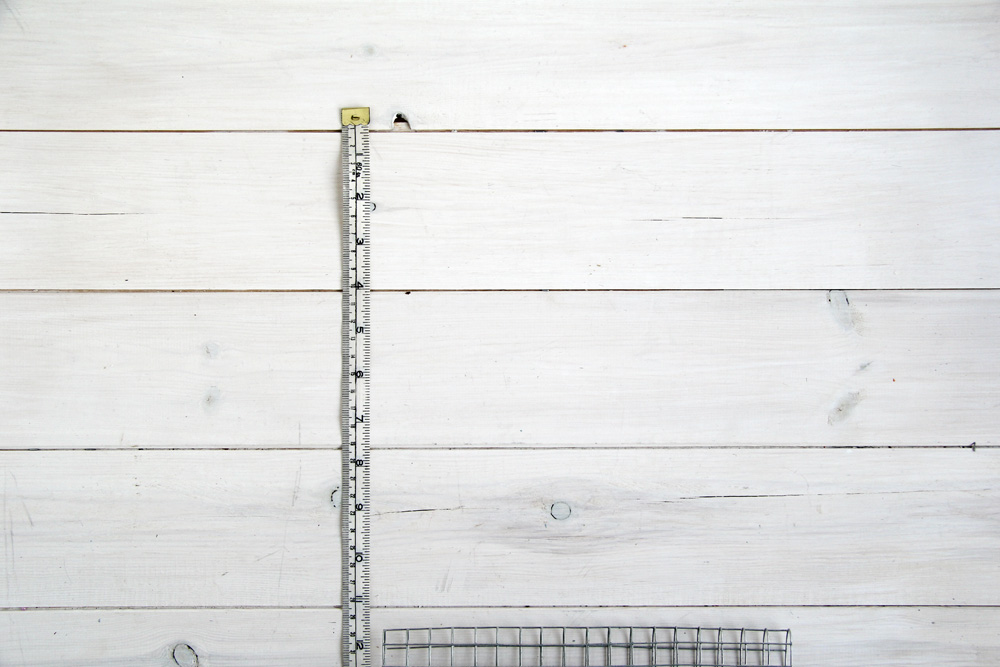
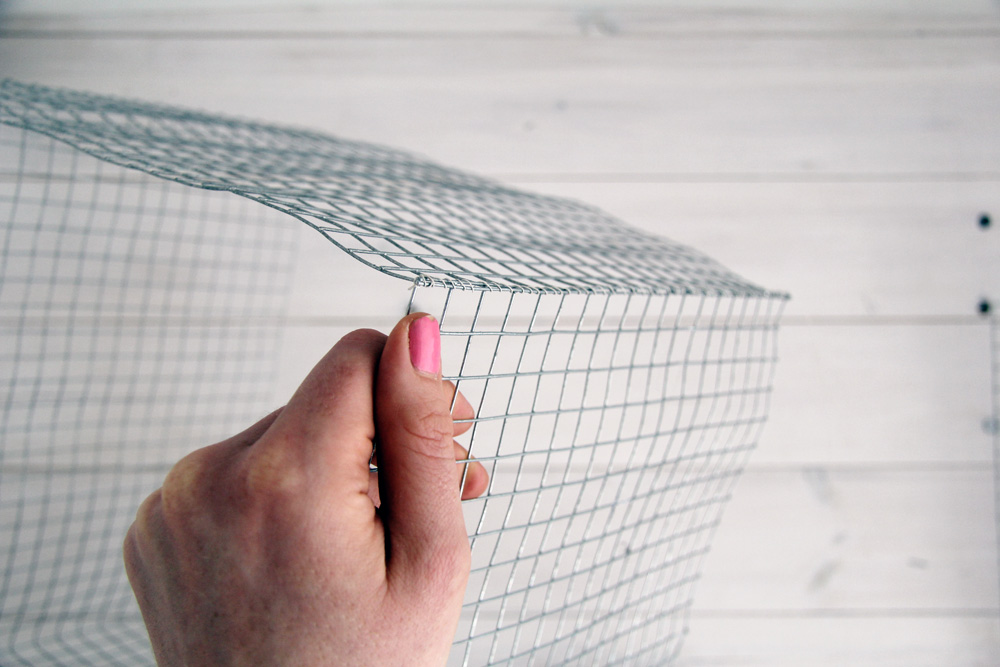
4. Measure the length of one side and fold along the wire at this point.
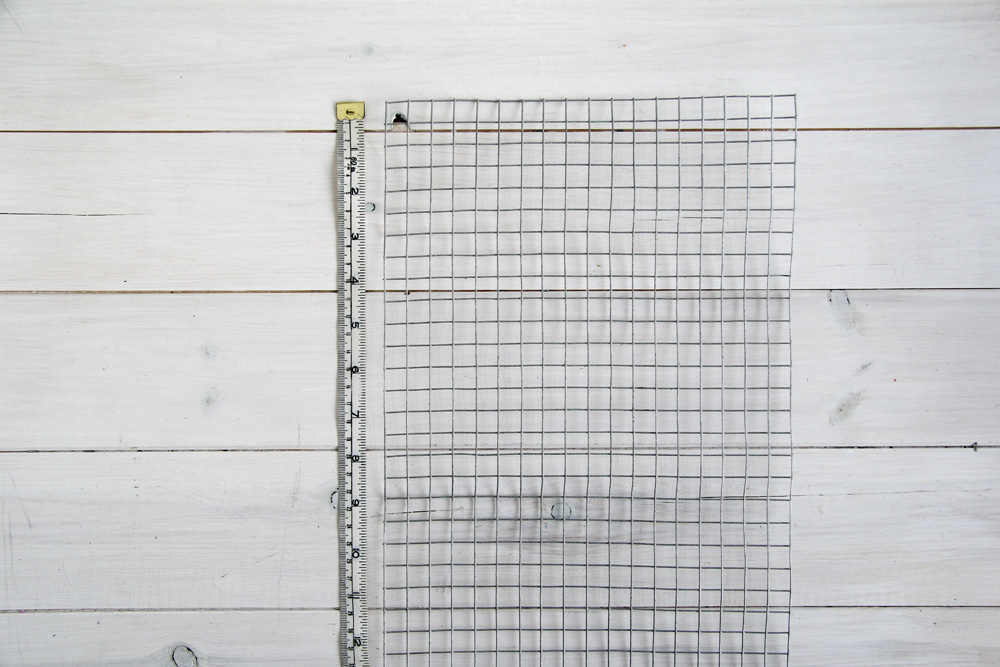
5. Continue to do this until you have all four sides of the box.
6. To make the base measure/count the squares of each side above and cut out another piece of mesh to fit.
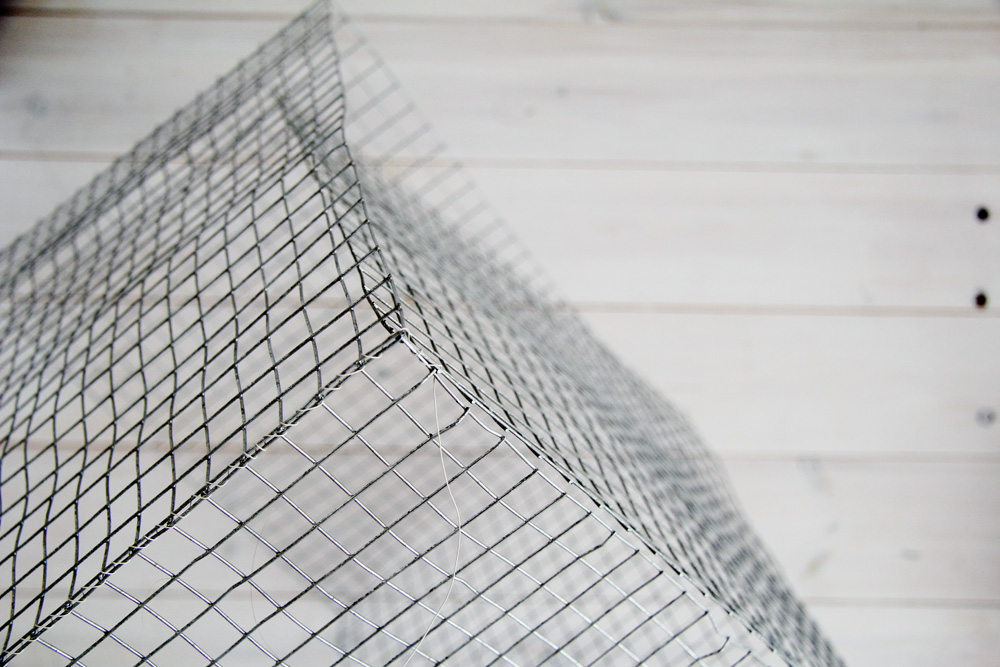
7. Take a meter long length of finer wire and wrap the two ends of the box together keeping the edges aligned.
8. Attach the base of the box the same way wrapping the thinner wire around all four sides of the box and the base.
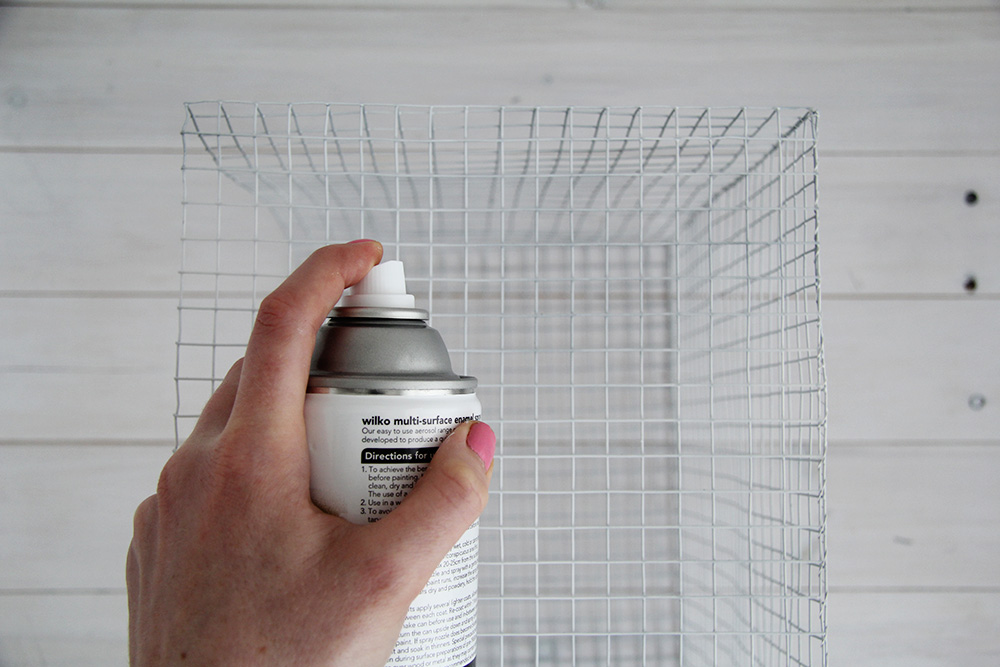
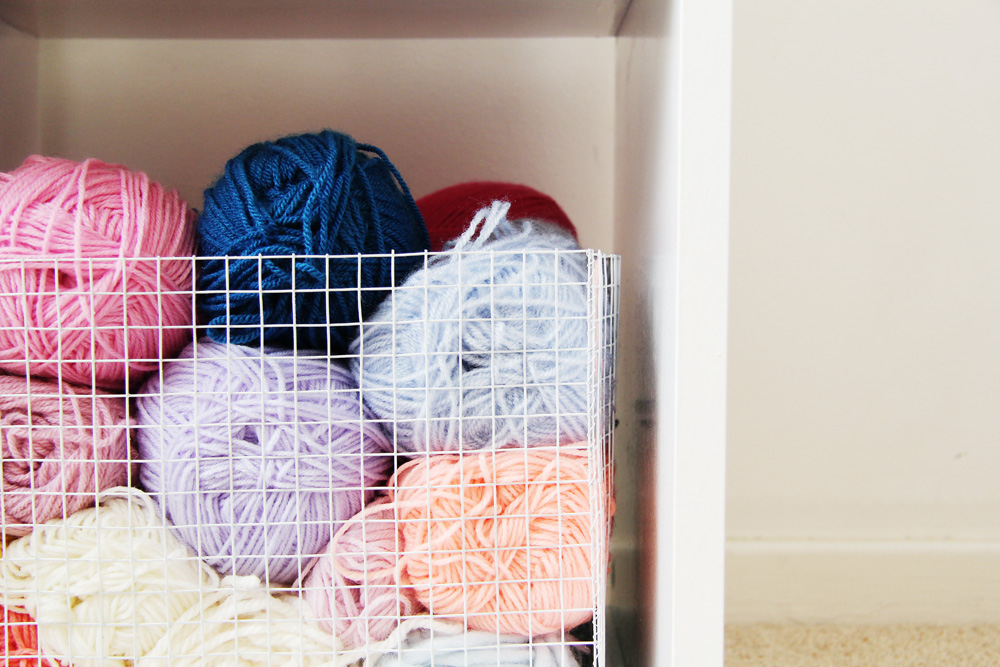
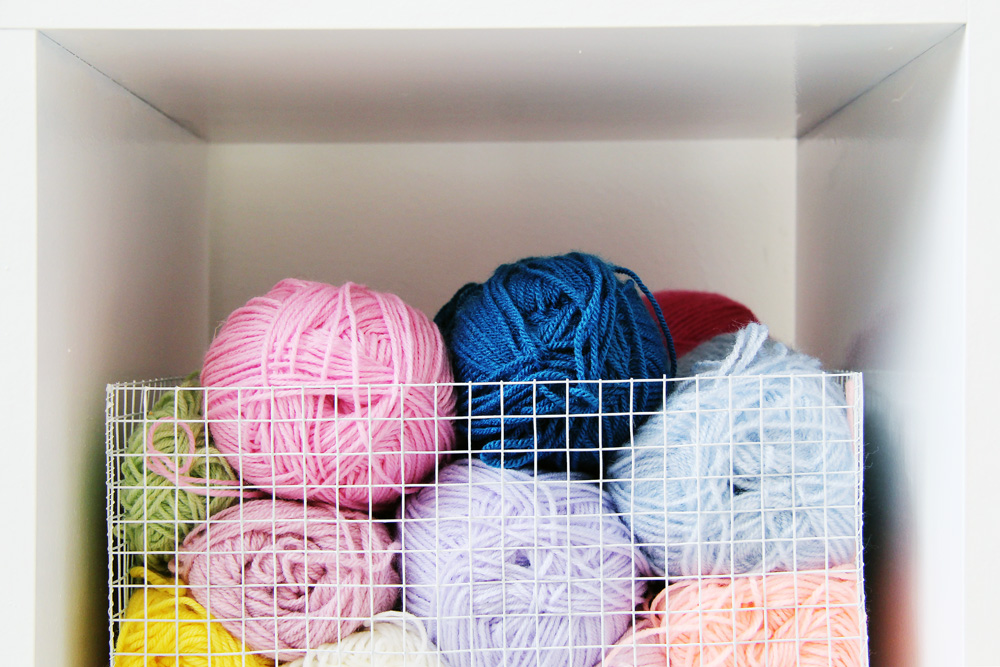
9. Spray all over the outside of the box with the white spray paint. The inside will be covered by the excess paint. Leave to dry and fill with gorgeous things.


Ohhhhhh yes, Fran. These are so pretty! Much simpler to make than I thought, and I love that you painted them white!
Thanks Amy! I can’t help it al the moment. Everything has to be white in my life! I love the minimal look but it can be a bit boring sometimes. I don’t mind so much with these baskets though because I can fill them with colour :)
Wonderful idea! I also like that you painted them. Funny, i’ve been looking for a large wire basket to keep in my living room to store extra cushions and blankets to keep cozy. Maybe I’ll do this too! Love this and all of your projects.
Sarah
thesloppyperfectionist.blogspot.com
Baskets are always useful! You’ll definitely need to file down those edges to make sure you don’t get any pulls on your pillows. ;)
Although not DIY, Ikea currently has 2 different sizes with tops that help them double as tables. Good place for throw pillows or pillows for floor seating, books, mags, soft toys, etc.
Love these, and much easier way to make them than trying to do as one complete piece (how I attempted to do it!!). Can I ask how you stopped the ends being sharp at the top etc so you could handle it without hurting yourself & damaging anything?
Hey Donna,
Yes, I learn’t this the hard way! I used a metal file to smooth each end down. It doesn’t take too long but I did mine after spraying so I went back over with the paint afterwards. xx
Oh my, you are a genius! Thank you!!
I love love love these Fran, another great DIY! It amazes me how you come up with all these fab ideas which are never pricy or overwhelming. I’m really looking forward to starting your e-course this weekend. This Friday is payday and on Saturday I’m going to go hunt for jewelry tools and bits & bobs. Very excited! Jesse x
Ok, you just made me wanna try this! Your such a genius and I LOVE all your idea! So creative!
Greate choice of spraying them white!
This is such a brilliant idea! I love the way the baskets look. Where do you buy the galvanized wire mesh?
Hey Jen, thank you!
You can get the wire mesh from garden stores. I’m not quite sure what it’s used for but it’s durable and flexible! :)
Thanks for your reply, Fran!
Rabbit wire.
More info: rabbit wire is those small squares wire, chicken wire is the stop sign wire, rectangle wire is hog wire. Hog wire would make bigger baskets if needed. To make a cute table basket, cut the rabbit wire into a single square, go around the edges with ribbon or yarn [blanket stitch or crochet]. Wire two diagonal corners together and add bow at peak. We used to do these at church for napkin holders. Add decorations for seasons or events.
I love this idea, also. This kind of wire is used by farmers or people who raises rabbits, or have rabbit trouble in their gardens. We called it rabbit fence, because it works great as a cage or a garden deterrent. It can be found at any farm equipment store or garden store.
Oh my goodness this is AWESOME, why didn’t I ever think of this ??? Thanks for the tips and I now have my perfect storage boxes for material stash for sewing !!!! THANK YOU ❤️
This really is a great idea. Did you try using J-clips to connect the panels? They are easier to work with, but mine always felt so loose. Maybe the paint would ‘glue’ them in place….
Now my mind is running with your idea. Add wood around the top secured with staples to make wire drawers. HEY!!! I could use you idea to organize the gazillion mismatched plastic containers in my kitchen!
Hey Lula, thank you so much!
I have not tried using J-clips that sounds much easier! I love the idea of the wood around the top too. The wires can be a bit sharp so you have to make sure they don’t catch. This is a great solution to that. Let me know how it goes :D
I lined my baskets with left over cotton fabric I had on hand. Now there is no worry regarding snags.
Beautiful, yes, I will try making a few of these. Thank you so much.
If you don’t want to or have the time to make the cloth liner, I used small plastic tubing, cut a slit and pushed it down over the top edge.
Great idea Christy!
Hi there, in my experience, there is no way to cut the wire close enough not to have a burr remaining. What can I do to get rid of them? I use wire cutters, pliers, scissors, nothing gets close enough.
Just use a metal file to ‘sand’ (not the correct term I think) them down until smooth
Fantastic site. A lot of helpful info here.
I am sending it to several pals ans also sharing in delicious.
And of course, thank you to your sweat!
Put more information on your website like this one, I really like these types of blogs