• Home
  • Blog
  • About
  • Collaborate
    • Media Kit
  • We Make
    • Bloglovin
    • Facebook
    • Instagram
    • Pinterest
    • Twitter
    • YouTube

Fall For DIY

  • DIY
  • Interiors
    • Planters
    • Paper
    • embroidery
    • Drinks
  • Blogging
    • Photography
    • Instagram
  • fashion
    • Jewellery
    • Accessories
  • Inspiration
    • Round Up
    • 50 DIYs
  • Office
    • Free Printables
    • Organize
  • Party
    • Christmas
    • Halloween

Our favourite things in your inbox every month!

How to Make Triangular Jump Rings

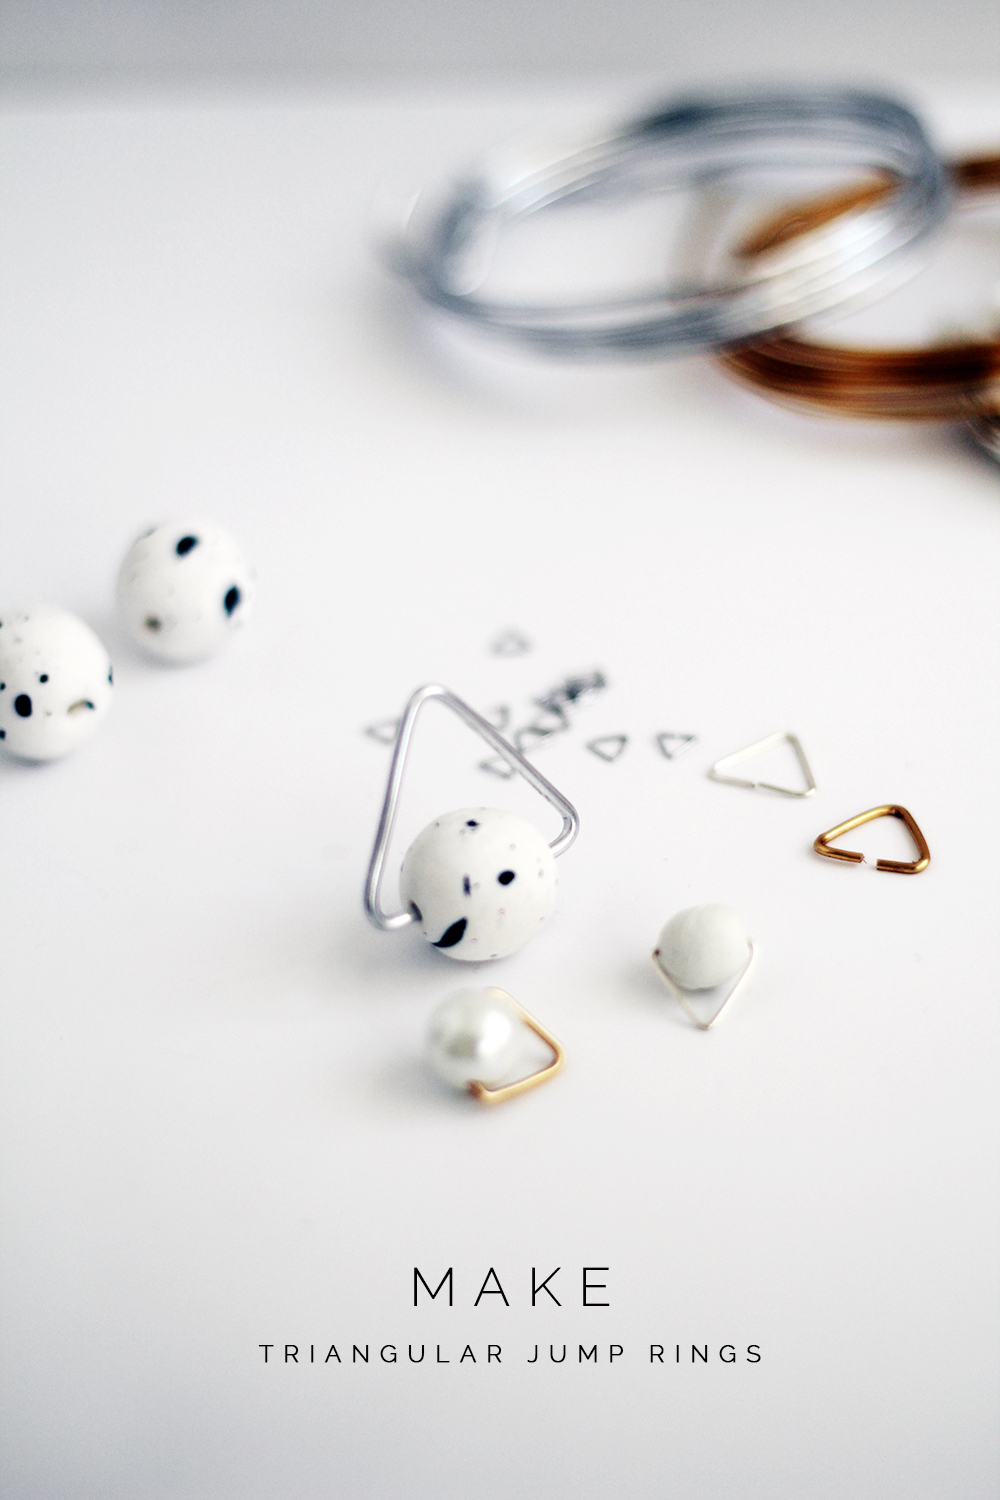
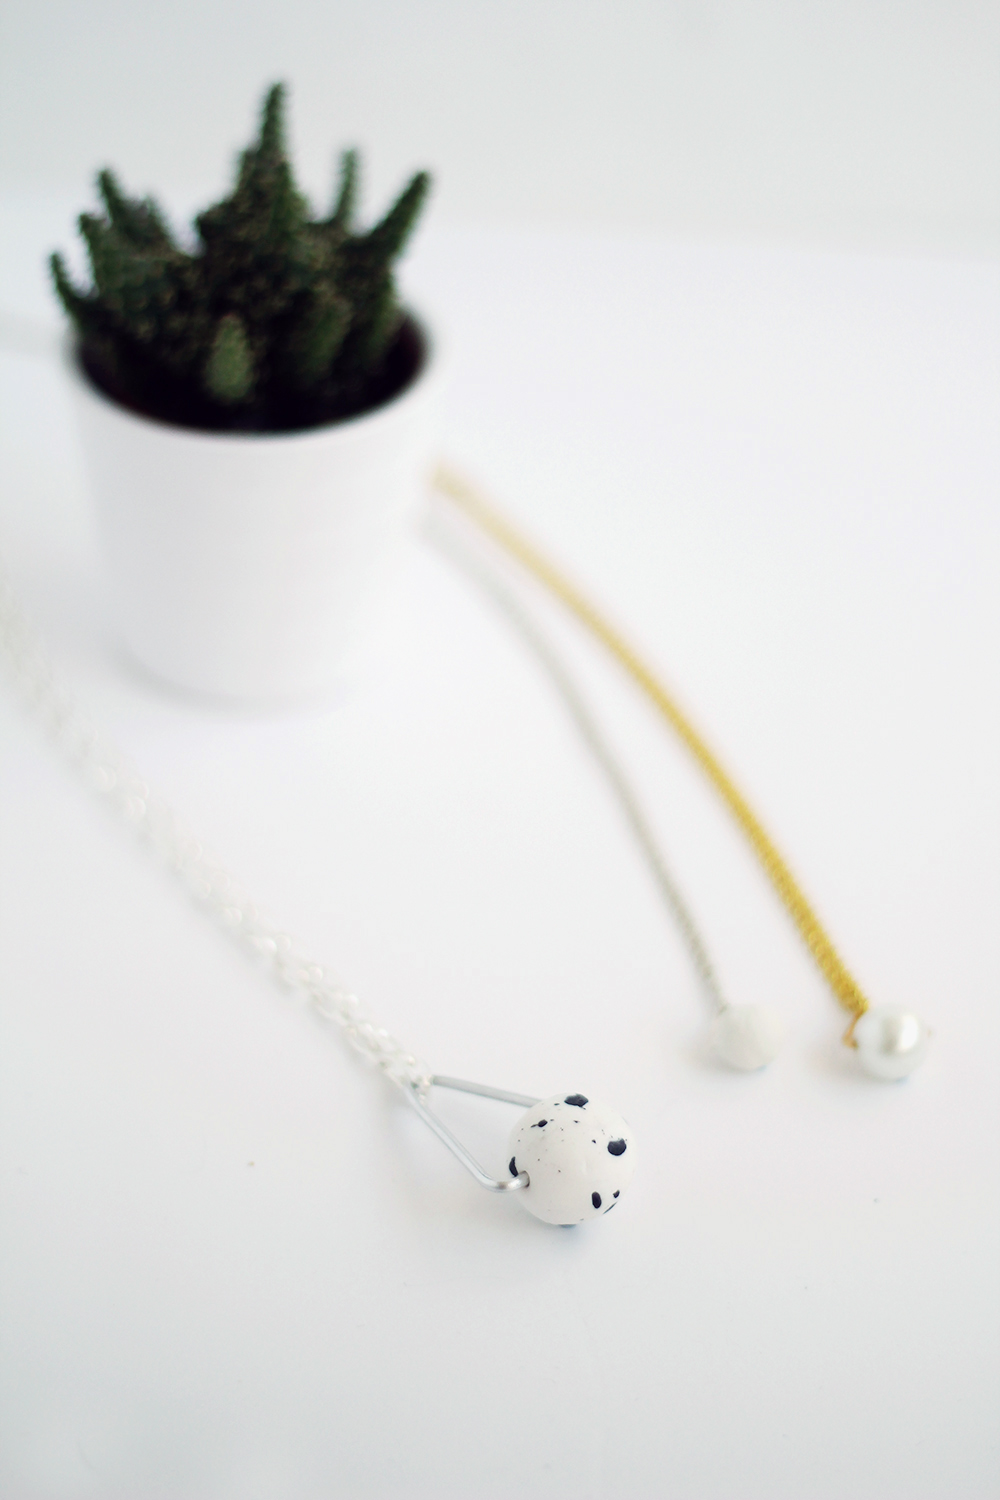
I’m currently in the middle of designing a new range of jewellery to sell on my Etsy shop. One of the great things about having this time to experiment with designs is that I’m actually using new tools and components that I have previously overlooked or have been unable to find a suitable use for. This is giving me tons of new ideas for new tutorials that I just had to share. How ace is that!? One of the things I’ve found out is jump rings don’t have to be rings. (Why are they called jump rings anyway!?) These triangular jump rings are one of my new favourite supplies and they are so easy to make. You can create them as subtle or as bold as you like depending on the wire colour and thickness. I love the thick, chrome, aluminium wire I’ve used to offset the handmade dalmatian bead, but alternatively you could use a thinner wire for a more delicate look. Make it your own!
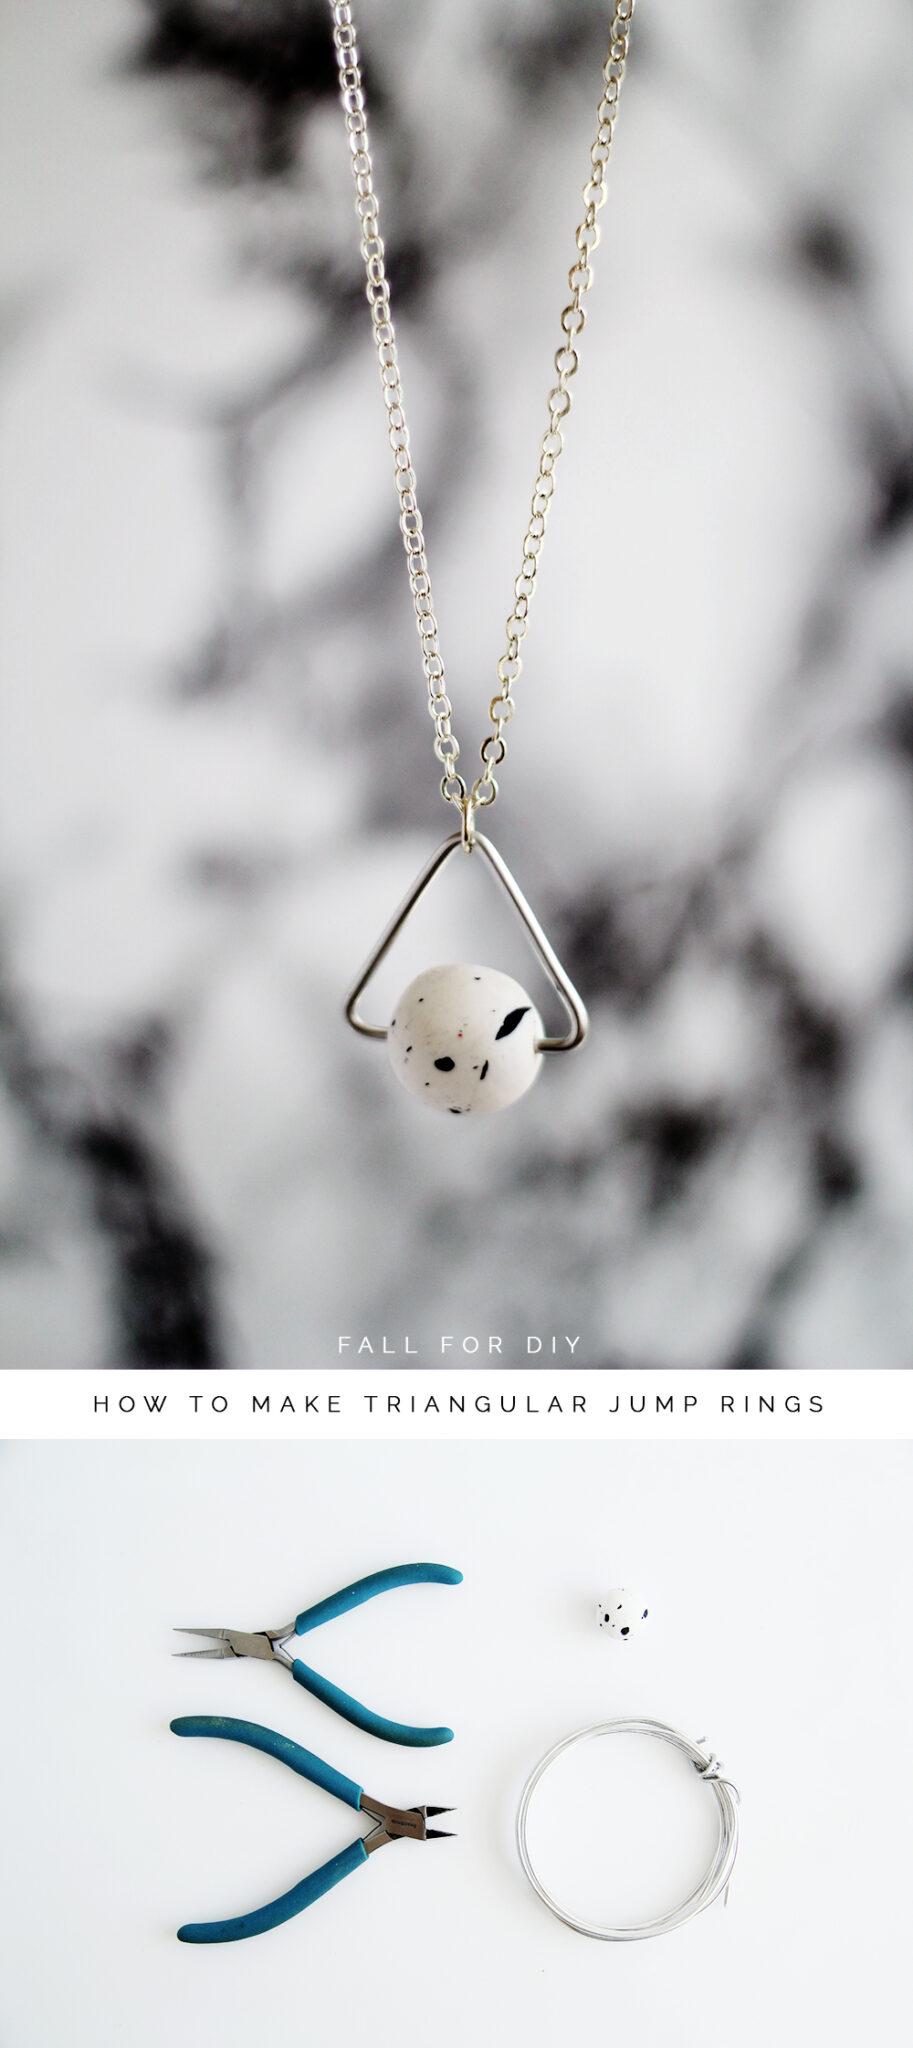
Materials:

Beads

Wire

Cutters & Flat Nose Pliers

Instructions:

1. Select a wire gauge that will fit through the hole in your bead.

2. Straighten out the wire then using flat nose pliers bend the wire to create the first corner. You can always cut the wire down a little so be generous!

3. Measure the wire against the bead and bend the wire at the middle point.

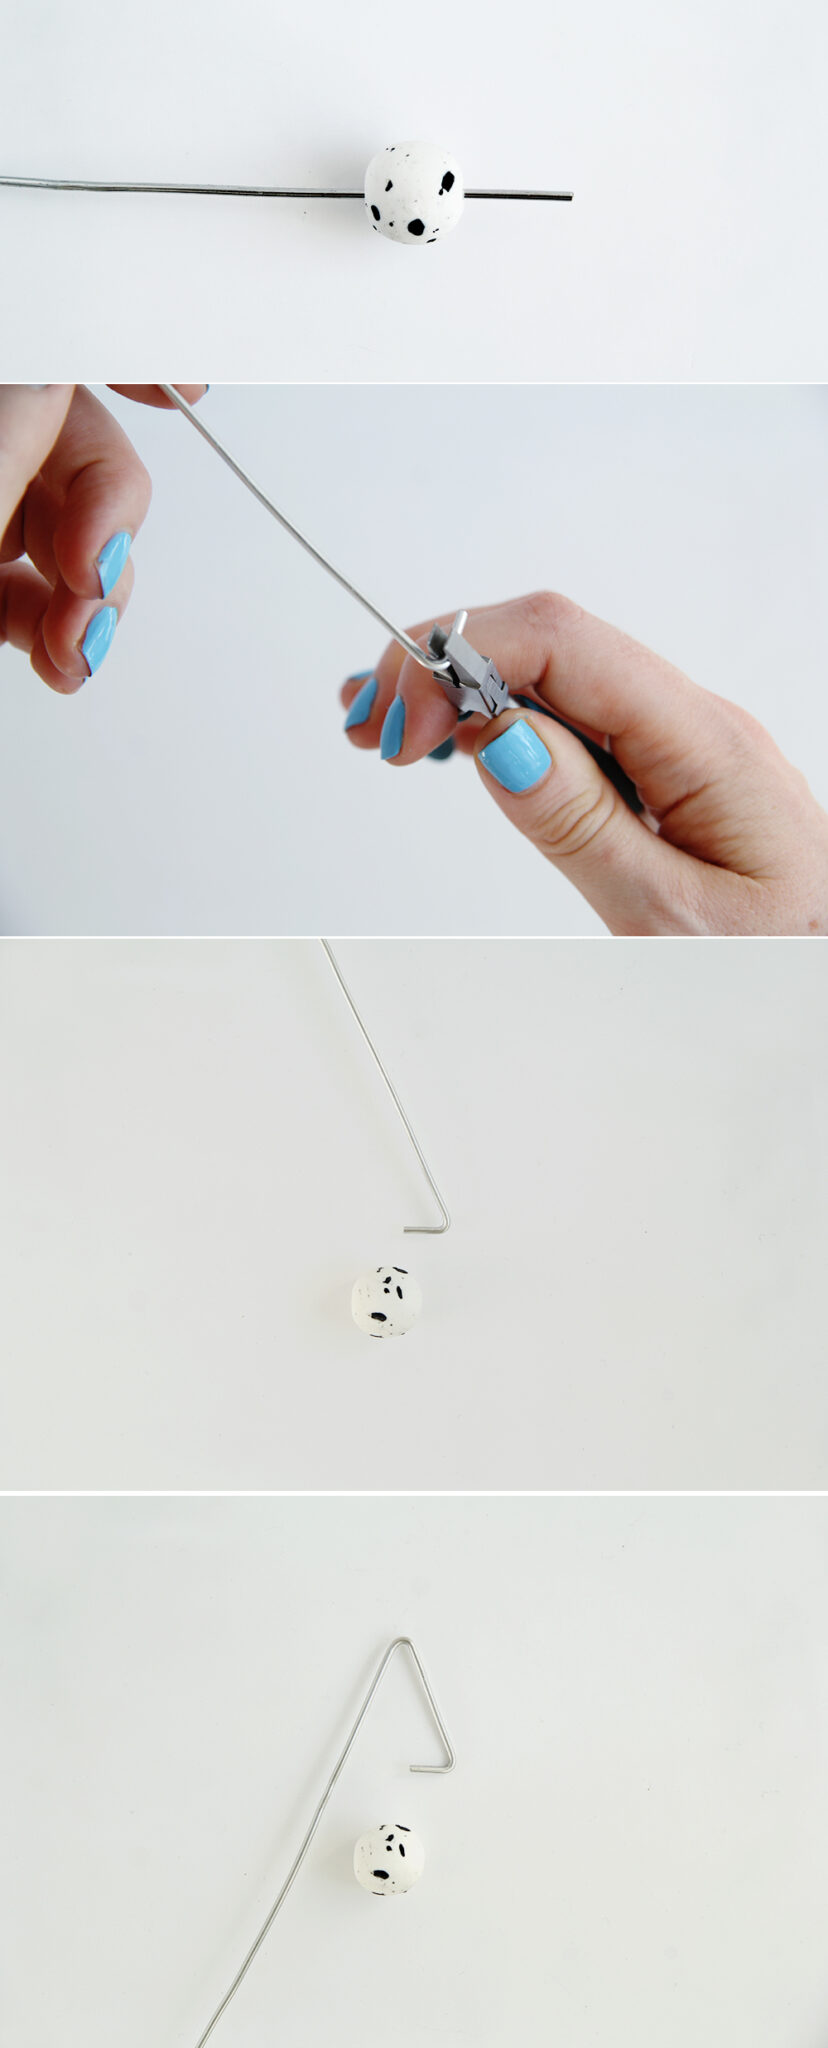
4. Make the last bend in the wire opposite the first bend.

5. Cut the excess off both ends so that there’s a small gap in the middle.

6. Pull the two sides of the triangle apart in the middle, slip one end onto one side of the bead and then slip the other side into the other side.

7. Push the wire back together again.

Related

DIY// Jewellery

« DIY Collar & Chain Necklace
DIY Decadent Crystal Necklace »

Comments

  1. Stephanie | Make and Tell says

    August 4, 2014 at 9:40 am

    This is such a great idea – I love how wonderfully the jump rings turned out! I’ve got a slight obsession with triangles at the moment so I’ll definitely be trying this project soon!

  2. Elsa says

    August 4, 2014 at 10:46 am

    Wow this looks so nice! I’ll definitively try it out

  3. Jennifer says

    August 11, 2014 at 7:28 am

    Great idea!

  4. Riemke says

    August 15, 2014 at 2:17 pm

    aw this is so cute! i’ll try it! :)

  5. Cloé says

    August 18, 2014 at 2:24 pm

    You make it look effortless!
    The end result is beautiful.

  6. Carole says

    May 13, 2015 at 12:31 am

    Cool. Thanks for sharing. :-)

  7. Kirsten M Blair says

    May 27, 2015 at 2:13 am

    People are always saying not to open round jump rings by pulling them apart,but to move the the sides out of alignment. Is it because these ends don’t touch that they can be opened like this? And would you do them sideways if they were just used as reg jump rings?

  8. Brenda says

    November 30, 2016 at 6:09 am

    What kind of clay for the ball

  9. Phyllis says

    October 4, 2020 at 5:02 am

    Hi everybody, here every one is sharing such familiarity,
    thus it’s nice to read this website, and I used to pay a visit this webpage all the time.

Trackbacks

  1. 8 DIYs to Try This Weekend | Paper and Stitch says:
    August 15, 2014 at 12:57 pm

    […] how to make triangular jump rings from Fall for […]

  2. Link Constellation: September 2014 - Maps to Enthusiasm says:
    September 4, 2014 at 3:07 pm

    […] triangular jump rings are a quick DIY project and are, like, […]

  3. Things to Make with Beads and Wire - Moms and Crafters says:
    January 12, 2018 at 7:03 am

    […] 8. Triangular Jump Rings by Fall for DIY : […]

  4. Things to Make with Beads and Wire – Moms and Crafters says:
    January 9, 2019 at 3:34 pm

    […] 8. Triangular Jump Rings by Fall for DIY : […]

Search

About

Preorder My New Book Easter

FESTIVE

Follow

Featured

shop earrings

Partners

Terms & Conditions
Private Policy Statement

DIY

DIY Easy Festive Stars

DIY Easy Christmas Star Decorations made using Card (with templates!)

Easily Add Machine Embroidered patches to Anything and Everything with Skitch

DIY Air Dry Clay Wavy Painted Bowl

Testing the LokLik Cutting Machine to Upcycle Old Clothes

How to Hack Your Bedroom for a Good Night’s Sleep

Folded Paper Christmas Decorations

7 Paper Christmas Decorations You Can Make Today

A Very Merry Christmas – Festive Trends 2023

DIY Bobbin Picture Memory Frame

Why I Replaced my Laminate Flooring with Vinyl (spoiler – because it’s AMAZING!)

A Green Garden Refresh with Durapost Vento Fences

More Posts from this Category

Copyright © 2025 ·Brand New Child Savory · Genesis Framework by StudioPress · WordPress · Log in