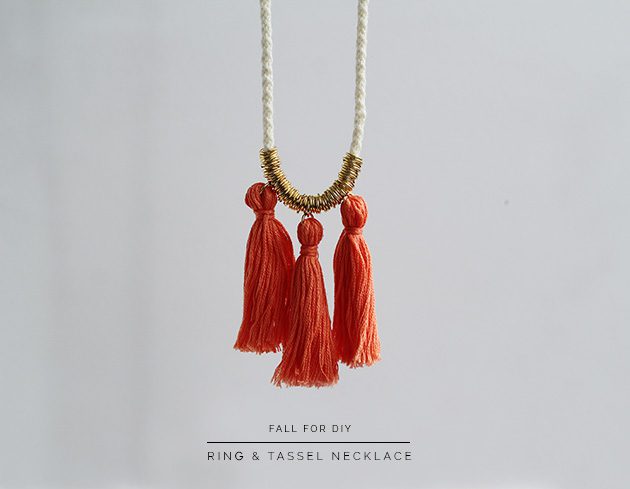
It’s been a while since I’ve added a tassel or two to a project, I was getting fringing withdrawals! So when I was in need of something a little more colourful to brighten up the transition from winter to spring what else could I do? And I have to say I’ve got serious love for this burnt coral hue. I’ve also never used jump rings this way before but I’m loving the result. One of the perks of separating the tassels this way is that the weight they create help the necklace to hang naturally and not sneak off to the side/shoulder/back..
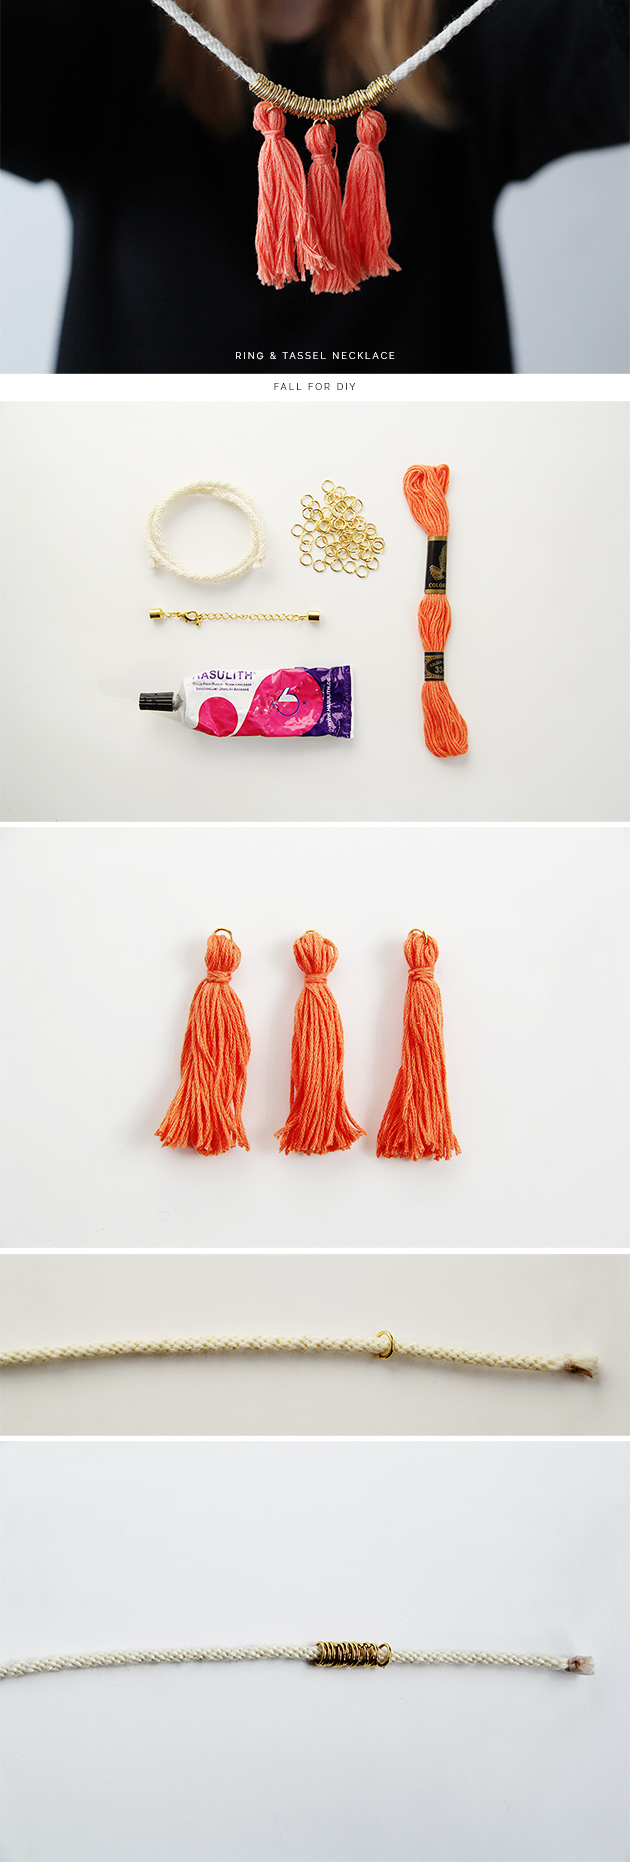
Materials:
Rope (I braided my own from yarn using this kumihimo tutorial)
Bell closer all in one clasp (2 x bell closers, 1 x extension chain, 1 x lobster clasp attached with jump rings)
Instructions:
Making tassels is super easy. Follow the instructions in this tutorial to find out how!
1. Make three tassels and attach a jump ring to each one.
2. Thread the rest of your jump rings onto the cord.
Continued…
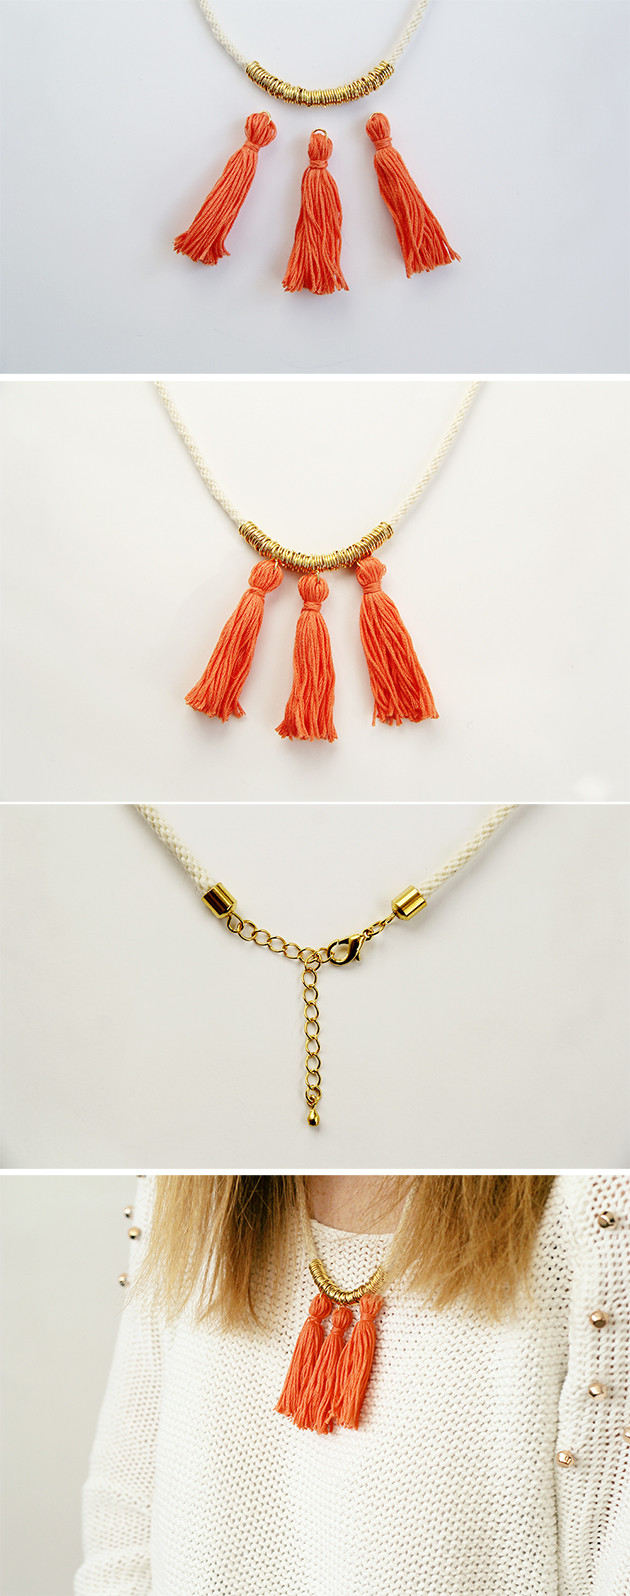
3. Position the tassels evenly along the length of jump rings and then attach each one using the rings that are already on the tassels.
4. Glue your bell closer to each end of the cord. If you don’t have one of these all in one clasps you can follow this tutorial to put one together yourself.
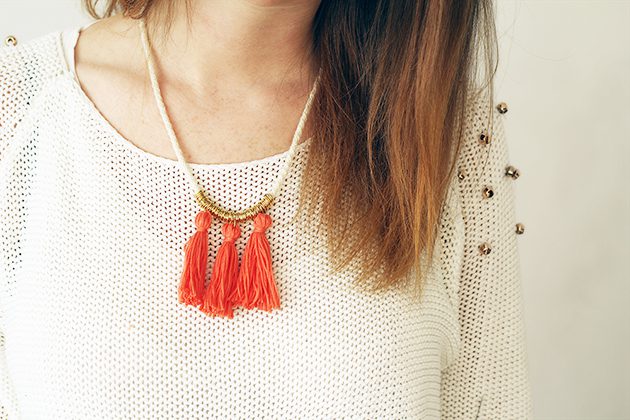
As I’m writing this it’s raining…. oh well, at least it’s spring around my neck!
I don’t usually do this, but I’m giving you guys a head up about my blog post tomorrow. It’s the first of my “DIY LIFE” series and I’ll be letting you in on my favourite and most productive way to stay organised. This has literally been a revolution to my life and helps me stay on top of work, blogging and my home life… I’ll say no more. You’ll have to come back tomorrow!


I really love the use of jump rings as an extra element to the necklace design. I never would have thought of it! This would look good with three different coloured tassels too. Pastels perhaps?
Sydney
Sydneymakesthings.blogspot.co.uk
Fran, this looks soooo cute! Love it :)
I have everything to make this! So excited. A DIY just for me today. Pinned! http://www.pinterest.com/pin/535787686891632291/
Love this :D
http://curlymade.blogspot.pt/
I love tassels, so I have to make this:) Love it!
So pretty! I especially love the coral colour you have chosen for the tassels.
What a cute necklace! I love that you also made the cord for the necklace, so DIY :)
I love the simplicity and yet gorgeous look of it. Thanks
This is amazing!!! I made a tassel necklace not to long ago but the jumps rings are such a great idea, it’s so much cuter!!!
xo
Kat
LOVELY. i just made my own version with an ombre aqua embroidery thread. Thanks for the inspiration.
I would love to see that! Instagram?
I’m so loving your work! I just discovered your a month ago and am thrilled every time I return. Beautifully photographed, timely and really useable ideas!
Thanks so much Gina!
Does anyone know where I can find the bell closer all in one clasp?
Hey Marylene,
I’ve just updated the supplies list so that you can find an Etsy supplier for all of the materials.
Thanks for stopping by :)
Hi Fran, I loooove this! I just have some questions though, as I’m trying to make a couple of these as gifts – how do you calculate the length of yarn you need to braid a certain length of kumihimo rope? I followed the tutorial you linked to, which suggested 1m, but that ended up being way too short for a necklace so I ended up going with 2.5m, which is now just a tiny bit too long! Lol.
Also, I ended up buying end caps that are a little too big for my rope, what size end caps did you use here?
Hey Jacqui! Thank you so much!! For the rope more us definitely more. It’s hard to say a specific amount because the length will change depending on the thickness of the yarn and the tension of the braid. I used 0.5mm end caps I think. If you can find them perhaps buy a range so you can try different sizes out. I’ll look for a link for you and post later x