• Home
  • Blog
  • About
  • Collaborate
    • Media Kit
  • We Make
    • Bloglovin
    • Facebook
    • Instagram
    • Pinterest
    • Twitter
    • YouTube

Fall For DIY

  • DIY
  • Interiors
    • Planters
    • Paper
    • embroidery
    • Drinks
  • Blogging
    • Photography
    • Instagram
  • fashion
    • Jewellery
    • Accessories
  • Inspiration
    • Round Up
    • 50 DIYs
  • Office
    • Free Printables
    • Organize
  • Party
    • Christmas
    • Halloween

Our favourite things in your inbox every month!

How To Space Beads with Crimps

Crimps are a small but mighty force in jewellery making. Tiny and delicate they are made to go unnoticed yet at the same time can create spectacular designs on intricate pieces. As well as having a great visual impact crimps are also used for the functional aspects of jewellery making. Used with cord, nylon wire or invisible cords to attach clasps, space beads, hold motifs in place and attach layers you have to agree, they’re pretty useful (and easy to lose) little things to have on hand! Today I’m using mine to space beads and end cord with clam shell cover connectors. I’m also using flat nose pliers to squeeze the crimps flat. Specific crimping pliers are available and are a fantastic investment if you use crimps a lot.
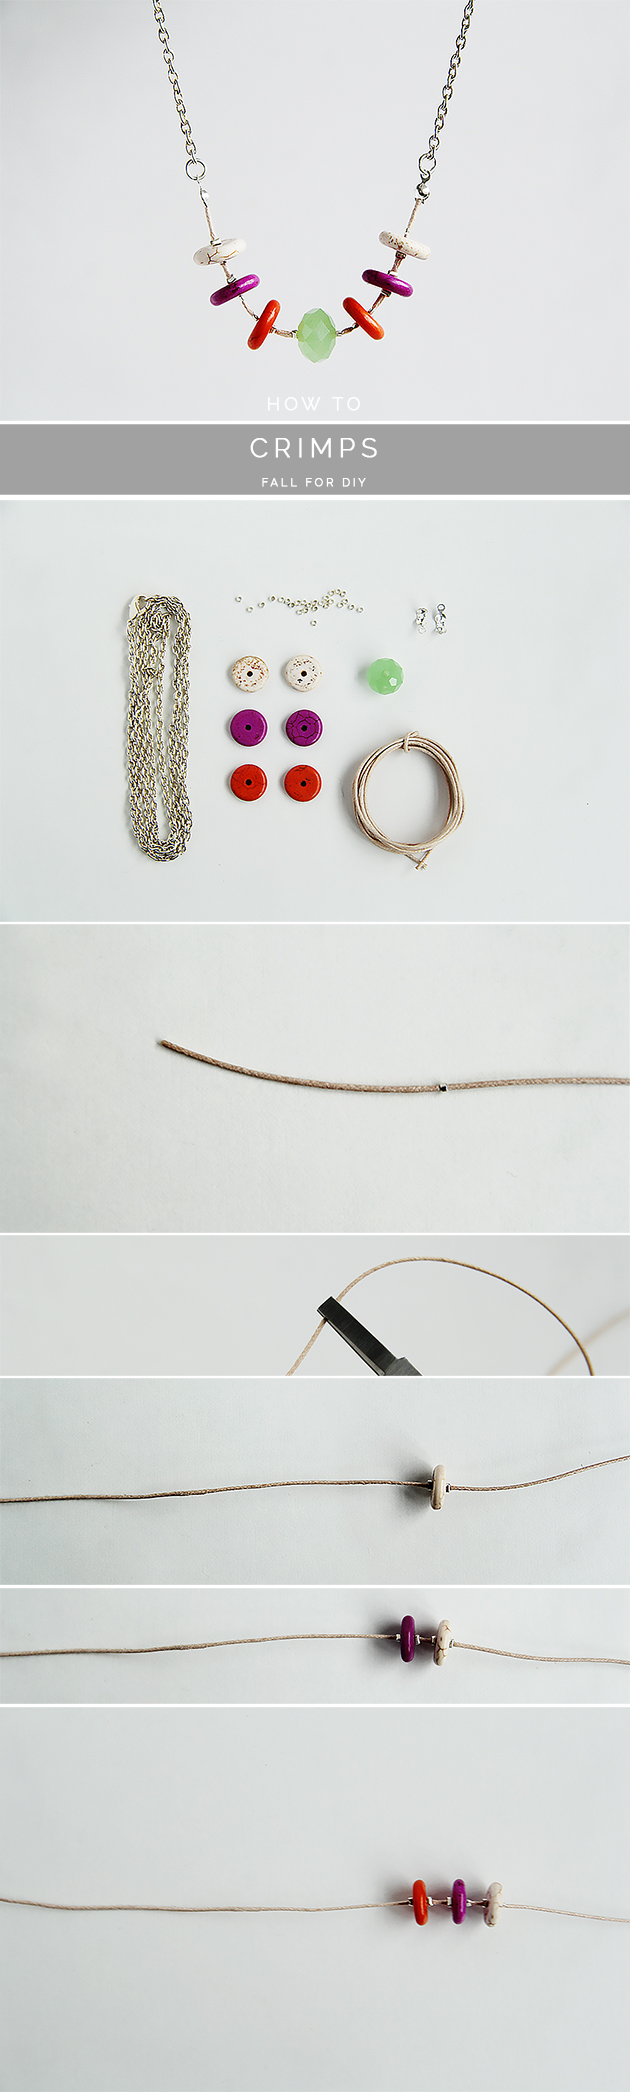
Materials:

Beads

1mm cotton cord

1mm crimps

Clam shell crimp covers

Necklace chain

Instructions:

(When you’re using cord with frayed ends cover the ends with glue and smooth down to create a needle like point)

1. Thread on the first crimp into place and flatten between your flat nose pliers.

2. Thread your first bead onto the cord followed by another crimp. Flatten with the pliers again.

3. Repeat these steps and build up the beading.

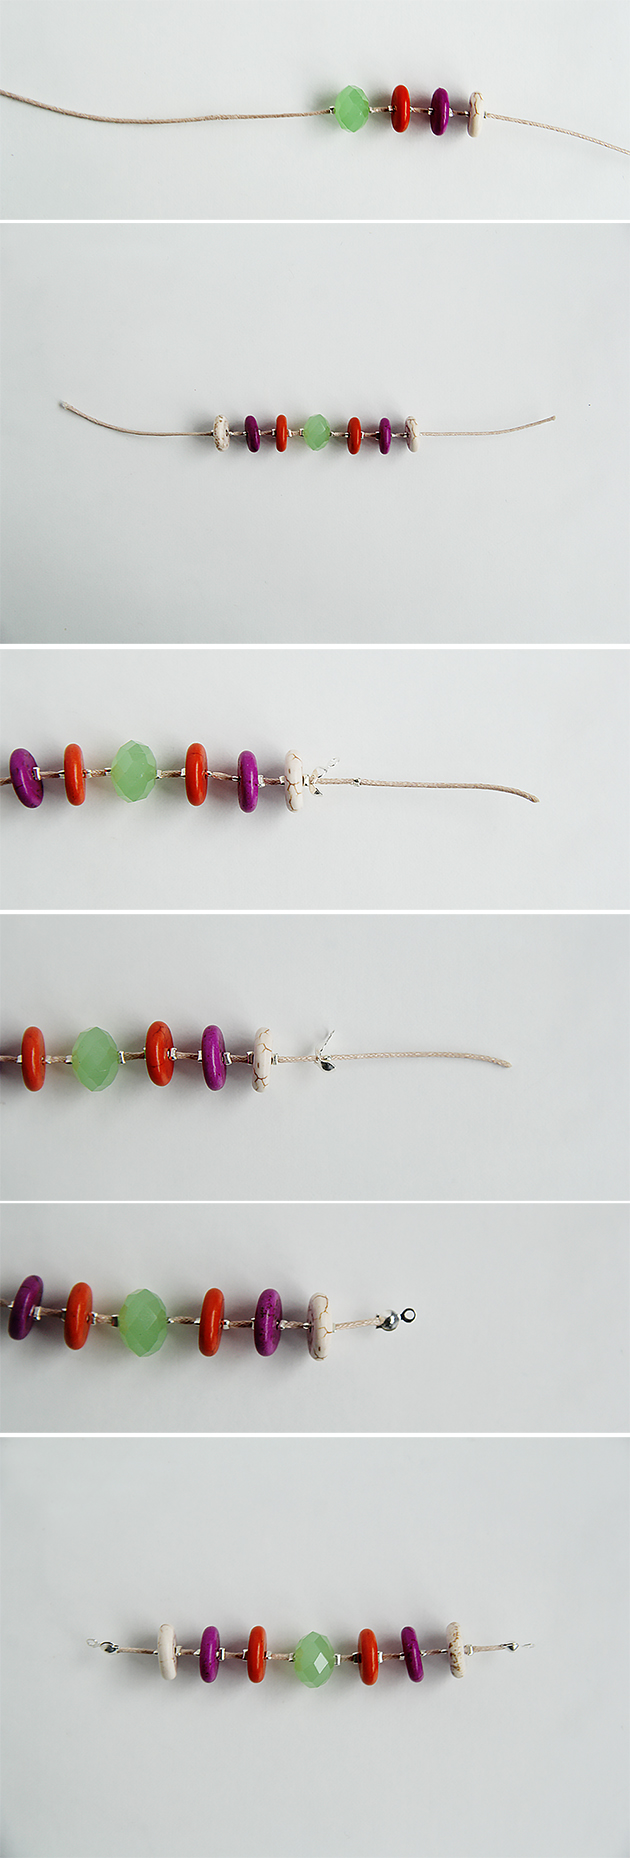
4. Once you’ve completed the design thread the clam shell cover onto the cord followed by a crimp. Place the crimp where you want the end of the cord to be and squeeze it flat.

5. Close the clam shell cover over the crimp and press closed with your pliers. Do the same the other side.

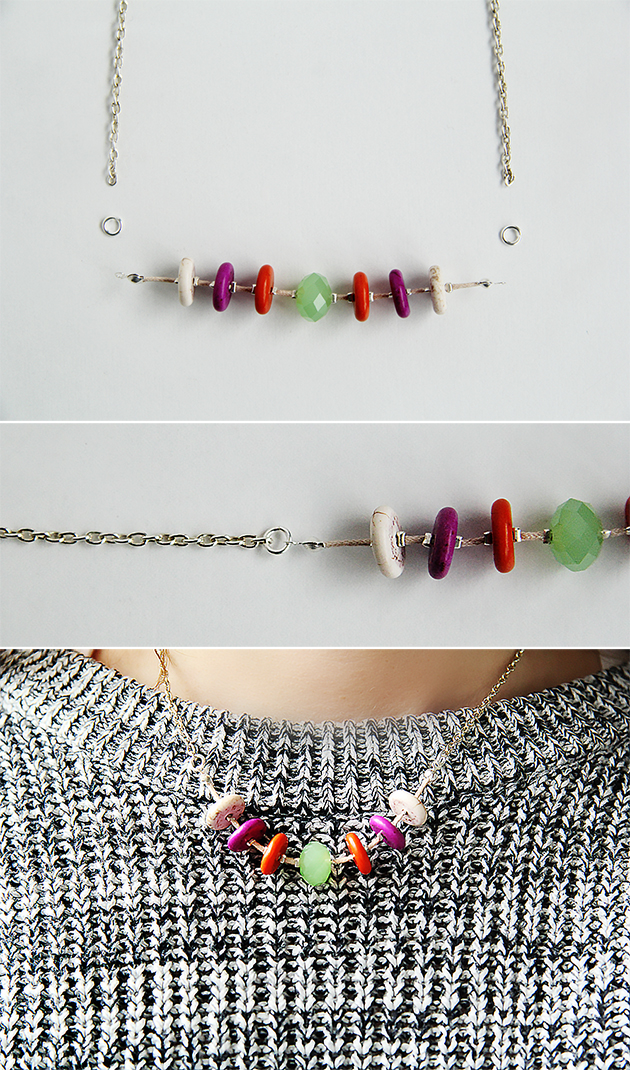
6. Split the chain in the middle and use jump rings to attach the clam shell covers to the chain. 

Related

DIY// JewelleryLeave a Comment

« Spring into Action
DIY Ring and Tassel Necklace »

Leave a Reply Cancel reply

Your email address will not be published. Required fields are marked *

Search

About

Preorder My Book Now!

Follow

Featured

shop earrings

Partners

Terms & Conditions
Private Policy Statement

DIY

A Green Garden Refresh with Durapost Vento Fences

A Green Garden Refresh with Durapost Vento Fences

3 Ways to Use a Printer that will Make Your Life Better

3 Ways to Use a Printer that will Make Your Life Better

DIY Tower Cleansing Bars

DIY Tower Cleansing Bars

DIY Wavy Shelf with Cricut

DIY Wavy Shelf with Cricut

How to make your Mother’s Day gift more than perfect this year with DIY fabric wrap

How to make your Mother’s Day gift more than perfect this year with DIY fabric wrap

DIY Valentine’s Clay Name Necklaces

DIY Valentine’s Clay Name Necklaces

DIY Seamless Floor to Wall Wood Panelling (with Laminate)

DIY Seamless Floor to Wall Wood Panelling (with Laminate)

How to Recycle your Advent Calendar this Christmas

How to Recycle your Advent Calendar this Christmas

DIY Faux Stoneware Candle Holder

DIY Faux Stoneware Candle Holder

DIY Speckled Clay Arch Picture/Card Holder

DIY Speckled Clay Arch Picture/Card Holder

More Posts from this Category

Copyright © 2023 ·Savory · Genesis Framework by StudioPress · WordPress · Log in