It’s December! Which means it is officially time to get into the festive spirit. I’m really looking forward to Christmas this year. More than I have for the past few years really. I don’t know why, but it seems a lot of other people feel the same way too.
It’s definitely a DIY Christmas for us so when Etsy asked me to put together a DIY for their countdown to Christmas Advent calendar I knew just the thing. Crackers! I also really wanted to try out some marbling, so I thought I’d combine the two and make these colourful treats for a modern Christmas table.
To find out how to marble the paper, see the first half of the tutorial on the Etsy Blog. Then to make the cracker follow the instructions below:
Instructions
Making the Cracker:
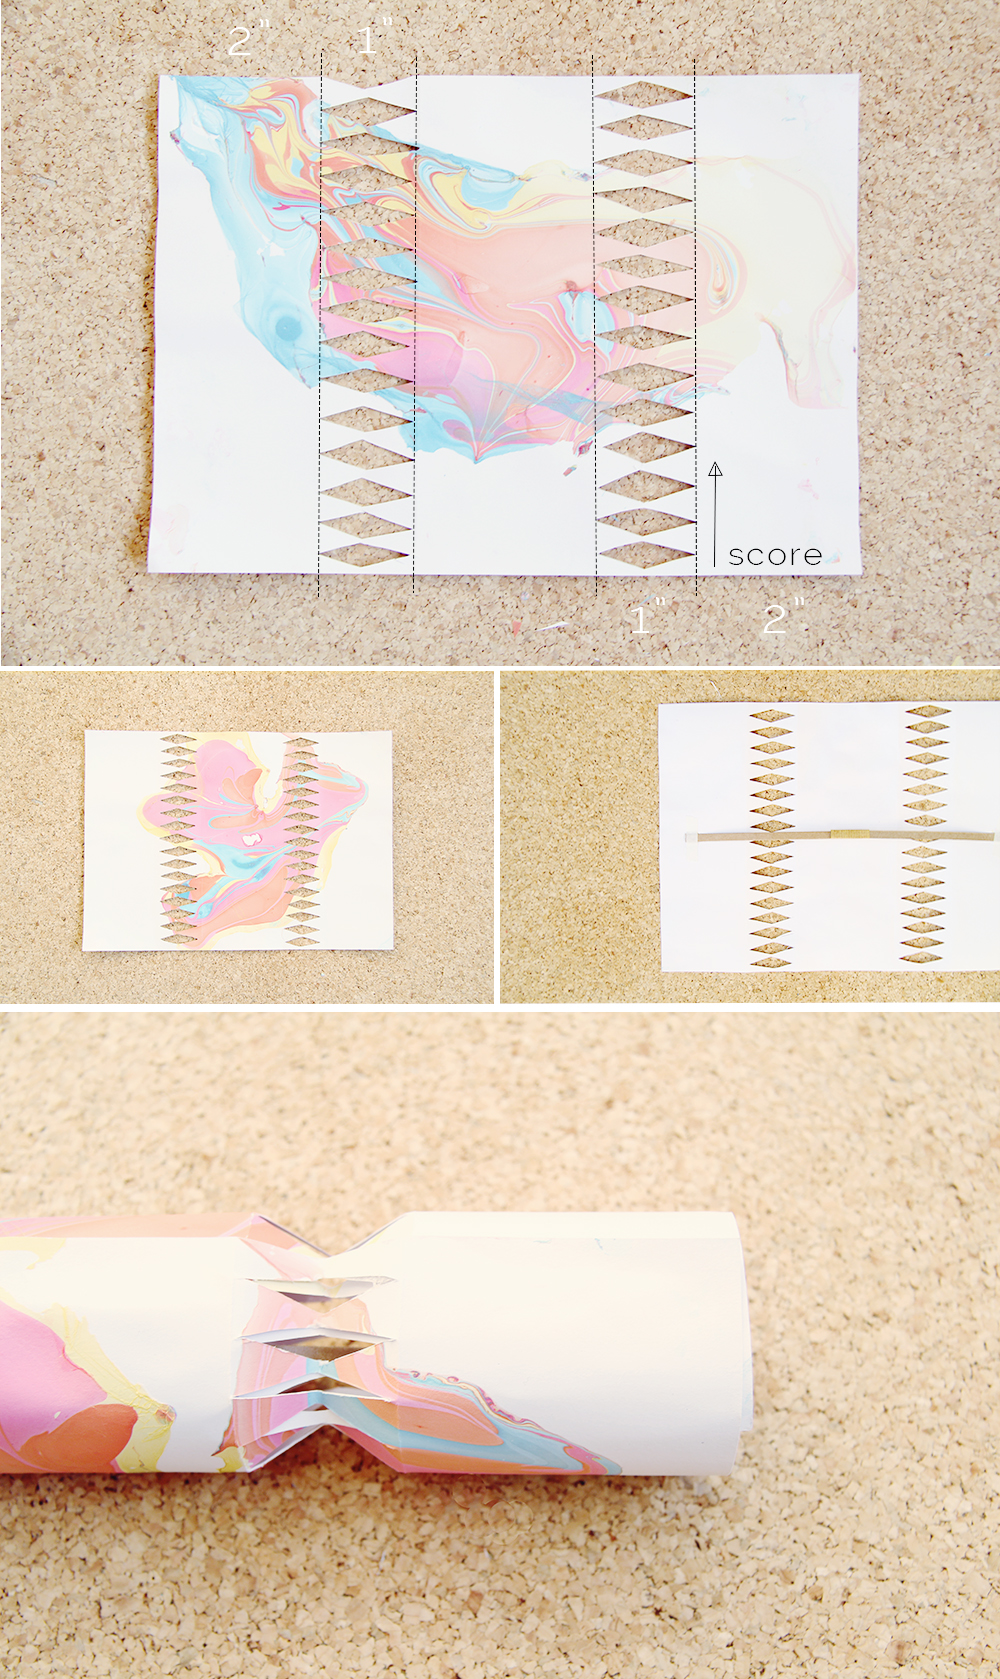
1. Score 2” into the card on both sides, and then another 1” from that line.
2. Using a scalpel knife cut out lozenge shapes between the scored lines. Make sure the cut out edges do not meet.
3. Stick double sided tape onto one of the longer edges and then create the tube. Seal together with an inch overlap.
4. Fill with presents for your friends and family! If you need ideas for great and easy DIY cracker fillers you can find one everyday this week on my blog Fall For DIY!
5. Tie brightly coloured threads around the cut out sections to create the cracker shape.
We’ve got an extra treat for you as well! For the next week we will be posting an easy and quick cracker/stocking filler DIY each day. That’s one less thing to think about! (You can thank us later…) Make sure you don’t miss out on any of the posts by following us on Bloglovin.
See you tomorrow!


Foam is a solution of polyurethane foam. Polyurethane foam is made from polyester and polyol, which are two raw materials for making foams. Foam, unlike other types of foams, is not a solid material but rather a liquid or a gas that has become a solid through the process of polymerization. Additionally, foam solution are made by combining three different types of ingredients: an agent that produces bubbles; an agent that hardens the bubbles; and a surfactant to create a foam.
Louisiana is a great state to visit with lots of beautiful scenery and activities to do. There are many attractions such as fishing, hiking, camping, boating and so much more! Louisiana has many different types of cabins to rent in Louisiana. Try this cabins to rent in louisiana for more ideas. There are cabins that are on the water that you can camp out in or go boating with your family and friends. There are also cabins that are located right on the lake shore where you can sit back and enjoy the scenery around you. You can even have a bonfire right on the beach at night time.