
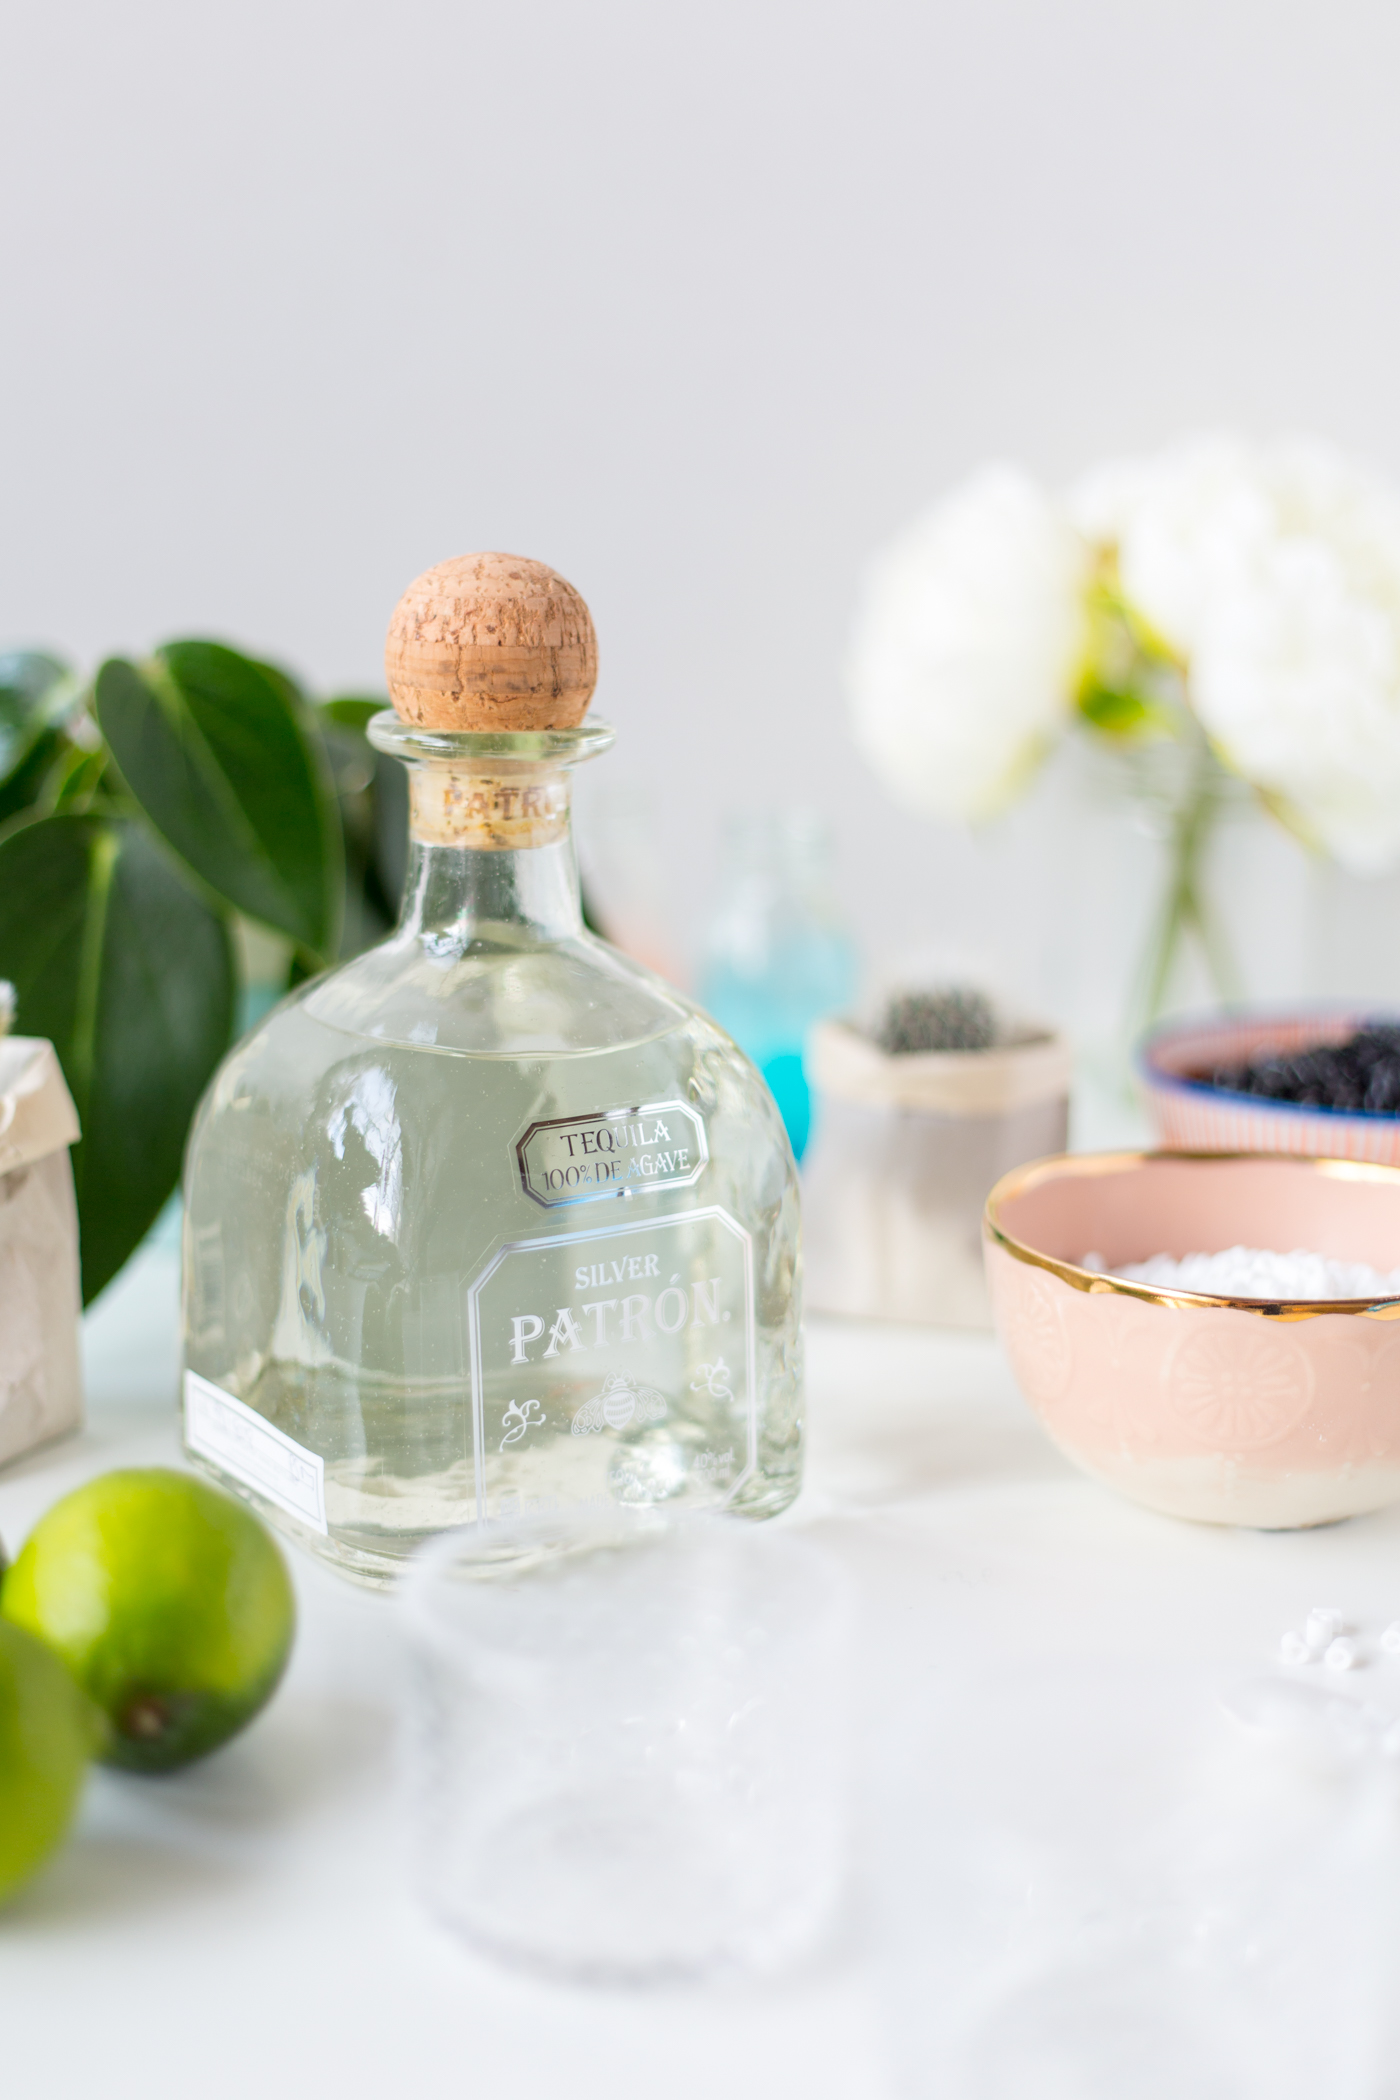
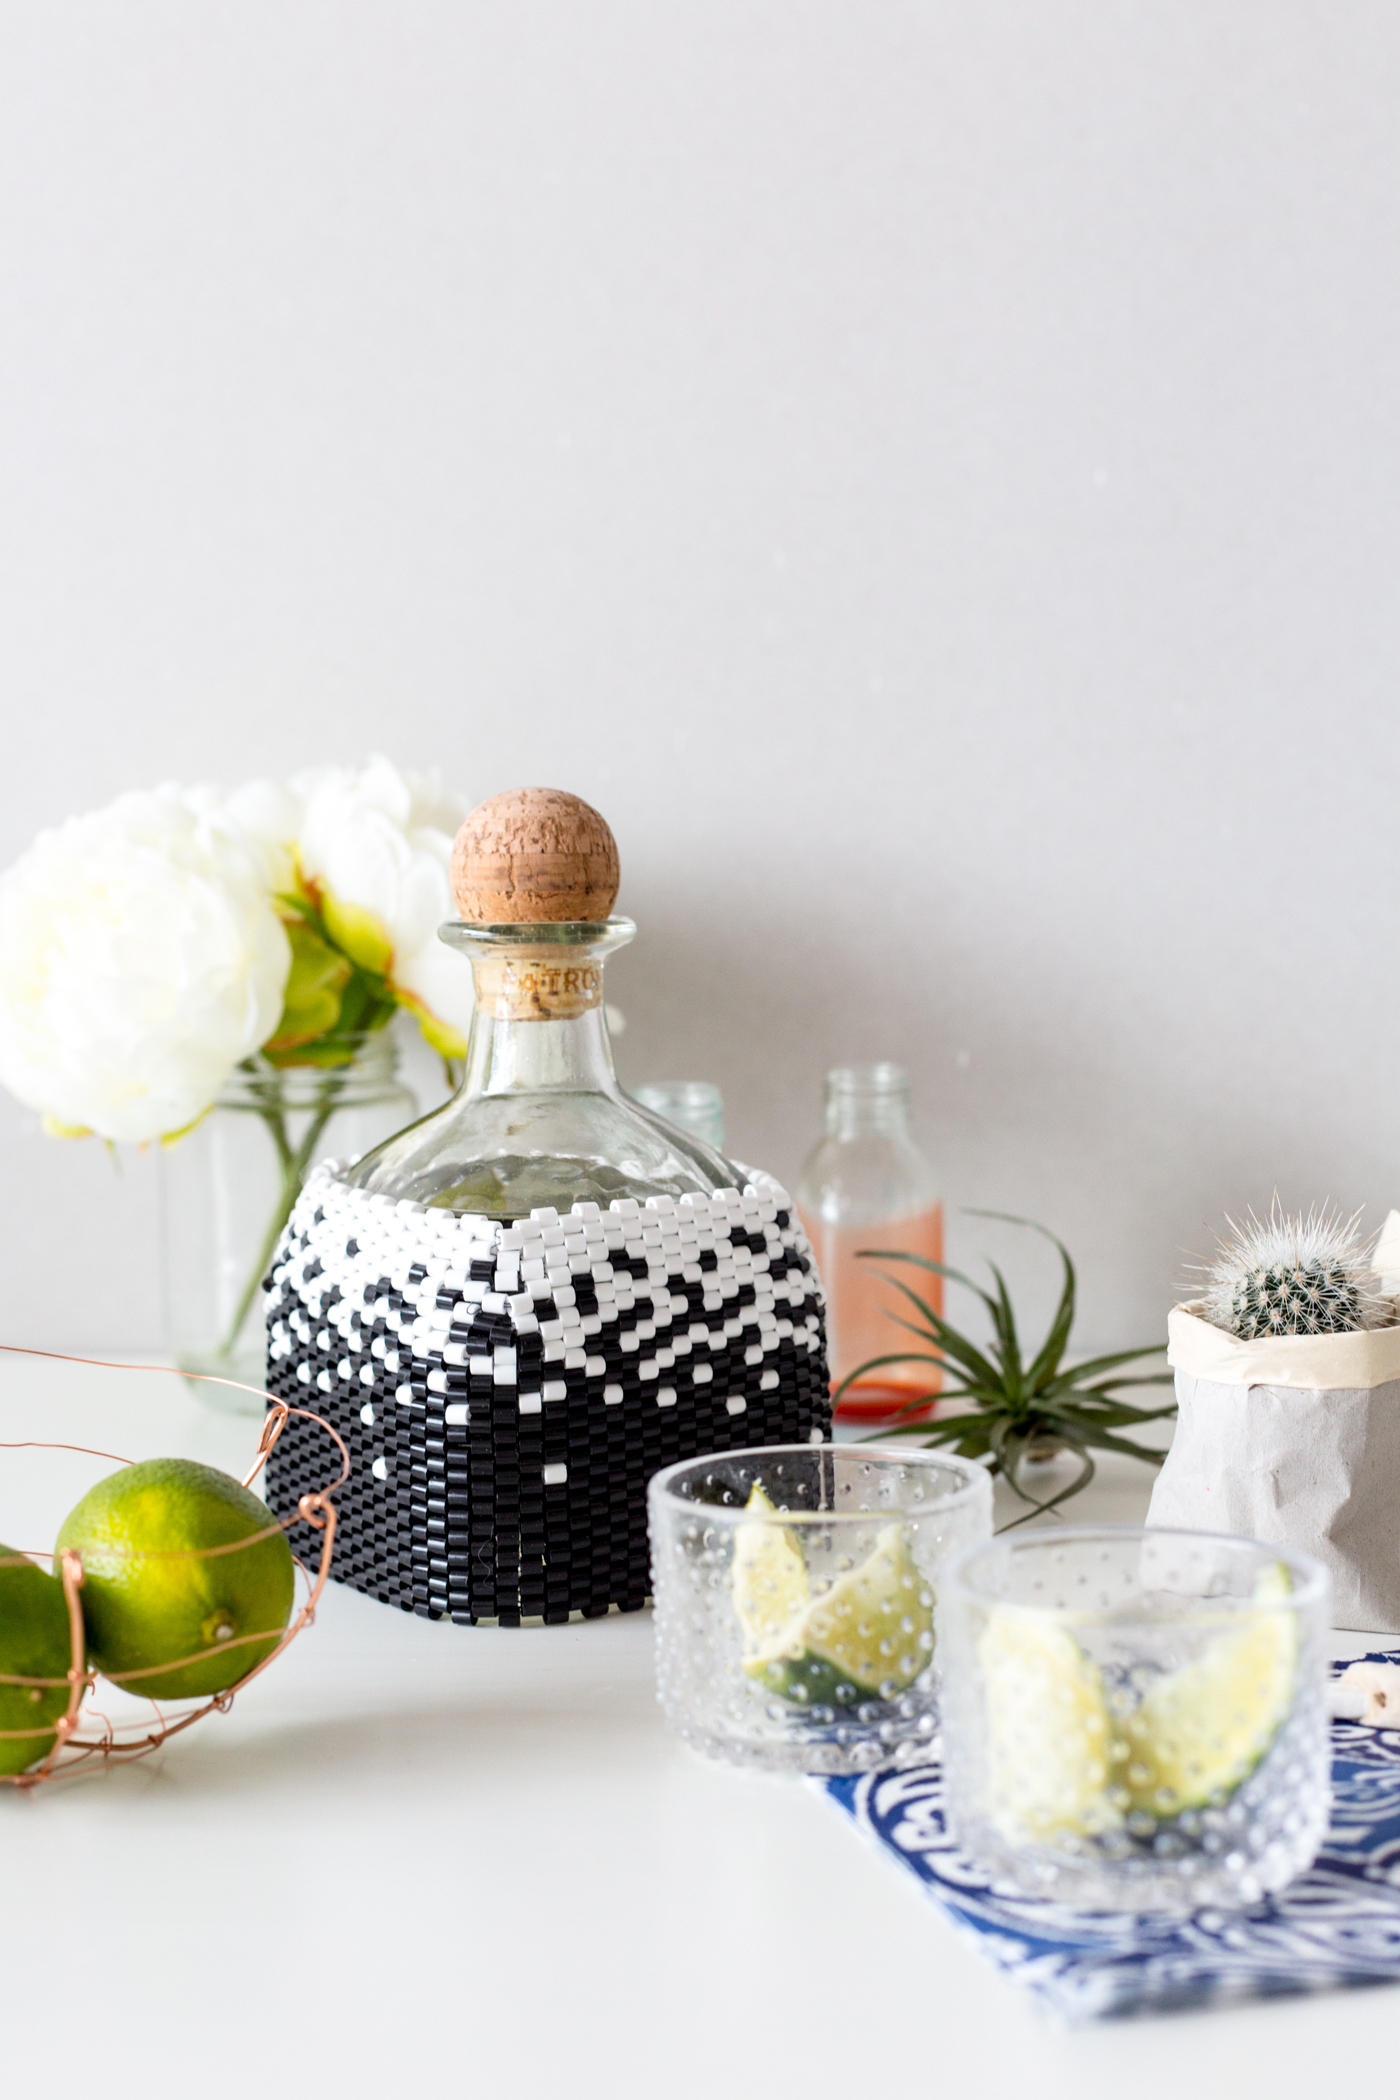
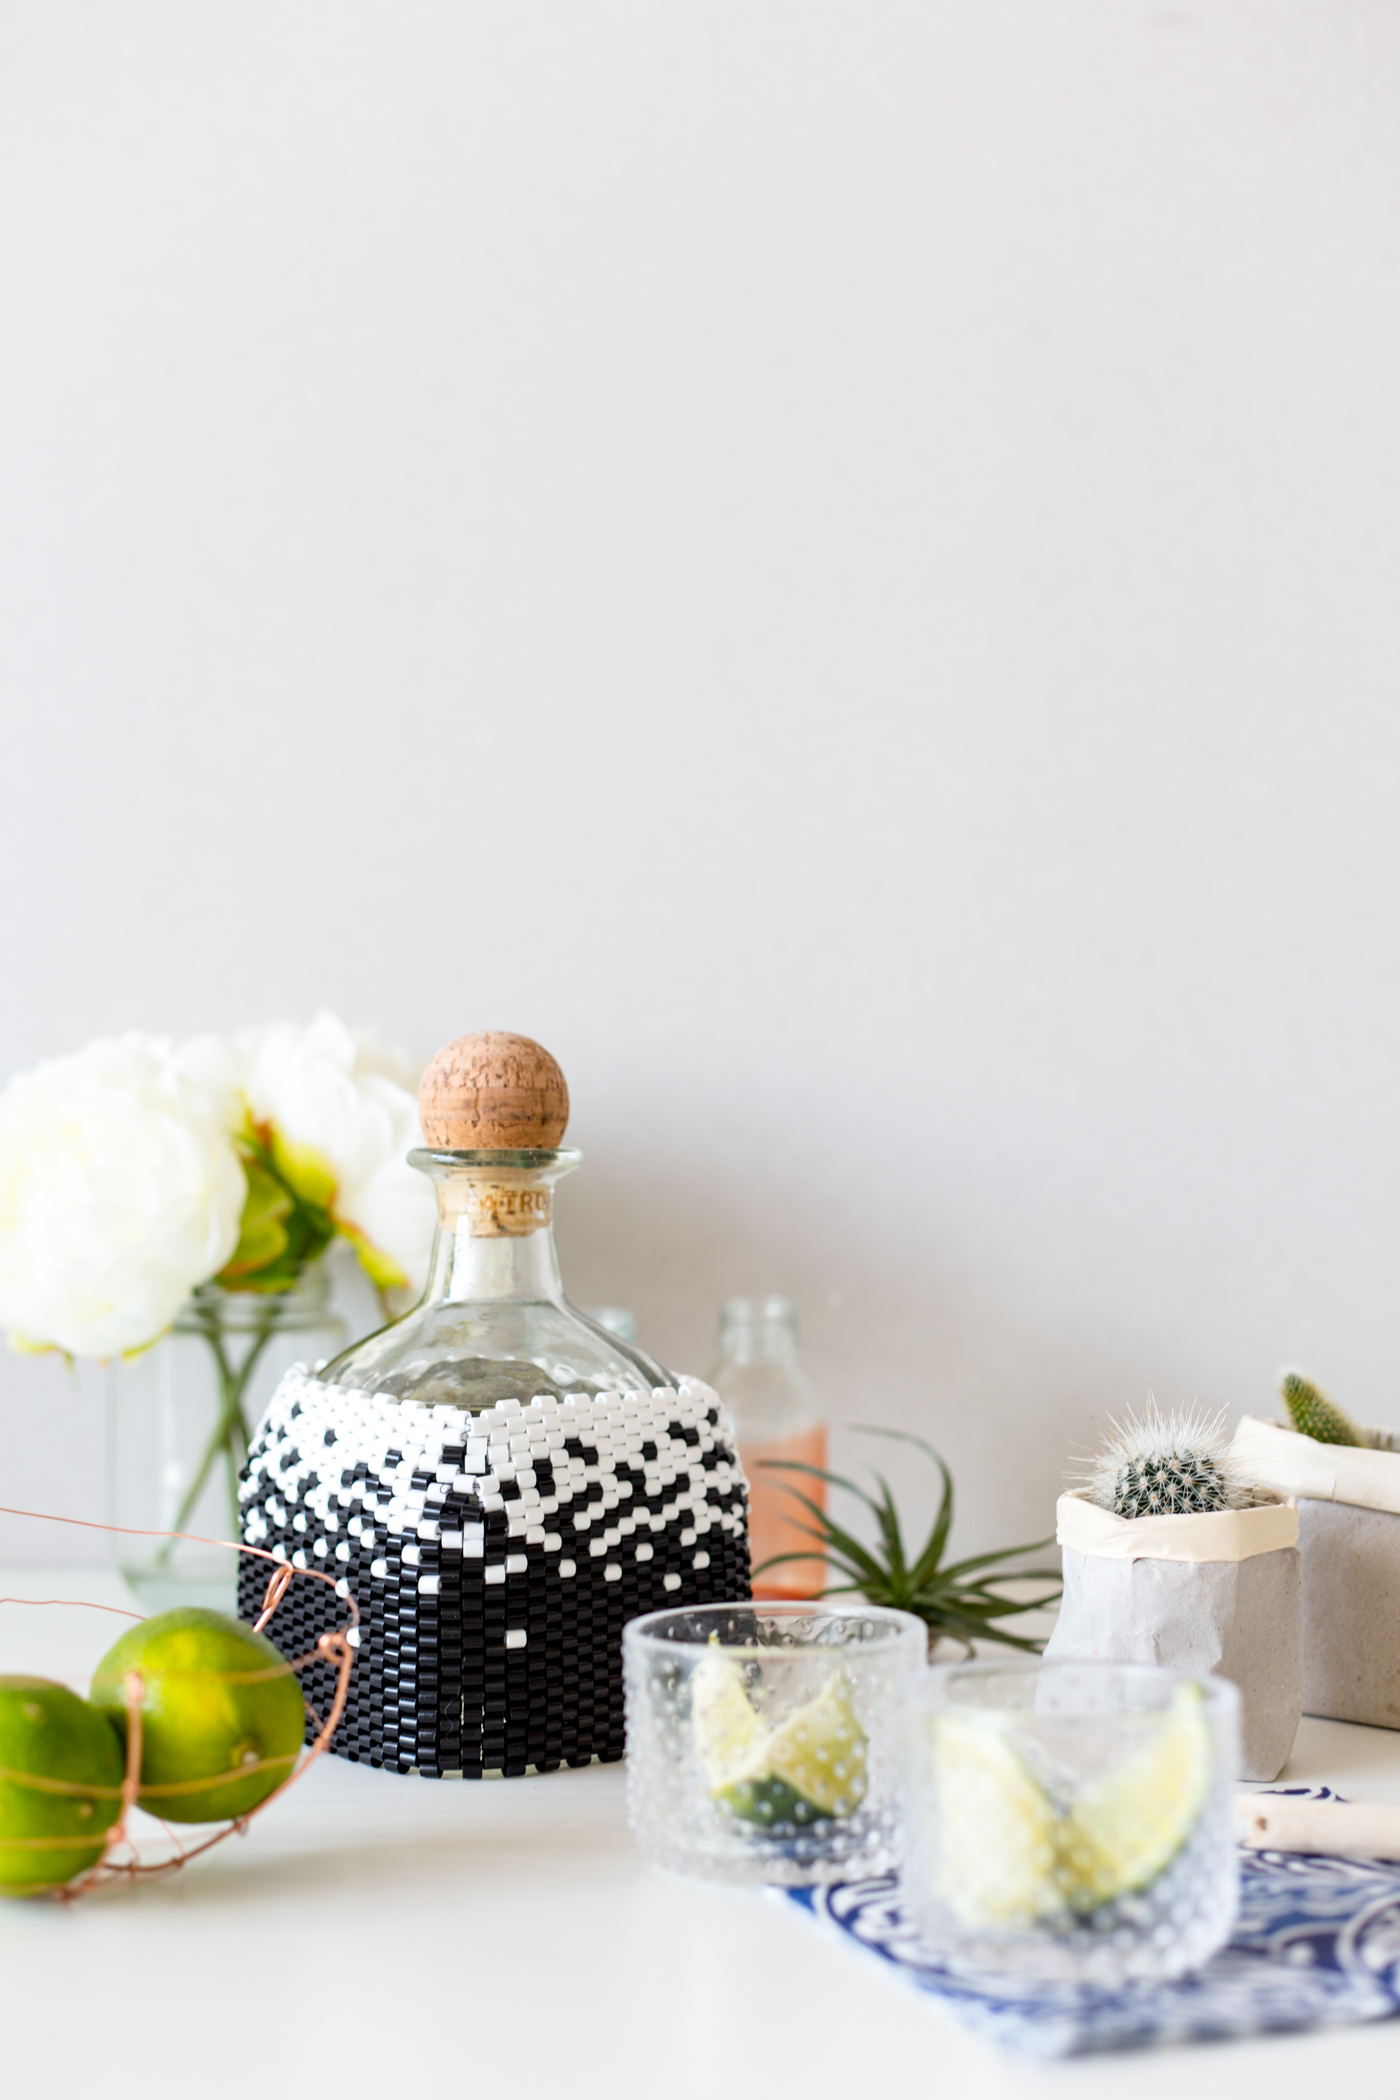
In recent years I’ve inadvertently found myself with quite a collection of different spirits and cocktail making supplies. Whereas in my younger years these might have fueled a late night kitchen party, I am now choosing to drink less and better (and wake up in the morning without the pain of one drink too many).
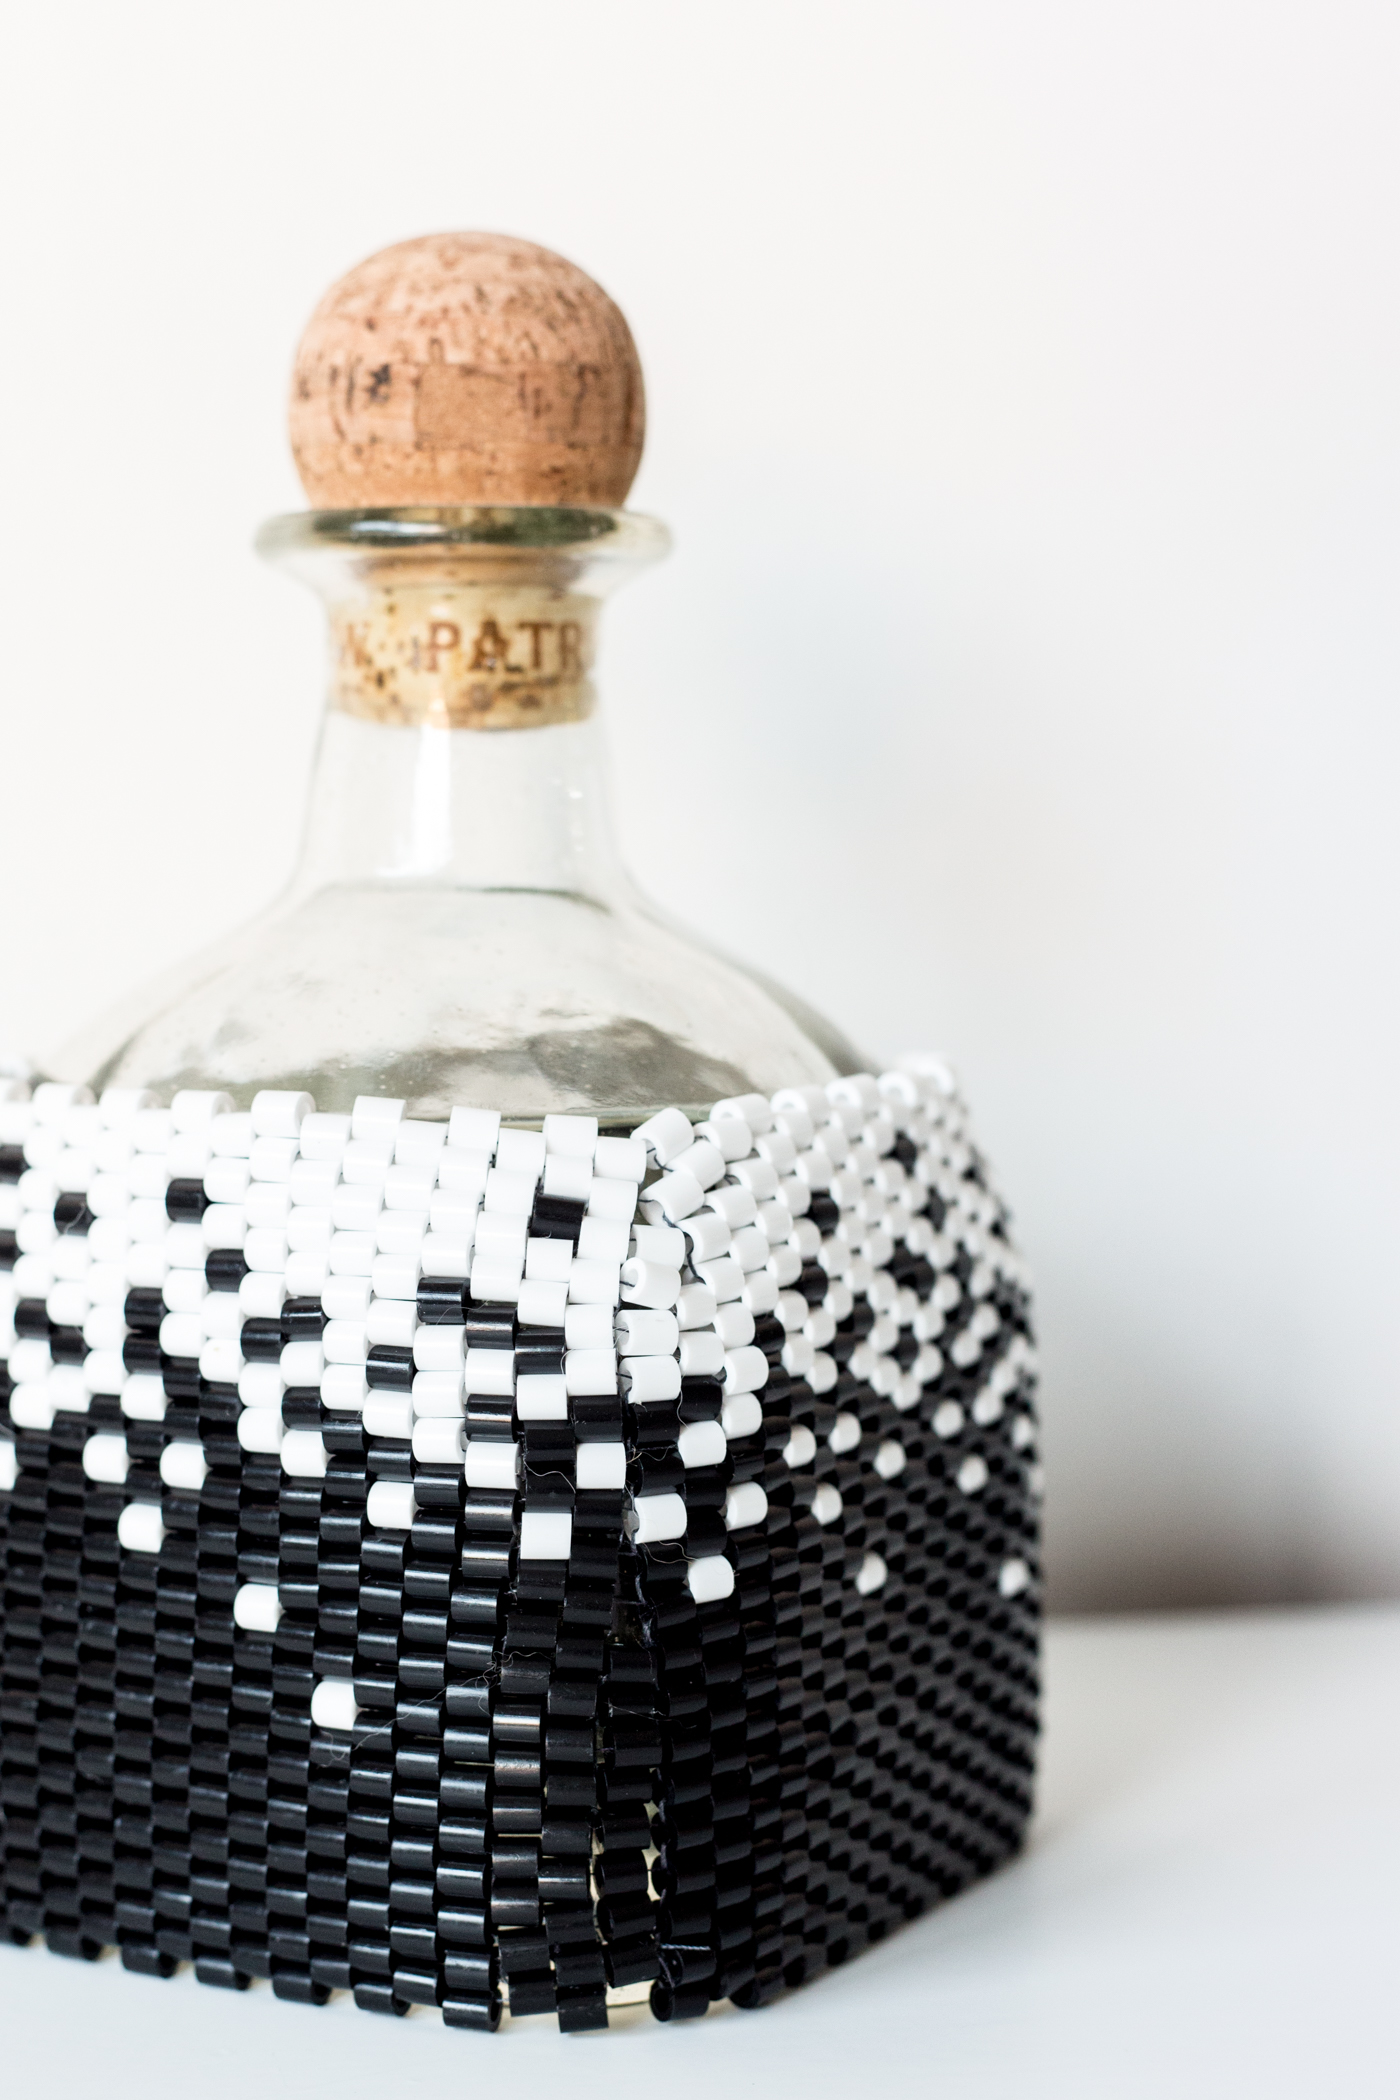
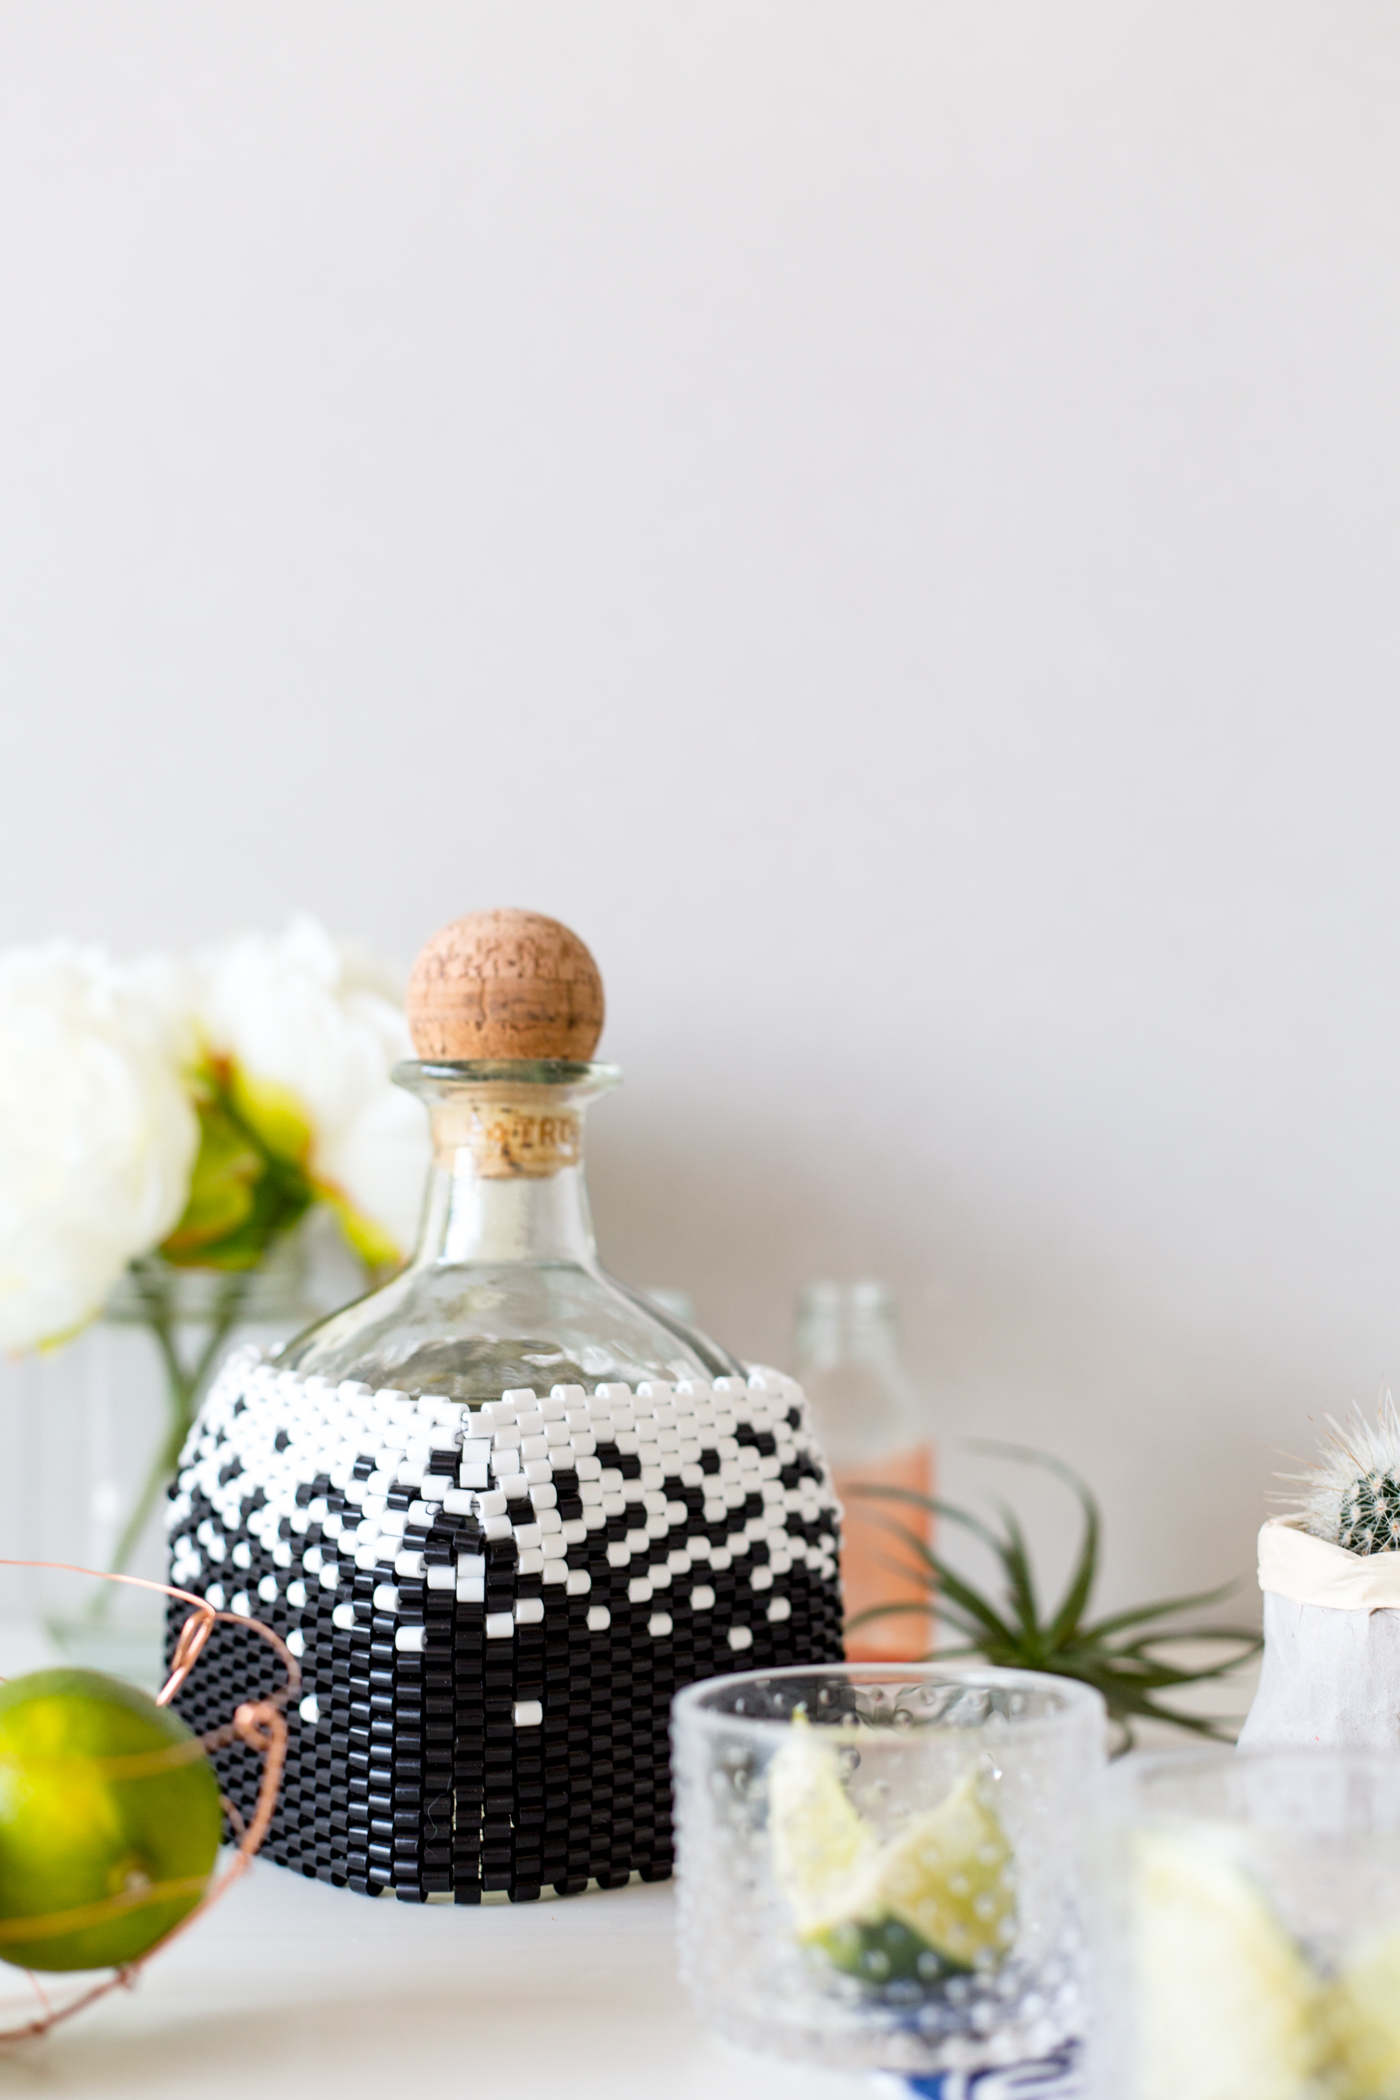
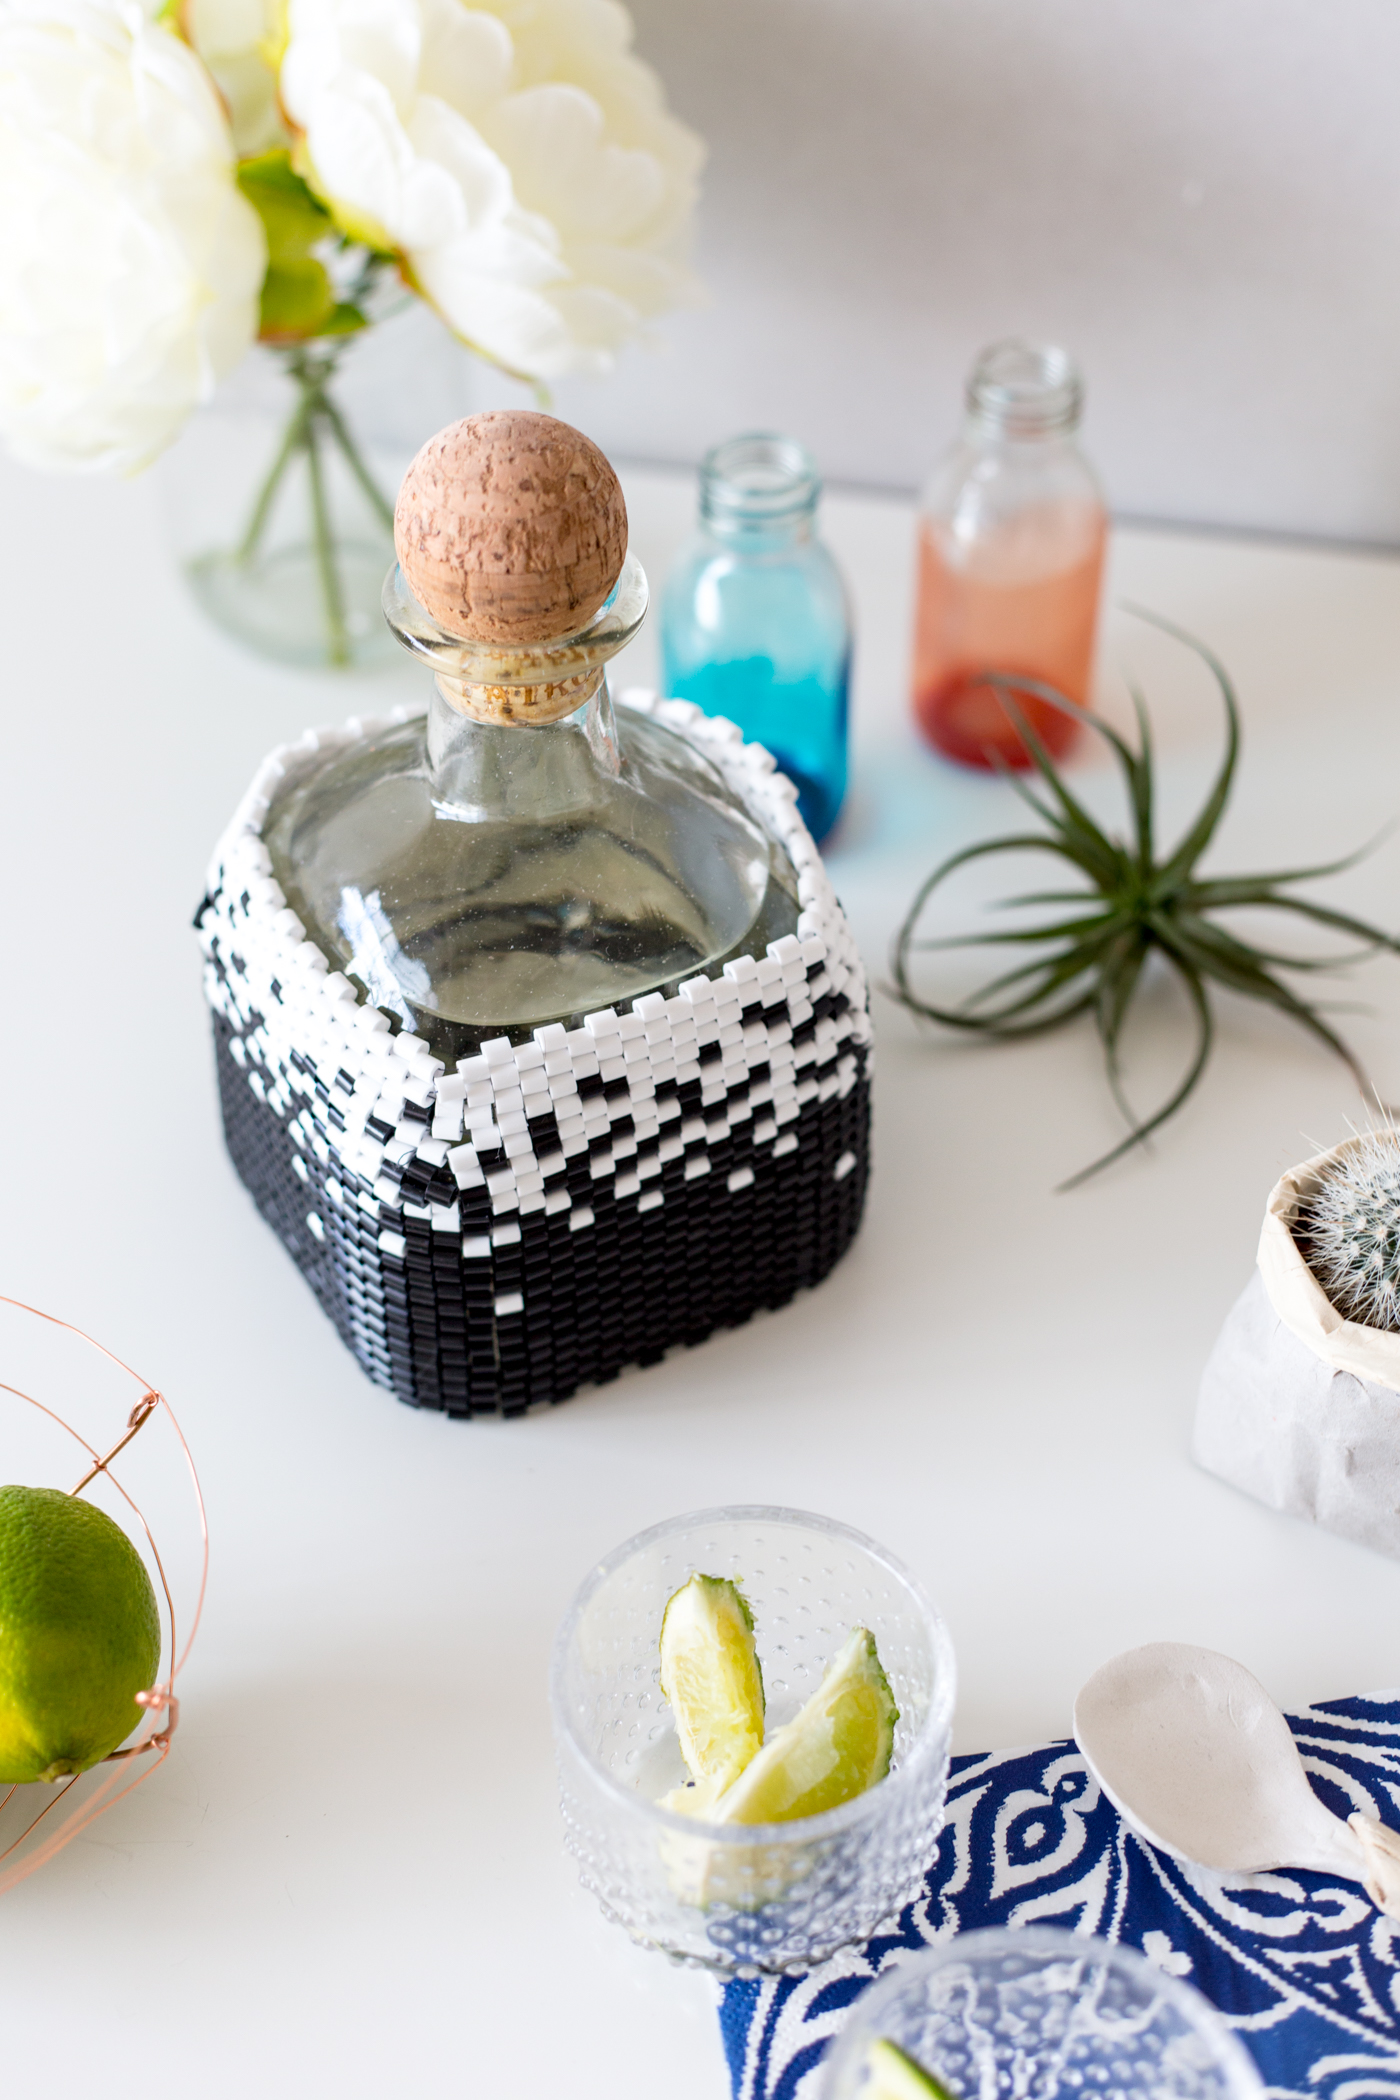
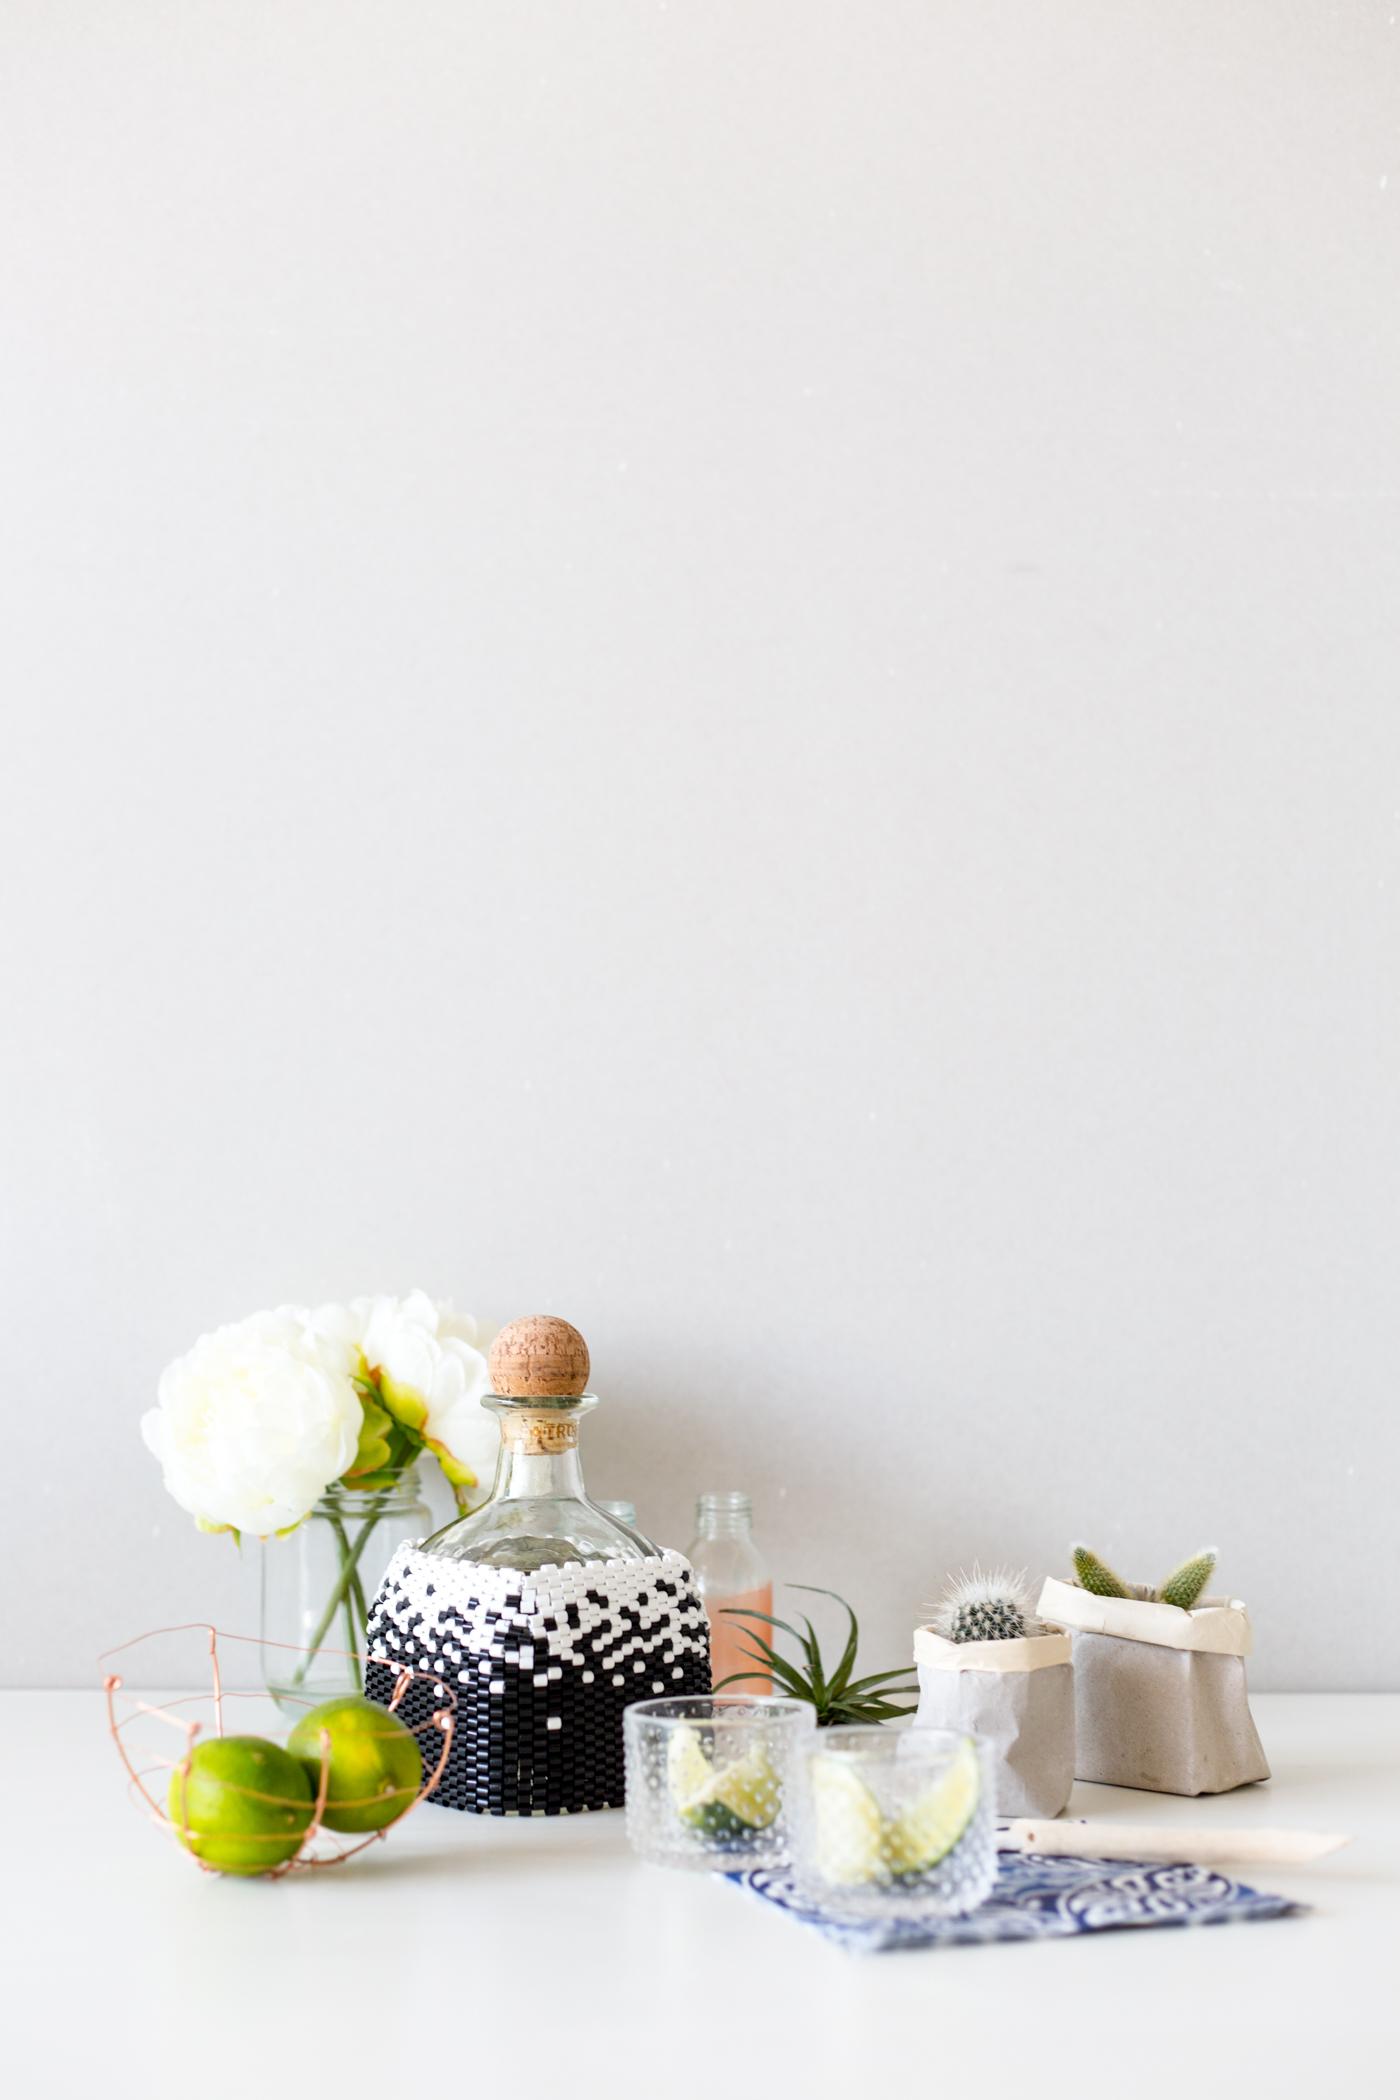
Rather than hiding these bottles away I am looking for the perfect cart to display them. With such interesting shapes and designs, they are interesting and beautiful enough to have on show. And thanks to the Art of Patrón Bottle Art Competition I have a reason use one of my favourites to create a piece of art with thisDIY Peyote stitch beaded bottle cover.

Now in its third year, the competition hosts an incredible range of inspiring pieces. In fact, it’s hard to believe all of these items came from the iconic Patron bottle. The competition is open until October 14th so you still have time to enter and a chance to win the $10,000 prize! Yes, run out now and get your bottle! Nine runners up will also win $1000 so it’s well worth spending an evening making something beautiful and entering your bottle here. (This competition is only open to US residents and you must be over 21 to apply.)
I’ve seen some really amazing and intricate beading all over Pinterest recently and this was the perfect opportunity to perfect my peyote stitch. If you want to recreate my bottle art you read on for the instructions!
Materials
Hema Beads | Needle & Thread
Instructions
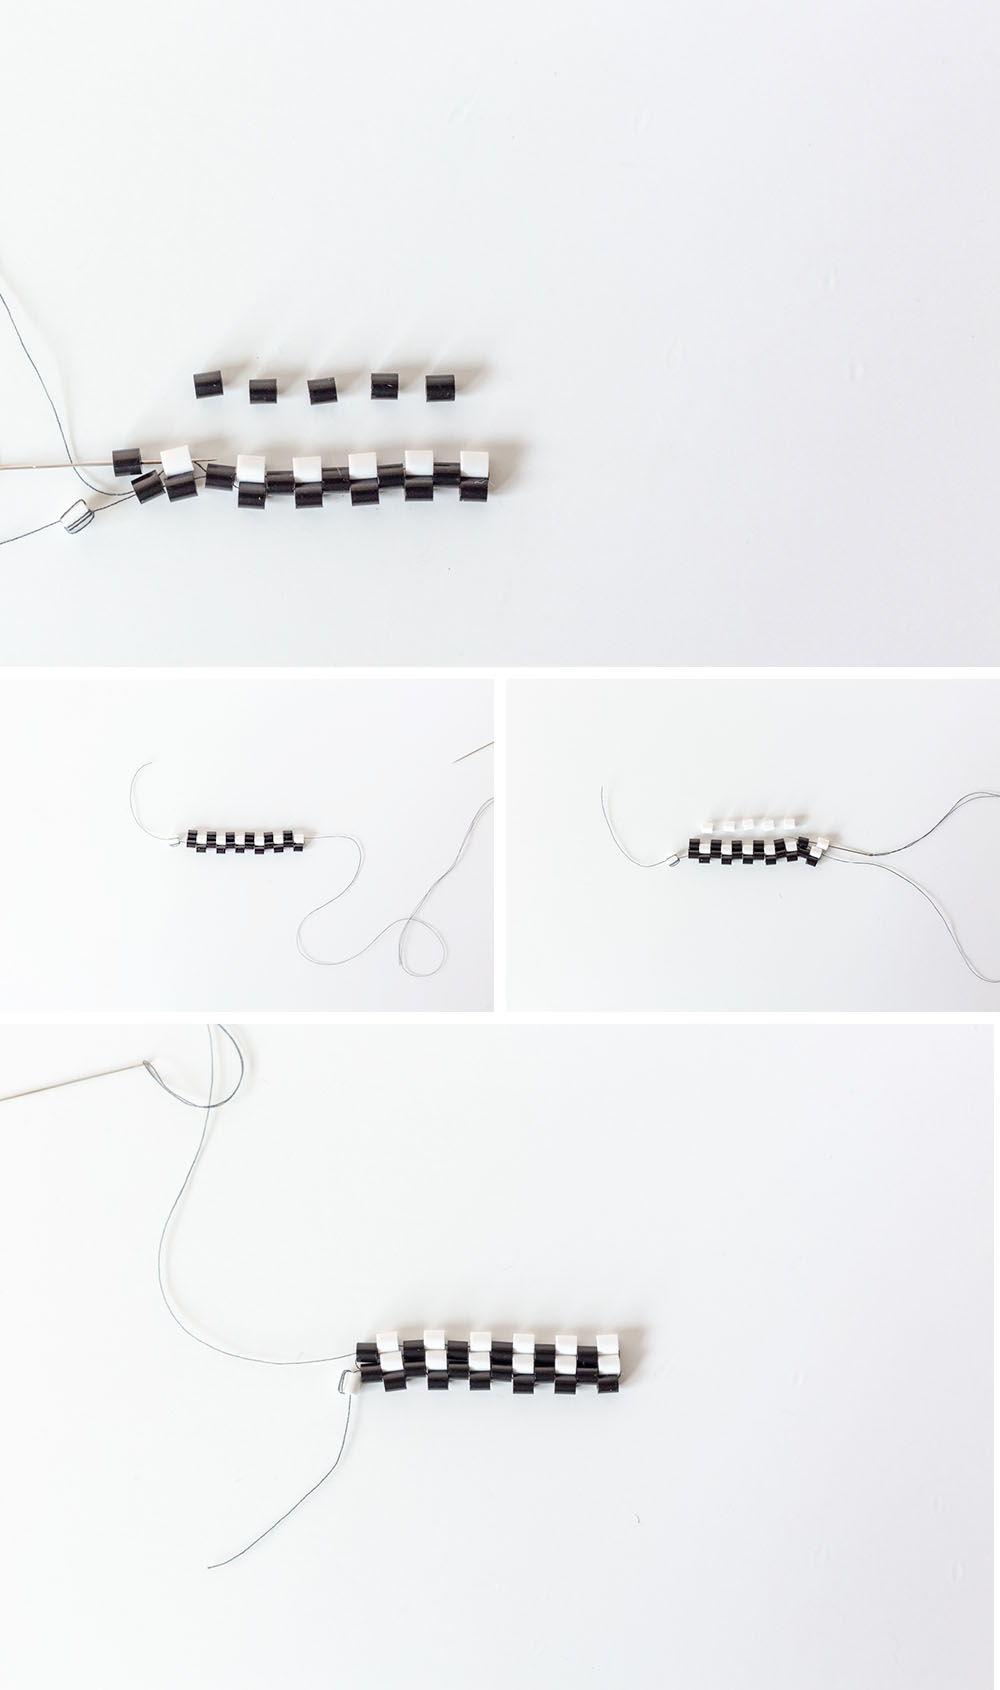
1. Thread your needle with a long piece of cotton. Take one white bead to use as a stopper (we’re using white so we don’t mix it up with the first row). Thread it onto the cotton, pushing the needle through the centre a number of times until it is securely in place.
2. Thread black beads onto the thread until the beaded length reaches around the whole of the bottle.
3. Start your peyote stitch:
*** Below I have included the tutorial for peyote stitch. I’ve used the contrasting black and white beads to highlight the rows of beads, rather than work in the pattern I have for the bottle cover. Head to step ‘4’ to see the rest of the cover tutorial, but stay here if you need to learn this bead weaving technique first!
a. Once you have threaded all the first row onto your cotton take another bead for the next row (shown here in white) and thread that onto the end of the row.
b. Take your needle and pass it back through the second bead from the end of the first row. This is the second black bead from your white one or three beads in total.
c. Thread on another white bead to the second row and continuing in the same direction, miss a black bead from the first row and thread your needle through the next one. Continue this pattern until you reach the end of the row.

d. Now all that hard work is done we can get to the easy part. On the third row thread your needle in the opposite direction through all the white beads placing the next row of black ones between them.
e. Keep working back and forth from left to right working a new row of beads in each time. Now you have your peyote stitch!
4. To create this gradual change in colour start with 12/13 rows of solid black beading. Slowly introduce the occasional white bead, building up the ratio until over a number of rows they switch and there are more white beads than black.
5. On row 18 you need to decrease the four corners. wrap the beaded work around the bottle placing the edges at one corner. Mark the other three on the work with masking tape. When beading the next row miss out one bead at the beginning edge and at each of the taped places. Just thread through the two beads on the last row without putting a bead in between them.
6. When you reach the end of the row pull the thread tight and you will start to see the piece take shape. continue to thread as usual keeping the tension on the thread.
7. After 6 more rows decrease again. Bead another two rows.
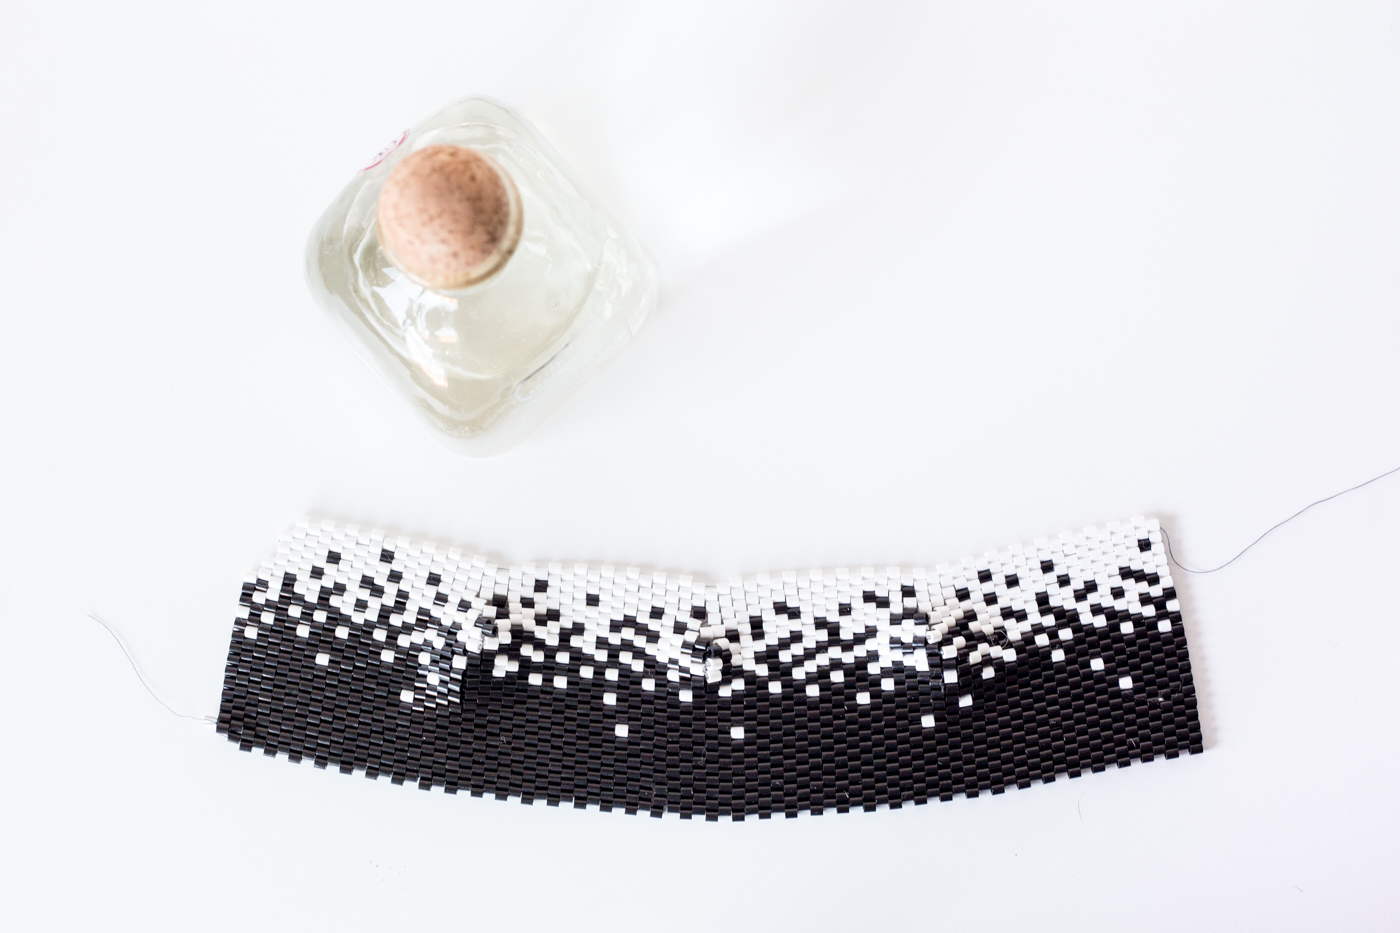
8. Wrap the piece around the bottle and sew up the meeting edges. Add more beads if needed to join seamlessly as possible.
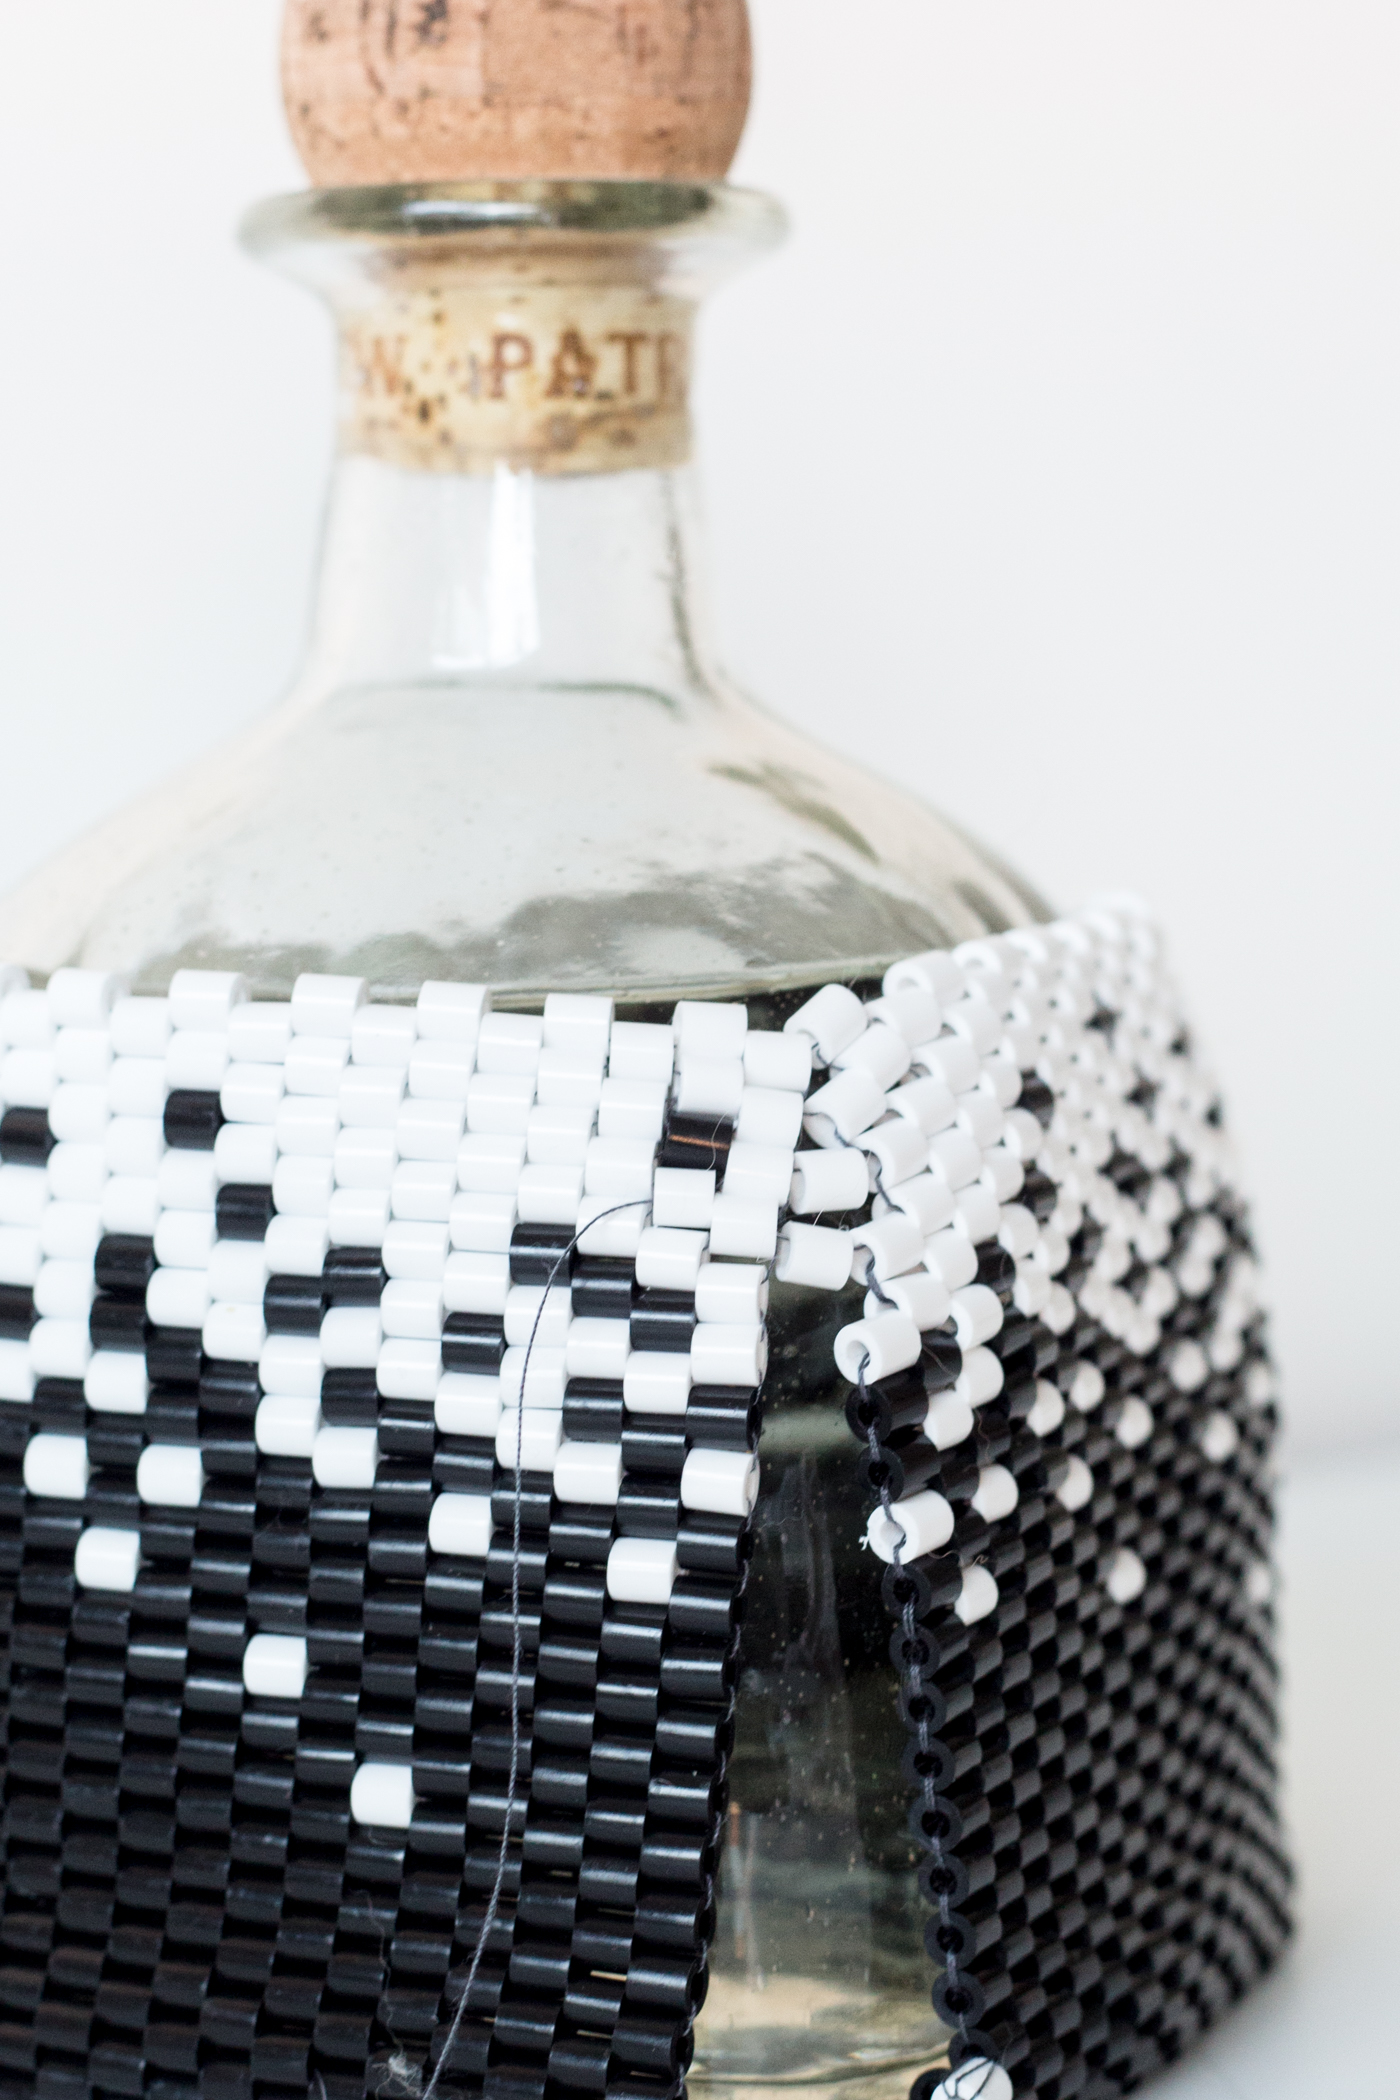
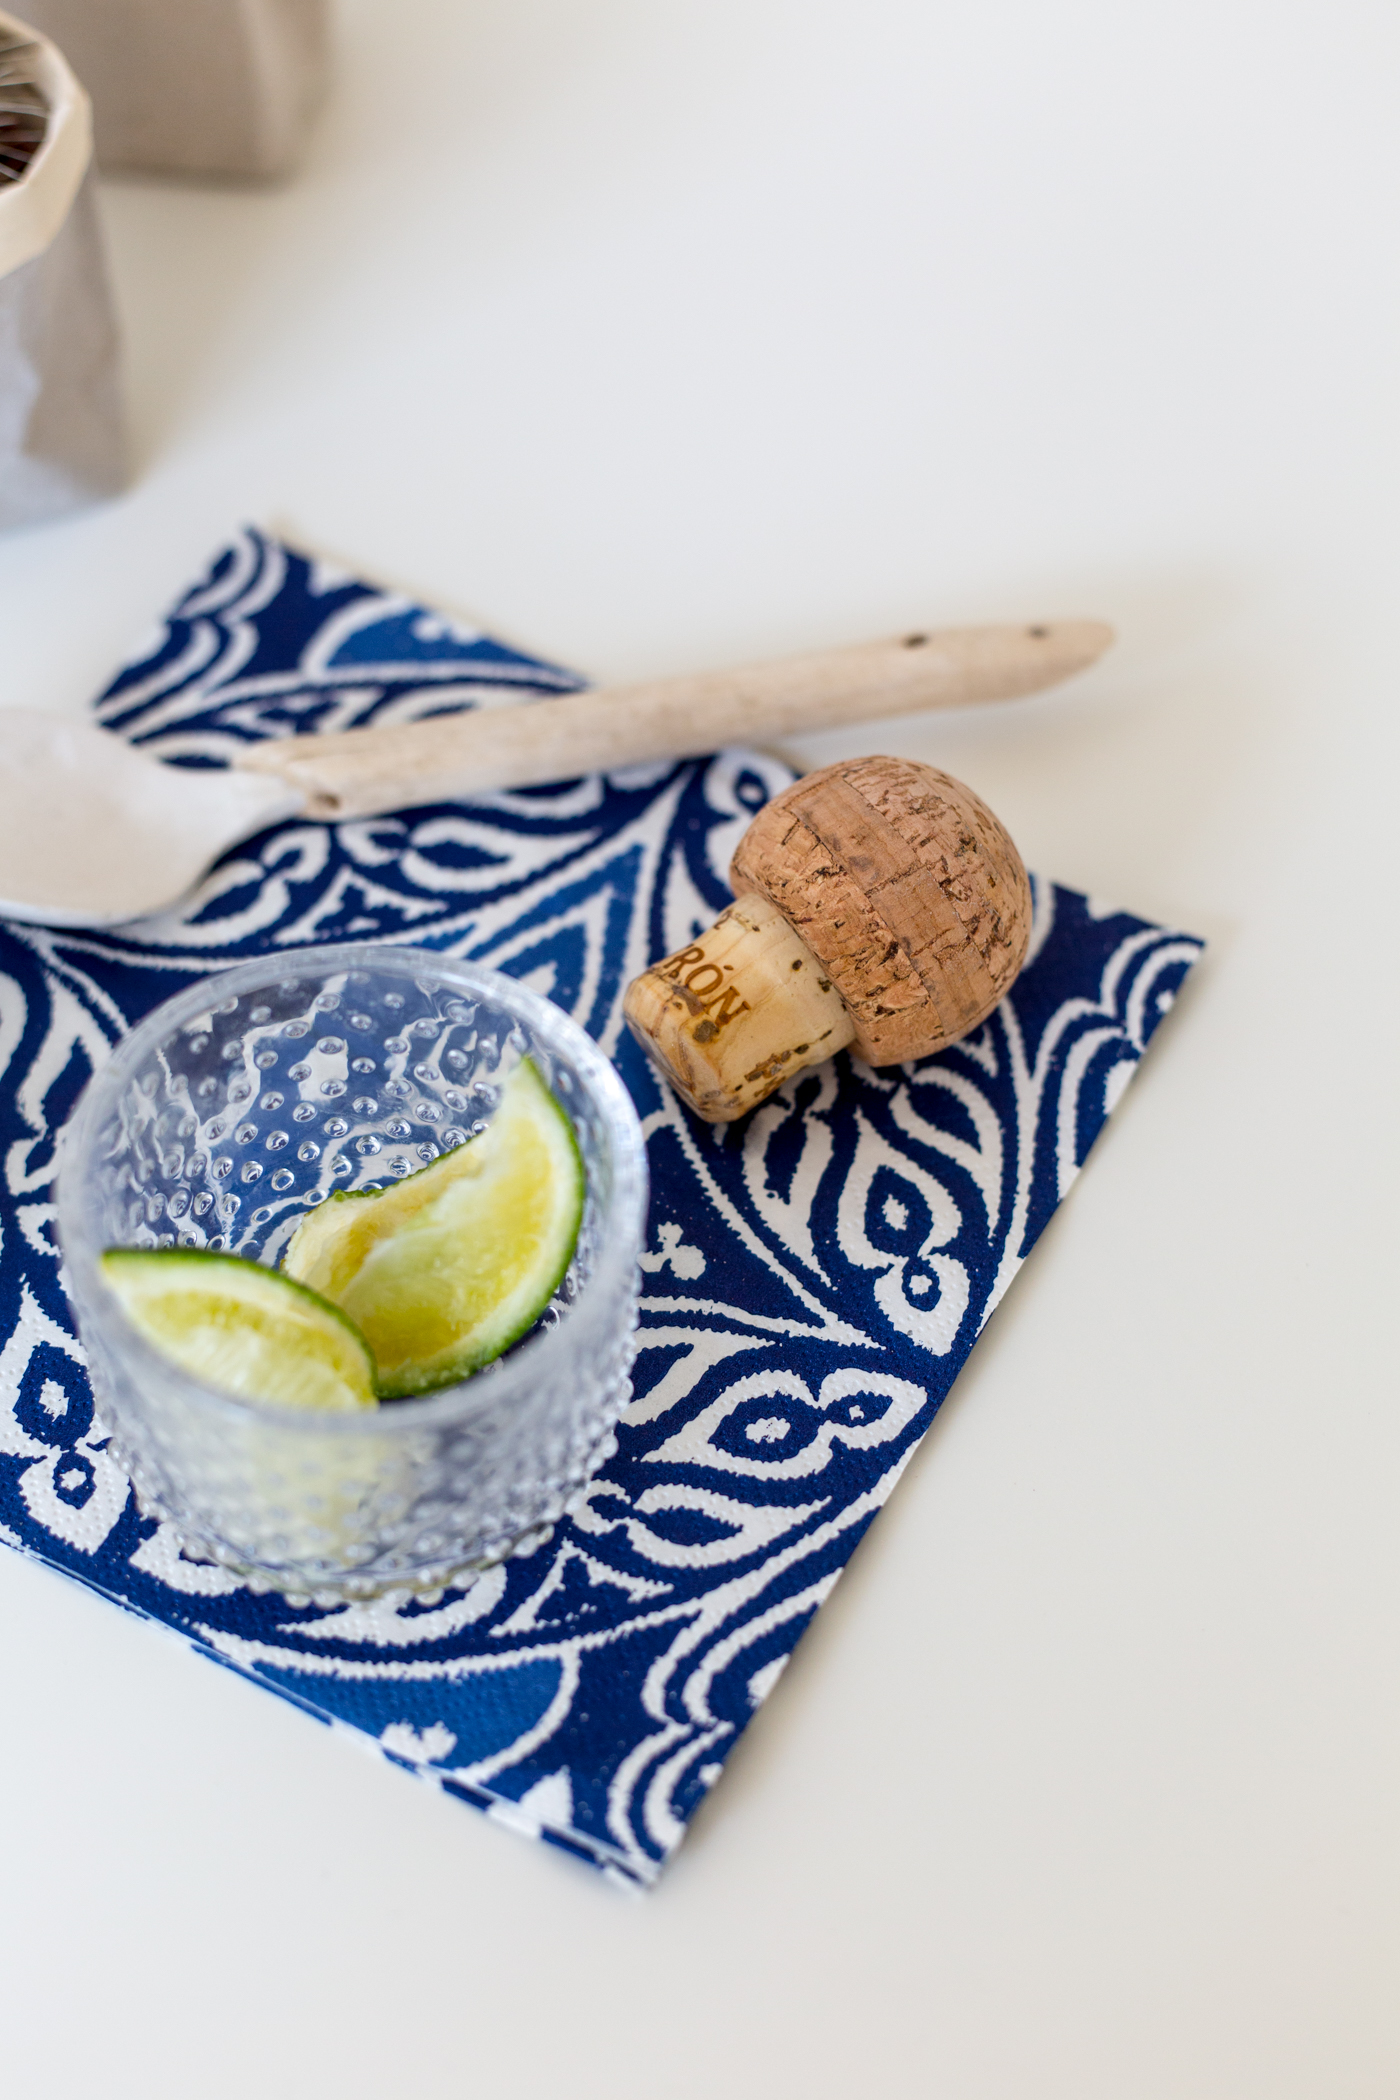
Once you’ve sewn it up top to bottom the cover is ready and you can pour yourself a celebratory drink!
Make sure you share you work with us using the hashtags #fallfordiy and #artofpatron. I can’t wait to see the winning entry!
*This post was made possible by Patrón but all opinions are my own. Thank you for supporting the brands that support Fall For DIY.


Such a nice idea! Unfortunately I’m not US residence – so no competition for me.
B.R. Karin
http://www.doiteria.com
That is brilliant! Oh and the possibilities and patterns you can make with this are endless!
omg this is so stylish and attention-grabbing! good job :)
I like rude people at some point, they always say what they have in mind, at least you can know what to expect from them.
Fantastic thanks for the awesome idea.
Beaded bottles were a popular beading craft when I first began beading a long time ago. Ten long years later, I finally discovered the joys of sewing beaded netting around the neck of a little glass bottle! While browsing the scrapbooking department of a local craft shop, I came upon a collection of miniature glass bottles and decided they would be ideal for honing my sculptural beading abilities on them. CBD oil for sale
Awesome guide waiting for more in the future :)
Amazing tips love your website.
Aside from loosened up muscles, your temper will likewise improve, hence furnishing you with an unwavering discernment. A decent outlook will hoist your temperament, assisting you with managing viably during upsetting circumstances. A body back rub will get inspiration, causing you to have a decent outlook on yourself; it additionally hugely affects great wellbeing.Visit full body massage
A b2b massage can help you to relax your muscles, which can make it easier for you to sleep at night. The mind can also be relaxed. Relaxing allows your brain to focus on the things it needs instead of worrying about other issues.Visit spa near to me