I’m still struggling to clear out my life, become more organised and maybe even create a little more space (the dream) in my home. Problem is I fill up any spare inch of surface space seconds after it’s cleared. I don’t even know where this new layer has appeared from. But like ‘poof’ out of nowhere were back to square one.
One way I trick myself into throwing away more is to keep a bin close. The quicker I can get the condemned object out of my site and into the rubbish, the sooner it is also out of my mind. This is the key to successful purging. If there’s any hesitation between the initial decision to throw. it. out! and following through on that resolution then inevitably the excuses will come.
“I can do something with that”
“You’ll regret this later when you need this exact, obscure piece of metal that came from a place unknown and doesn’t have an obvious use.”
“But this fabric’s so pretty. Maybe one day I’ll have time to make a quilt from 800, 1″ squares… maybe…”
Sound familiar? The solution is simple. Rubbish bins everywhere my friend. Keep them close by and therapeutically throw these things away. Clearing both the clutter from your home and from in your head.
To make it easier I’m making all my bins much prettier so I don’t mind putting one in every corner of my home. Try it out for yourself and let me know how you get on.
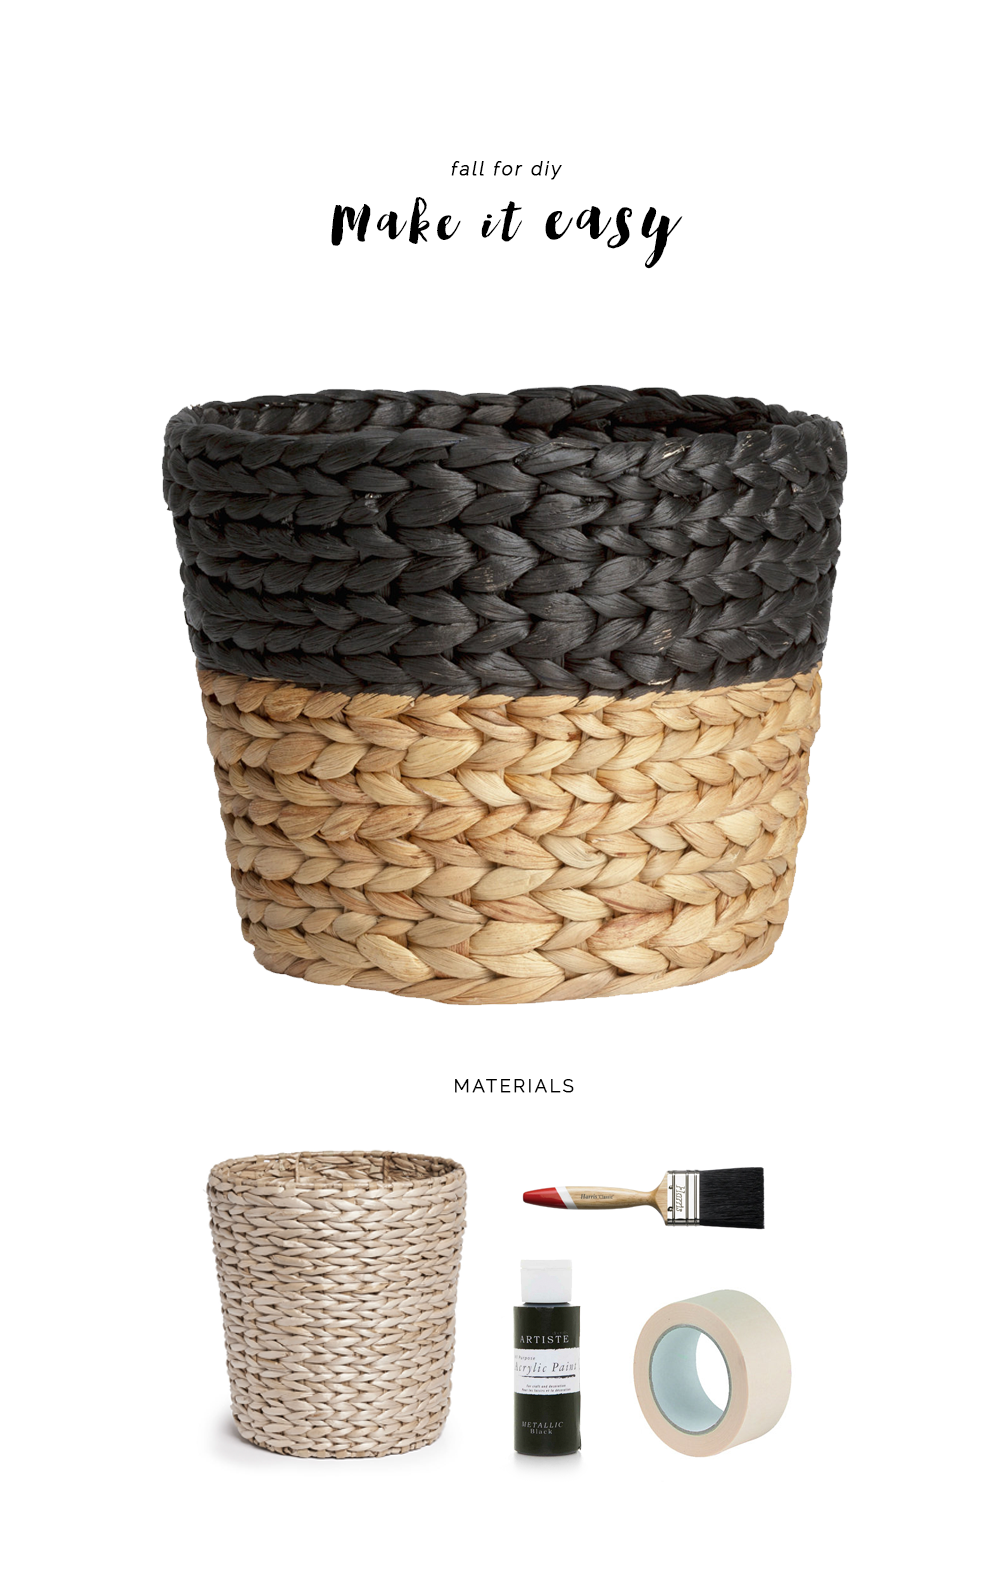
Materials
Woven paper basket | Black paint |Paint brush | Masking tape
Wrap the masking tape horizontally around the basket a few times, pressing it firmly against the reed. Paint the top half of the basket using the bristles on the brush to work it into all the spaces between the reed. Leave to dry and peel off the tape. Repeat on the inside of the basket.
Have a great weekend everyone!


Every time I read your blog I convince myself I NEED to have the supplies to remake what you have created! They are all so good!
bysophielee.blogspot.com