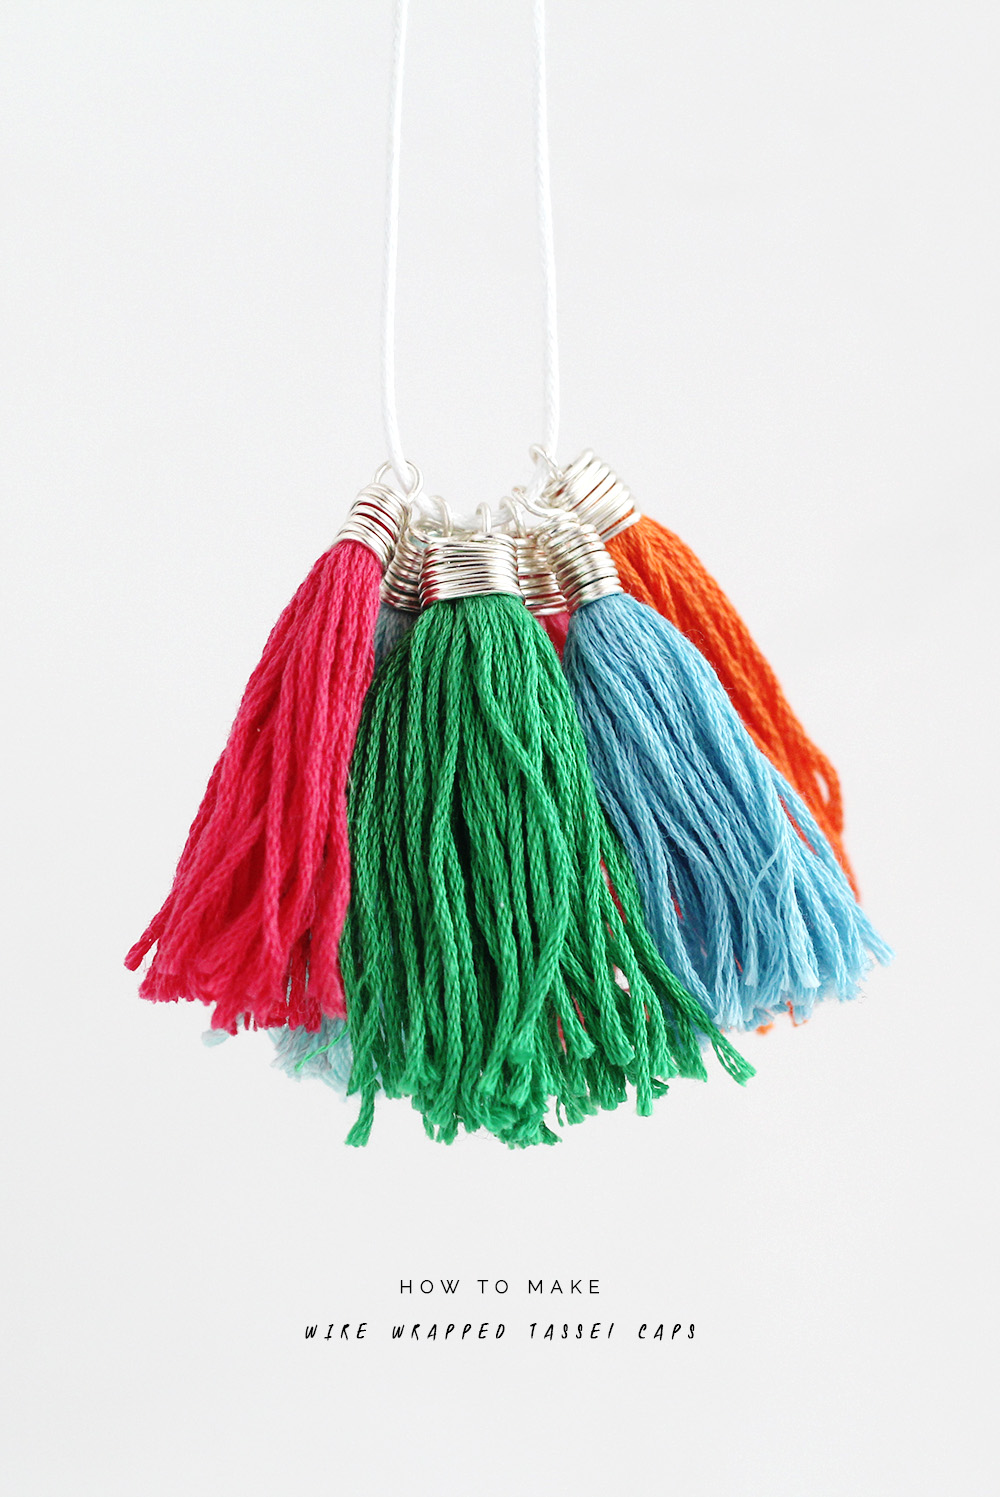
If you didn’t know by now I can tell you, I’m partial to a good tassel. They make great decorations, fashion accessories, party props and of course jewellery additions. They can be pops of colour or tonal variations. Neutral or Natural. You can make them with cotton, silk, twine, beads… How I could go on. There are so many options for your next ruffly project and I’ve got yet another one right here for you. Why not give your tassel a little metallic sheen with these wire wrapped tassel caps? This technique make the tassels so easy to attach to everything you’ll be wire wrapping all your tassels from now on! The only thing left is to decide on which colour wire to use.

Materials:
- Threads/cords
- 0.8mm Wire
- Plier Set
Instructions:
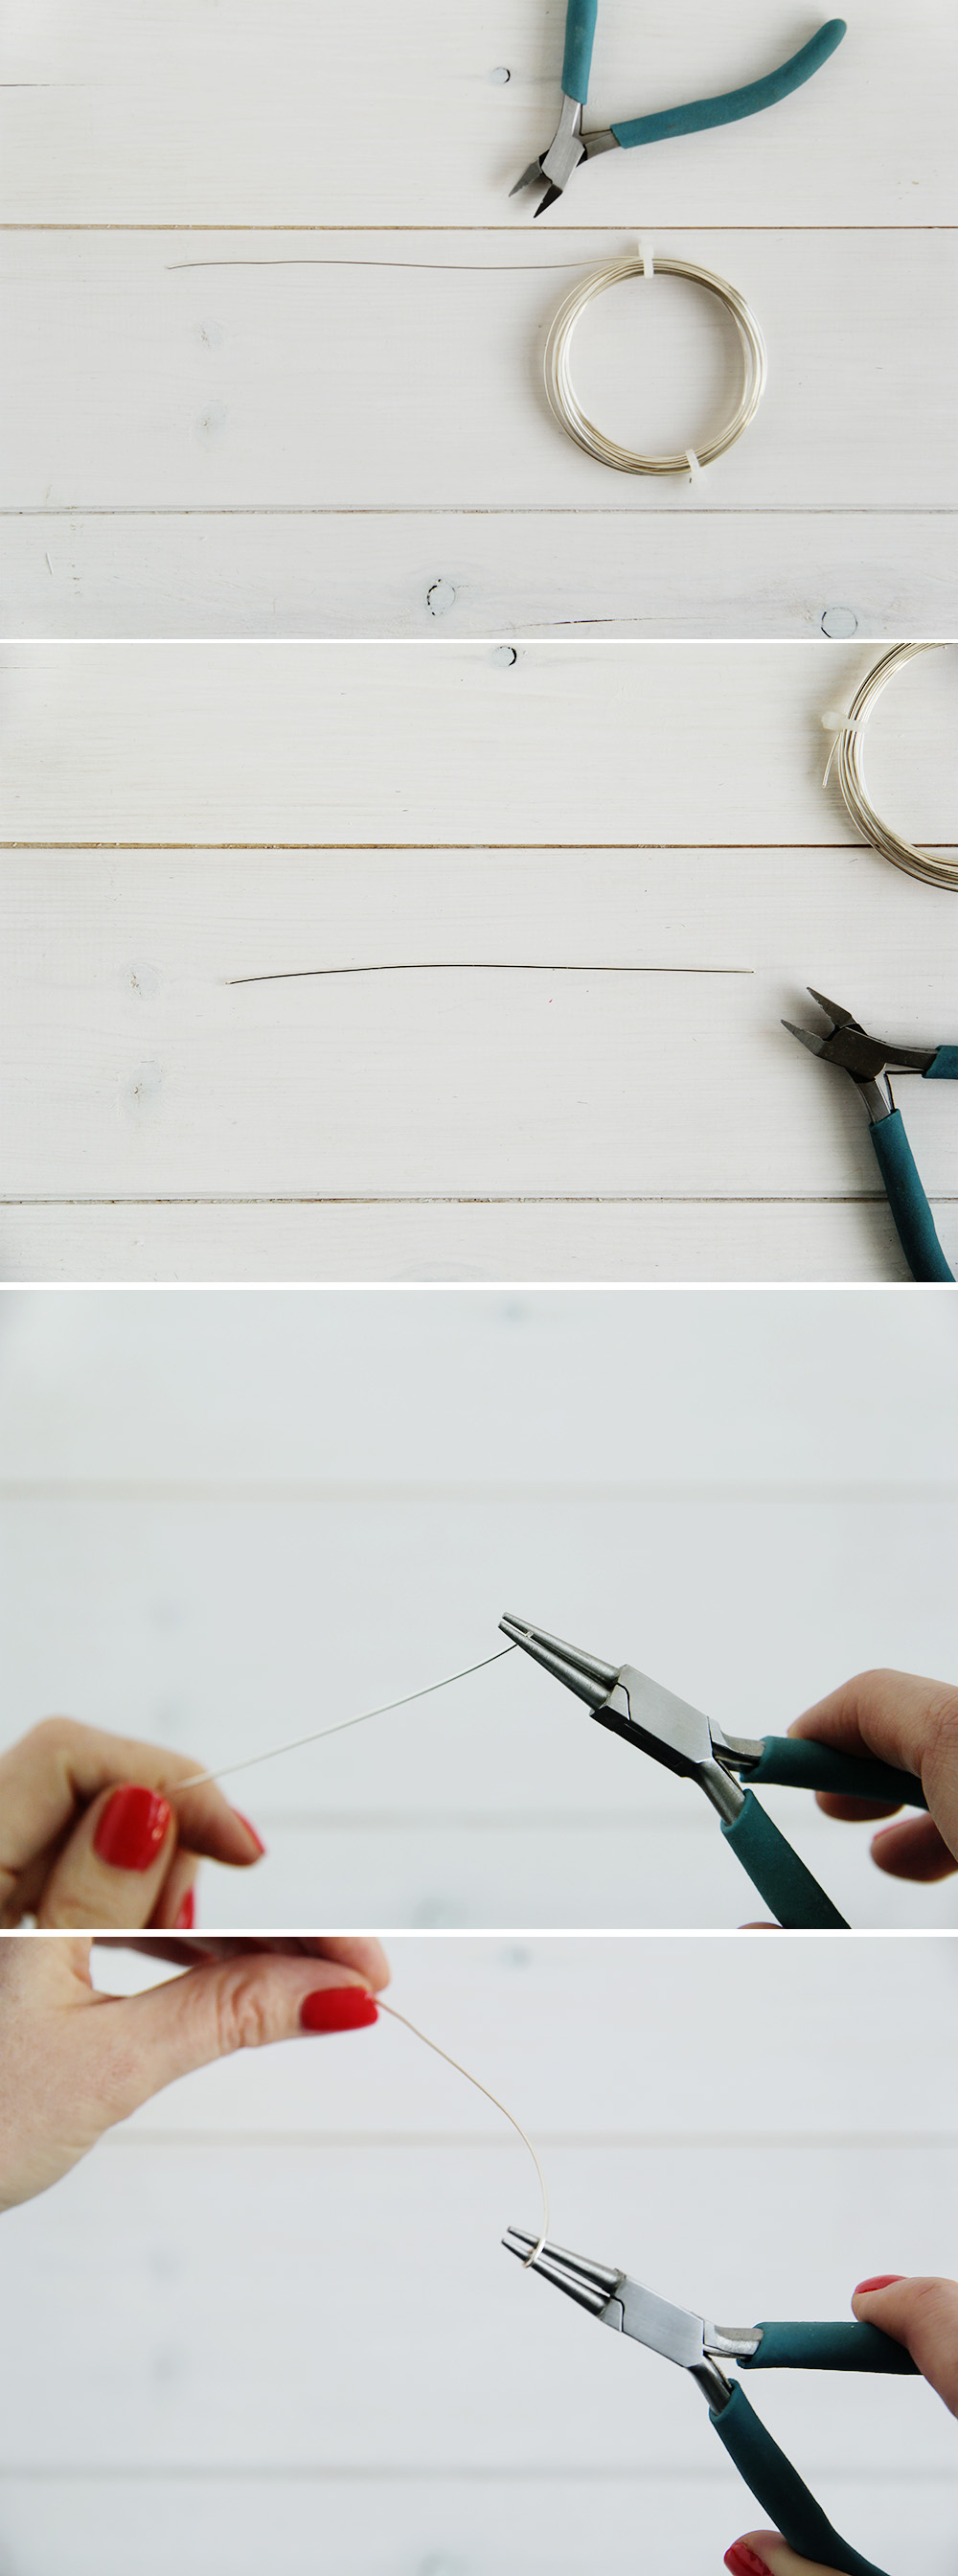
1. Cut a piece of wire about 3″ long.
2. Hold one end of the wire in between the round/needle nose pliers around a third of the way from the tip. Start to wrap the wire around both of the plier points.
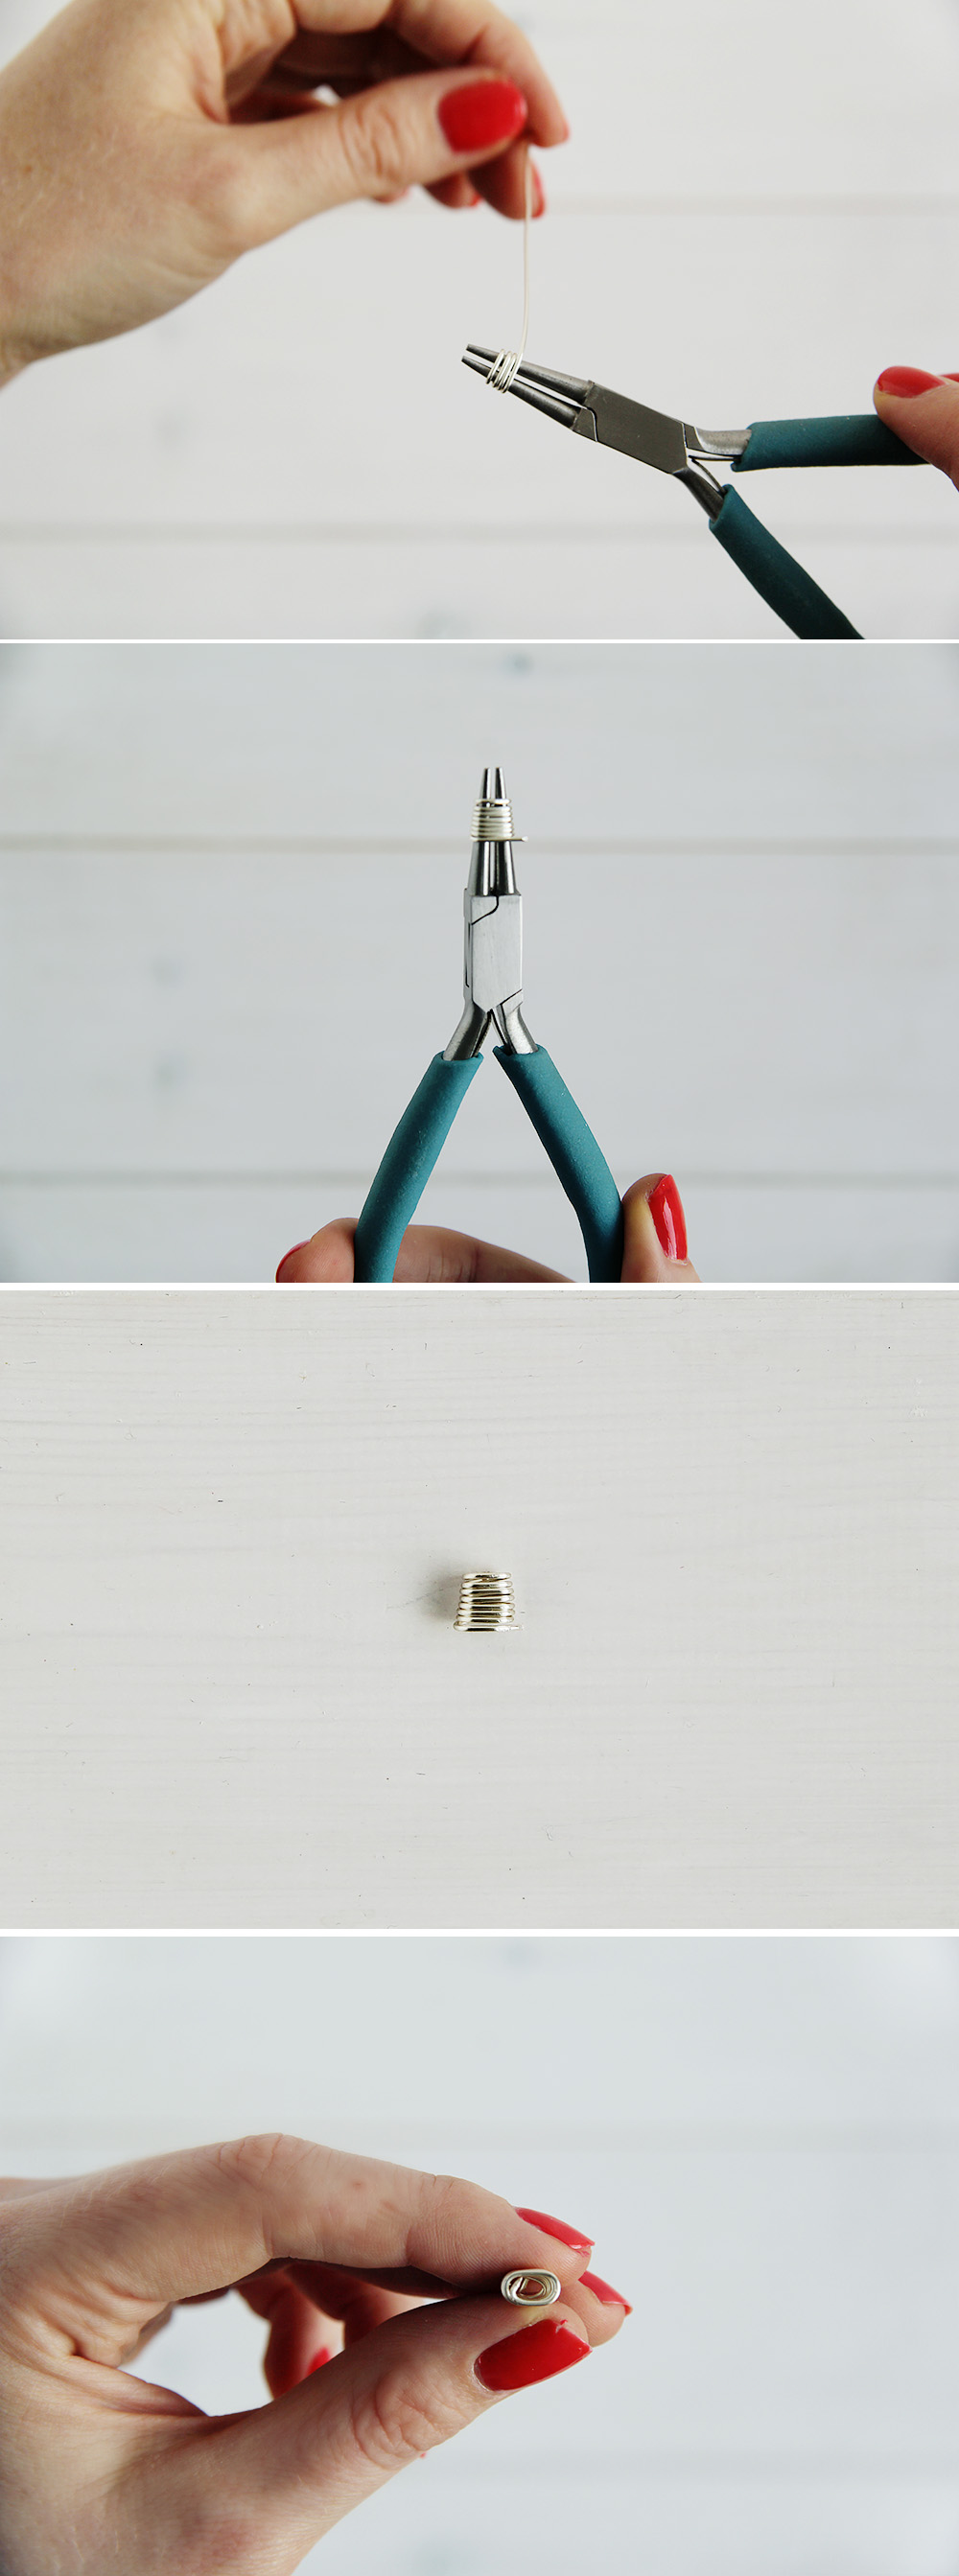
3. Continue to wrap until you have used up all the wire.
4. Slide off the end of the pliers and using chain nose pliers fold the end inwards.
4. Wrap the cord around your fingers into a loop several times.
5. Cut another piece of wire, thread it through the middle of the loop and wrap it around the threads once leaving one long end of wire. trim the shorter end down.
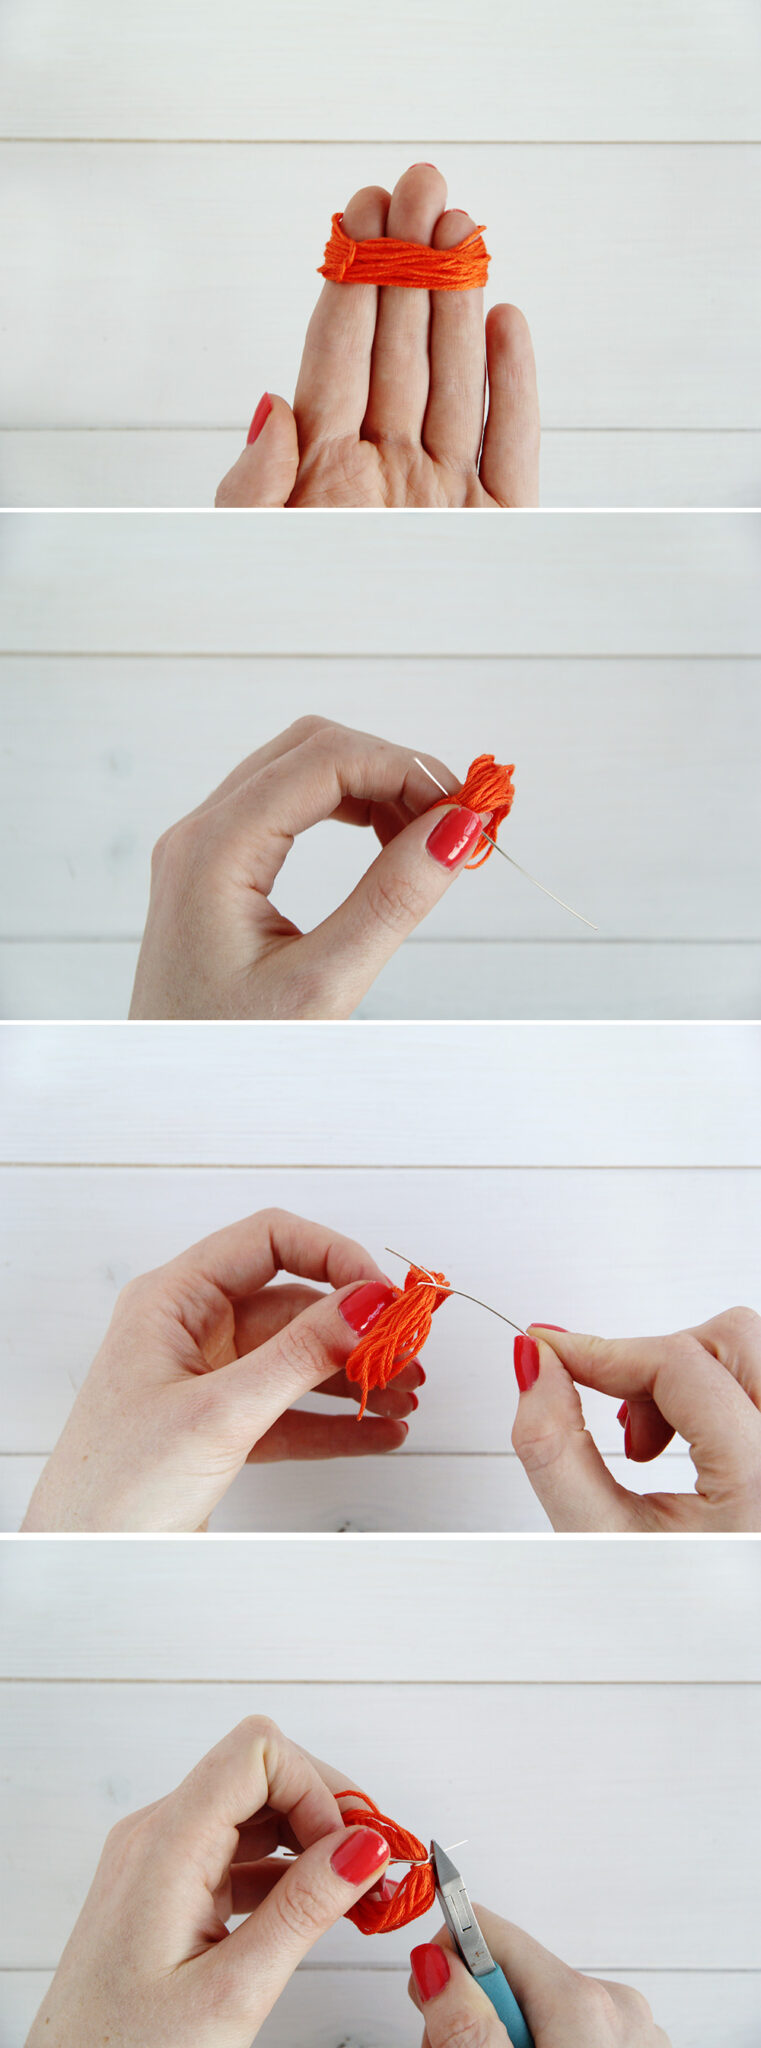
6. Thread the end of wire attached to the cord through your spiral of wire.
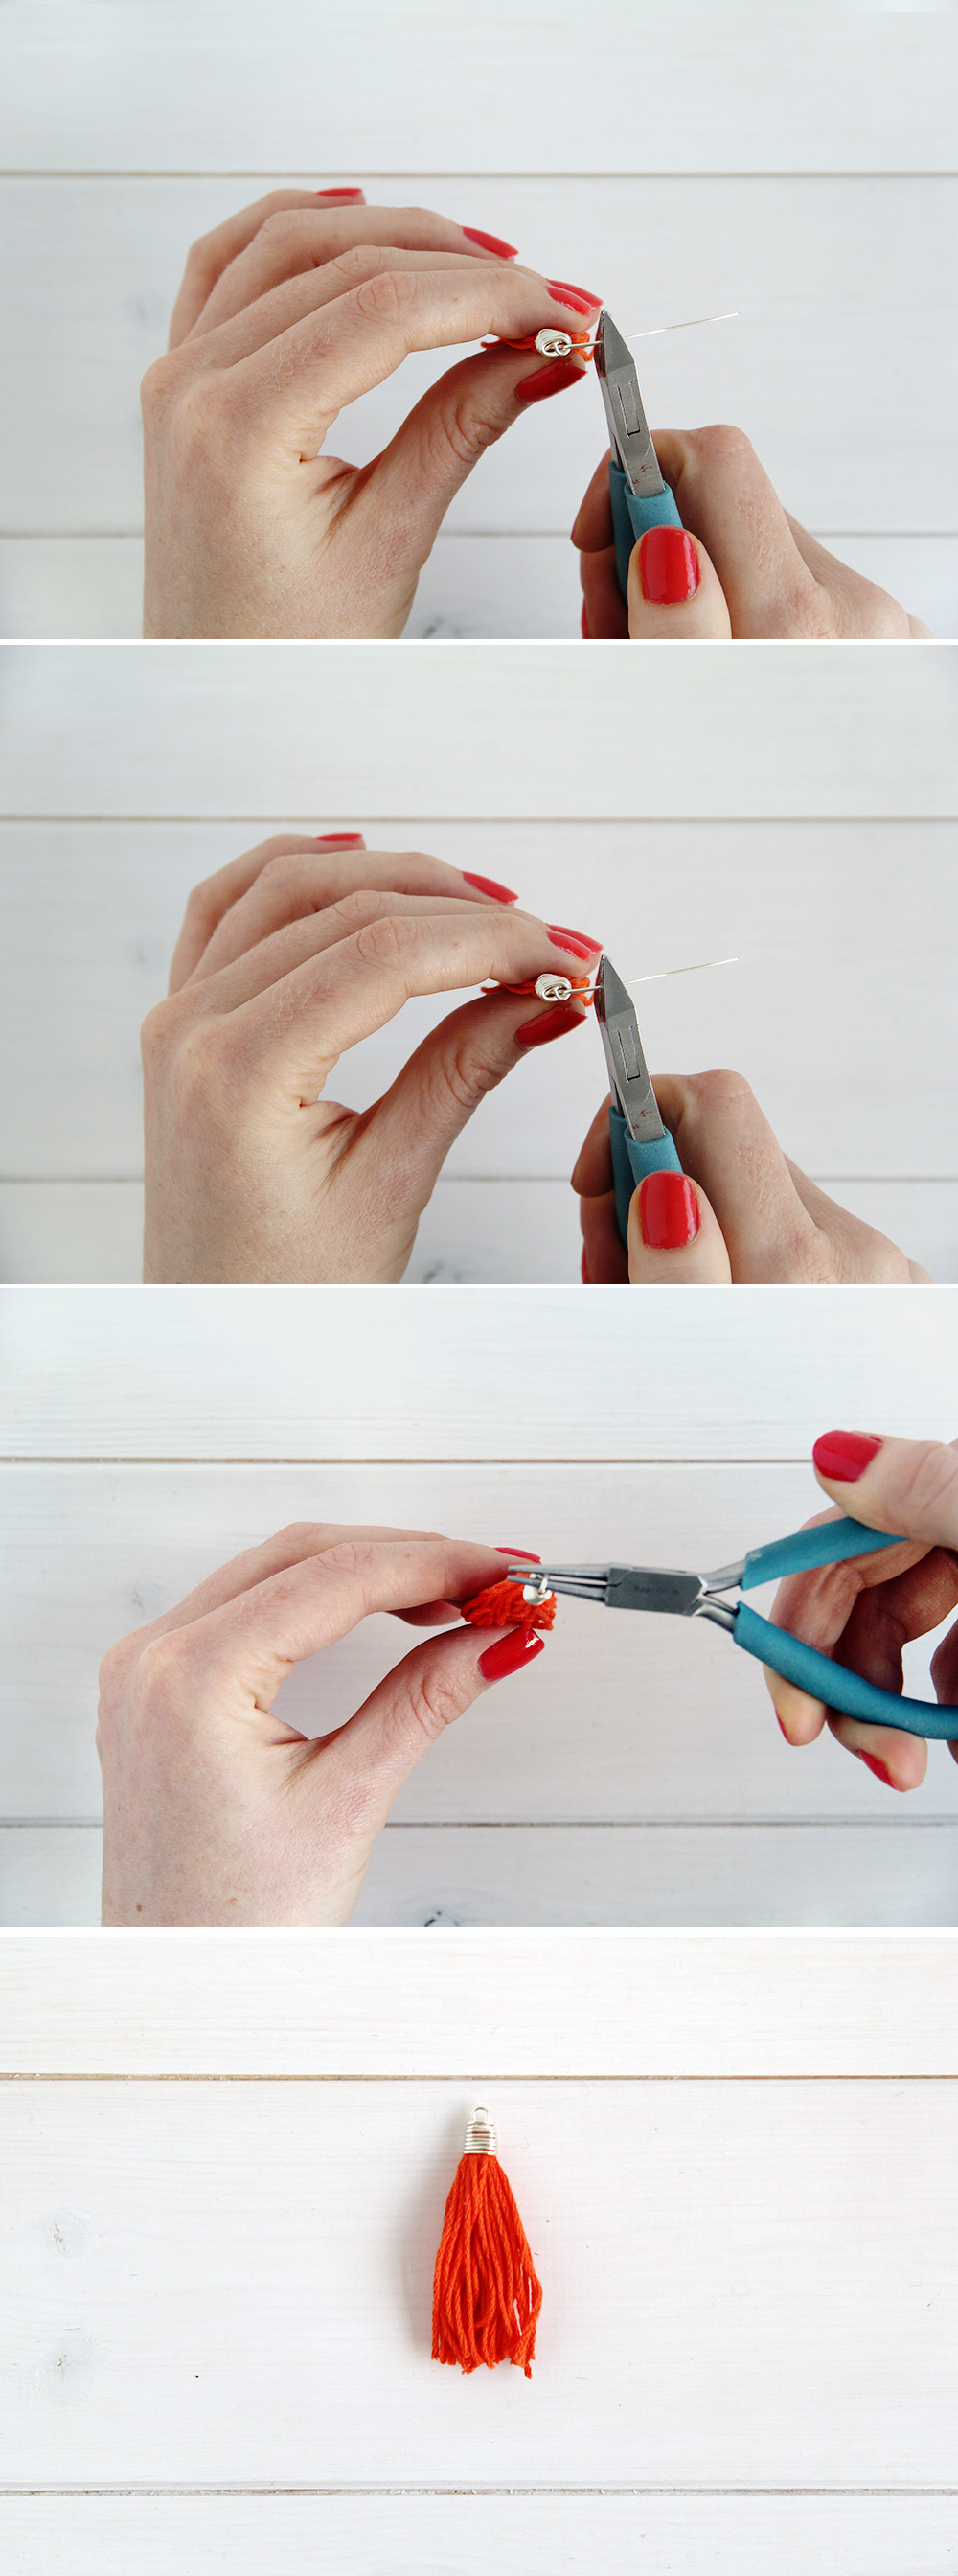
7. Fold over 90 degrees, trim to about 1cm and turn a loop. If you want to know more about perfecting basic jewellery making techniques like this one check out the Beads & Baubles ecourse.

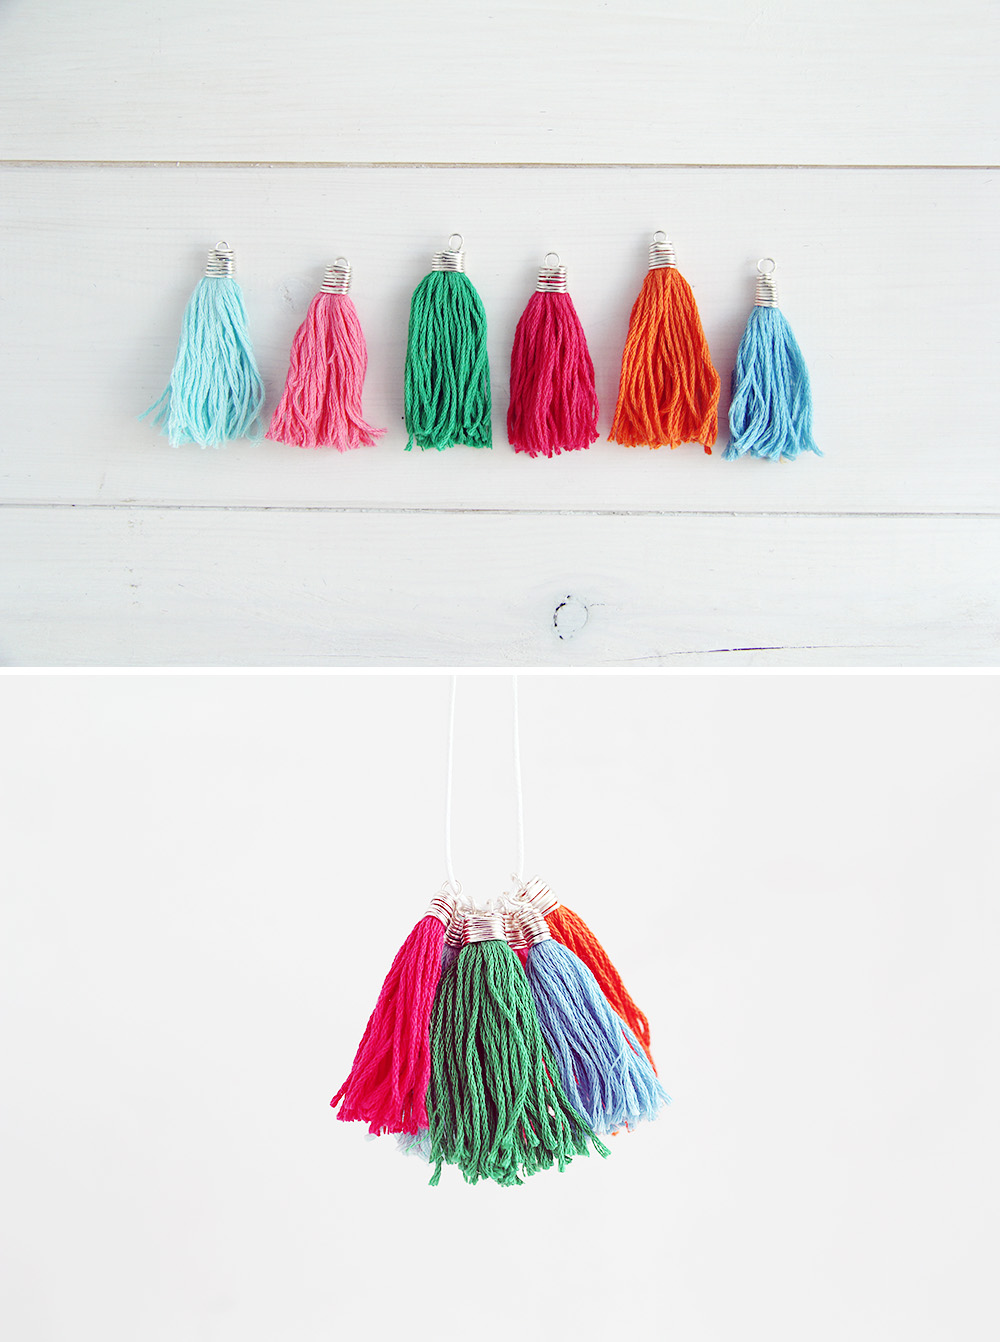
If you’re wondering what you can do with the tassels once you’ve made a whole bunch of them try making an Alternative Tassel Garland or this Easy Pillow Decoration. If you’re looking for something to adorn yourself with rather than your living room then try this Tassel Necklace DIY or a Tassel Bag Charm. So many things to do with tassels, so little time!


How neat! And I finally have a way to not waste those pesky leftovers from crocheting while also making a pet toy or decoration!
Yes! It’s perfect for leftovers. :)
Thanks for this tutorial! I love the colors you chose for your tassels! And thank you for linking to projects using tassels because that’s exactly what I was thinking. “Oooh tassels, cute! But what do I do with them?” :P
Love, Elsa
Very nice!! Love this idea, now I have an alternative way to finish my jewelry. Thank you!
Many many thanks to allowing me here for add printer windows 10 this online tutorial post.This is so important for the users of windows 10 OS.
This is the most helpful tutorial I have ever read. You should teach!! Thank you so much for posting.
Your blog website provided us with useful information to execute with. Each & every recommendations of your website are awesome. Thanks a lot for talking about. Get fix satta matka game here.
Sohana Sharma Fun Manali Thanks to you for your knowledge information!!!