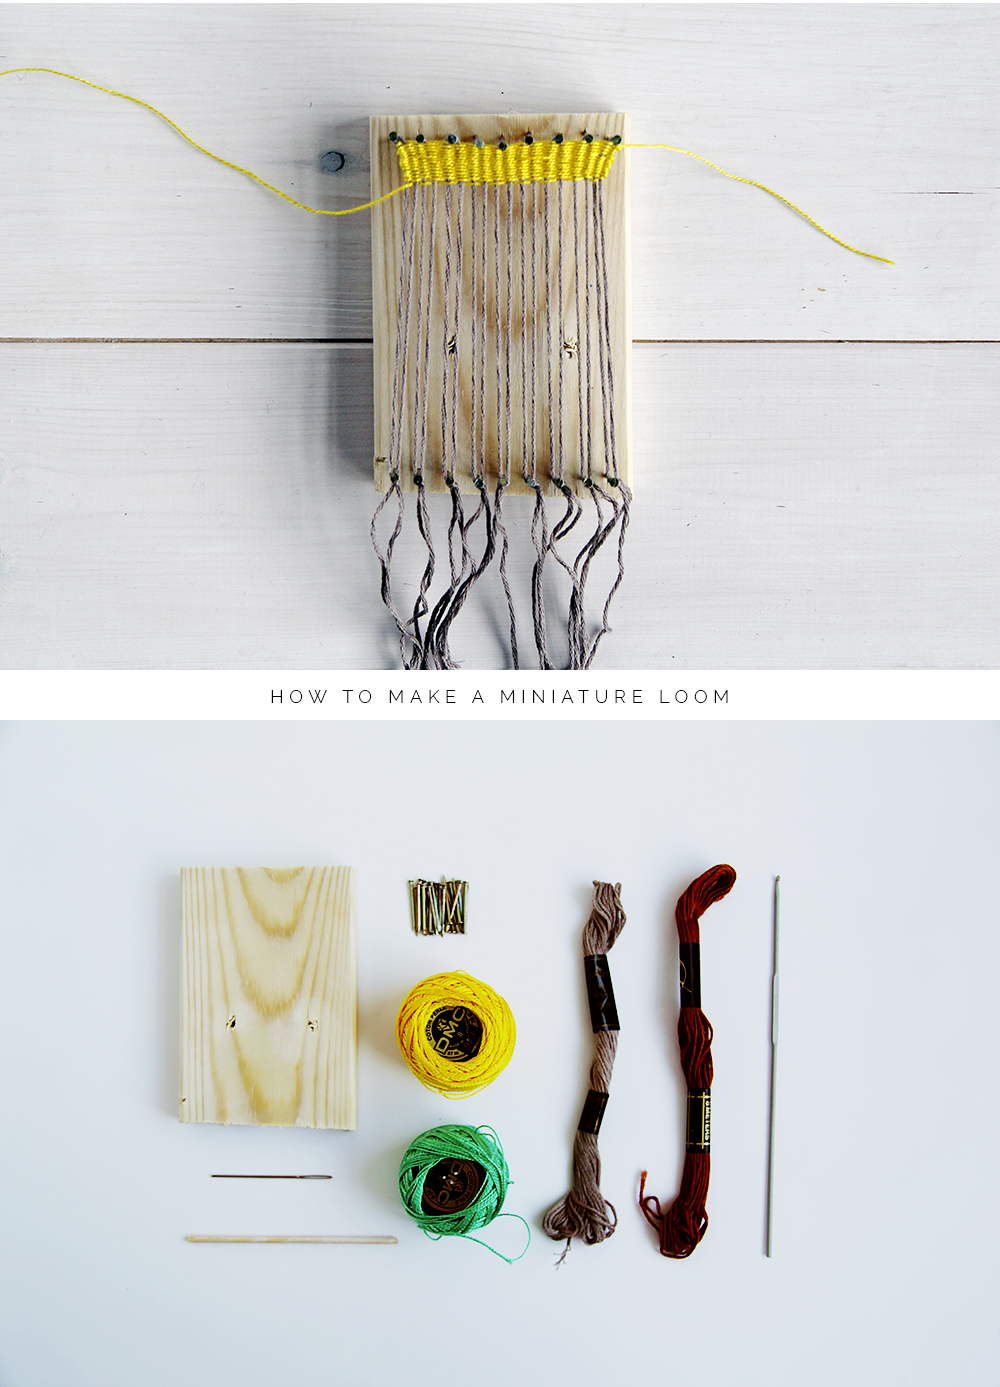
You know how I love to take the big trends, shrink them down and make jewellery out of them..? Well of course it was only a matter of time until I started weaving up some miniature accessories. Woven wall hangings are a must have for any hipster home these days (yes.. I do have one….) but if you don’t fancy decorating your house with them why not decorate yourself instead? I’ve used an simple rectangular shape for this tutorial but it’s so easy to change the shape of the loom and make more interesting pieces. I’ll be posting more on weaving shapes and turning your pieces into jewellery later so follow us to make sure you don’t miss that! You can find the links to your fave social media site at the bottom of this post.
Materials:
Wood Block
Nails
Hammer
Embroidery threads
Tapestry Needle
Crochet Hook (optional)
Instructions:
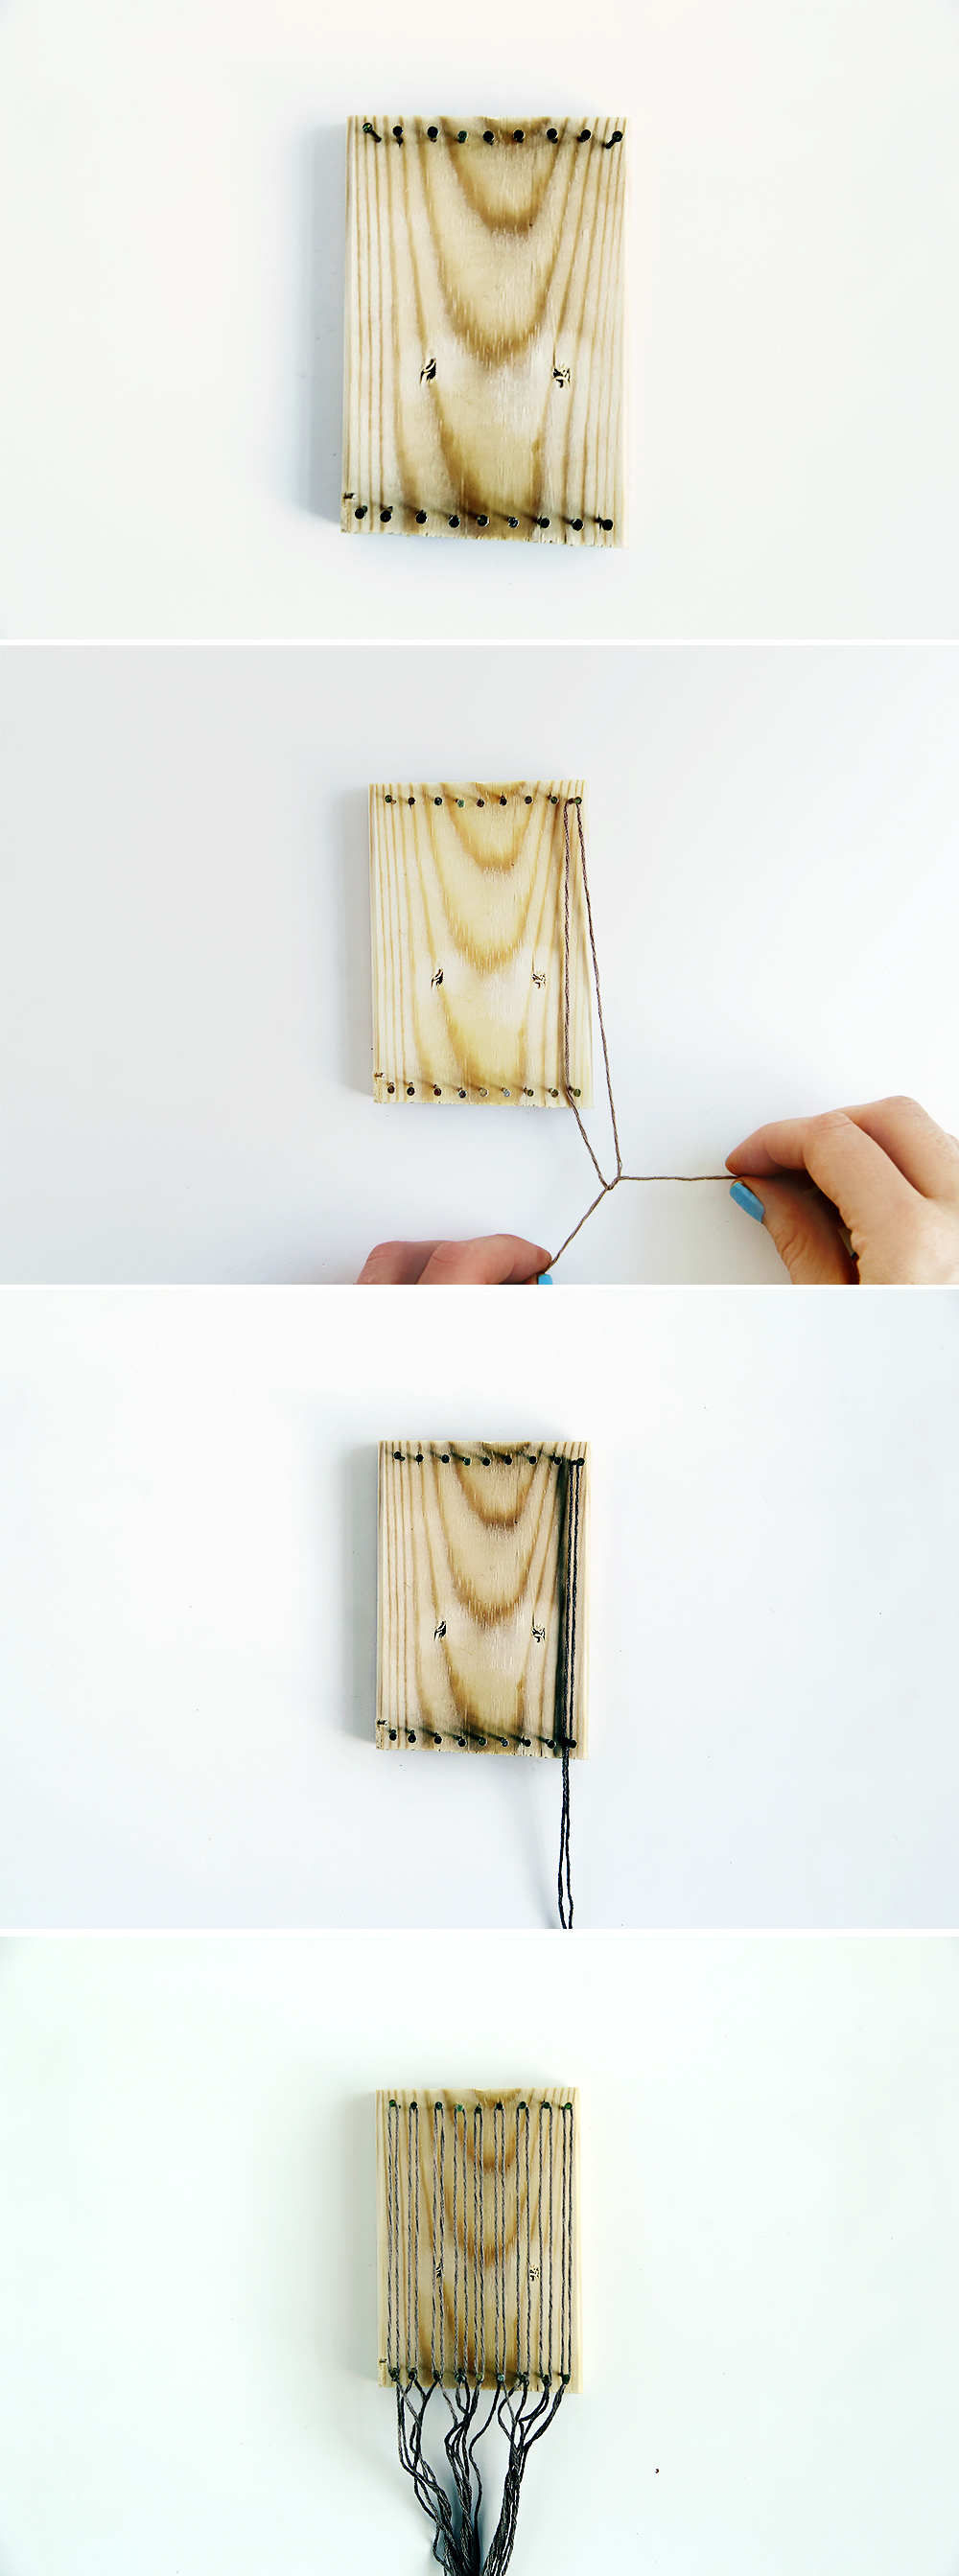
1. Take a small block of wood and sand any rough edges.
2. Hammer nails along the top and bottom about 5mm 1/4″ apart. Make sure you have an equal amount of nails at the top and bottom.
3. Tie on lengths of your warp cord over one top nail and one bottom nail. Do this along all the nails.
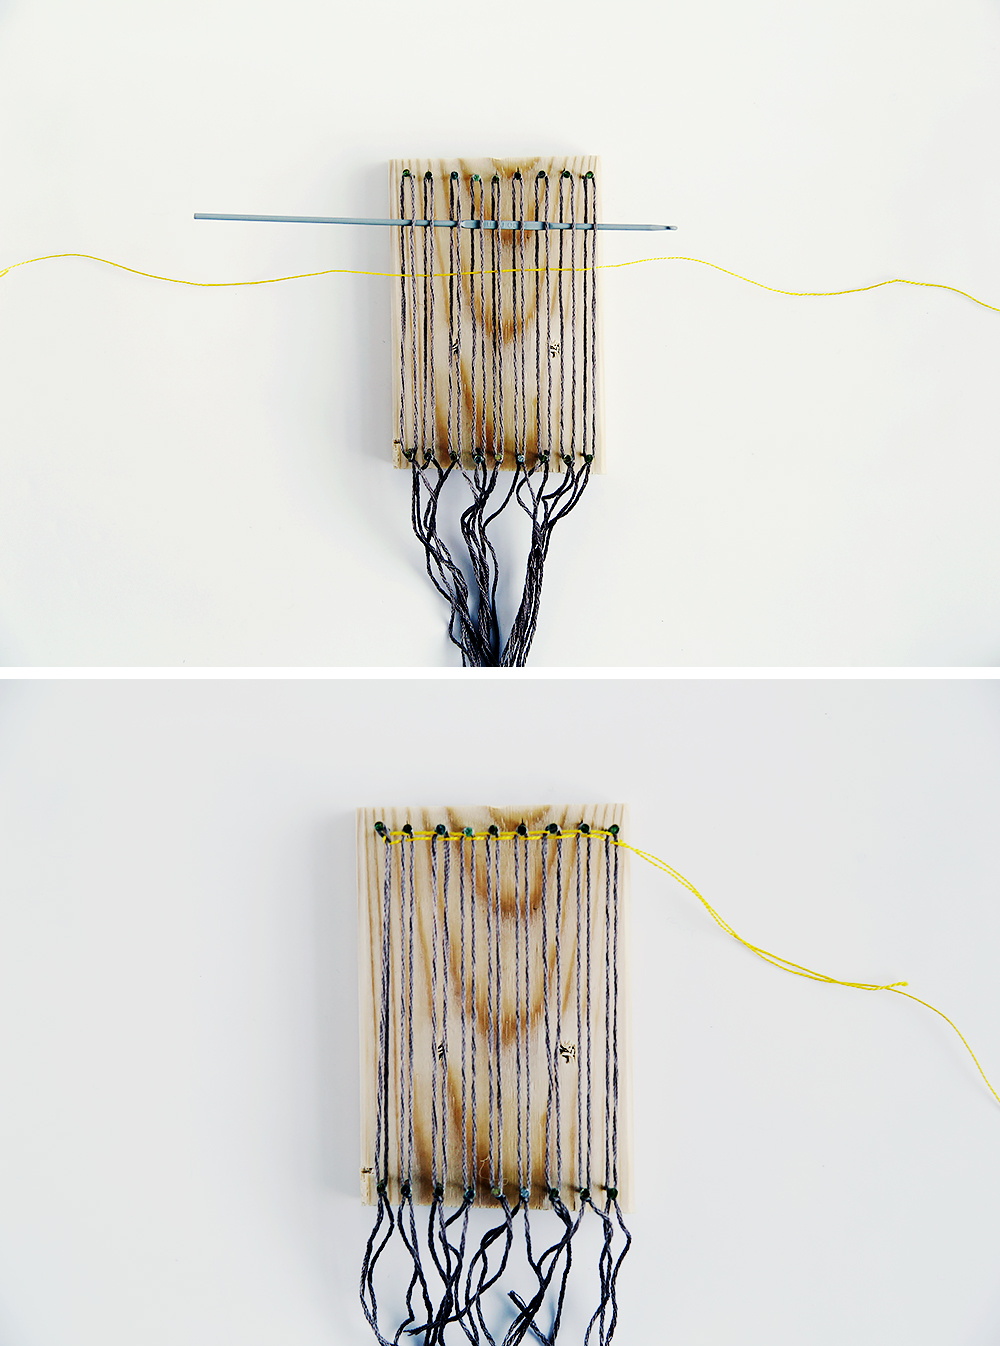
4. Using a crochet needle (or skewer) separate the warp threads by threading the needle over the first then under the second. Continue to go over each odd number and under the evens.
5. Thread your weft thread (the thread going across) onto a needle and thread it through the middle using your hook and a guide.
6. Remove the crochet hook, push the thread to the top and the begin to weave the crochet hook through the warp threads again but this time going under the odd numbers and over the evens.
7. Thread your weft thread through this gap again, using the hook as a guide.
8. Continue these steps changing threads and building up patterns as you go.
Hopefully this post wasn’t too dull for you super crafty lot. I wanted to make it as simple as possible to cover the basics of weaving. In future posts I want to explore shape, design and fun stuff like tassels to make it all a little more interesting…


Great tutorial as always :) Could you do some tutorials on the things you can made out of this miniature loom? :)
Hey Florianne,
Absolutely! I’m going to make quite a few variations so I’ll be posting a tutorial full of tips very soon. Thanks for commenting xx
Hi! Loved this tutorial. Did you end up posting other projects using this miniature loom? I can’t seem to find anything on your website…
Hey Bernice!
You know I never did! How things get away from you.. I’ve put it on my list for this year though so hopefully I will have a tutorial going up soon :)
Thanks! Would be great if you did! And yes, I’m sure you’re constantly getting new ideas to work on! Your blog is amazing!
As an absolute newbie with only my first woven pendant underway using a piece of cardboard for a loom lol, I am hoping you could kindly inform me how you remove the piece from this type of loom? Are you able to just lift off the threads from the nails with a hook for example? Thank you for tolerating my beginner question :-)
If you keep shaving the same area, your bumps may become more inflamed, increasing the risk of scarring. If you can, it’s better to let the Vidmate area recover completely first, as most cases clear up within a few weeks.
Don’t pick at the bumps or https://tutuappx.com/ tweeze out the hair, as this may introduce new bacteria and further irritate them.