• Home
  • Blog
  • About
  • Collaborate
    • Media Kit
  • We Make
    • Bloglovin
    • Facebook
    • Instagram
    • Pinterest
    • Twitter
    • YouTube

Fall For DIY

  • DIY
  • Interiors
    • Planters
    • Paper
    • embroidery
    • Drinks
  • Blogging
    • Photography
    • Instagram
  • fashion
    • Jewellery
    • Accessories
  • Inspiration
    • Round Up
    • 50 DIYs
  • Office
    • Free Printables
    • Organize
  • Party
    • Christmas
    • Halloween

Our favourite things in your inbox every month!

How to Make a Kumihimo Disk

I love a good Kumihimo braiding sesh. The constant repetition of swapping threads and turning the disk is enough to ease even the most stressful of days. Watching the intertwined cords build up to make an aesthetically pleasing cord that you can then use to make awesome jewellery is so satisfying. I recommend it to everyone and with this tutorial you don’t even need to go out and buy any specialist tools or materials to get started.

Materials:

Foam Sheets

Glue

Scissors/Craft Knife

Instructions:

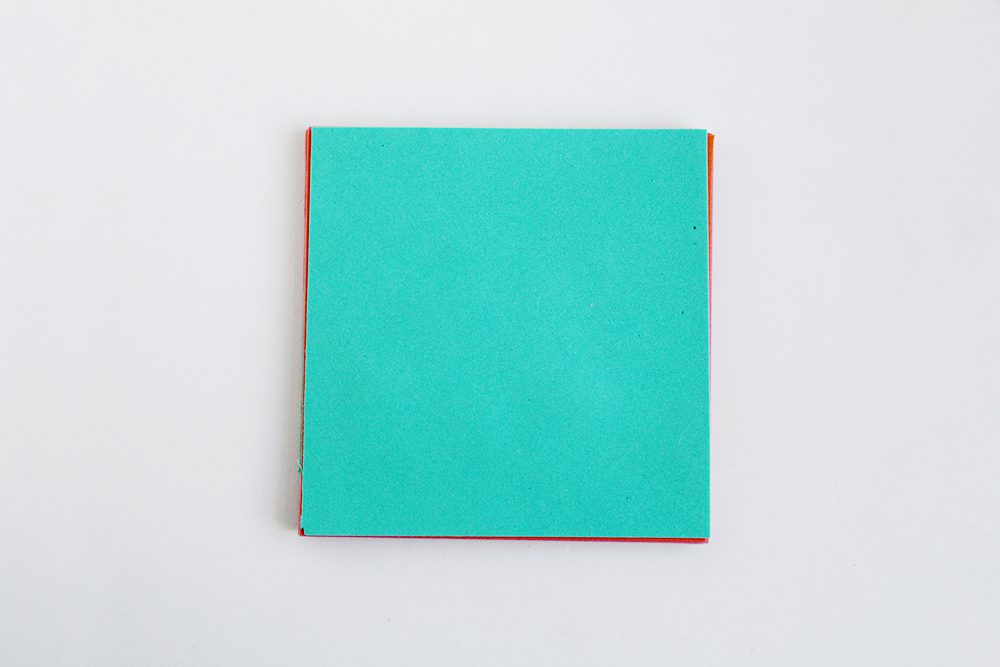
1. Depending on the thickness of your foam glue a few sheets together to make a foam pad around 1/4″ thick. Leave to fully dry.

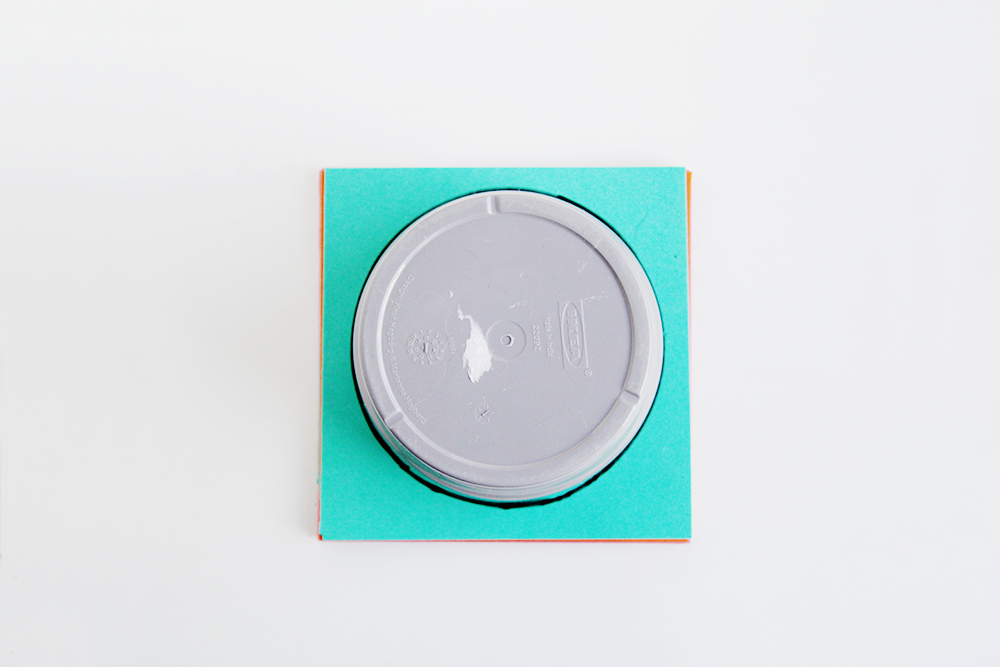
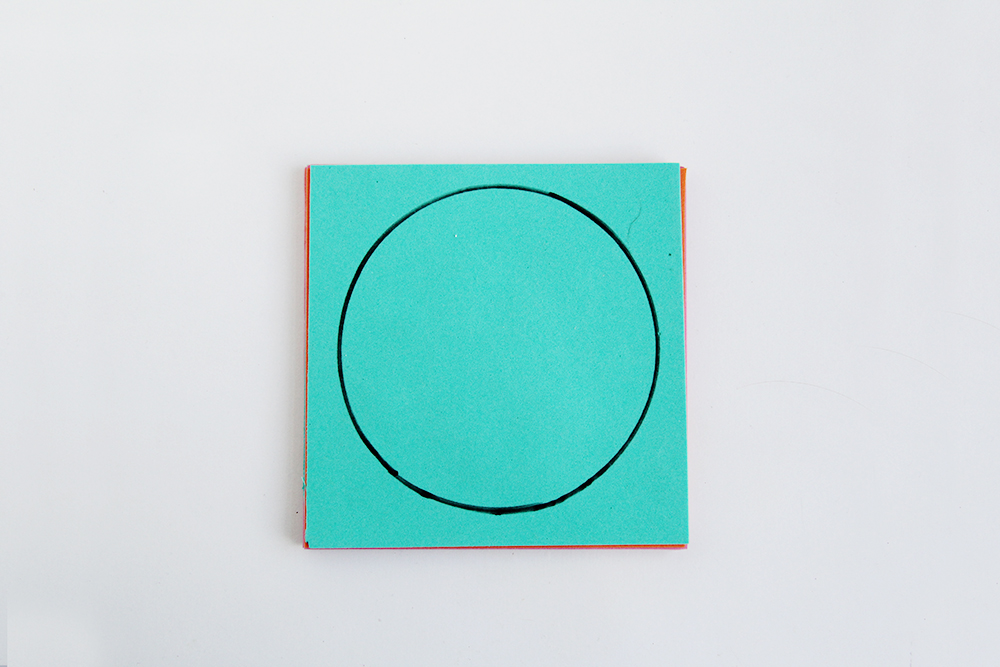
2. Draw a circle about 10 cm / 4″ on to the foam and cut out.

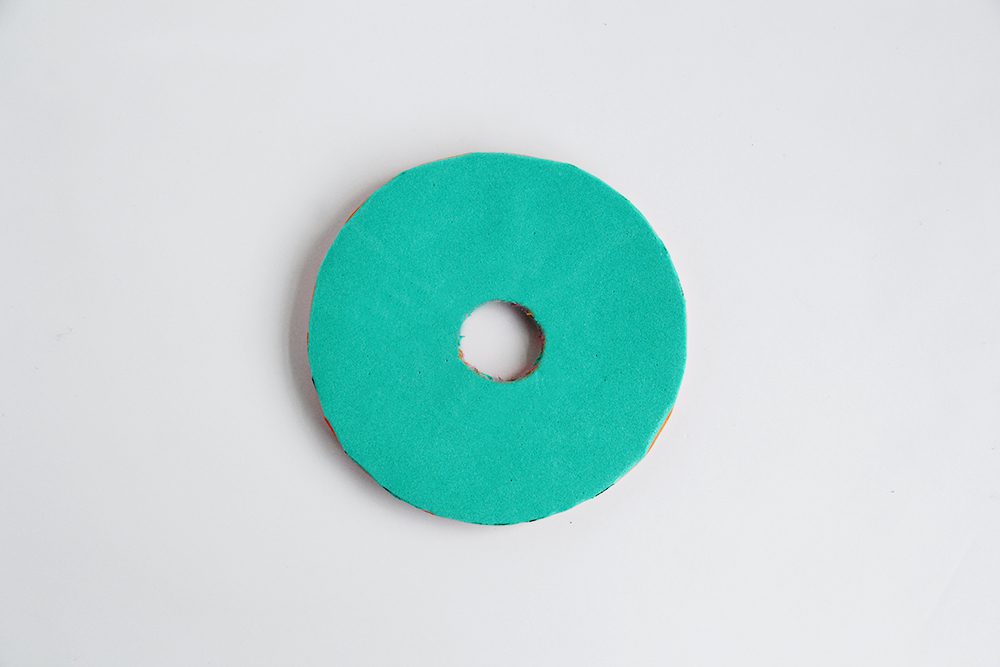
3. Cut another small circle out from the middle about 2 cm / 1″.

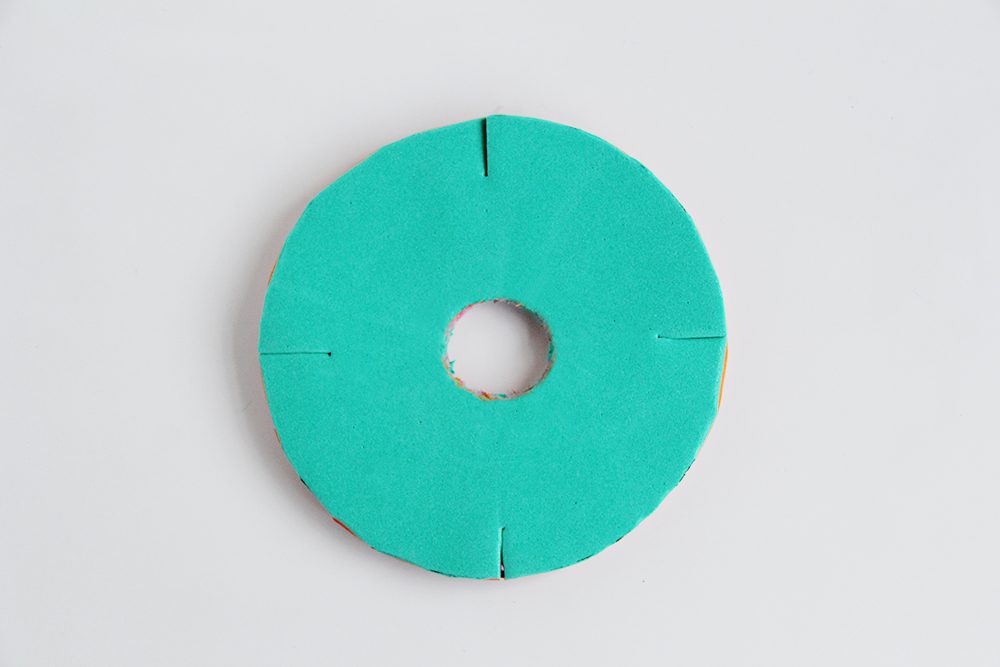
4. Cut small slits in the foam; north, south, east and west.

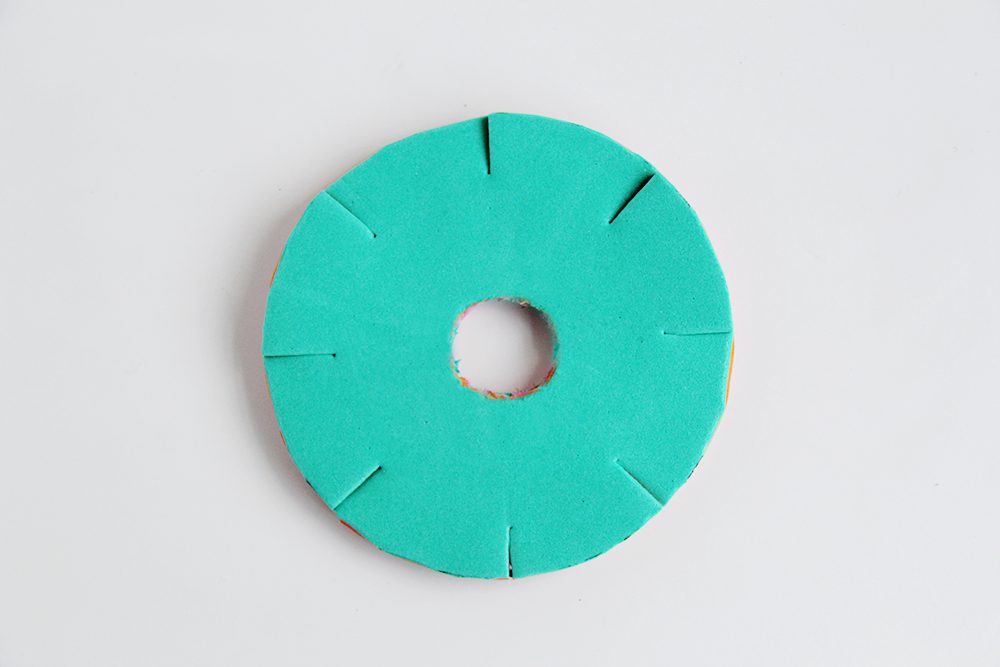
5. Cut four more slits in the middle of these points.

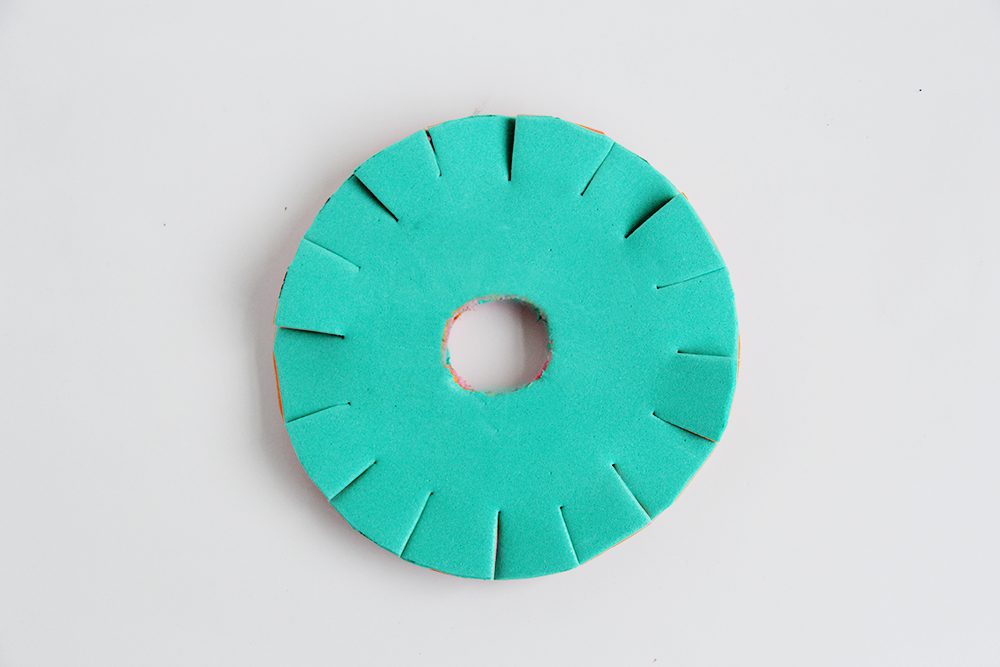
6. Cut eight more slits in between the existing cuts.

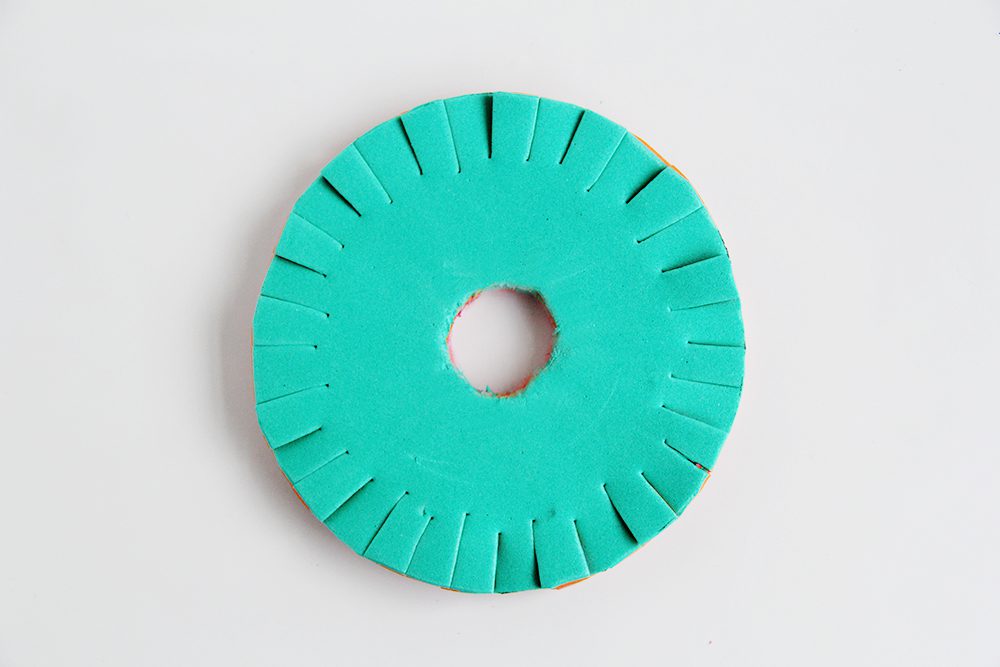
7. Do this one more time to create a total of 32 cuts in the board.

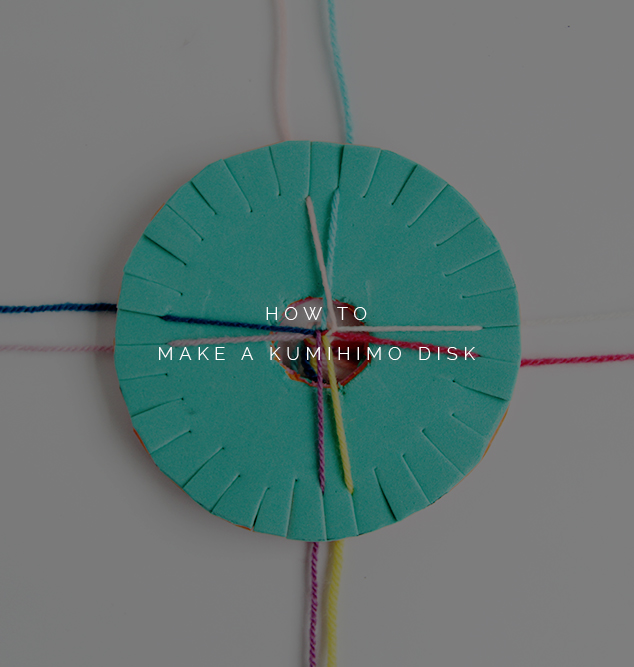
Thread on your strings and get braiding! You can number the cuts 1 – 32 if you have particularly complex pattern to follow. If you want to make a basic braid follow this tutorial (click on the image to go to full tutorial) to get started. Now it’s time to go get into a new Netflix series and unwind. You deserve it!


Related

DIY// Jewellery

« Fall For… Jewelled
DIY Woven Hanging Planters »

Comments

  1. Ice Pandora says

    July 6, 2014 at 9:08 pm

    That’s pretty awesome and yet simple DIY c: thanks! Xx

  2. Gen says

    July 6, 2014 at 11:42 pm

    This craft is the best idea. A while ago, I bought a kumihimo disk to replace my cardboard one and ! found that that the cardboard one worked much better :)

    • fran says

      July 9, 2014 at 10:43 pm

      Really!? DIY wins! :D

    • Kl says

      May 2, 2020 at 12:07 am

      Yeah it does work

  3. Alexis @ Persia Lou says

    July 7, 2014 at 4:51 pm

    I’ve never tried this before. Thanks for the tutorial!

    • fran says

      July 9, 2014 at 10:49 pm

      It’s so relaxing. I highly recommend!

  4. Ria Smits says

    July 28, 2014 at 3:38 pm

    Hello Fran

    Thank you so very much for sharing because I need something simpel to relax because life can be very stressfull so every now and than.
    So thanks again from Ria

  5. rose says

    September 19, 2014 at 7:08 pm

    can you use cardboard to make one?

    • Elle says

      August 31, 2017 at 9:54 pm

      yes. I just finished a few for a children’s demonstration. You just can’t tug hard on them.

  6. Norman Murillo says

    July 13, 2016 at 8:28 am

    Hi i think its easier if we use an old cd, saves us alot of cutting, just sying

    • Elle says

      August 31, 2017 at 9:55 pm

      How do you cut the notches to hold the thread?

  7. Nan says

    March 19, 2020 at 12:45 am

    Thanks, I haven’t found a DIY square one yet but used this to make some “fresh chains” out of sterling silver and copper wire. Great tutorial and awesome share!

Trackbacks

  1. favorite website says:
    October 22, 2017 at 9:34 pm

    nursery rhymes Lyrics and songs

    How to Make a Kumihimo Disk | Fall For DIY

  2. 9 easy japanese craft ideas - says:
    November 1, 2022 at 3:24 pm

    […] starters, you will need a kumihimo disk made of foam or cardboard. You can also choose to DIY or purchase it from craft […]

Search

About

Preorder My New Book Easter

FESTIVE

Follow

Featured

shop earrings

Partners

Terms & Conditions
Private Policy Statement

DIY

DIY Easy Festive Stars

DIY Easy Christmas Star Decorations made using Card (with templates!)

Easily Add Machine Embroidered patches to Anything and Everything with Skitch

DIY Air Dry Clay Wavy Painted Bowl

Testing the LokLik Cutting Machine to Upcycle Old Clothes

How to Hack Your Bedroom for a Good Night’s Sleep

Folded Paper Christmas Decorations

7 Paper Christmas Decorations You Can Make Today

A Very Merry Christmas – Festive Trends 2023

DIY Bobbin Picture Memory Frame

Why I Replaced my Laminate Flooring with Vinyl (spoiler – because it’s AMAZING!)

A Green Garden Refresh with Durapost Vento Fences

More Posts from this Category

Copyright © 2025 ·Brand New Child Savory · Genesis Framework by StudioPress · WordPress · Log in