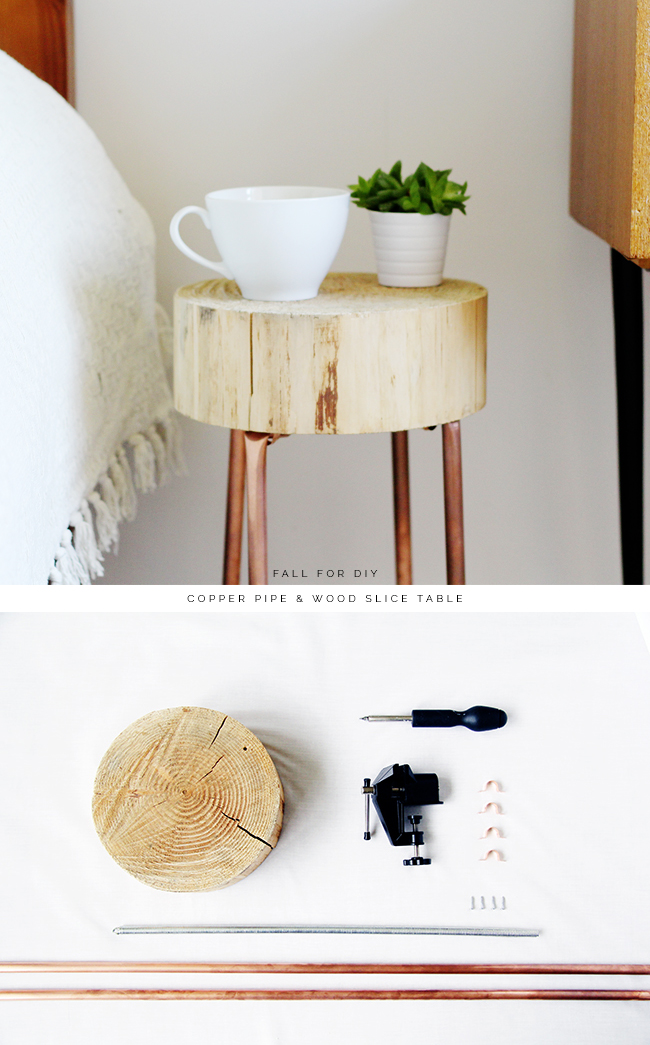
This side table is the perfect example of procrastination. I have been ‘planning’ this tutorial since we purchased our Christmas tree and it came with this hunk of wood on the bottom. I (naturally) squirrelled it away to make into the perfect DIY at a later date… Six months and 500 ideas later I decided I had to just get on with it and I’m so happy I did! No longer do I have to reach so far for my coffee in the morning. That in itself is worth it.
Materials:
Wood Slice
Bench Vice
Copper Pipe
Saddle Clips
Screws & Screwdriver
Pipe Bending Spring and Pipe Bender (Optional: If you have them lying around you might as well use them)
Instructions:
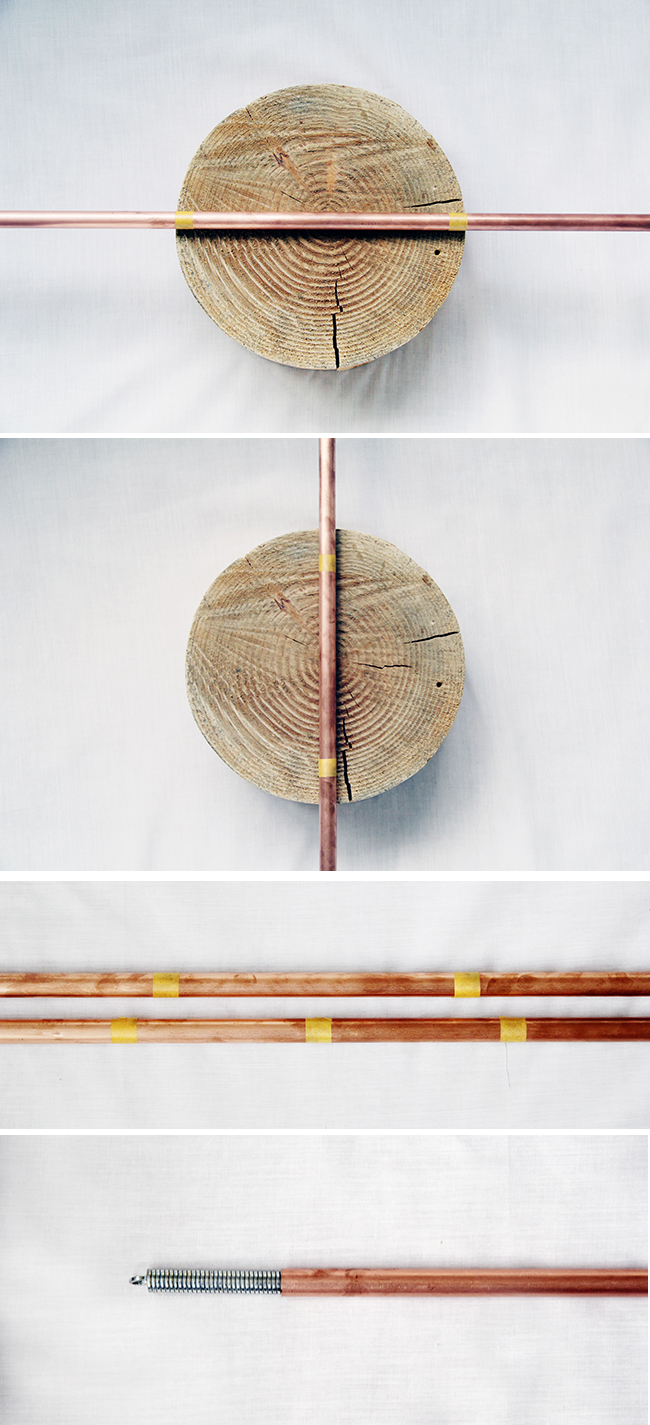
1. Use tape to mark out the width of your wood slice on the first copper pipe. Make sure there are equal lengths of pipe either side to keep it central.
2. Do the same with the second piece of pipe but mark it 1cm / 1/2″ from the edge.
3. On the first pipe mark the exact middle between your tape. You should be left with two pieces of pipe that look similar to the ones below.
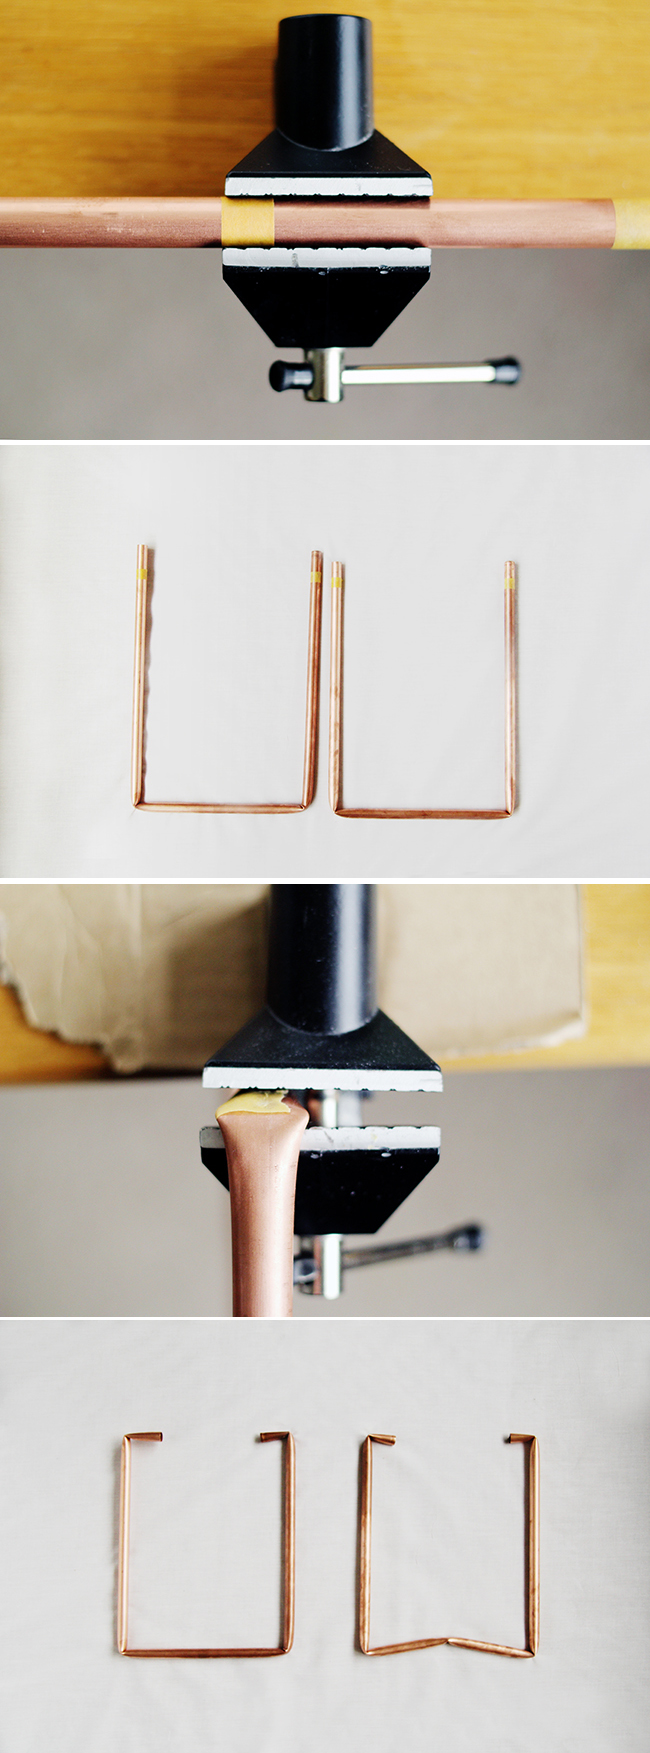
4. If you’re using a pipe bender spring pop it in now. (I ended up not using this as I just wasn’t strong enough, so don’t worry if you don’t have one.)
5. Hold the pipe tightly in the vice at the outer tape markings and pull the rest of the pipe towards you. It’s easier the more pipe you have to bend.
6. Bend the two ends up to create a U shape as shown below.
7. Measure from the bottom of the U up to the ends of the pipe. Here you’ll want to measure an equal amount from the bottom that will allow you at least a couple of inches at the top of each pipe. Mark off with tape.
8. Put the pipe back into the vice face down with the rest of the pipe facing towards you and bend the pipe in your direction.
9. Once you’ve bent all four ends of the pipes inwards go to the the final tape mark that is left in the middle of your first pipe and bend just enough to let the second pipe sit underneath it. You’ll need to adjust the sides a little now to give you two legs that look like the bottom picture below.
10. Place the leg with the straight pipe down first and then slot the other leg over the top. Balance your wood slice on the top to make sure it’s steady. If it’s way off you might need to bend your pipe again.
11. Screw your saddle clips into the bottom of your wood slice over the ends of the copper pipe. It really helps if you have 6 hands here. Try to accost someone into helping you hold the legs in place if you can.
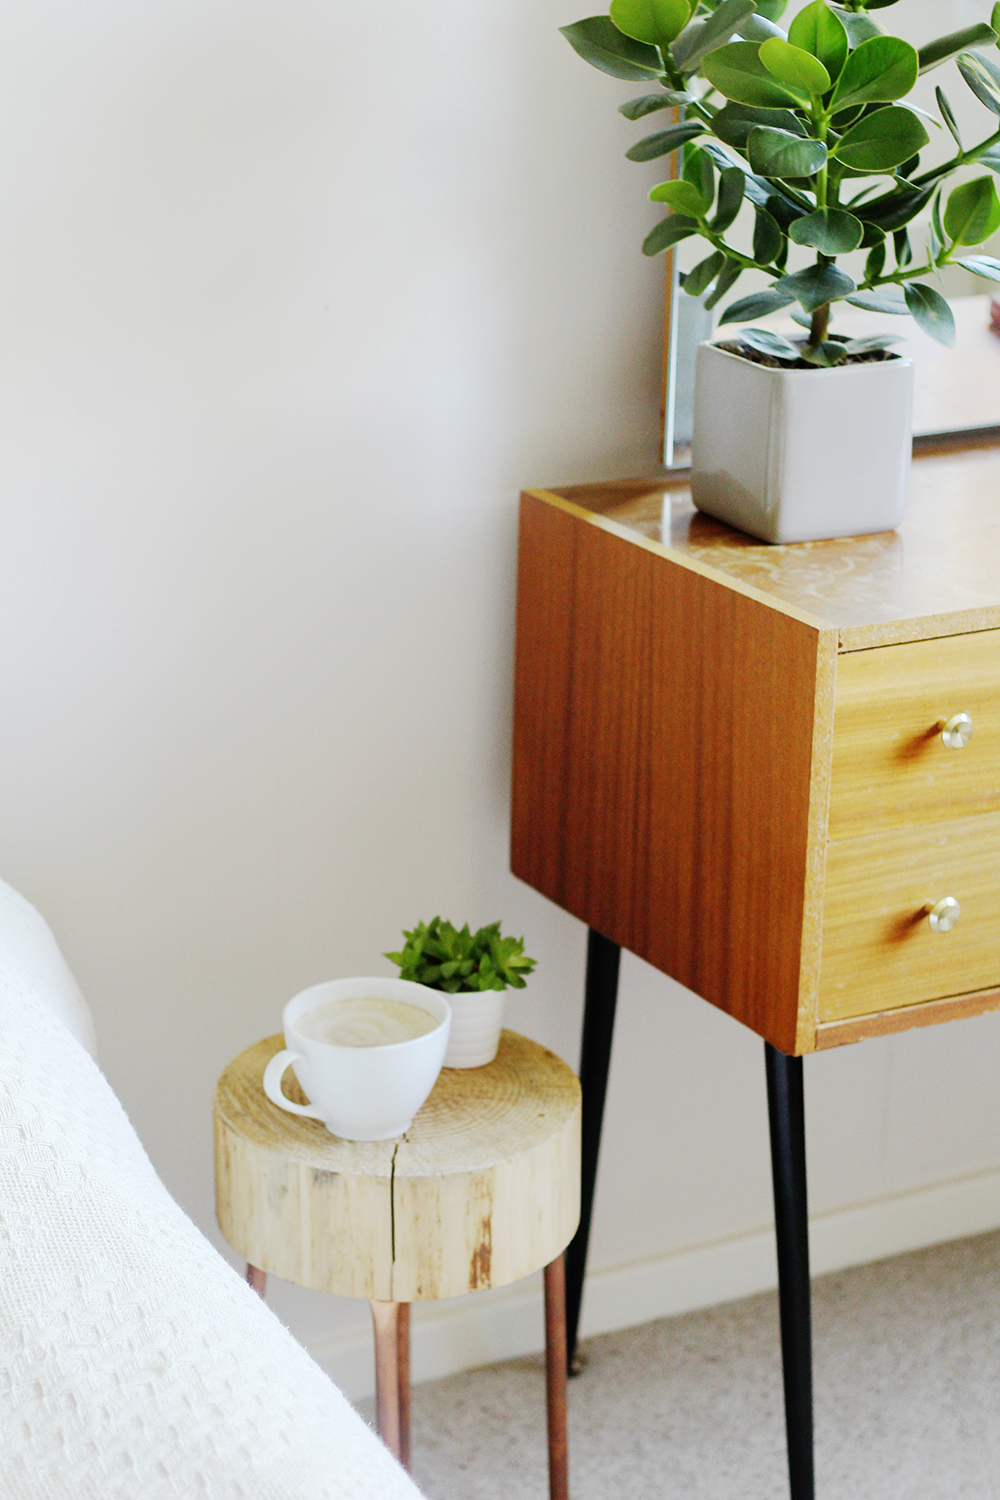
12. Turn over and give your new table and new home. Find something pretty to sit on top and you’re done!


Great idea!!! With few materials you made a really beautiful table!!
https://www.facebook.com/ohmyaccessoriess
Great DIY!
The design is amazing!
xoxo
Veva
LOVE this- so simple and chic.
Wow, fantastic DIY! Great :-)
xxoo
This is so pretty! Love it!
OH my goodness this is truly incredible- so much thought and effort put into all your posts! Such a wonderful blog and I am so lucky to have stumbled upon it! :) Thank you so much for putting so much time into your blog, it really is wonderful!
xx
Dear You Love Em
Hey Emily,
Thank you so much for so many kind words! Thank you for coming over here. I just had a quick peak at your blog and it looks fantastic (I’m so jealous of the warm winter days you’re having!) I’ll be following!
Oh my gosh I love how this turned out! I recently made a rustic stand with DIY copper legs too, but they are sorta “hairpin” style. I didn’t have a pipe bender, so I did it by hand using refrigeration coil {no way I could have bent regular copper, haha}. However, I definitely need to get one so I can make even stronger stands like yours in the future. LOVE!
Hey Katie,
I love your table! I really want hair pin legs but I couldn’t do it. We’ll have to do a swap and try each others tutorial out :D
That’s so pretty! I’m totally impressed! I haven’t delved into furniture making yet. :)
Hey Beth,
I needed to start making more useful things than jewellery! I have way too much. To be honest I want to make more clothes. Scary though!
This is such a cute idea, and it looks quite simple! Now I just need to find the tools to make this…
-Shannon from http://www.strippedchic.com
I love the look of this and seems very doable. Thanks for the inspiration :)
I looooove this tutorial ! and I love all of your ideas! So much inspiration going on here :)
Could you tell me how long the copper pipes are that you used? That would be a great help.
Thank you <3
I measured out everything like you said, but mine came out very wobbly. Any recommendations?
Hey Suzi!
Sorry it came out wobbly. I think it would help if you used a really strong glue like E6000 to secure where the two posts meet at the bottom. Also using sticky pads along the bottom of the pipe if any part is shorter than the others. I really hope this helps! Let me know if you have any other problems :)
Hi there, this table is amazing – thanks for sharing! Do you happen to know what type of timber it is and also the dimensions of the slice.
Thank you
Hi! What is The size ( 1/2″, 3/4″, 1″”) ou The pipe? Thanks
Can I buy one from you? Do you sell them?
Any suggestions on where to find stumps? I once read somewhere they have to dry for a season?
Love love love this post.
Right here is the perfect blog for anybody who hopes to understand this topic.
You understand a whole lot its almost tough to argue with you (not that I really would want to…HaHa).
You definitely put a new spin on a topic which has
been discussed for many years. Wonderful stuff, just wonderful!
I am looking for the method about how to make a side table with copper pipe recently.Thank you for sharing this great tutorial!DIY side table making tutorial.
This is a very good tip especially to those new to the blogosphere.
Brief but very precise info… Appreciate your sharing this
one. A must read article! thicongbep.vn
hey!
As an expert in this sector, I tell you what you are doing good!
wonderful resourceful article
Keep helping people
Regards
James V. Jordan
Nice DIY work.
I love using stumps and natural rough wood for home décor, and if you also, then you’ll love this amazing side table
Wow, I’m really impressed. because you made a beautiful table with few materials.
Also, Your information really Reliable. Thank you so much.
very informative and helpful post about DIY projects, I love your woodworking and designing stool. I will try for making it at home but may a saw is an important tool for it.
I thoroughly enjoyed all of your pictures and descriptions of your build. Well done!
Such a great post, Really this is very informative and interesting content. I love your DIY projects, especially the table design is outstanding. great job
Oh my gosh this is adorable. Sidetable like that are super expensive so i love this diy version. will be adding it to my list of things to do this holiday season!