• Home
  • Blog
  • About
  • Collaborate
    • Media Kit
  • We Make
    • Bloglovin
    • Facebook
    • Instagram
    • Pinterest
    • Twitter
    • YouTube

Fall For DIY

  • DIY
  • Interiors
    • Planters
    • Paper
    • embroidery
    • Drinks
  • Blogging
    • Photography
    • Instagram
  • fashion
    • Jewellery
    • Accessories
  • Inspiration
    • Round Up
    • 50 DIYs
  • Office
    • Free Printables
    • Organize
  • Party
    • Christmas
    • Halloween

Our favourite things in your inbox every month!

How to Finish Necklaces the Pro Way

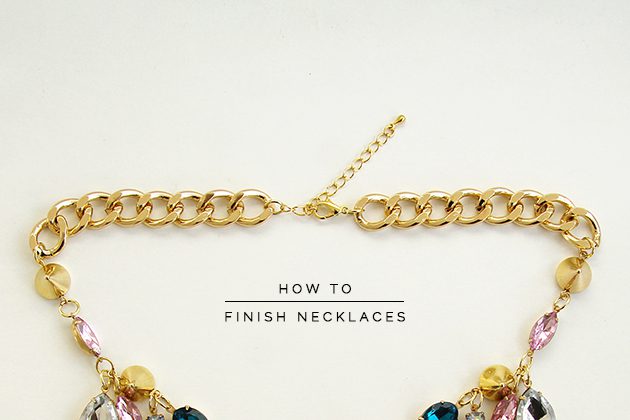
As with most things in life it’s the finishing touches that can really make a difference. Adding extension chain to your DIY necklaces give them a professional quality that will make your jewellery stand out! You can buy extension chains ready made but making your own is easy, cheap and customisable. You can change the length of the chain and the bead at the end to complement the rest of the necklace.

And if you’re wondering about the necklace I’ll be posting a DIY to make this baby later on this week so follow Fall For DIY on Bloglovin (or some of the other links at the end of this post) to keep in touch!

Instructions:

1. Attach your end bead to a small section of chain using a jump ring.

2. Attach a jump ring to your lobster clasp.

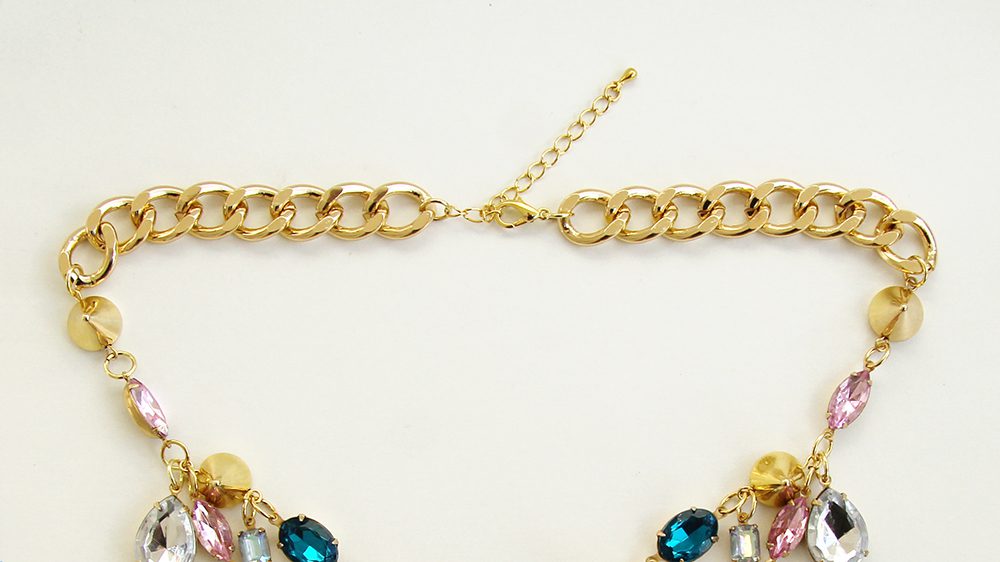
3. Attach both ends to the chains of your necklace.

Well, that was easy! To find out how to complete some of the other techniques in this post check out our HOW TO page for links


Fall For DIY how to finish necklaces professionally

Related

DIY// Jewellery2 Comments

« DIY Faux Hammered Gold Rings
DIY Copper + Pine Magazine Rack »

Comments

  1. Gia says

    July 17, 2015 at 6:48 pm

    Is the end bead necessary? I purchased everything but the end bead, and i was wondering if i could still make a necklace. Also where/ what did you use to create your website? I’ve been looking into some but I haven’t found one right for me yet. And if you could, can you give me some recommendations?
    – Thank You.
    Gia

    Reply
    • fran says

      July 21, 2015 at 10:55 am

      Hey Gia!

      The end bead is not a necessity. It’s just there to weigh down that little bit of extension chain. You could also use a drop bead like this one with a jump ring or one with a hole from top to bottom like this one with a headpin.

      You can also get the classic extender teardrop beads from here

      If you want to know more my about jewellery making my ecourse is still only £10/$16 (60% off) for one more week. You can find out more info on that here

      I hope that helps!

      Thanks for reading :) xxx

      Reply

Leave a Reply Cancel reply

Your email address will not be published. Required fields are marked *

Search

About

Preorder My Book Now!

Follow

Featured

shop earrings

Partners

Terms & Conditions
Private Policy Statement

DIY

A Green Garden Refresh with Durapost Vento Fences

A Green Garden Refresh with Durapost Vento Fences

3 Ways to Use a Printer that will Make Your Life Better

3 Ways to Use a Printer that will Make Your Life Better

DIY Tower Cleansing Bars

DIY Tower Cleansing Bars

DIY Wavy Shelf with Cricut

DIY Wavy Shelf with Cricut

How to make your Mother’s Day gift more than perfect this year with DIY fabric wrap

How to make your Mother’s Day gift more than perfect this year with DIY fabric wrap

DIY Valentine’s Clay Name Necklaces

DIY Valentine’s Clay Name Necklaces

DIY Seamless Floor to Wall Wood Panelling (with Laminate)

DIY Seamless Floor to Wall Wood Panelling (with Laminate)

How to Recycle your Advent Calendar this Christmas

How to Recycle your Advent Calendar this Christmas

DIY Faux Stoneware Candle Holder

DIY Faux Stoneware Candle Holder

DIY Speckled Clay Arch Picture/Card Holder

DIY Speckled Clay Arch Picture/Card Holder

More Posts from this Category

Copyright © 2023 ·Savory · Genesis Framework by StudioPress · WordPress · Log in