I recently bought a Kumihimo disk, and since then it’s gone everywhere with me. I had been wanting to try this style of braiding out for such a long time, so when I saw Vina sold them in my local bead shop I couldn’t resist. Once you get going it’s so quick and easy, I’ve become a bit obsessed… So I hope you like this tutorial, because there will be more!ll need:
You’ll need:
- Kumihimo Disk (alternatively cut 32 slits into a circle of foam/thick cardboard)
- 4 x 1 metre cotton cord/embroidery threads
- Bell closer cord end, extension chain and clasp. Mine come all in one, but if you need help attaching these see How to attach clasps one and two
- Metal tubing and a tube cutter. I got these from my local DIY hardware store.
To make the braid:
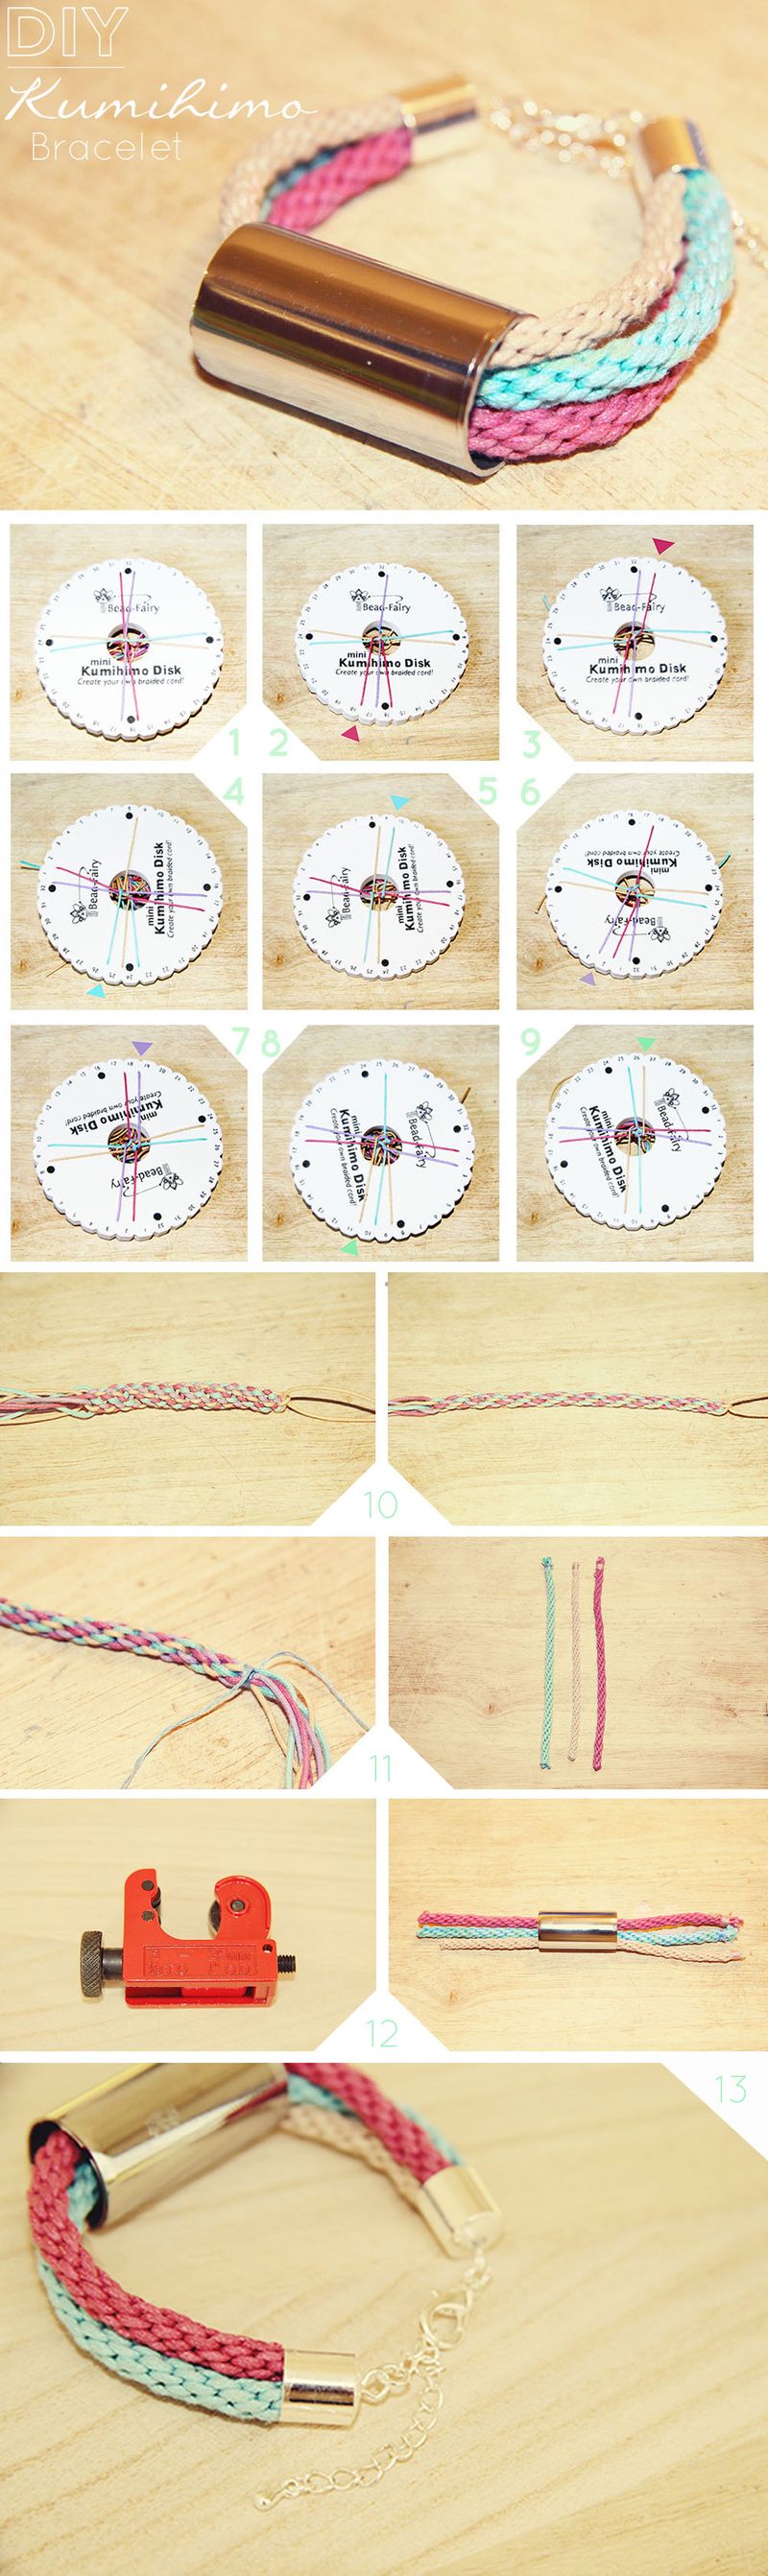
- Fold you 4 cords in half, and tie a separate piece of string around the middle bringing all 4 together. Thread the middle through the hole in your Kumihimo disk and slot 2 cords at the top, 2 at each side and 2 at the bottom.
- Move the top left hand cord to the slot to the left of the bottom left hand cord.
- Move the bottom right hand cord to the slot to the right of the remaining top cord.
- Rotate the disk 90 degrees anti clockwise and bring the top left hand cord to the slot to the left of the bottom left hand cord. (As you did in step one)
- Move the bottom right hand cord to the slot to the right of the remaining top cord.
- Rotate the disk another 90 degrees anti clockwise and bring the top left hand cord to the slot to the left of the bottom left hand cord. (As you did in step 1 and 4.) Your disk should be upside down now.
- Move the bottom right hand cord to the slot to the right of the remaining top cord.
- Rotate the disk 90 degrees anti clockwise again and bring the top left hand cord to the slot to the left of the bottom left hand cord. (As you did in step 1,4 and 6.)
- Move the bottom right hand cord to the slot to the right of the remaining top cord.
Continue to turn the disk and move the cords around the board until you run out of cord.
To make the bracelet:
10. Take the cord off the disk and run your fingers down to stretch the braid out.
11. Measure the length you need and tie embroidery thread around the braid several times to
seal the end. Trim off the excess
12. Cut a 4cm/1.5″ piece of pipe following the instruction provided with your pipe cutter.
(Alternatively you could use the softer “fake piping” which you can cut with scissors) Thread
this onto your braids.
13. Glue all of your cords into a large bell closer cord end and leave to dry.
And there you have it. I always wonder if people make the jewellery DIYs I post. I’d love to see pictures of this tutorial and any others you have made! Email f.stone.teahab@gmail.com if you can.


