I have to admit I’ve really been looking forward to this tutorial since we cooked it up. After many many shrink plastic ring experiments and some slightly burnt fingers I’m starting to get a bit addicted to making them. The studio is littered with various misshapen mishaps…as you will discover it takes a little bit of trial and error to get the sizes down and if you do anything but a straight ring it can be a little tricky to keep the shape.
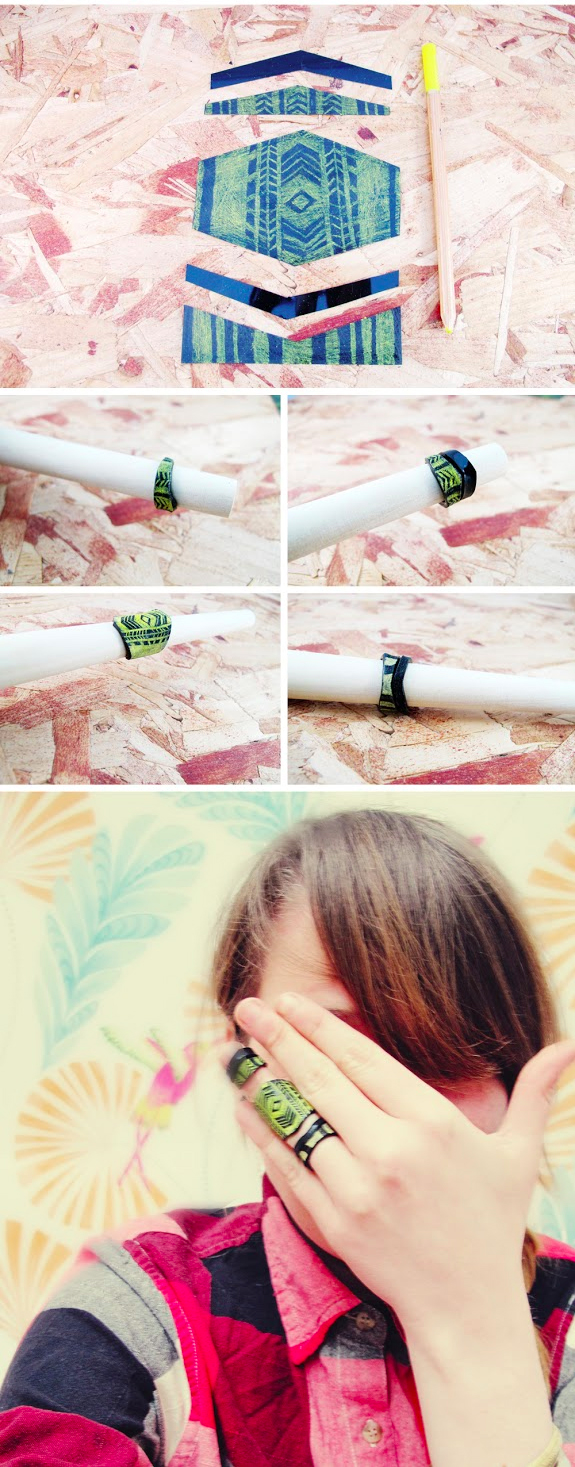
So after all that practice we decided that one ring just wasn’t enough and today we’re bringing you a totem pole ring tutorial. It’s a fun and versatile way to wear them, you can add as many or as little and go as colourful or as understated as you fancy. I’ve gone for a hint of neon and yellow on black for this one..have fun experimenting and watch your fingers!
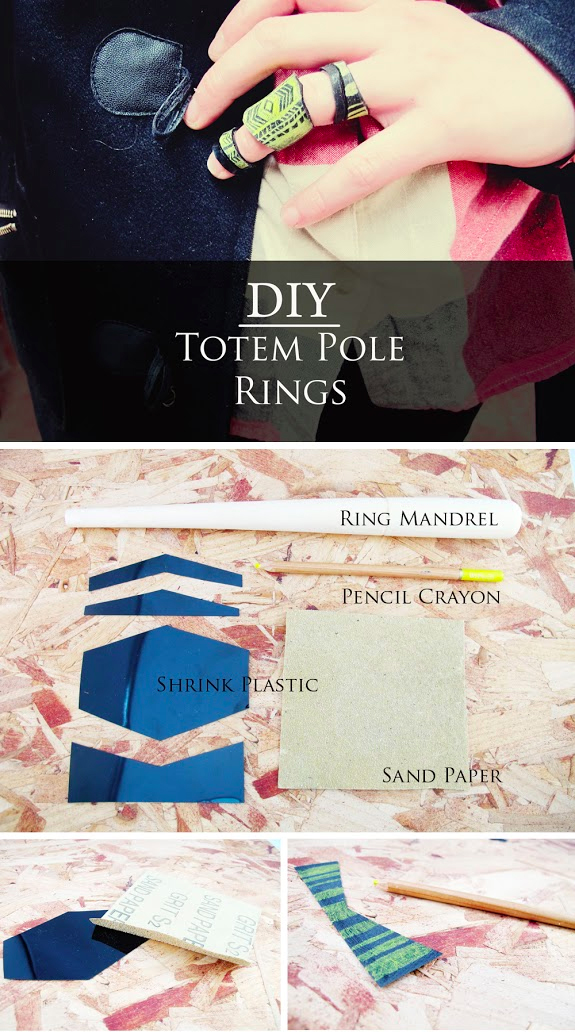
What you will need:
Sheet of shrink plastic/ring mandrel/sand paper/pencil crayons/scalpel/ruler/
Instructions:
Cut your shrink plastic into 3 sections with a ruler and scalpel or scissors for the top middle and bottom of your finger. I’ve split some sections into 2 just to break things up a bit, but it’s up to you how you decide to arrange them. I did a few test rings first and figured out my size on the ring mandrel by measuring and marking it on. Mine were between around 10-12 cm but obviously it will vary, I’d recommend going a little smaller if you’re unsure as you can leave a little gap at the back rather than overlapping!
Once you’ve got your sections cut out you’ll need to sandpaper them in a cross hatch effect before drawing on them. Wield your pencil crayon and get drawing! Now you’re ready to cook your shrink plastic
This is the tricky bit…when your shrink plastic comes out the oven wait for a second so’s not to burn your fingers! You need to get it on to the ring mandrel or a similar rounded object before it starts to harden, trying to keep it straight and in shape as you mould it around. Repeat the process with all sections of the ring until you’re happy with the sizing. (Admittedly I had to reheat a couple and try again!)
Once they’ve all cooled you’re ready to stack them up!
Hannah


Thanks for inspiration. I recently bought a new phone, and I wondered: how do I protect myself from viruses? I googled for a long time, until I got to the point where I needed good software. So I recommend you to secure your smartphone by downloading the best antivirus apps for android devises from a special website.