• Home
  • Blog
  • About
  • Collaborate
    • Media Kit
  • We Make
    • Bloglovin
    • Facebook
    • Instagram
    • Pinterest
    • Twitter
    • YouTube

Fall For DIY

  • DIY
  • Interiors
    • Planters
    • Paper
    • embroidery
    • Drinks
  • Blogging
    • Photography
    • Instagram
  • fashion
    • Jewellery
    • Accessories
  • Inspiration
    • Round Up
    • 50 DIYs
  • Office
    • Free Printables
    • Organize
  • Party
    • Christmas
    • Halloween

Our favourite things in your inbox every month!

DIY Howling Halloween Letter Treat Bags

Fall For DIY Howling Halloween Treat Bags

There are many reasons I love this DIY. It’s very inexpensive, you probably have everything you need already in the house, it’s easy to make and, most importantly it has stopped me eating all the treats before I get to give them away!

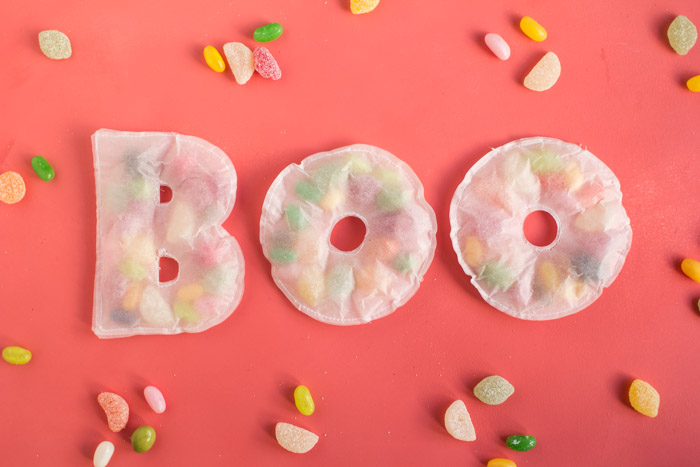
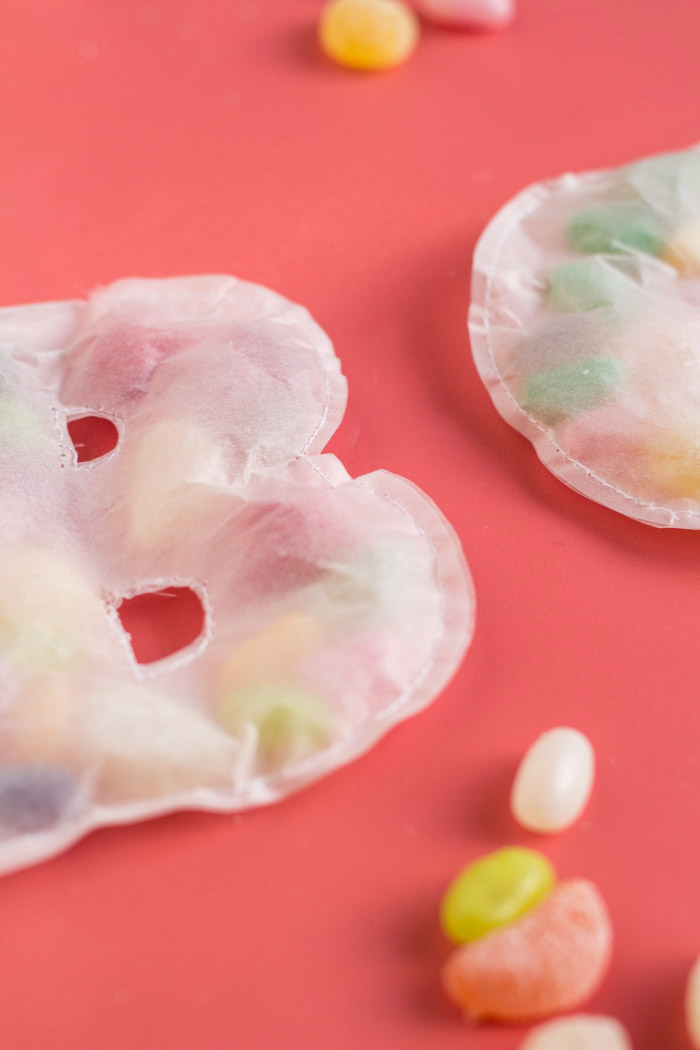
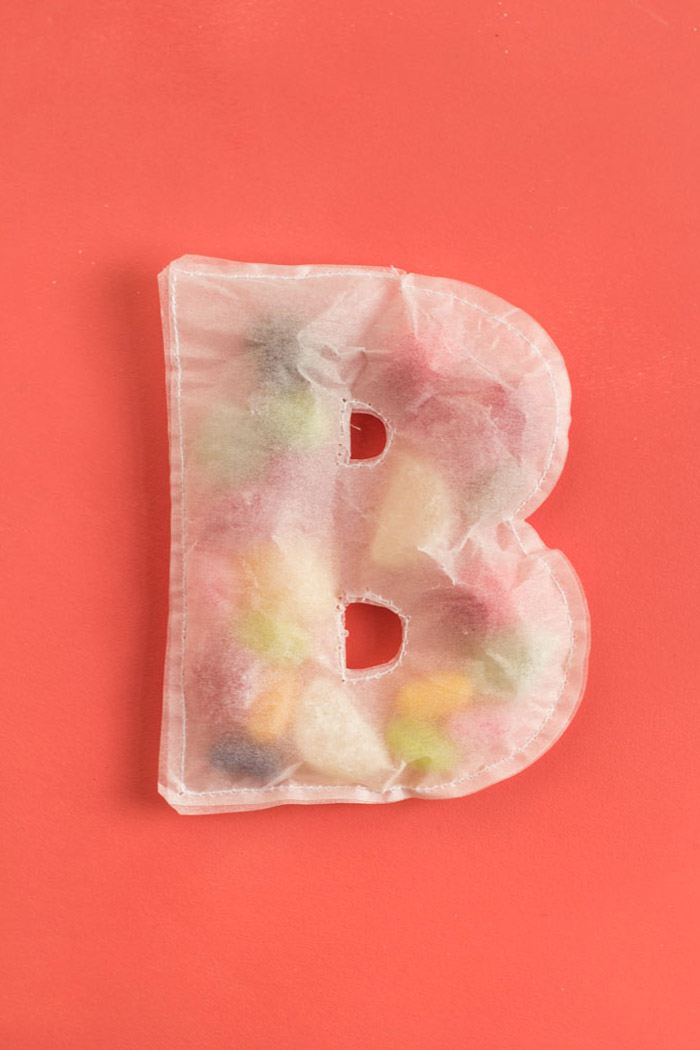
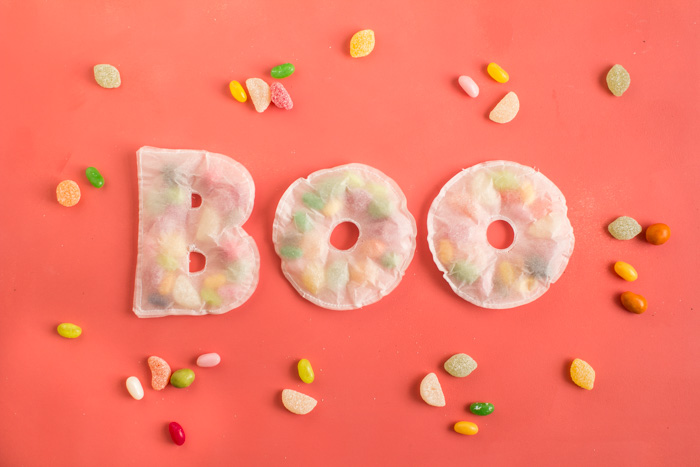
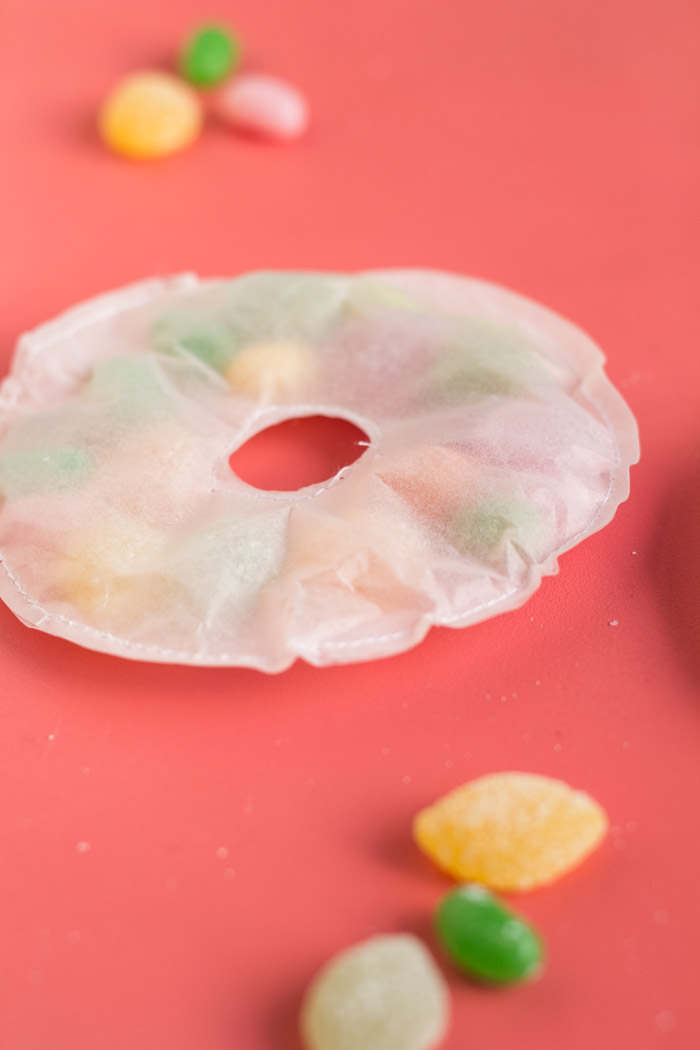
The trick with these letter bags is to make the thickness of each letter wide enough, with lots of space inside once they are sewn up. Using baking paper means the letter bags are strong enough but easy to rip open once you want to get to what’s inside. And because the paper is just a little translucent, you can only just see what the “guts” are made of… SPOOOOOOOKY!

Fall For DIY Howling Halloween Treat Bags

 Materials

Baking paper | Scissors | Needle & thread | Sweet treats

Fall For DIY Howling Halloween Treat Bags

Roll out the baking sheet and draw on your letters. I made a cardboard template of my letter to make sure my front and back were the same size. Once you have cut them out stitch around all of the edges leaving an inch gap to stuff them with goodies!

Fall For DIY Howling Halloween Treat Bags

Once they are full stitch up this last little gap and trim off the excess thread.

Spell out ghoulish words and leave them for your party guests to try out their own, before tearing open and savouring the insides of course!

Fall For DIY | Howling Halloween Treat BagsFall For DIY Howling Halloween Treat Bags Fall For DIY Howling Halloween Treat Bags

Related

DIY// Halloween2 Comments

« December’s We Make Collective Kit & Call for Contributors
WEEK 1 | #sevendayperiscope, The Holiday Collective, #makingwithEtsy and We Make Weavings »

Comments

  1. gabriella says

    October 28, 2015 at 12:22 pm

    Well if this isn’t the cutest Halloween DIY I’ve seen yet. Glad you shared!

    g.

    Reply
    • fran says

      November 1, 2015 at 10:38 pm

      Thank you so much Gabriella! <3

      Reply

Leave a Reply Cancel reply

Your email address will not be published. Required fields are marked *

Search

About

Preorder My Book Now!

Follow

Featured

shop earrings

Partners

Terms & Conditions
Private Policy Statement

DIY

A Green Garden Refresh with Durapost Vento Fences

A Green Garden Refresh with Durapost Vento Fences

3 Ways to Use a Printer that will Make Your Life Better

3 Ways to Use a Printer that will Make Your Life Better

DIY Tower Cleansing Bars

DIY Tower Cleansing Bars

DIY Wavy Shelf with Cricut

DIY Wavy Shelf with Cricut

How to make your Mother’s Day gift more than perfect this year with DIY fabric wrap

How to make your Mother’s Day gift more than perfect this year with DIY fabric wrap

DIY Valentine’s Clay Name Necklaces

DIY Valentine’s Clay Name Necklaces

DIY Seamless Floor to Wall Wood Panelling (with Laminate)

DIY Seamless Floor to Wall Wood Panelling (with Laminate)

How to Recycle your Advent Calendar this Christmas

How to Recycle your Advent Calendar this Christmas

DIY Faux Stoneware Candle Holder

DIY Faux Stoneware Candle Holder

DIY Speckled Clay Arch Picture/Card Holder

DIY Speckled Clay Arch Picture/Card Holder

More Posts from this Category

Copyright © 2023 ·Savory &middot; Genesis Framework by StudioPress &middot; WordPress &middot; Log in