
My little inner marbling voice is really starting to take over. There are just so many ways to create this beautiful abstract pattern and so many uses for it! I’ve barely finished this tutorial and I’ve already got marbled aspirations for new projects. I just can’t help myself! Marbled fabric anyone?
Let’s stick to one thing at a time. This tutorial is very much inspired by all the fantastic pearl back earring DIY’s I’ve seen this summer. I think marbling has such a cool, winter aesthetic so using this pattern is a great way to take this trend right through into autumn.


Materials
Instructions
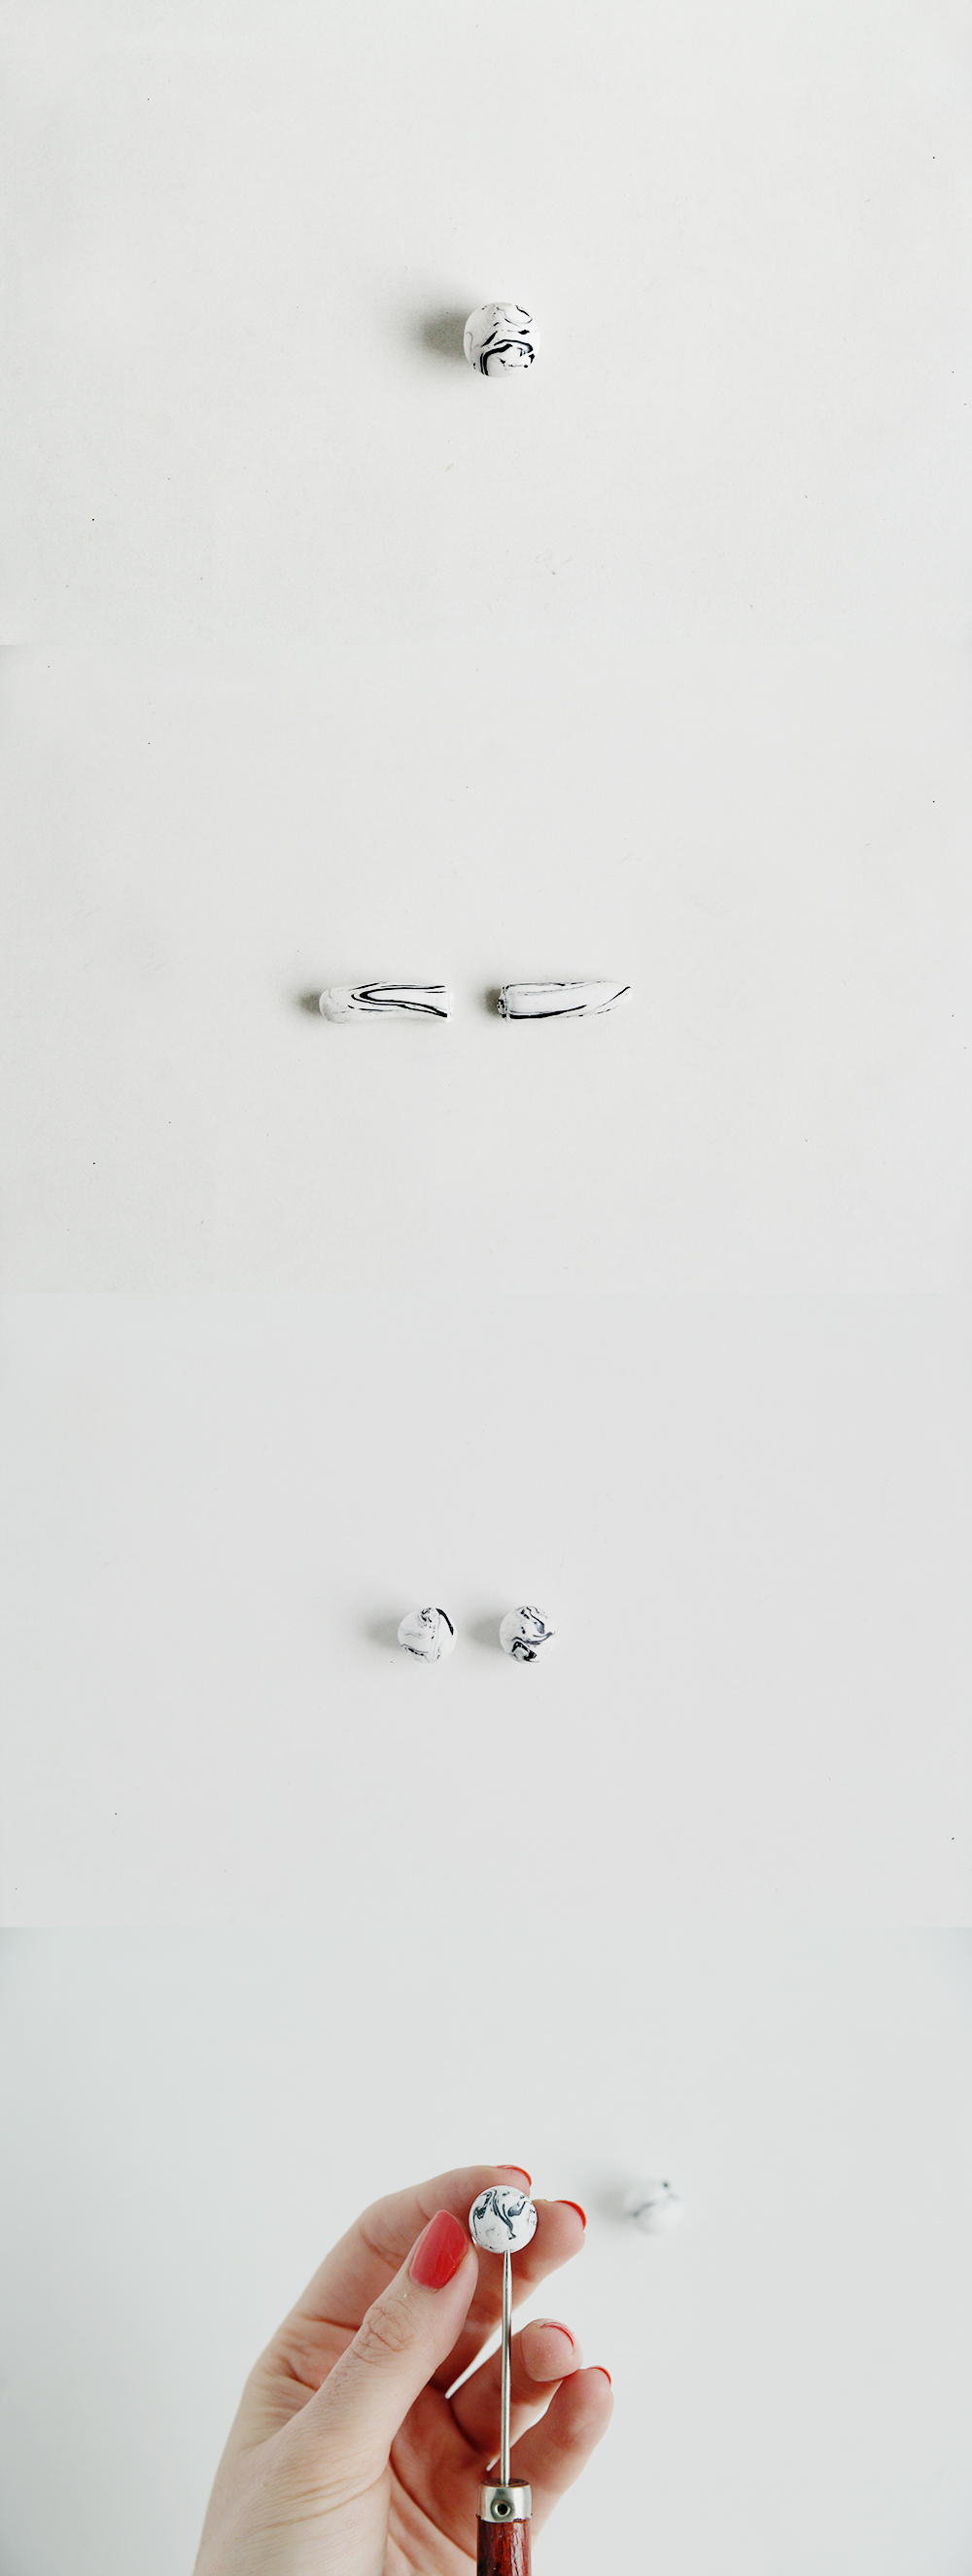
1. Roll out a ball of white clay into a long, thin tube and break up the black clay into small flecks.
2. Roll the white tube through the black polymer clay until all the black and white are together.
3. Roll it into a ball then roll back into a sausage again.

4. Keep doing this until you’re happy with the marbled pattern. Be careful not to over mix as you’ll lose the pattern as the colours mix together.
5. Separate the clay into two equal balls.
6. Use a bead reamer or skewer to poke a small hole into the balls.
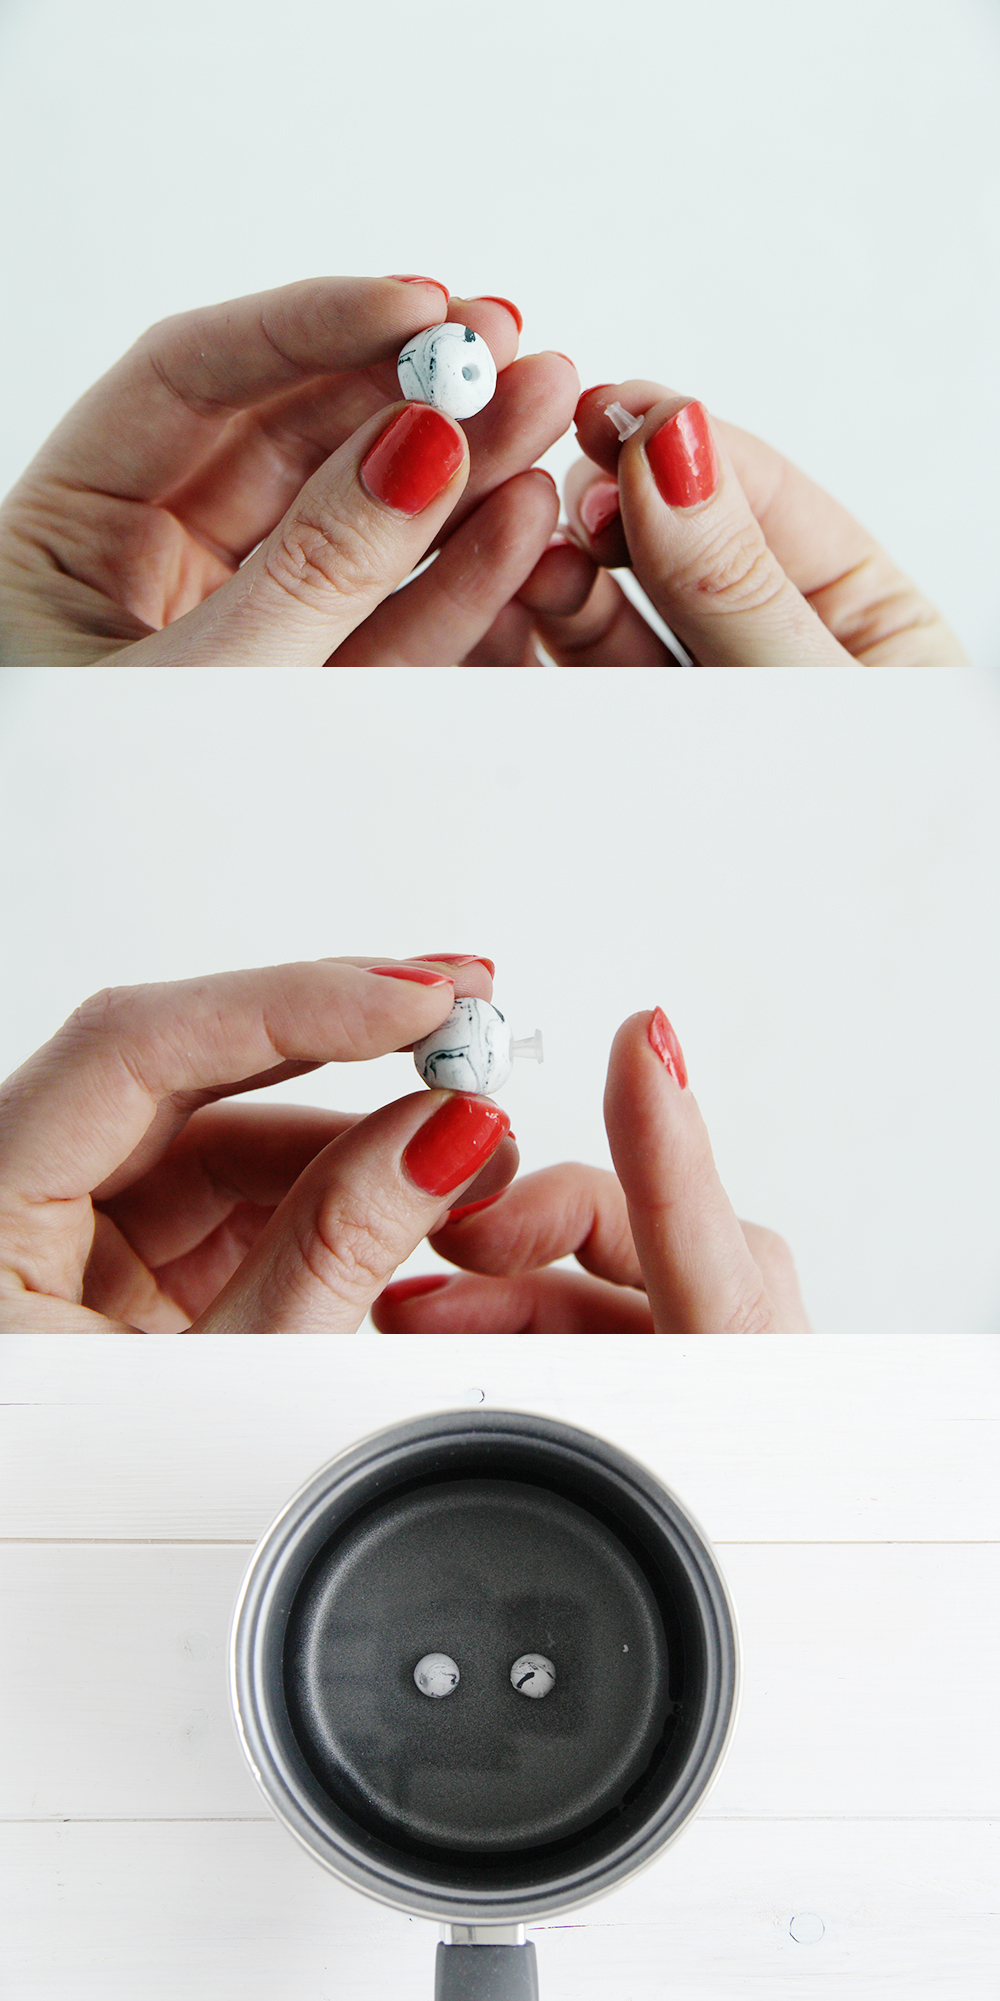
7. Take your rubber earring backs and poke them into the holes.
8. Heat the clay on low in water for about half an hour, remove from the water and leave to cool.
8. To make the earring cut a piece of wire around 1″ long.
9. Bend the wire using flat nose pliers at the middle until it’s about a 45 degree angle.
10. Use a cup burr or nail file to smooth the edges. This part goes through your ear and into the marbled ball. You might need to trim or make it longer to fit perfectly.

If you want to check out some other marbled tutorials I have many (and a slight obsession!) try these marbled envelopes or marbling enamel. My marbled sneaker tutorial is very popular right now. I think it’s down to this time of year when we’re all moving from open toe sandals into something warmer and all weather ready!


Great idea!
hi there, may i know what type of wire your using in this diy? thanks
Hi, why do you not bake the clay? I new to polymer clay & have only been baking.
Are you looking to save money from your purchases? It’s too simple to convert your spending to gift cards. Here I explained about the JackListens Survey. For example, you are a previous customer of Jack In The Box restaurant. However, you can take part in the Jack Listens survey at https;//www.jacklistens.page/survey/ with your previous receipt. After completing all the steps in the survey, you will get a chance to win Free Tacos from Jack In The Box restaurant. Like this, we have more surveys to give customer feedback.
Are you looking to save money from your purchases? It’s too simple to convert your spending to gift cards. Here I explained about the JackListens Survey. For example, you are a previous customer of Jack In The Box restaurant. However, you can take part in the Jack Listens survey at https://www.jacklistens.page/survey/ with your previous receipt. After completing all the steps in the survey, you will get a chance to win Free Tacos from Jack In The Box restaurant. Like this, we have more surveys to give customer feedback.