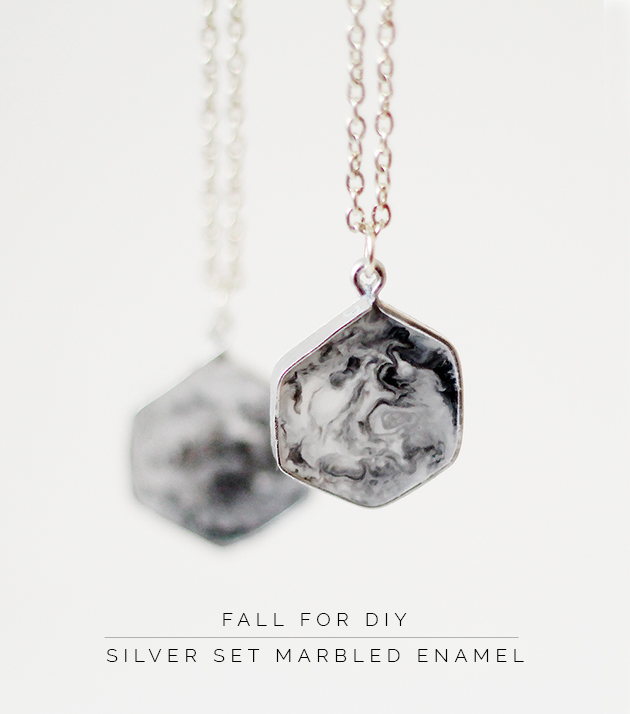
It’s no secret that me and bezel settings are somewhat at war. I have made it my life’s mission to create an easy DIYable setting for a range of materials and I think I’m winning! My DIY Faux Geode Necklace was a light bulb moment and a serious game changer in the way I’ve been developing my (strategy) jewellery. The faux geode setting was backless and for this tutorial I wanted to create a full setting. That’s when I discovered epoxy putty – my new secret weapon!
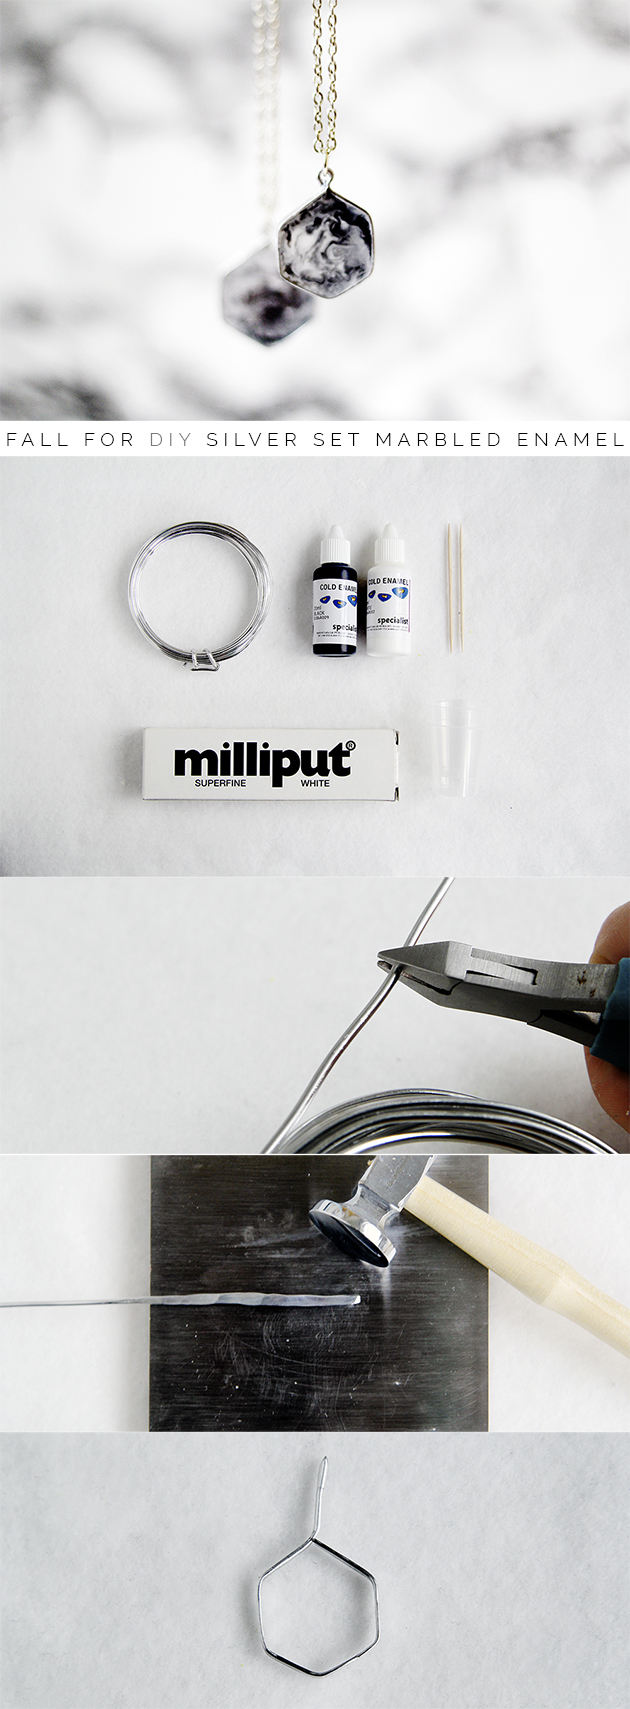
Materials:
2mm Silver Aluminium Wire (Aluminium is light and very easily hammered flat)
White Epoxy Putty
Black and White Liquid Enamel (and hardener)
3 x Small Plastic Containers
Cocktail Sticks
Instructions:
To Make the Setting:
1. Cut a length of wire around 4″ and hammer flat 3″ leaving around 1″ untouched.
2. Shape the bezel section out of the flattened wire and cut the rounded un-flattened wire down to 1 cm in length. Turn this into a loop at the top of your pendant with round nose pliers.
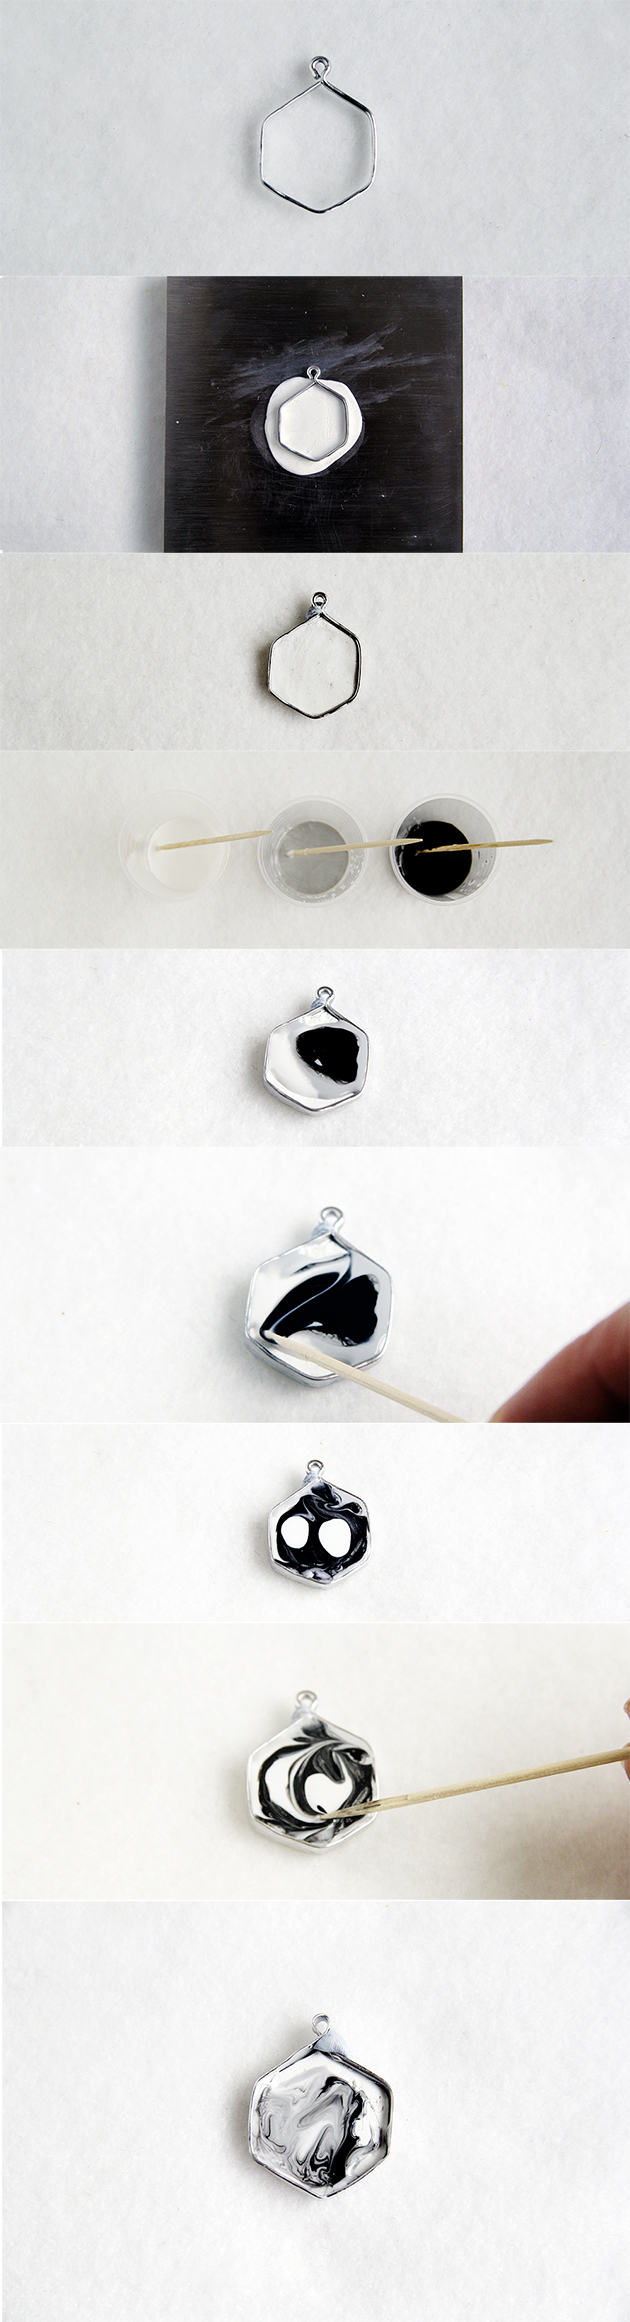
3. Mix equal measures of your epoxy putty and roll out flat with about 3/4mm thickness.
4. Push your wire bezel into the putty and use a scalpel knife to cut the excess away.
5. Leave this to harden. See your epoxy putty instructions for specific times.
To Make the Marbled Enamel:
1. Mix up a small amount of black, white and grey enamel. Read your enamel instructions fully and mix carefully to allow for proper use. You can also use nail varnish to get the same marbling effect. I’ve done a similar thing (with a different pattern) here
2. Pour small amounts of each colour into the bezel. Use less of the darker colours than of white to give that light marbled effect.
3. Use a cocktail stick to draw lines in the enamel. Add more dots of colour as you think necessary and move your cocktail stick through them to create random lines and effects.
4. Once you’re happy with the pattern leave to dry in a dust free environment. Check back a few times in the first hour to make sure the pattern hasn’t shifted. If the enamel is still liquid you can adjust it with a cocktail stick, but if it has started to harden your stuck with it!
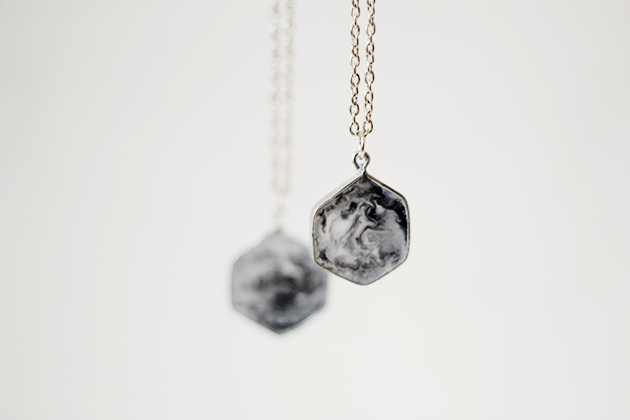
5. Once your enamel is dry add your pendant to a necklace chain. Check out our range of How To page for more tutorials on this.


This is really pretty! I’ve never used enamel before. Thanks for sharing!
Thanks for reading Beth! Good luck with the enamelling – I’ve used liquid enamel. Loads easier than the powdered stuff x
What a really beautiful effect!
Hi I really wanted to do this, but I could not find the liquid enamel and where did you get that hammer?
Hi, lovely idea. But it is incorrect to describe this as enamel, it is plastic resin.
True enamel is powdered glass and requires firing in a kiln.
Ah, I was sent a kit from a company that described this as liquid enamel and could never find it again. That’s probably why! I’ll look up plastic resin and see what I can find instead. Thanks for the info!