My Christmas decorating is an ongoing process. It’s so much fun to sit down in the evening, heat up a mug of gluewine, treat myself to a couple of (dozen) mince pies (hello gym) and make some decorations. It’s also a great excuse to experiment with some new techniques. So what if it goes wrong. Christmas ornaments are meant to look a bit rough around the edges right? A tree with lights and shiny stuff on? Hardly the epitome of taste… and it shouldn’t be! It’s about having fun together, so grab someone, anyone, and try out these Salt Dough Patterned Baubles together.
I’ve made the imprint patterns from things around the house. Scroll down to see what they are!
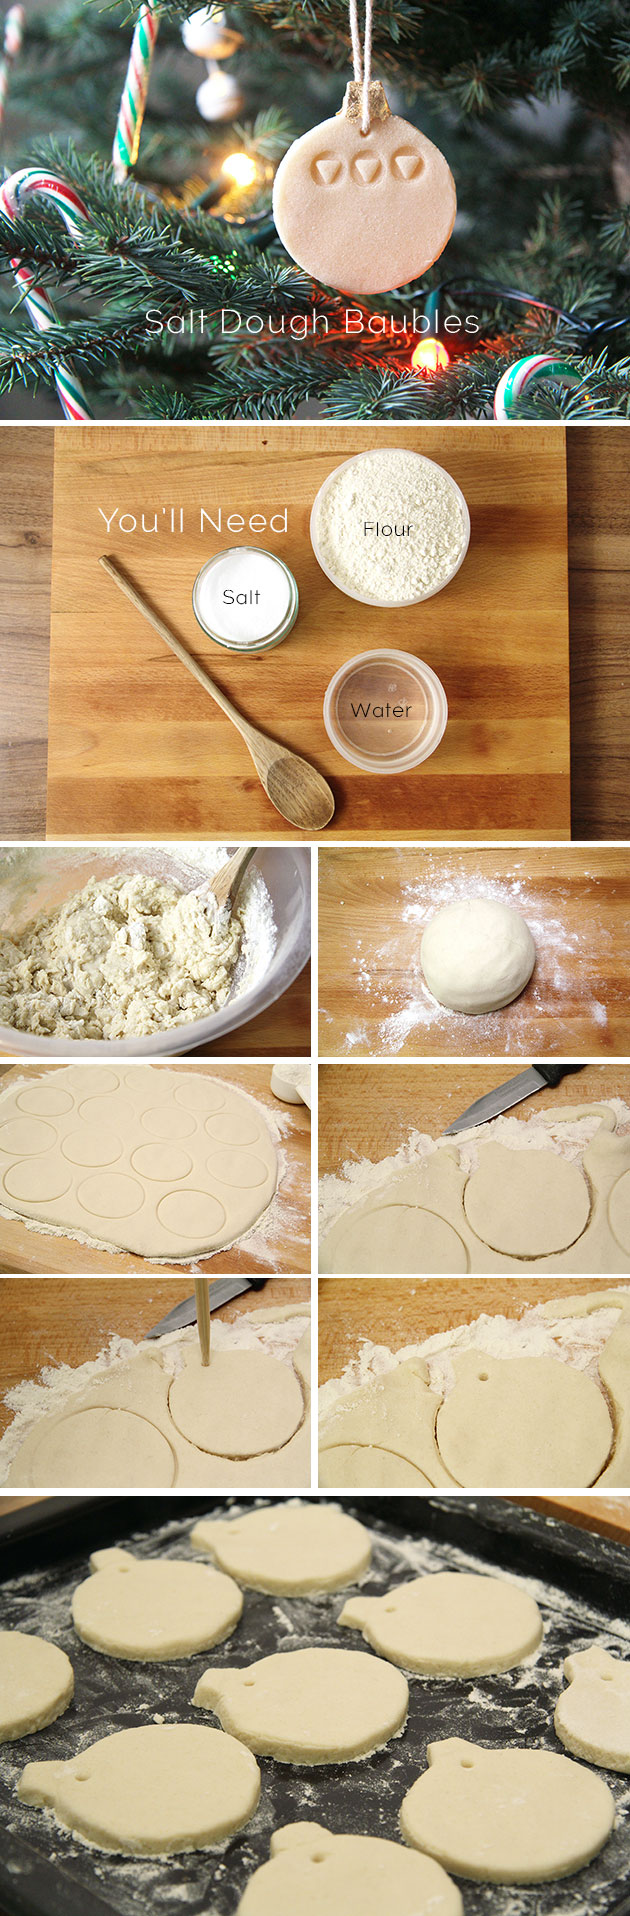
Ingredients:
2 cups of flour
1 cup of salt
1 cup of water
1. Mix all the ingredients together and knead for 5-10 minutes until the mixture is smooth, then roll out.
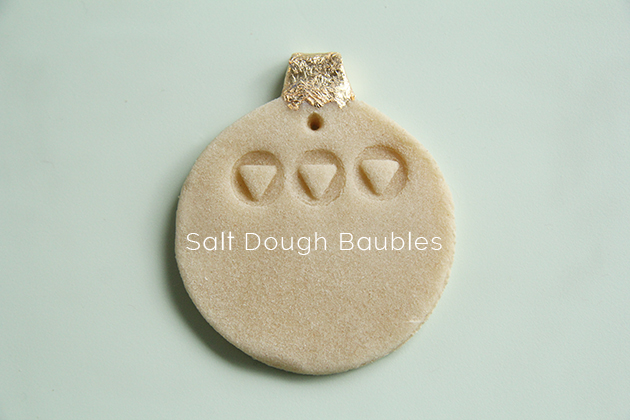
2. Cut out circles leaving a small rectangle for the bauble top. Make a hole just below this using a stick like object such as a chopstick.
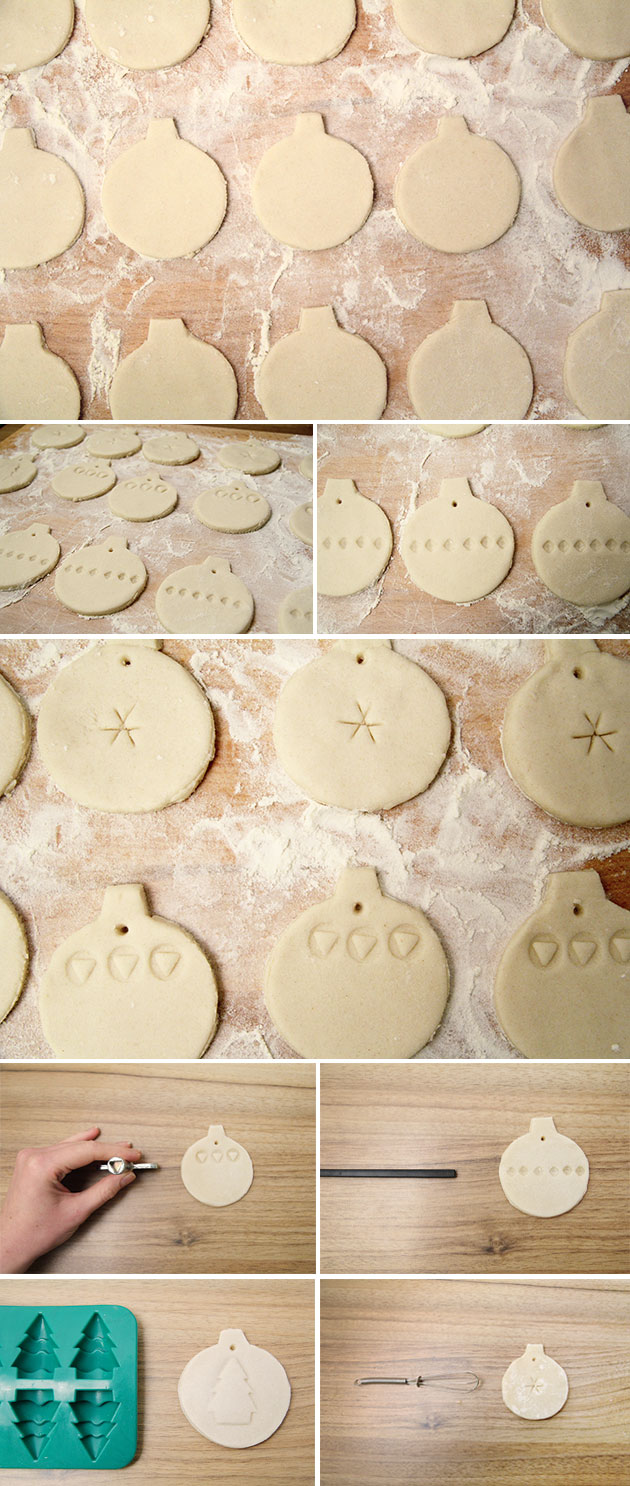
3. Using different shaped objects, imprint the dough baubles. I’ve used:
1. Electric meter box key.
2. The square end of a chop stick.
3. A Christmas tree shapes mould.
4. A miniature whisk from a hot chocolate gift set.
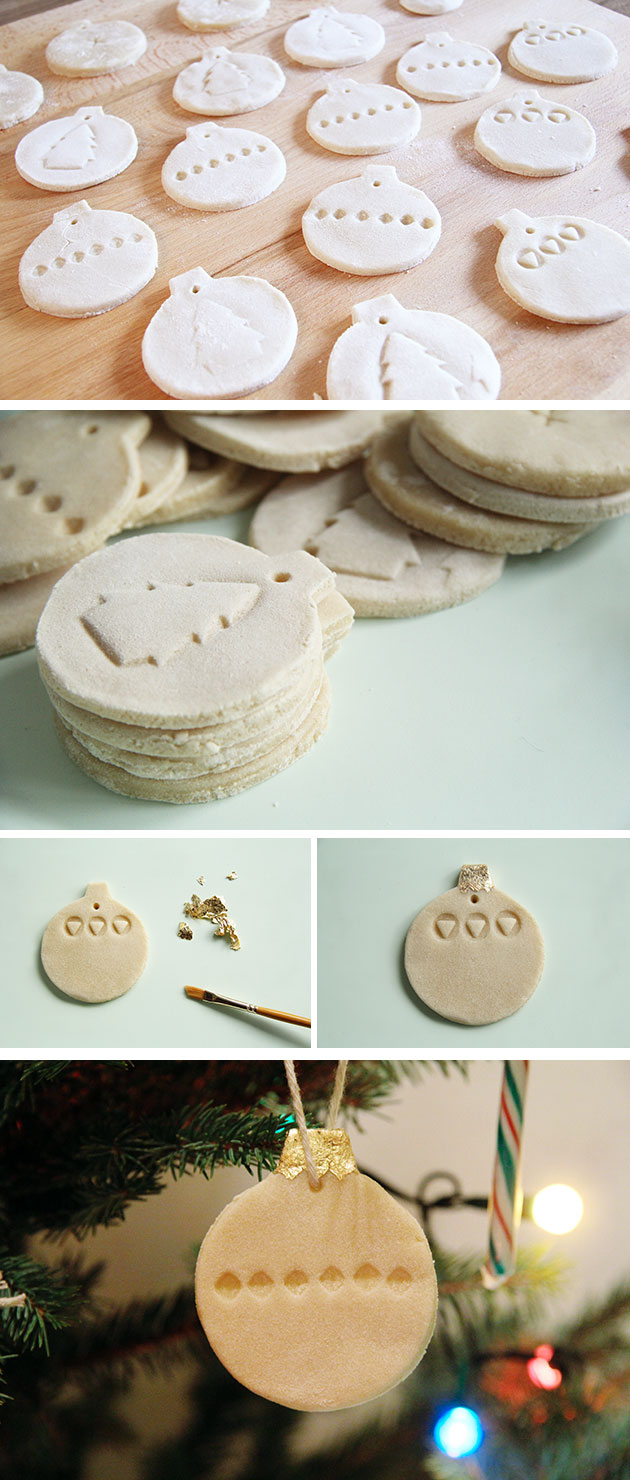
4. Bake the ornaments on a low heat for around 45 minutes – 1 hour. Keep an eye on them so as not to over bake and turn them brown. Once they’re dried out and hard take them out and leave them to cool.
5. Paint or glue gold leaf to the top of the ‘bauble’ and thread cord through the hole, tying to create a large loop.
6. The final step. Get your favourite Christmas tunes playing and start decorating the tree! ahhh, Christmas bliss!


As soon as I read this article, I saved it right away so that this year I will decorate a special Christmas tree.