I’ve got to say, Birmingham is lacking in places to buy jewellery making/haberdashery items compared to other big cities (other than The Birmingham Bead Shop of course), and I know it’s a problem that many of our readers also have. This is one of the reasons I love this tutorial. We’ve sourced these materials from all sorts of different places. The massive chunky chain is actually a dog collar (this becomes a little problematic later… I’ll explain further on in the tutorial), the split rings/keyrings are from the key cutters and the embroidery floss is from the Birmingham indoor market. Ok yes, the clasp is from The Birmingham Bead Shop, but besides that we done good right?
(Just a little note before we start; you’re going to need around 3/4 packs of embroidery floss. I found this out the hard way.)
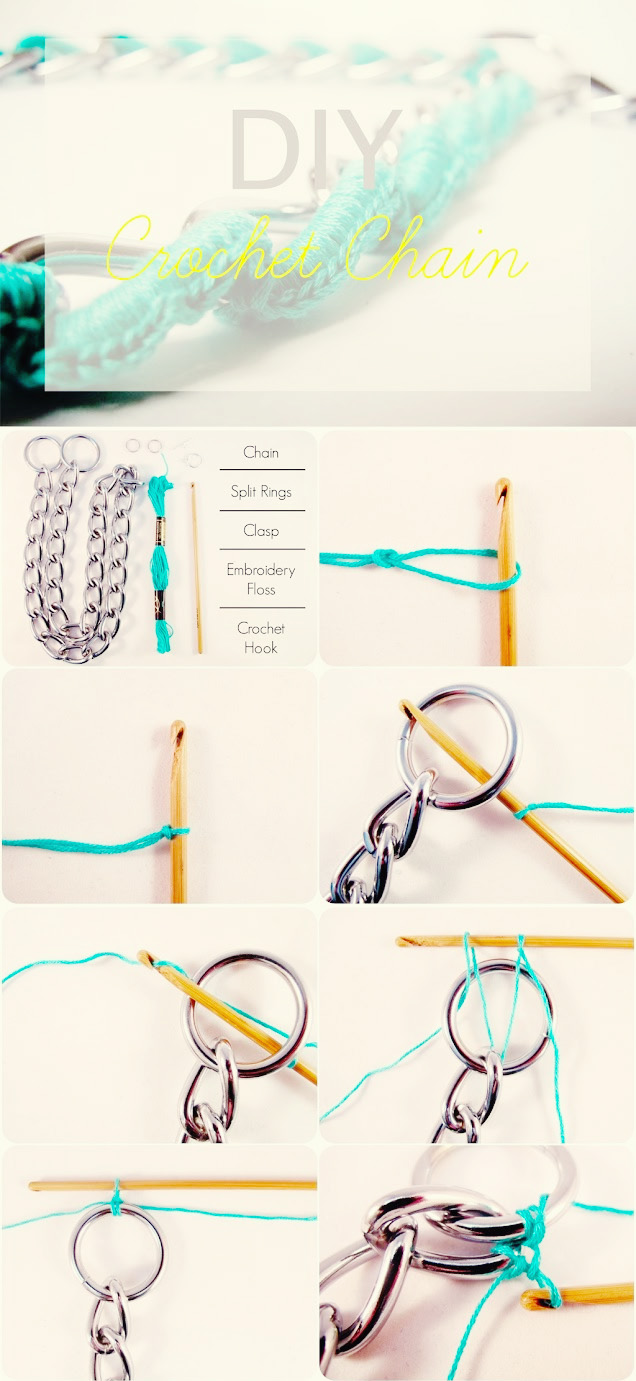
Tie a slip knot and put it onto the crochet hook / Put the crochet hook through the first chain link / Wrap the yarn over the hook and pull back through first chain link / Wrap the yarn over the crochet hook again / Pull the wrapped yarn through the two loops that are already on the crochet hook
(There’s a great tutorial on crocheting onto chain here: http://www.beadinggem.com/2012/01/crochet-and-chain-mixed-media-bracelet.html) / Continue to do this onto one side of the chain. It’s a bit trial and error with how many stitches you’ll need on each chain link. I’ve done 16, but experiment to see how it sits / Continue until you’ve covered the length of the chain. Our chain was a little long so I used the flat grinder thing(?) on my craft drill to cut one end off. (This was actually pretty dangerous, I wouldn’t recommend it unless you really know what your doing… I almost set fire to my arm!) So then I decided not to cut the other end off, and left it as a massive extension chain. It actually works quite nicely to stop the twisty thing that always seems to happen where the clasp moves around to the front / Put your jump rings onto the chain to create the correct length and pop your clasp onto them.
And there you have it. I was going to sell this one at the Contemporary Craft Fair we’re doing at the Midlands Arts Centre next weekend, but I like it too much. I’ve put it up on our Etsy shop so if you’d like to buy one I can make them to order. This gives us plenty of room to experiment with colour choices!
Hope you’ve enjoyed today’s post!


google